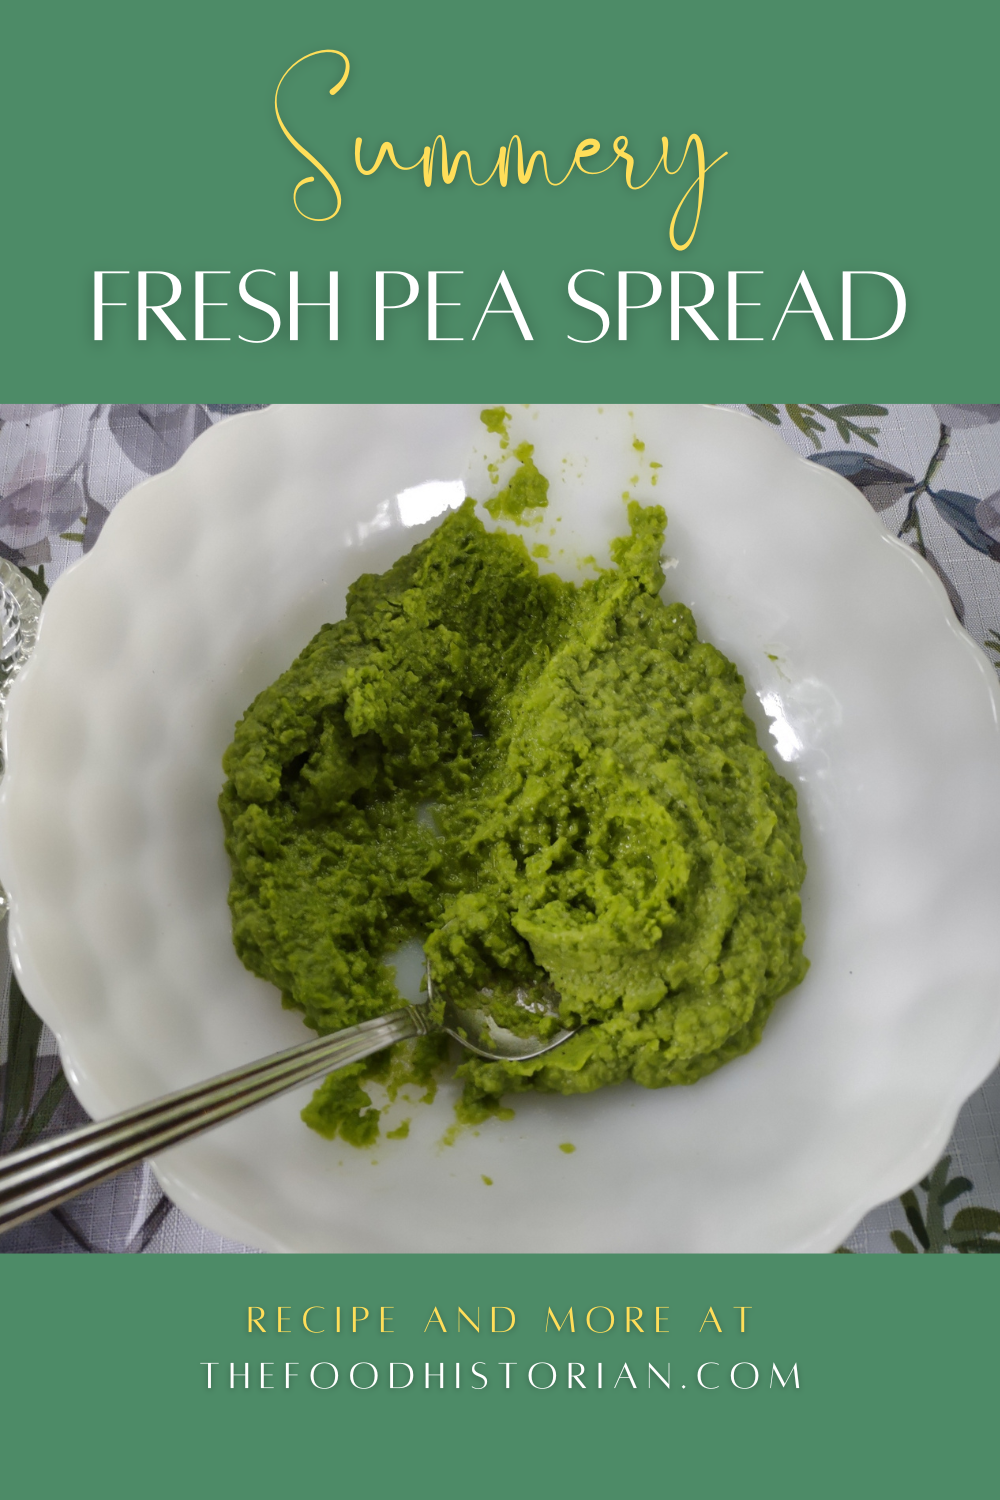
 When it comes to freshness, there's nothing like a freshly picked garden pea. But most of us aren't growing them ourselves, and "fresh" peas in grocery stores are generally old enough that the sugars that make peas so delicious are converted to tasteless starch. Canned peas are generally overcooked and mushy. Fine for eating alongside mashed potatoes and meatloaf, but not so fresh-tasting. What's the solution? Frozen peas. Ironic, I know, but frozen peas are often so much better than "fresh" unless you've picked them yourself or get them the same day. To me, peas signal not only spring but also early summer - when mornings and evenings are still cool, even when midday is hot. In the Northeastern U.S., peas were historically on the menu as late as July 4th! They're popular in Scandinavia, too. I wanted some nice, bright color for my Scandinavian Midsummer Porch Party, and this fresh pea spread hit the spot. I've made Spring Pea Hummus before - and that's equally delicious. But I wanted something vegan this time. Fresh Pea Spread RecipeThis recipe definitely needs a food chopper or processor! You could use a food mill in a pinch, but you'll need to finely mince the onion, first. 1 bag frozen organic peas 1/4 sweet onion (I used Vidalia) 1 tablespoon lemon juice 1 tablespoon olive oil salt pepper Cook the peas in a little water on the stove or in the microwave until no longer frozen and just barely cooked. They'll be soft after thawing anyway. Add the peas and onions to the food chopper and pulse until well-mixed. Add a tablespoon of lemon juice and a tablespoon or two of olive oil and pulse again until as smooth as possible. If you're using a food mill, mince the onion as fine as you can before sending through the food mill with the peas, then mix in the lemon juice and olive oil by hand. Sample and add salt and pepper to taste. Serve on rye crisps or other crackers, or use as a sandwich spread. 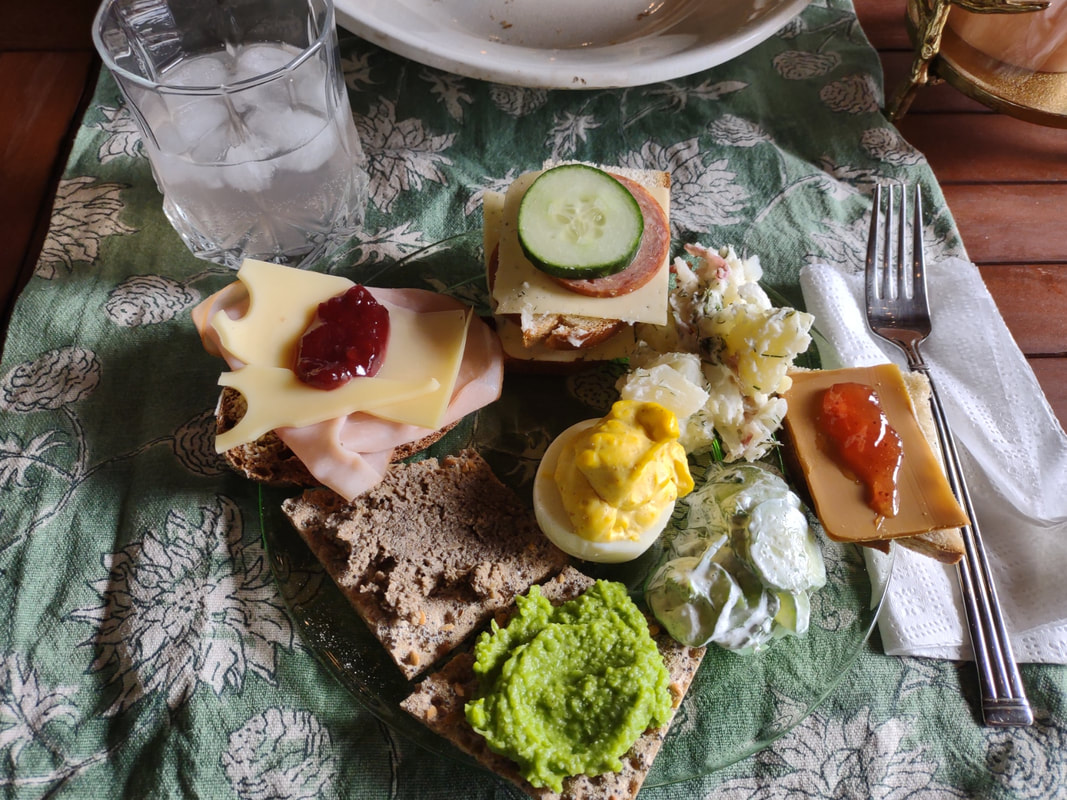 Fresh pea spread on a rye crisp on the bottom center of my Midsummer plate! The Food Historian blog is supported by patrons on Patreon! Patrons help keep blog posts like this one free and available to the public. Join us for awesome members-only content like free digitized cookbooks from my personal collection, e-newsletter, and even snail mail from time to time! Don't like Patreon? Leave a tip!
0 Comments
 I'm not sure why deviled eggs are so popular. At least, mine are! They're always the first thing to go at every party, and no matter how many I make, even leftovers get devoured quickly. Historically, deviled eggs were "deviled" by mixing the yolks with soft butter and mustard. Later, the deviling became associated with cayenne pepper or paprika. The popularity of prepared mayonnaise meant that condiment soon supplanted butter as the primary ingredient. Deviled eggs are perfect for just about any party, but they seem especially lovely tea party, picnic, and summertime fare, so I just had to make them for my Scandinavian Midsummer Porch Party. As you can see in the photo, they were half-gone almost instantly, and totally gone by the end of the night. Despite their relative simplicity, they always seem so festive! They're not difficult or expensive to make, but a few tips will make things a bit easier than you might expect. Deviled Eggs RecipeI like to use free range local eggs for my deviled eggs, which makes for super delicious and bright yellow yolks. Slightly older eggs are better for peeling as the albumen of the egg starts to pull away from the shell. So if you've got a dozen eggs that need eating, there's no better way to use them up than deviled eggs. Deviled eggs are best when you boil the eggs the same day you devil them. 1 dozen eggs mayonnaise Dijon or spicy brown mustard sour cream (optional) In a stock pot large enough to accommodate all the eggs in a single layer without touching, cover the eggs with cold water. Cover the pot and place over high heat, bringing it to a full rolling boil. Turn off the heat and leave the eggs, covered, for 15 minutes. Then fish them out (a slotted spoon works nicely) and deposit them in a large bowl of ice water to stop the cooking process and cool them down. Let them rest at least 10 minutes. Now for the hard part - peeling them. I find the water method easiest. One at a time, place each egg in a glass, fill a third of the way with water, cover the top with your hand, and shake vigorously. Alternatively, crack the egg all over, peel up a small part, and then place under running water. In both instances, the water gets between the shell and the cooked egg, making peeling easier. Although a perfectly peeled egg is a joy, no one ever complains about a slightly battered one - they all taste the same! Slice the peeled eggs in half lengthwise and pop the yolks out into a small bowl. Mash the yolks thoroughly with a fork, until no large chunks remain. Then add about a half cup of mayonnaise and 1-2 tablespoons of prepared mustard. Add some sour cream if you like. The yolk mixture should be extra-creamy, but bright yellow from the yolks. Taste and add more mustard or salt as you like. Remember, the whites are bland. Using a spoon, plop the yolk mixture evenly into the egg halves (use a plastic bag with the tip cut off if you want cleaner piping - also good for transporting the eggs and filling on site for picnics and such), making sure to cover most of the white, not just the hollow left by the yolk. A good deviled egg should be just a bit messy to eat. Deviled eggs contain egg and mayonnaise, so they should not be left at room temperature for too long. Luckily they're not likely to last long, anyway! 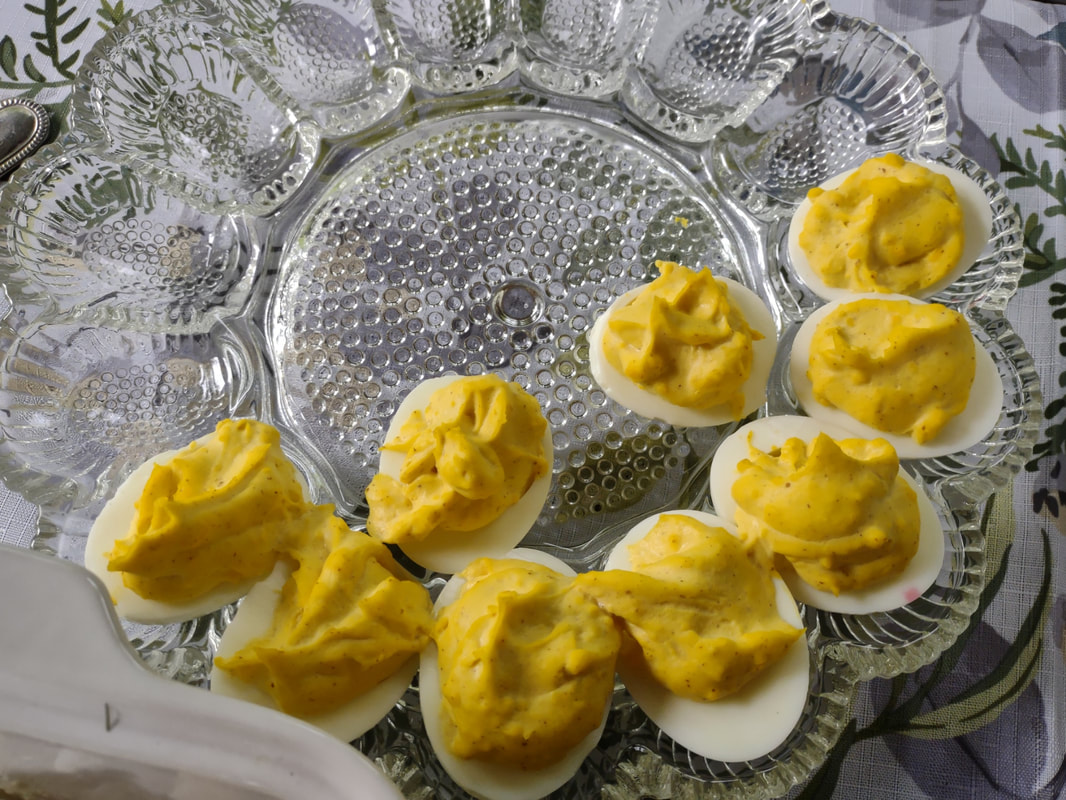 Half the deviled eggs were gone before I could take a photo! Lol. The Food Historian blog is supported by patrons on Patreon! Patrons help keep blog posts like this one free and available to the public. Join us for awesome members-only content like free digitized cookbooks from my personal collection, e-newsletter, and even snail mail from time to time! Don't like Patreon? Leave a tip! 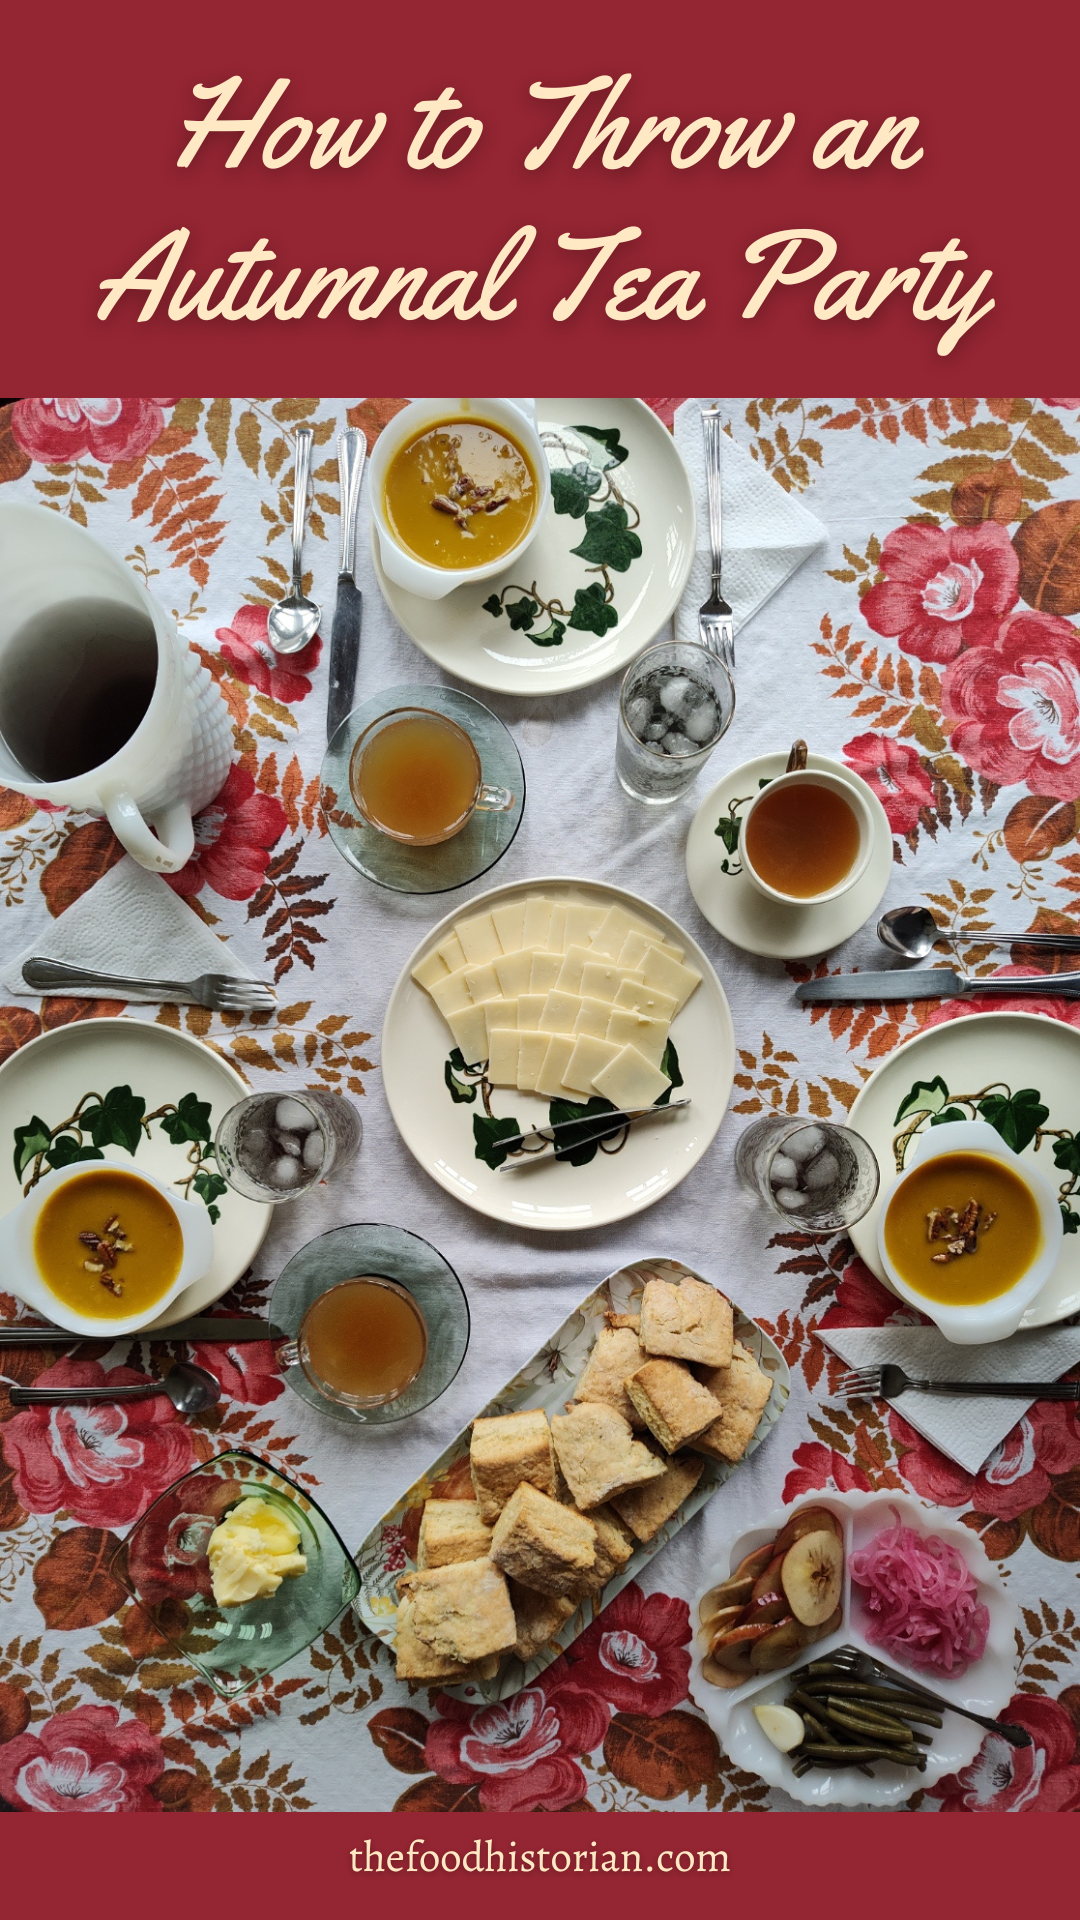 Today is Midsummer! The summer solstice is a big deal in Scandinavian countries, and I grew up celebrating it with my local Swedish Society. We'd have a big potluck, replete with Scandinavian goodies, in a local park, raise a giant maypole, and then sing and dance Swedish songs around it. My florist parents and I would do all the decorations for the maypole - a local guy would bring a huge harvest of poplar and cottonwood branches to serve as the greenery, and my dad would wire it all onto feet and feet of garland. The morning of, we'd wire leftover fresh flowers onto the garland and then deck the maypole, which had to have been at least 20 feet tall. Then it would get raised up at the park and everything felt festive! The picnic would be held in a big covered park pavilion, and we'd often have live music or visiting Scandinavian bands, but the food was the main attraction. Midsummer has long roots in Scandinavia. Celebrated since pagan Viking times, the festival emphasized the importance of the sun and fire. Sankthansaften - or St. John's Eve - is the night before midsummer, and in Norway is often celebrated with huge bonfires, including the one in Ålesund, Norway, which features the largest bonfire in the world! In Sweden, where midsommar is the biggest deal in all of the Nordic countries, the maypole is generally the center of midsummer celebrations. Salmon, shrimp, herring, sour cream, dill, cucumbers, strawberries, almond-flavored desserts, and whipped cream feature prominently in most Midsummer menus, along with copious amounts of aquavit (which, sadly, I could not find in my local liquor stores). Spring fish runs, woodland strawberries, and early vegetables like new potatoes all reflect the arrival of the summer season in Scandinavia, which is later than in most of Europe. Midsummer also heralds the season of midnight sun. As the longest day of the year for the Northern hemisphere, the summer solstice near the Arctic circle means just a few hours of twilight, and no actual nighttime, for weeks. Here in the northern United States, it just means the sun sets a little later than normal. Ever since my mom died, I've been feeling the need to reconnect with my Scandinavian roots. There are far fewer of us out East than back home, so I decided to introduce my friends to a real Scandinavian party. The midsummer porch picnic was born and now I want to do one every year! Scandinavian Midsummer Menu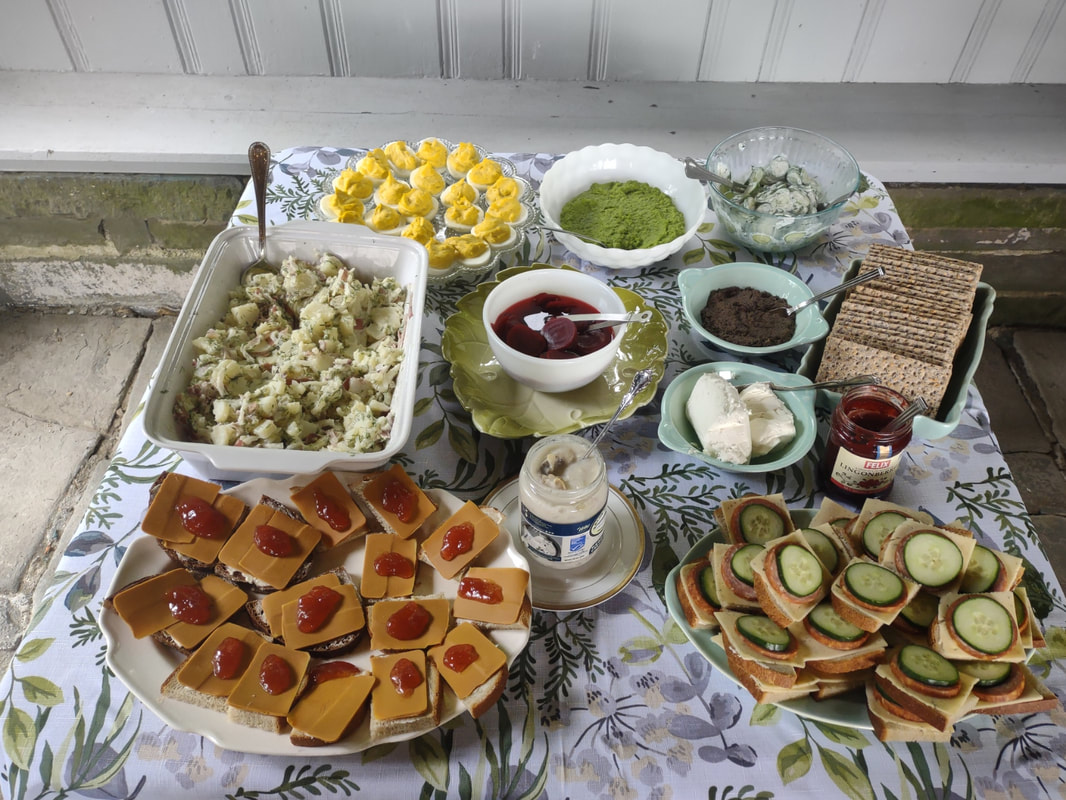 L-R from the top: Deviled eggs, spring pea spread, Scandinavian cucumber salad, dilled potato salad, pickled beets, mushroom pate, rye crisp crackers, goat cheese, lingonberry jam, brunost sandwiches with strawberry jam, pickled herring, dilled havarti, summer sausage, and cucumber sandwiches. I wanted the menu to be relatively straightforward and easy to prepare. I had a few extras on my list, but didn't quite get there due to time constraints (as per usual). I did the desserts ahead of time, but everything else was prepared the morning of. I was running behind, so the sandwiches were assembled with help from the guests! Here's the full menu: Appetizers: Deviled eggs Fresh Pea Spread Mushroom Pâté Goat cheese* Creamed Pickled Herring* Wasa Rye Crackers* Sides: Dilled Potato Salad Scandinavian Cucumber Salad Pickled Beets* Open Faced Sandwiches: Salmon Cucumber Salad on White Dill Havarti and Summer Sausage with Cucumber on Rye Ham and Jarlsberg on Pumpernickel with Lingonberry Jam Ski Queen Brunost on Rye with Strawberry Jam Dessert: Sandbakkels Small and Large with Jam and Whipped Cream Midsummer Rice Pudding with Raspberry Sauce Rommegrot Ice Cream Drinks: Rhubarb Gin & Tonics Elderflower Punch *you can buy these things - no need to make yourself! I'll be posting one recipe a day for the next several days, so keep your eyes peeled. No need to bookmark your favorites, I'll link them all back to this menu. 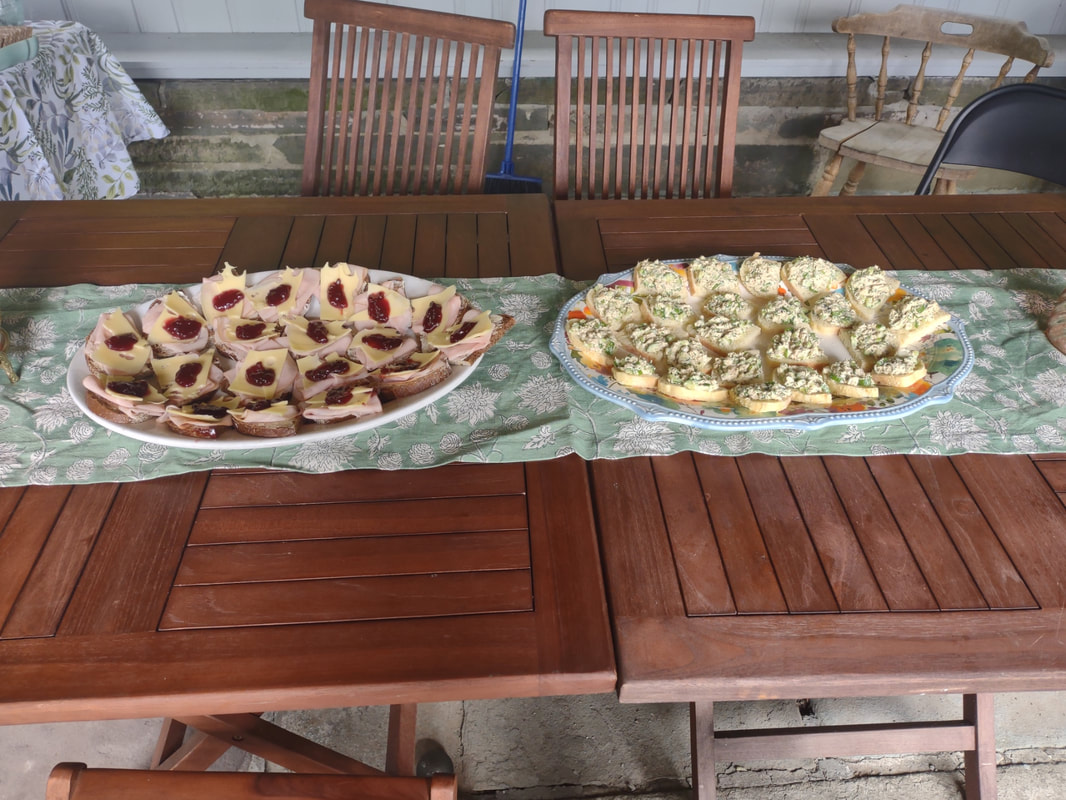 Two of the four open-faced sandwiches - ham and Jarlsberg with lingonberry jam at left, salmon cucumber salad at right. We are lucky enough that our little house has a very large screen porch, and one larger than our living room! This is always the perfect place for summer parties, although the fireplace is no longer useable. The uneven stone floor makes for some interesting seating and table arrangements sometimes, but it's worth it for the space to spread out all at tables together. I got to use some of my vintage dishes, including newly acquired Block Optic green Depression glass, some little pink depression glass dessert plates, and my favorite lace-edged milk glass plates for those who were too nervous to eat off of the green uranium glass. 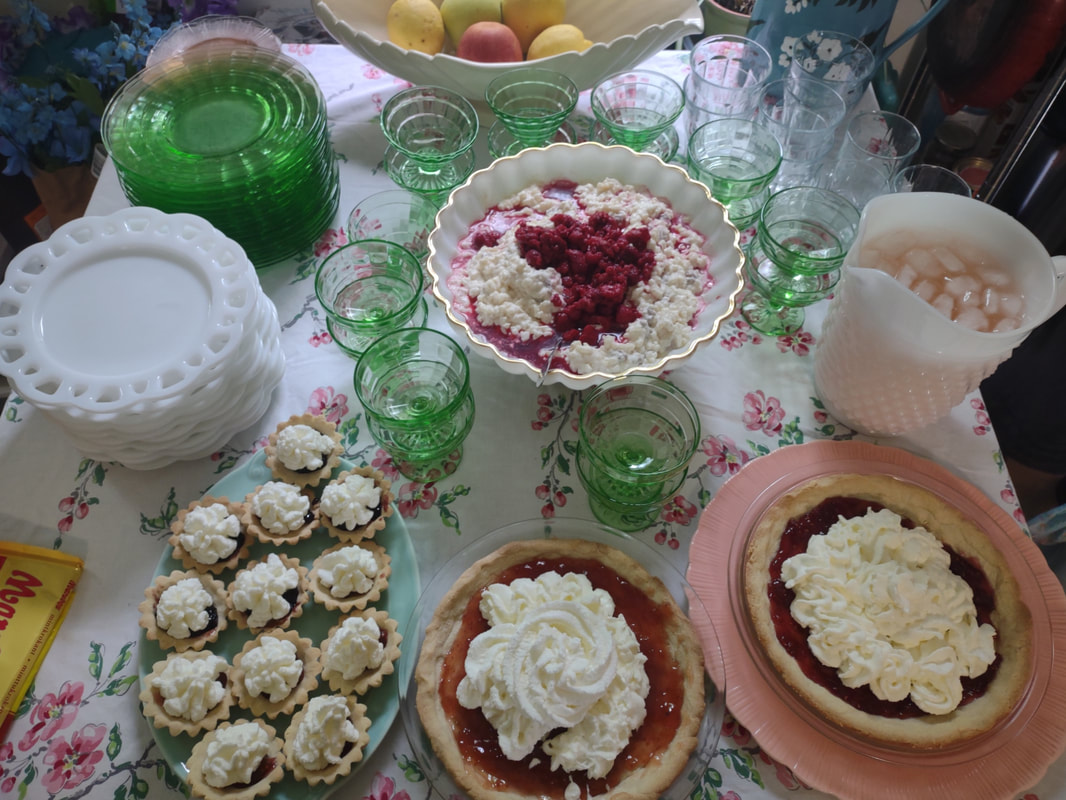 Rice pudding with raspberry sauce, a pitcher of rhubarb gin and tonic, and sandbakkels large and small with strawberry, blackberry, and homemade (not by me) raspberry-rose wine jam and topped with homemade whipped cream. The blue pitcher just out of sight in the upper right hand corner contained the elderflower punch. Although the party was a smash success (the first guest arrived at 2 pm - the last left at 10:30 pm), and we did get our bonfire outdoors, we were having too much fun to make the flower crowns I had planned! And the unseasonably chilly weather (a high of just 63 F after the previous day's high of 90 F was a bit of a shock) did put the kibosh on some of our plans. But we still had a great time. I tried pickled herring for the first time. It was my Swedish grandpa's favorite, but although it was nowhere near as bad as I feared as a child, the creamy sweet-and-sour flavor was not my favorite. I sent the jar home with a friend who fell in love. The pickled beets went home with another friend who loves them, and the last bits of the extremely good creamy cucumber salad went home with another friend's kids, who couldn't stop eating it. The rhubarb gin turned out divine, and everyone was curiously addicted to the elderflower punch. The extra creamy rice pudding with raspberries was my take on the Swedish rice pudding the society made by the gallons for the big Scandinavian festival I grew up attending every year. The raspberry sauce topping is a must. But the runaway surprise hit of the afternoon was the brunost with strawberry jam. To a person the 15+ people who attended loved it. That was the only platter of sandwiches to be totally gone by the end of the evening. In all, a delightful party, despite the weather, and one I'm definitely going to repeat. Next year I'll make sure to have the flower crown activity ready to go, I'll decorate more with some Scandinavian flags and a mini maypole or two (I don't think I could swing a giant one), and aquavit is definitely going on the menu for next year. And I will try to take more photos! If you'd like to try your hand at your own midsummer party, feel free to steal liberally from the menu above. Just don't forget to make things festive with flowers, candles, pretty table linens and dishes, and, if you can swing it, a real fire! Glad midsommar, alle! Learn more about Scandinavian midsummer traditions. The Food Historian blog is supported by patrons on Patreon! Patrons help keep blog posts like this one free and available to the public. Join us for awesome members-only content like free digitized cookbooks from my personal collection, e-newsletter, and even snail mail from time to time! Don't like Patreon? Leave a tip! 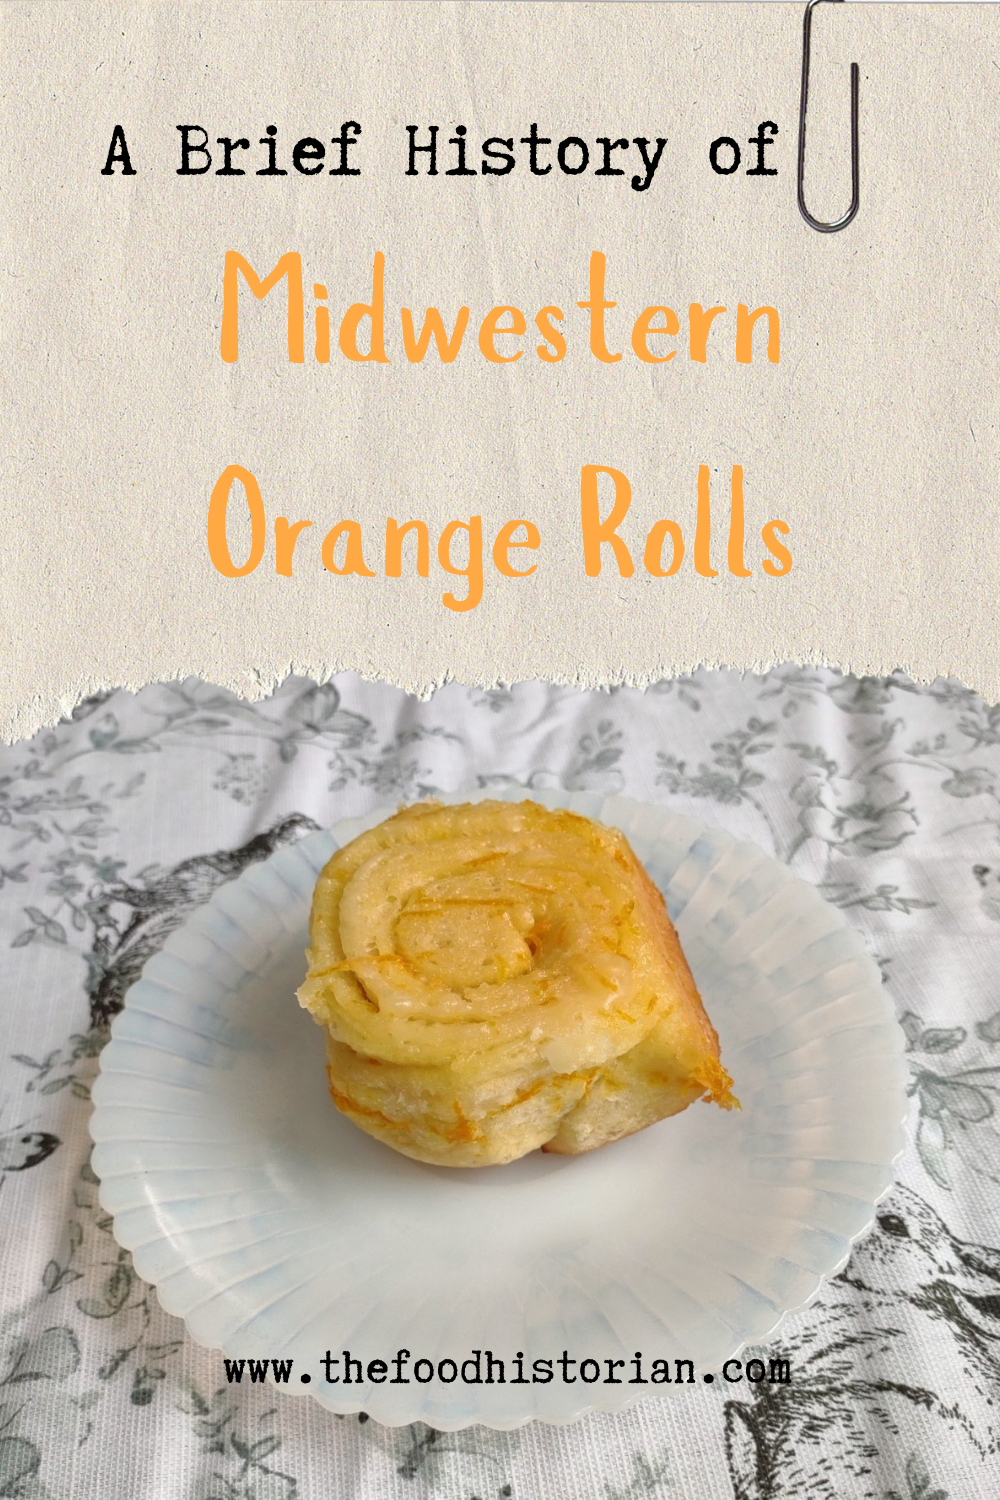 Last year I wrote about North Dakota Caramel Rolls, which have dominated the state in recent years. But funnily enough, although they are less popular now, orange rolls were equally if not more popular when I was growing up. And I found many more references to them in my historic cookbooks. Orange rolls in the upper Midwest (mainly Eastern North Dakota, where I grew up, and Minnesota) were popular Sunday brunch staples, although they competed about even with caramel rolls in my neck of the woods. Of course, the kind I grew up with were not made from scratch, but rather the frozen kind made by the Rhodes frozen bread company. They came with a delightful orange cream cheese frosting. But despite being a brunch staple of my Midwestern childhood, I didn't know much about these, and I wanted to try a historic recipe for a brunch of my own. The origins of orange rolls and their popularity in the Midwest is, like many things, a bit cloudy. If you search for "history orange rolls" today, you'll likely get a LOT of hits about ALABAMA orange rolls (scroll to the bottom for the links), but nary a one about the Midwestern kind. Truth be told they don't look like they differ much. A sweet roll dough with orange zest and sugar rolled up like a cinnamon roll and topped with an orange glaze. So why did both Alabama and the Upper Midwest develop a love of orange rolls? Oranges aren't grown in either region. Enter the 1910s and '20s orange craze. In the 1870s California orange agriculture exploded, and oranges - once an imported wintertime treat - became increasingly available year-round. "Orange fever" struck Florida around the same time, until a big freeze in 1894 and again in 1895 set the industry back on its heels. In the 1920s the industry got a boost from the Florida real estate boom. Cooperatives like the California Orange Growers Exchange began to market nationally using clever advertising techniques. "Sunkist" - a playful spelling of "sun-kissed" - became synonymous with the California Orange Growers co-op, and later became their official name. 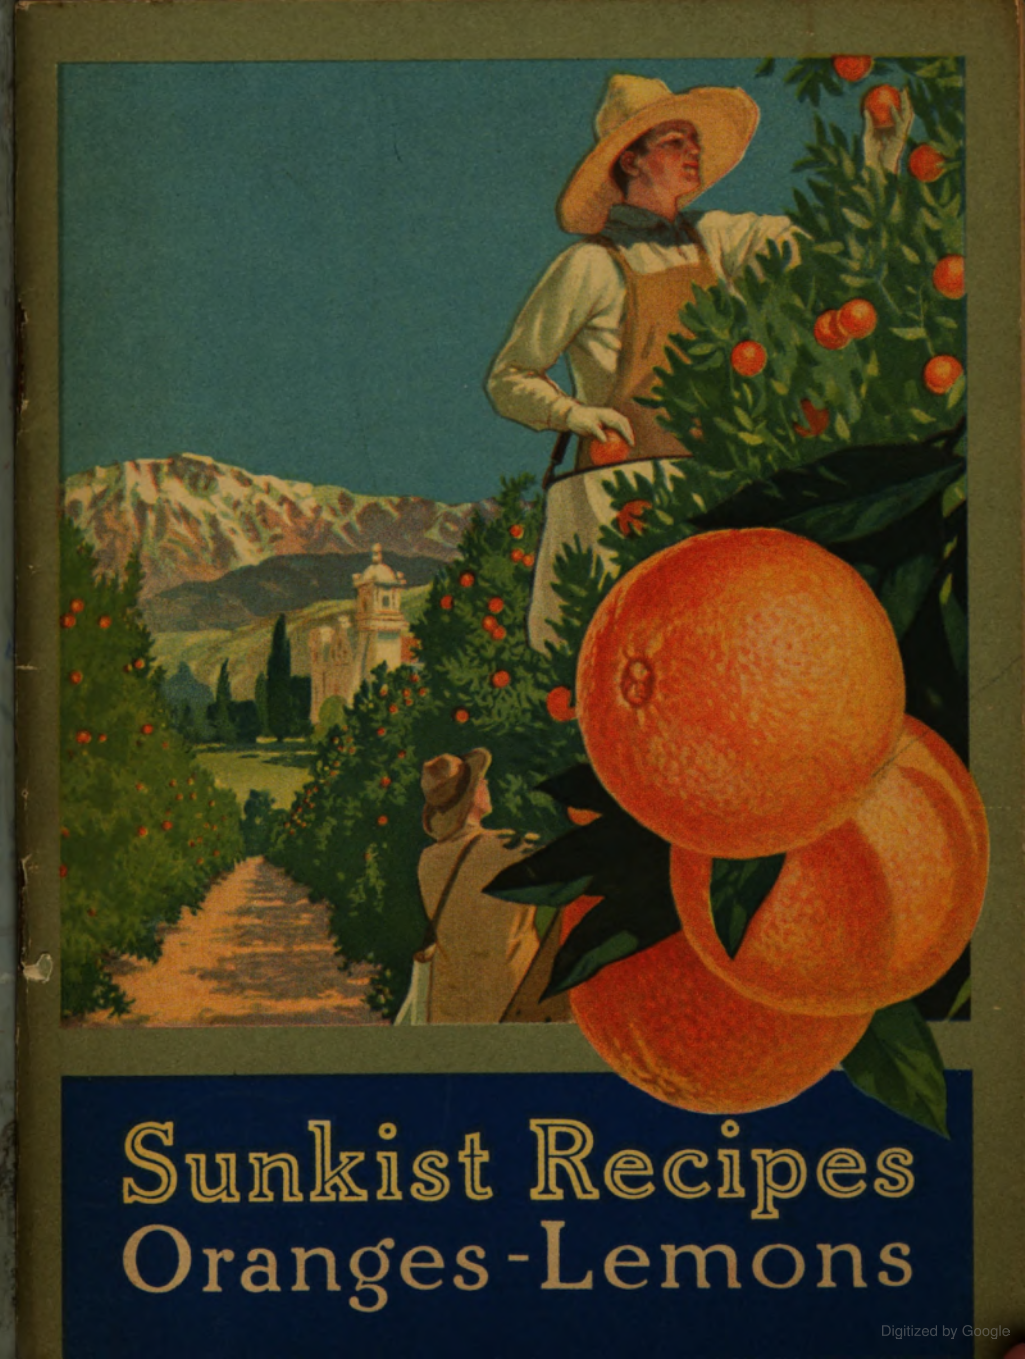 "Sunkist Recipes: Oranges and Lemons," by the California Fruit Growers Exchange, 1916. The earliest recipe for what resembled orange rolls comes from Sunkist Recipes, Oranges - Lemons, published by the California Citrus Growers Exchange in 1916. 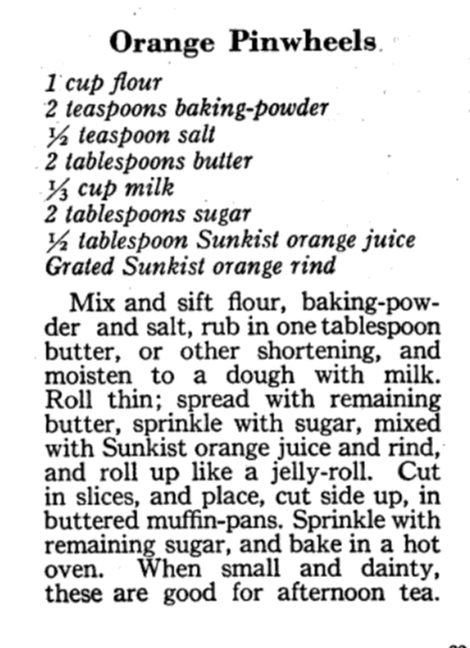 "Orange Pinwheels" are essentially baking powder biscuits, rolled thin, spread with butter and sugar mixed with orange juice and zest, then rolled up and sliced, with more sugar sprinkled on top. The Sunkist biscuit-style recipe survives, with or without attribution, in other cookbooks throughout the 1920s and '30s. Often, the biscuit "rolls" are called "orange rolls," not "pinwheels," which makes the research a bit confusing! The earliest recipe I could find for yeasted orange rolls comes from Mrs. Allen's Cook Book by one of my favorite cookbook authors, Ida Bailey Allen, published in 1917. But even these aren't quite the same as what I was looking for. 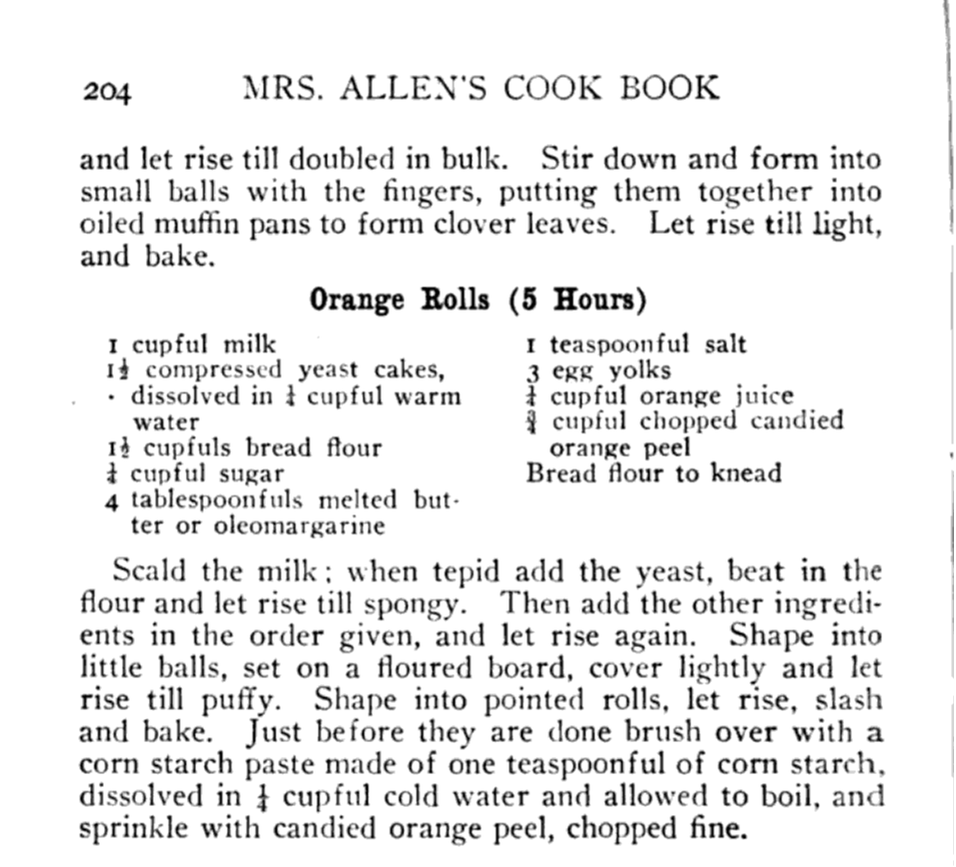 Recipe for "Orange Rolls (5 Hours)" from "Mrs. Allen's Cook Book," by Ida Bailey Allen, 1917. Mrs. Allen's "Orange Rolls (5 Hours)" are not actually rolled up rolls - they're more like buns flavored with orange juice and candied orange peel, and then glazed with more orange peel. Thankfully, Frances Lowe Smith has our back with her More Recipes for Fifty, published in 1918 and containing several wartime-friendly recipes, including this one for "Orange Rolls," which are to be prepared using a yeasted dough and spread with butter and sugar mixed with orange juice and grated rind and then "rolled like cinnamon rolls." The first North Dakota reference I could find is for the biscuit-y kind of orange rolls, in a 1930s North Dakota Agricultural Extension circular. But looking through my cookbook library for vintage midwestern cookbooks, I also found tons of references to orange rolls! Largely from the 1930s and '40s (which is when most of my North Dakota and Minnesota cookbooks date to). I decided to go with this recipe, because it looked fairly easy and definitely quick. No getting up five hours before brunch for these beauties (sorry, Mrs. Allen). Taken from Receiptfully Yours, a community cookbook published by the Ladies' Guild of the Zion Lutheran Church of Duluth, MN, the recipe turned out very nicely! 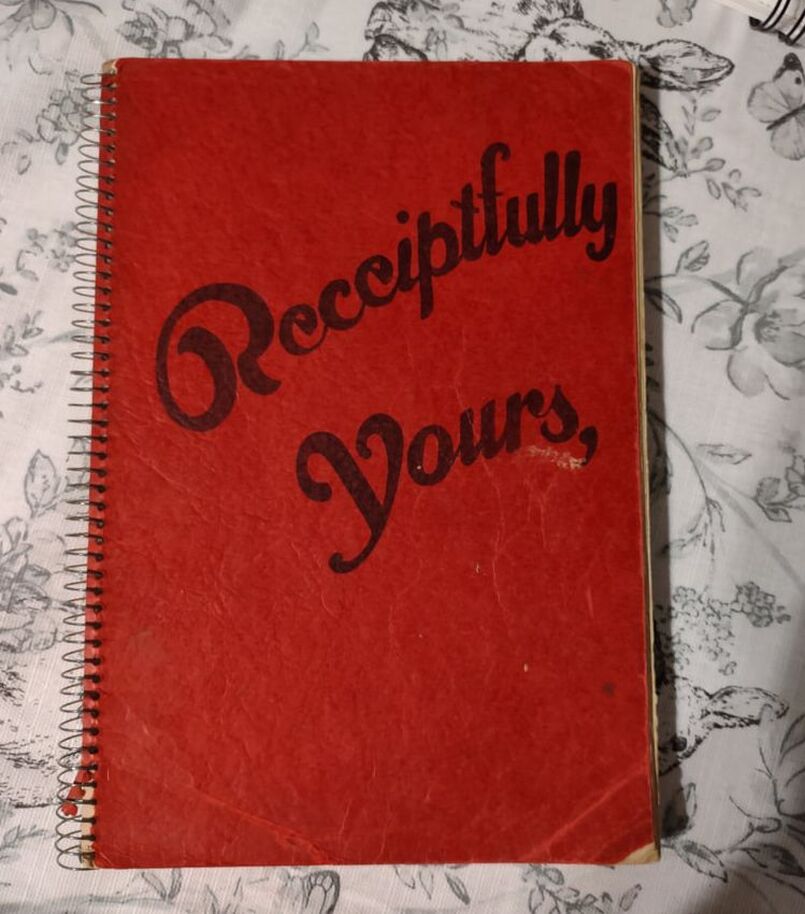 Although Receiptfully Yours, is undated, I'm guessing it dates from the 1940s, judging by the type and the style of binding. Both the Cinnamon Roll recipe and Orange Roll variation were submitted by Ethel Mathison. I love that they used full names, instead of "Mrs. Husband's Name!" 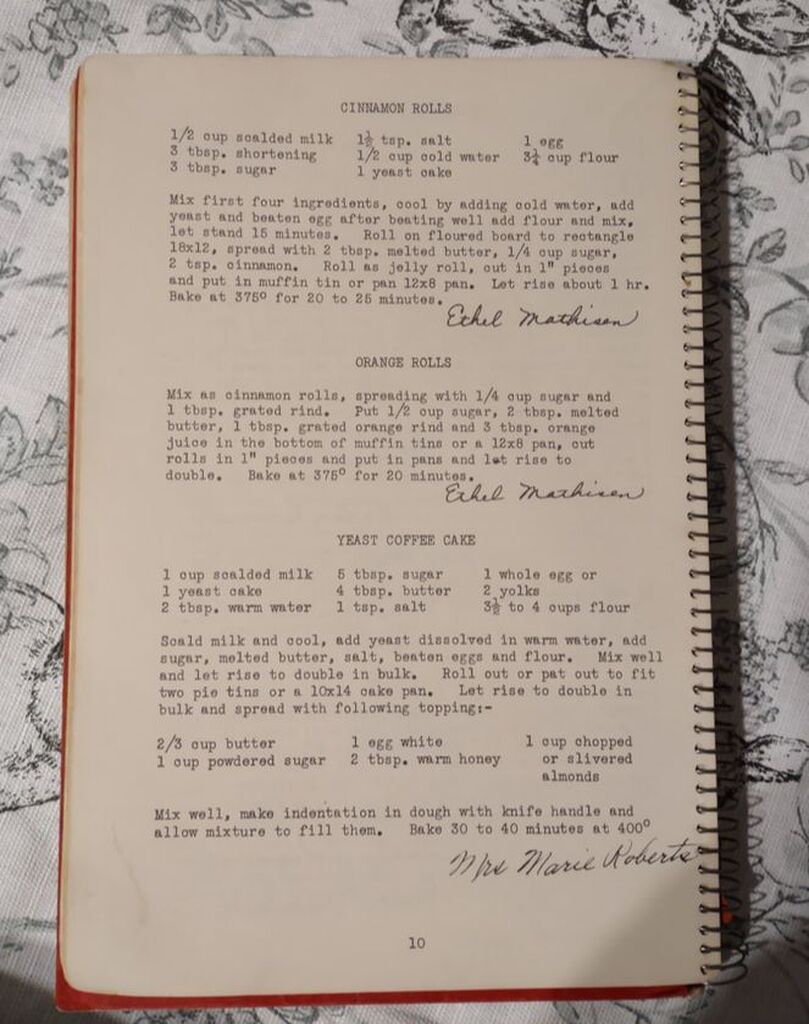 Midwestern Orange Rolls RecipeLike many orange rolls recipes, this one starts as a recipe for cinnamon rolls, with orange rolls listed as a variation. Interestingly, instead of having an orange glaze or cream cheese frosting, this recipe is listed much like caramel rolls! With a butter-sugar-orange-juice mixture cooked in the bottom of the pan. Here is my slight modernization of the recipe: - - For the dough - - 1/2 cup scalded milk 3 tablespoons butter 3 tablespoons sugar 1 1/2 teaspoons salt 1/2 cup cold water 1 envelope quick-rising yeast 1 egg 3 1/4 cups flour - - For the filling and glaze - - 3/4 cup sugar 2 tablespoons grated orange zest 2 tablespoons melted butter 3 tablespoons orange juice Preheat the oven to 375 F. Mix milk, butter, sugar, and salt in a saucepan and heat over medium heat until the butter is just melted. Cool by adding cold water, then add the yeast and egg and beat well. Then add flour and mix until smooth, kneading several times. The dough will be soft. Let the dough rest 15 minutes. Roll the dough out on a floured board (or clean countertop) into a 12" by 18" rectangle. Mix 1/4 cup sugar and 1 tablespoon zest and spread on the dough, then roll as for cinnamon rolls and cut crosswise into 1 inch slices. In a 9"x13" pan, mix 1/2 cup sugar, 2 tablespoons melted butter, 1 tablespoon orange rind, and 3 tablespoons orange juice, then top with the cut dough pieces. Let rise until doubled, then bake for 20 minutes or until golden brown. Flip to serve. 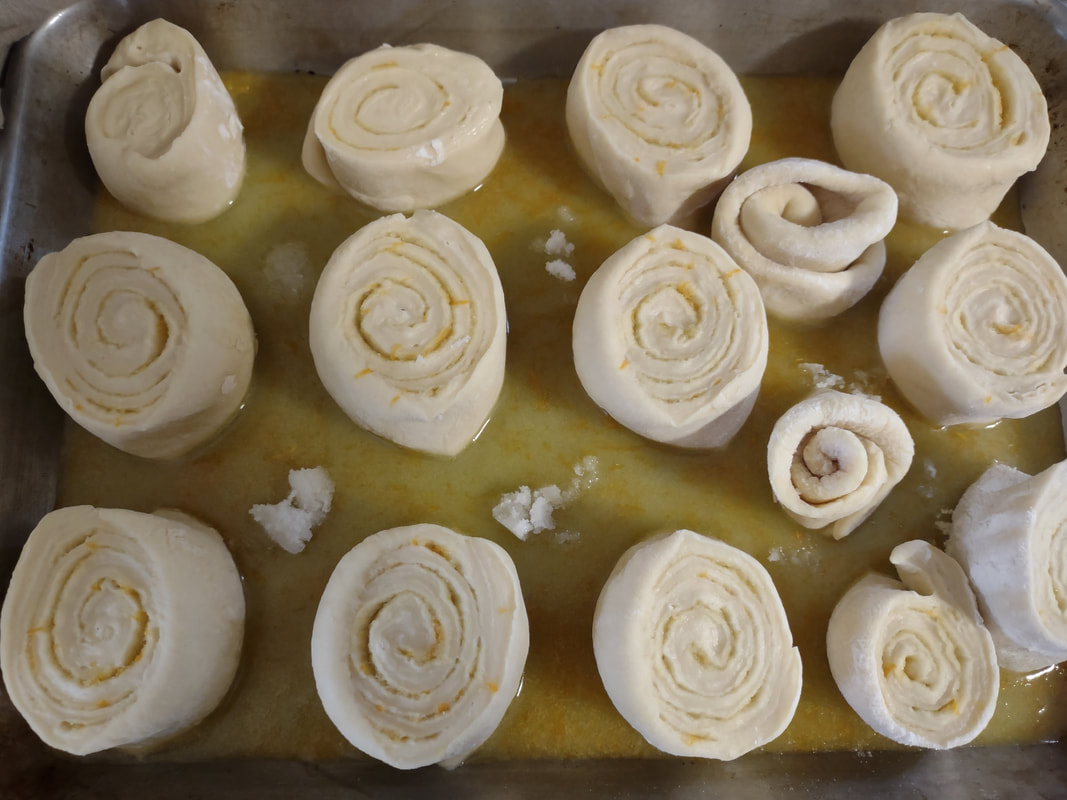 Leaving space between the raw rolls is key! They need enough space to rise. 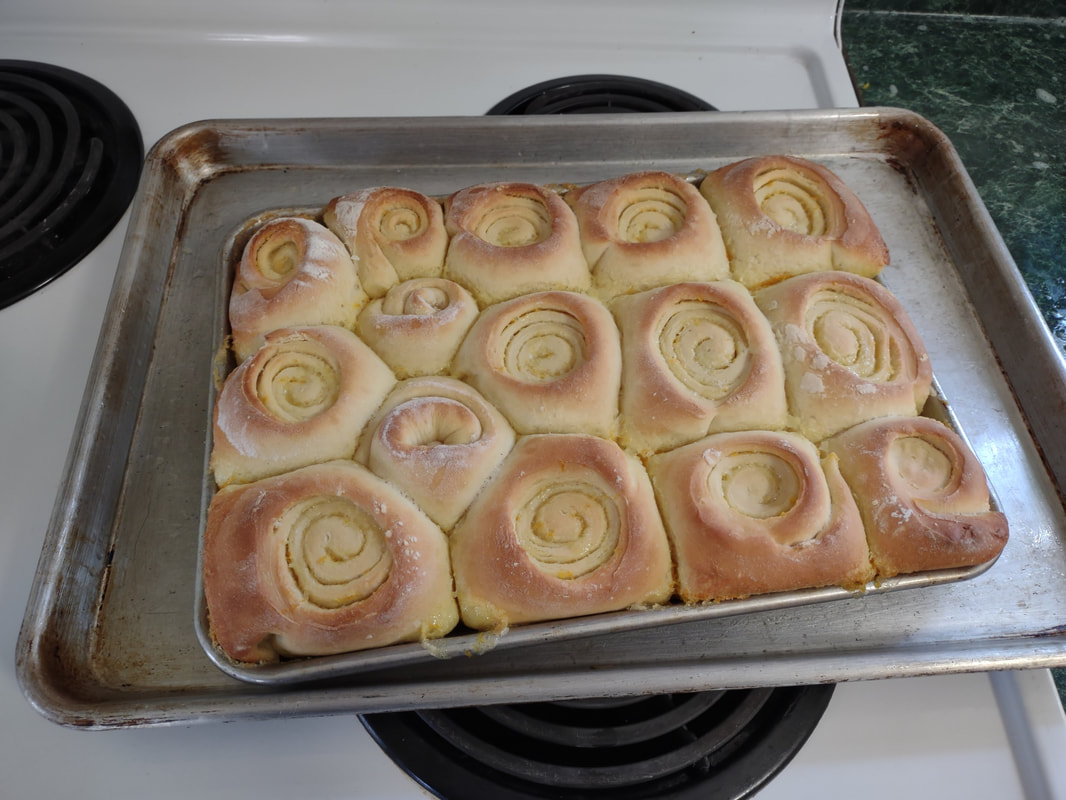 I was worried about the sauce spilling over (and you can see a few spots where we got close!) so I baked these on a baking sheet to catch any spills. But they turned out beautifully. 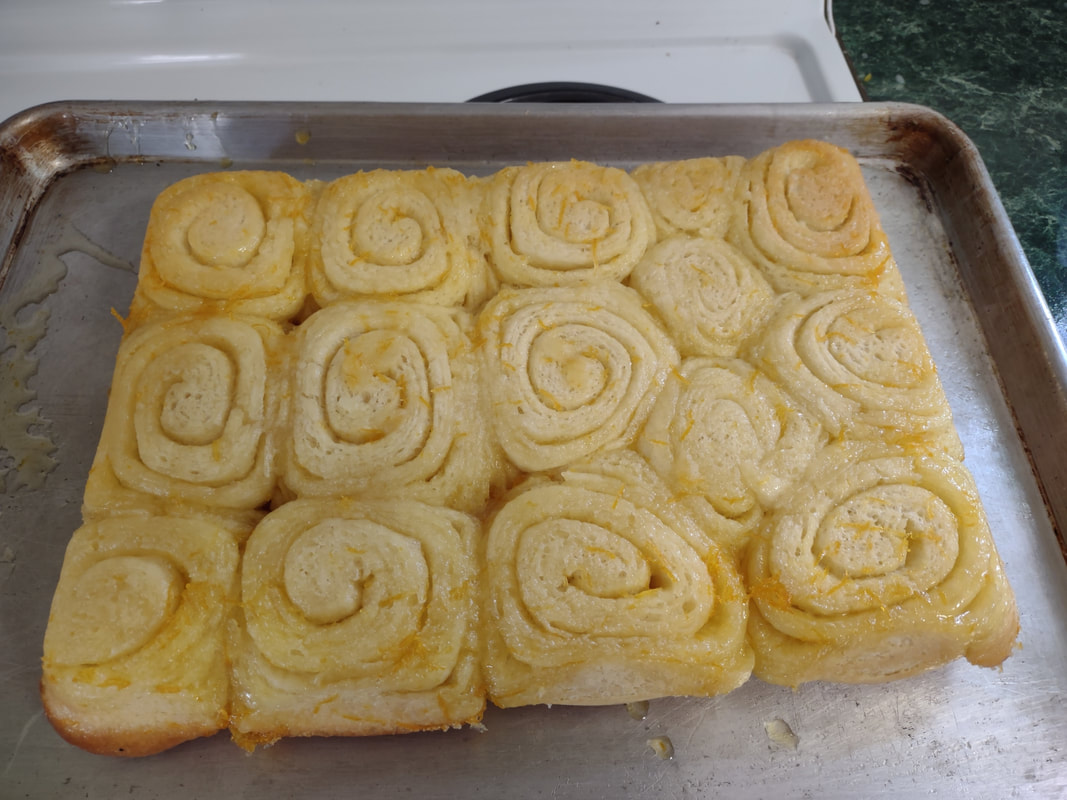 The baking sheet was also useful in flipping them over! Here you can see the syrupy bottoms. These turned out beautifully, although very sweet! I used some very sweet heirloom navel oranges in the recipe, and something with a little more acidity might have been better. When I make them again, I might take a page from some of the other recipes and moisten the sugar for rolling with a little orange juice, and pick some more sour oranges. I may also bake them a smidge longer. Of course, I may also decide to try my hand at some of the other recipes, too! These rolls are perfect for a weekend brunch, bridal or baby shower, or afternoon treat. Have you ever had orange rolls? How do you take yours? 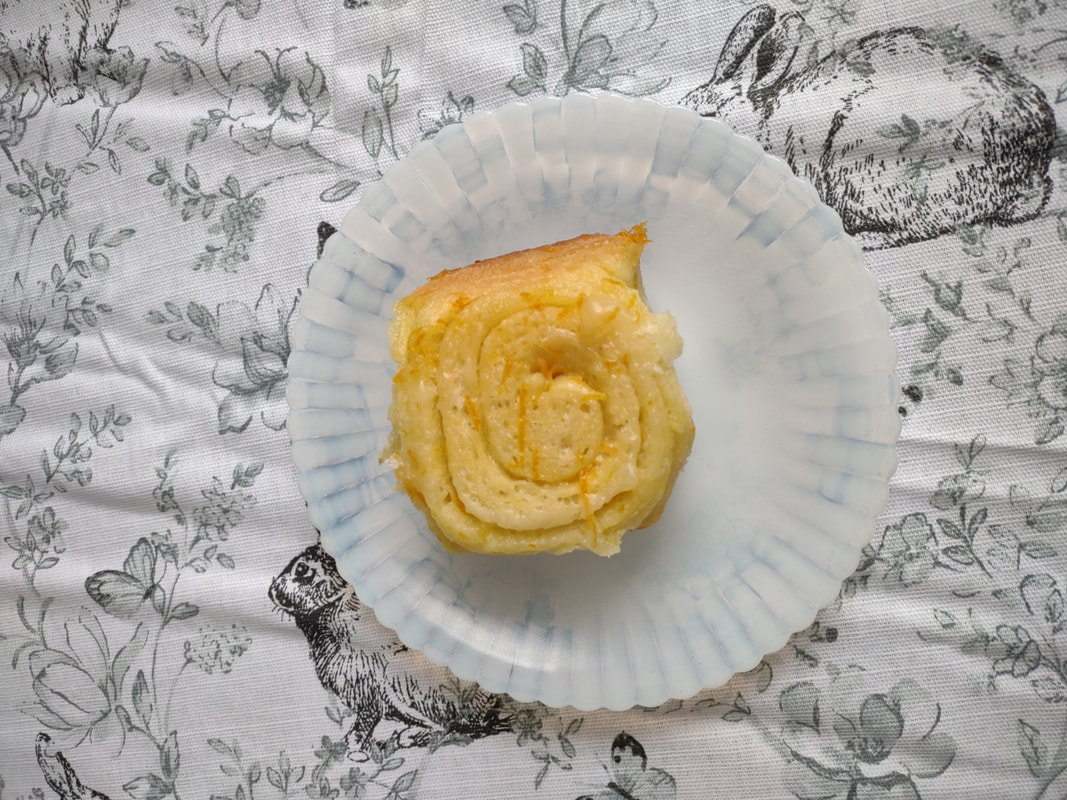 Alabama Orange Rolls History LinksAnd now, as promised, a taste of the rabbit hole I went down in researching this post. The Alabama orange rolls may be more internet famous than the Midwestern ones, but it looks like they laid their claim to fame a bit later - in the 1960s and '70s, to be precise. Read on for more of the back story. The delectable history behind Birmingham’s famous Orange Rolls Why the Alabama Orange Roll is a Southern Classic - Southern Living The sweet story of Millie Ray and her famous orange rolls The Food Historian blog is supported by patrons on Patreon! Patrons help keep blog posts like this one free and available to the public. Join us for awesome members-only content like free digitized cookbooks from my personal collection, e-newsletter, and even snail mail from time to time! Don't like Patreon? Leave a tip! 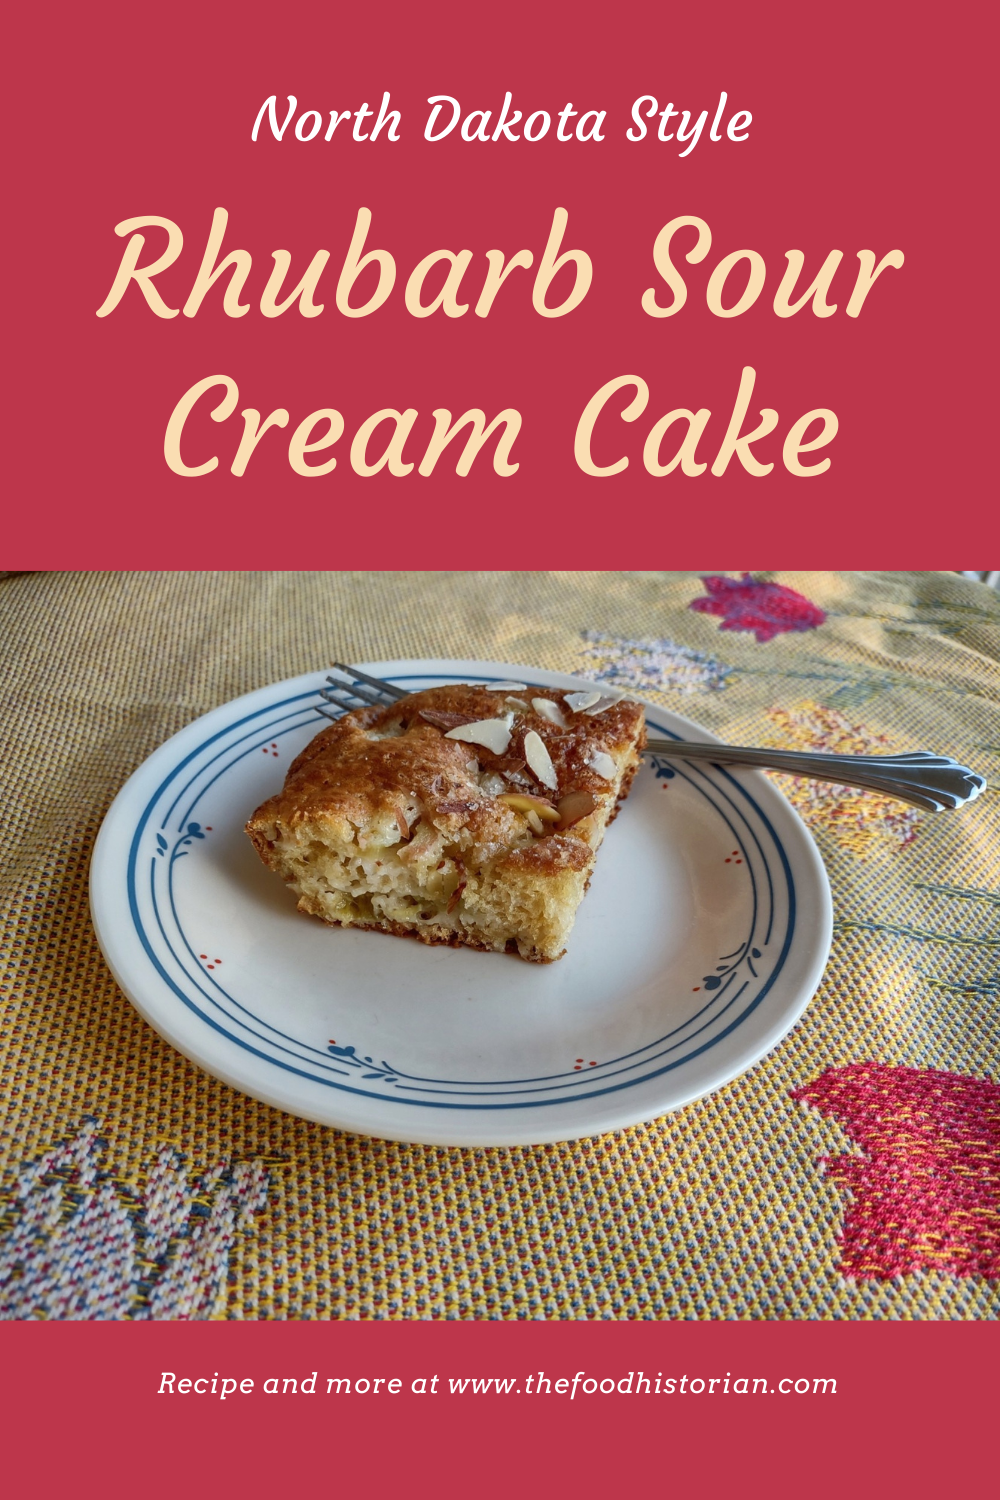 Last week I went home to North Dakota for Mom's funeral. The service ended up being lovely, with a huge turnout, and so nice to see extended family and old friends. Reminders of her were everywhere, of course, but while her garden was starting to come up, including the special fern peonies she rescued from her grandmother's garden, nothing was really blooming yet. But the rhubarb on the south side of the house was already going gangbusters. About a month ago, right after Mom died, my sister and I were going through some of the books she had out, including cookbooks. Sister found a copy of the Ritzy Rhubarb Secrets Cookbook: Rhubarb Recipes by the Good Cooks of Litchville, North Dakota and the Surrounding Area, which is much in-demand on the North Dakotan corners of the internet. Edited by Jane Winge and originally published in 1991 and reprinted in 1992, 1993, 2000, and 2002, it's probably the most popular rhubarb cookbook in the Upper Midwest. We both wanted it, but given my already extensive cookbook collection, I said she could have it. Except then we found another copy! Thanks to Mom's thrifting skills, we both got to have one. Which was just a perfect present from her. All of the guests for the funeral were gone by Sunday, leaving just me and Dad. I decided I wanted to make a rhubarb cake for the two of us. We had the most delicious rhubarb bars at the after-service dinner, but they ran out before I could get one! Thankfully a friend had gotten dessert WITH her dinner, and shared. We found out later the young (and very talented) baker thought that people might not like rhubarb, so she didn't make as much of those as the other bars (rommegrot bars - a take on a favorite Norwegian cream porridge). I was like, "Not this crowd!" Rhubarb is very popular around here and those who moved away remember it from childhood. Everyone raved that they were the best rhubarb bars they'd ever had. And while I sadly do not have that recipe (yet, lol), I was feeling cake-ish (as I often do), so searched the Ritzy Rhubarb Secrets Cookbook for a likely candidate. This one immediately struck my fancy. Not only was it the first one listed in the cake section, it also looked easy as pie. 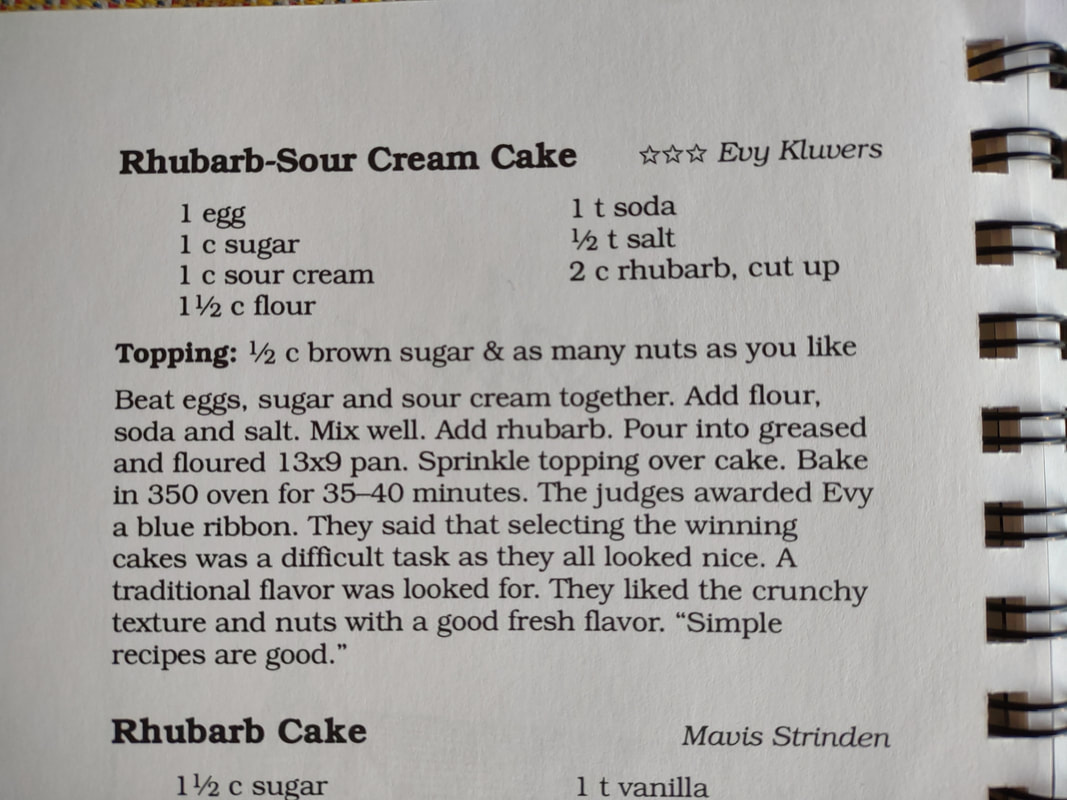 Evy Kulver's award-winning Rhubarb Sour Cream Cake, from the "Ritzy Rhubarb Secrets Cookbook." "The judges awarded Evy a blue ribbon. They said that selecting the winning cakes was a difficult task as they all looked nice. A traditional flavor was looked for. They liked the crunchy texture and nuts with a good fresh flavor. 'Simple recipes are good.'" How's that for the most North Dakotan review ever? But they're not wrong. This is a simple recipe with good, fresh flavor. No butter to soften and mixes up in a flash. The sour cream provides the fat and moisture in the recipe, and the baking soda reacts with the acidity in the sour cream to create lift, with help from the egg. Rhubarb-Sour Cream Cake RecipeHere's how Evy's original recipe reads: 1 egg 1 cup sugar 1 cup sour cream 1 1/2 cups flour 1 teaspoon baking soda 1/2 teaspoon salt 2 cups rhubarb, cut up Topping: 1/2 brown sugar and as many nuts as you like Beat eggs, sugar, and sour cream together. Add flour, soda, and salt. Mix well. Add rhubarb. Pour into greased and floured 13x9 pan. Sprinkle topping over cake. Bake at 350 for 35-40 minutes. Here's my adaptation, because since Dad doesn't bake, some of the ingredients were a bit lacking. The main one being I substituted nonfat plain Greek yogurt for the full fat dairy sour cream. Still turned out wonderfully, though! 1 egg 1 cup sugar (Mom only had raw sugar) 1 cup nonfat Greek yogurt 1 teaspoon vanilla extract 1 tablespoon vegetable oil (skip if using full fat yogurt or sour cream) 1 1/2 cups flour 1 teaspoon baking soda 1/2 teaspoon salt at least 2 cups chopped rhubarb 1 tablespoon raw sugar 1/4 cup sliced almonds Grease and flour a 9"x13" glass baking dish and preheat the oven to 350 F. Chop fresh rhubarb in advance. If using frozen, thaw and drain. Whisk the egg, sugar, yogurt, vegetable oil, and vanilla together. Add the flour, baking soda, and salt and stir quickly with wooden spoon. Add rhubarb and stir to combine, then pour into greased and floured baking dish and spread evenly. Work quickly as the baking soda will instantly start to react with the acid in the yogurt (probably a big slower with dairy sour cream). Sprinkle with sliced almonds, and then sprinkle sugar on top. Bake at 350 F for 30-40 minutes, or until top is golden brown. This makes a springy, delicious cake that would be good with any type of berry as well. Serve plain or with whipped cream, warm or cold. The rhubarb is not sweetened, so the sugar on top is necessary, along with the full cup of sugar in the batter. If you like your desserts very sweet, toss the rhubarb in sugar to coat before baking. But for me this was just perfect. 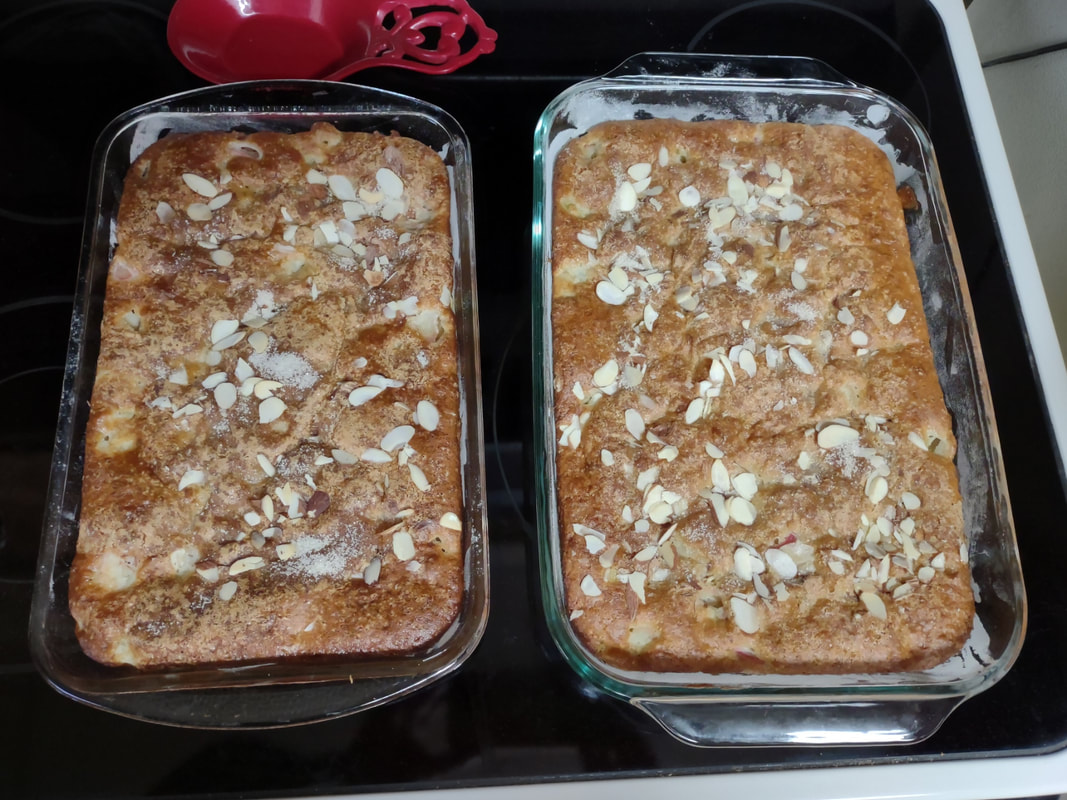 The rhubarb cake baked up nicely, even in two slightly different sized pans. The smaller one on the left got about 5 minutes longer as I made that one first, but that one on the right cooked quicker because it was less thick. 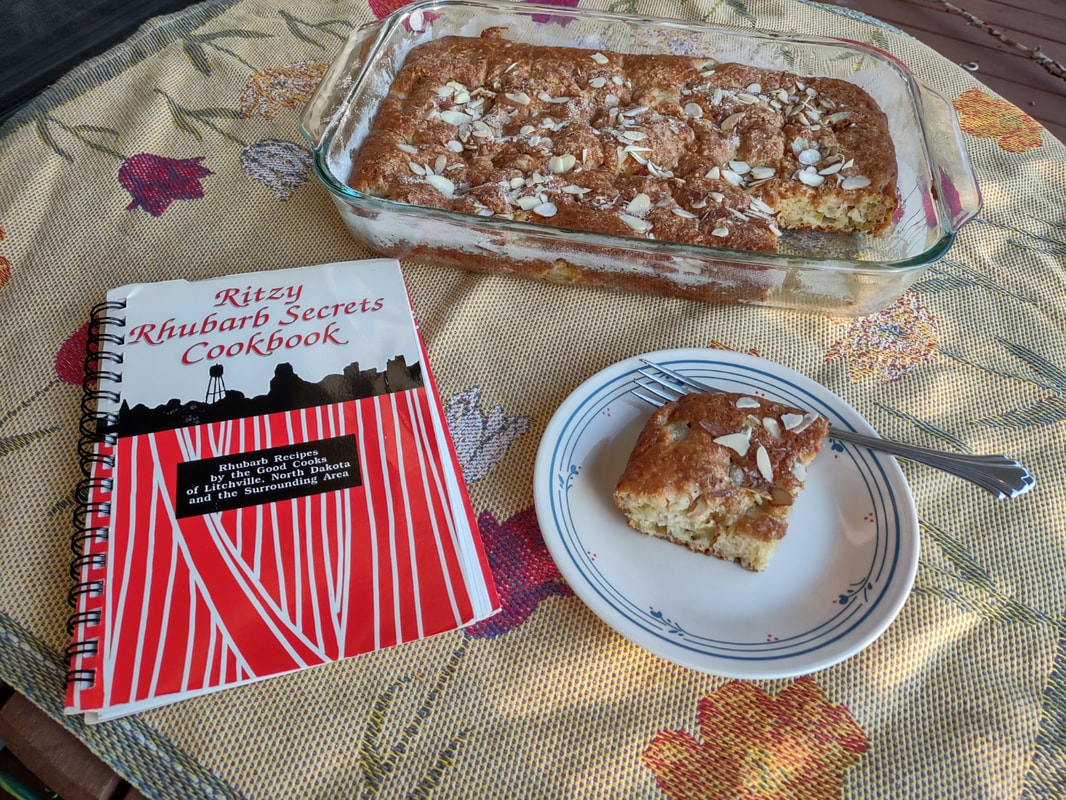 On the front porch with one of Mom's beautiful Scandinavian tablecloths and the "Ritzy Rhubarb Secrets Cookbook." This cake was so easy it is definitely going in regular rotation. It will probably be a little more tender and moist with real sour cream, or full-fat yogurt, than the nonfat kind, however. But I could see it easily adapting to each fruit harvest as it comes in - rhubarb, strawberries, sour cherries, raspberries, blueberries, peaches, plums, blackberries, etc. And of course, you can always slice and freeze raw rhubarb for wintertime baking. Litchville is a very small town in Barnes County in the Eastern half of the state, and clearly there are lots of rhubarb experts there! The cookbook has approximately 150 pages of recipes, everything from the more traditional like cakes, pies, and preserves, to beverages, breads, and salads. Rhubarb culture is strong in the Upper Midwest, especially North Dakota, because the cold climate makes it difficult to grow most fruits. Rhubarb thrives in cold and neglect. North Dakota's long, cold winters, and cool, wet springs are perfect for rhubarb, which needs a certain number of below-freezing days in the winter to produce. Certainly the rhubarb I planted in New York is doing much less well. According to Ritzy Rhubarb, "Rhubarb is an enigma. Botanically it is a vegetable, but legally it is a fruit. A court ruling in Buffalo, New York, on July 17, 1947, declared it a fruit because its use in the home is similar to that of other fruits." Rhubarb is related to buckwheat, and only the stalk is edible. The leaves contain a toxic amount of oxalic acid (what makes rhubarb sour) and should not be eaten. The stalks, which range in color from pale green to ruby red, are a sour treat after a long winter. Mom and others of her generation remember going out to the garden with a cup of sugar and a paring knife and dipping the raw rhubarb stalks in the sugar to eat. That's a little too sour for me, but a fun childhood memory. I like rhubarb in everything from pie, bars, cakes, breads and jams to more savory applications like mixing rhubarb sauce with garlic and eating it with chicken or pork. Yum. Do you have a favorite way to eat rhubarb? The Food Historian blog is supported by patrons on Patreon! Patrons help keep blog posts like this one free and available to the public. Join us for awesome members-only content like free digitized cookbooks from my personal collection, e-newsletter, and even snail mail from time to time! Don't like Patreon? Leave a tip!  A few weeks ago, COVID finally got me, and making myself a simple chicken noodle soup made me feel so nourished, even as I felt terrible. So when a friend told me she had also gotten COVID, feeling fatigued with a cough, I knew I had to make something and bring it over. But my friend is vegetarian, so chicken soup was out. What to make? Inspiration struck in the form of chickPEA noodle soup. I didn't have any intention of posting this recipe, but my friend thought it was so good she demanded I share, especially since vegetarian and vegan-friendly alternatives to chicken soup are often so few and far between. It is incredibly easy and quick to make, so even if you don't have anyone to cook for you, you can tackle this recipe. If you are feeling under the weather, this will perk you right up. To be honest, in many ways, I thought it was better than traditional chicken noodle soup, and it will probably go in regular rotation, especially when I'm not feeling well. Vegan Chickpea Noodle SoupThis soup relies heavily on the quality of your vegetable stock. I used Better Than Bouillon refrigerated organic vegetable bouillon doctored with some herbs and turmeric for color and flavor and it turned out lovely. It also scales up nicely and frankly, the bouillon is the most expensive ingredient! Everything else is eminently affordable. If you're feeding a crowd or want to double the recipe for a week of lunches or to freeze, you can. It's also extremely quick. The whole thing, including chopping vegetables, probably took about 30 minutes, start to finish. Which is nice when you're feeling under the weather or you need some comfort food in a hurry. 2 tablespoons fat (I used 1 each olive oil and salted butter) 1/2 cup sliced carrots 1/2 cup minced celery 1 small onion, minced (about 1/2 a cup) 1 clove garlic, finely minced 1 can chickpeas 4-5 cups water 4-5 teaspoons bouillon (less if you like a thinner, less salty broth, substitute 1 bouillon cube per teaspoon) a few generous shakes of ground turmeric a shake or two of dried thyme a pinch of dried marjoram a pinch of ground pepper 1 bay leaf a small handful (about the size of a nickel) of short spaghetti In a large stockpot over medium heat, sauté the carrots, celery, and onion in the fat until the onion is translucent. Add the garlic and stir well. Let it keep cooking while you drain, but do not rinse, a can of chickpeas. Add the chickpeas and water to the pot, then add the bouillon and herbs and spices. Bring to a boil, reduce heat to medium-high, and let cook until the vegetables and chickpeas are tender, 5-10 minutes. Then add the spaghetti and simmer/boil until the spaghetti is tender. Serve hot with plenty of fresh bread and butter, or biscuits (my friend felt well enough to make some garlic cheddar biscuits. I was jealous), or Saltines, or any other comforting carb you prefer. The vegetable bouillon I used does have tomato in it, so discerning palates will be able to detect a hint of tomato in the broth, but it's not particularly noticeable. If you are using boxed vegetable broth, add a tablespoon of soy sauce (an ingredient in the bouillon) or miso paste for some extra umami flavor and richness. The tender chickpeas really do mimic the flavor and texture of chicken, and the broth is almost identical. Don't skimp on the fat - you want some of that golden goodness floating on top. But my husband commented that it tasted less greasy than chicken noodle soup, and that he preferred this lighter version. From a distance, it even looks like chicken noodle soup. 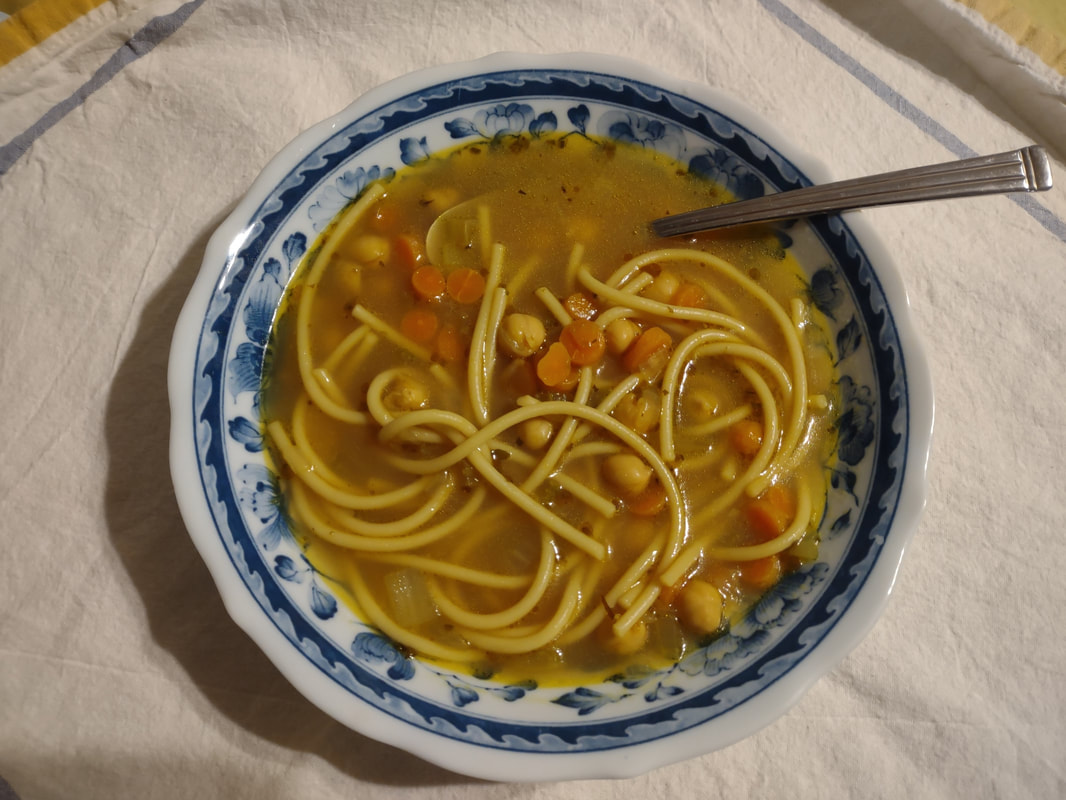 The beautifully golden chickpea noodle soup in a lovely new blue transferware bowl my grandma gave me. Keep this recipe in your back pocket when you are in need of some comforting. It's easy, inexpensive, and healthy. Just the ticket to get you feeling better. You could also easily riff this soup to substitute potatoes or rice for a gluten-free alternative to the pasta, add other vegetables like frozen peas and/or corn, and add cream or milk for a creamier broth. If you like your soup brothier, add more water and more bouillon. If you don't have chickpeas and want to substitute another type of legume like cannellini beans, I recommend adding them after the pasta is done cooking, otherwise you'll end up with beautiful, golden, bean mush. Chickpeas are a little sturdier and I find they often need extra cooking to soften them up a bit, but cannellini beans will start to disintegrate after a few minutes of boiling. I hope you haven't been sick recently, but this new extra-contagious variant is going around, and most of us have spent the last two years avoiding getting regular colds and the flu, so our immune systems aren't quite as up to the challenge as they might usually be. The season of spring also means pollen, leading to irritated throats and sinuses for some of you. This soup will make you feel better, whatever ails you. Stay healthy, dear reader. The Food Historian blog is supported by patrons on Patreon! Patrons help keep blog posts like this one free and available to the public. Join us for awesome members-only content like free digitized cookbooks from my personal collection, e-newsletter, and even snail mail from time to time! Don't like Patreon? Leave a tip! 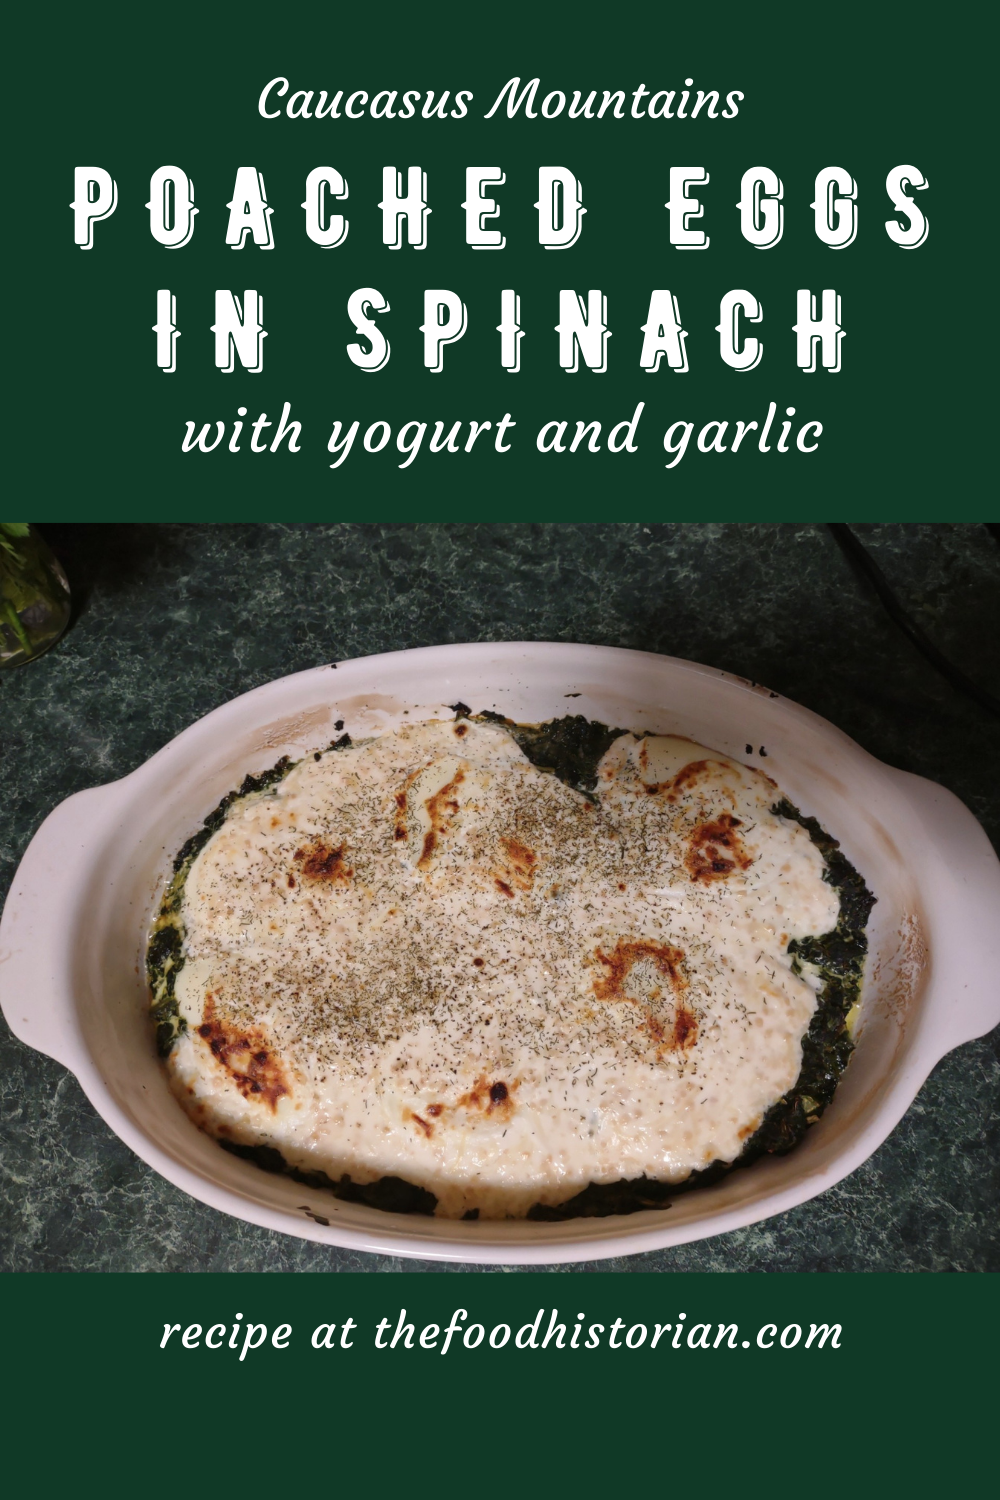 Note: This article contains Amazon Affiliate links. As I'm sure many of you have, I've been thinking a lot about Ukraine and Eastern Europe these days. Last week I launched a Substack specifically so I could give food history commentary on current events, and my first post was all about Ukraine. I've long had an interest in the cuisines of Eastern Europe and the states of the former Russian/Soviet empires. Their creative use of ordinary ingredients and emphasis on fresh fruits and vegetables is extremely appealing to a Midwesterner raised on meat and potatoes. The connection to the land, gardens, and older folks also reminds me a lot of visiting my great-grandmothers in rural North Dakota, who kept huge gardens, and dirt cellars full of preserved foods. I'm always on the lookout for new cookbooks in this vein, so when I saw the following, I snatched it up. The week before the Russian invasion of Ukraine - Cuisines of the Caucasus Mountains: Recipes, Drinks, and Lore from Armenia, Azerbaijan, Georgia, and Russia by Kay Shaw Nelson arrived at my door. First published in 2002, it's written by Nelson, an American who studied Russian language and literature and later became enamored of the food of Georgia (which I am also very interested in). She covers the whole of the Caucasus Mountains, and writes eloquently on each country and their regional differences in agriculture, wild foods, terrain, and foodways. 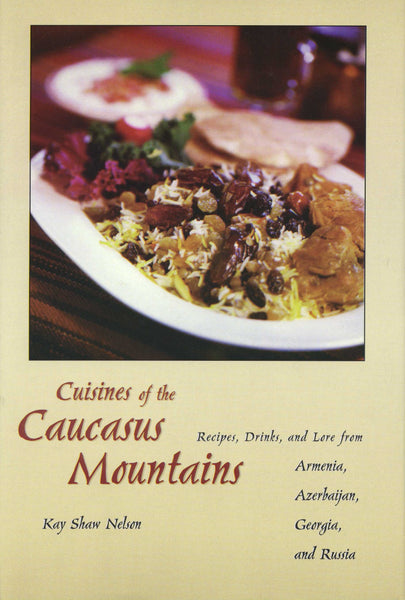 Cover of "Cuisines of the Caucasus Mountains" by Kay Shaw Nelson (2002). I'm always interested in vegetarian dishes, and this cookbook has quite a few, in addition to some delicious-sounding meat dishes. The book is divided by a combination of meal and ingredient, including appetizers, soups, dairy dishes (where eggs are confusingly included), fish, meat/poultry/game, vegetables & salads, grains & legumes, breads/pastas/savory pastries, desserts & sweets, and beverages/drinks/wine. I have earmarked a number of dishes, including salads and egg-based dishes. After the success of Eggs en Cocotte last week, I thought we'd take a stab at another egg dish for a simple supper. Nelson doesn't assign this dish to a country or region, like she does the others, so I've ascribed it to the entire Caucasus Mountains region. 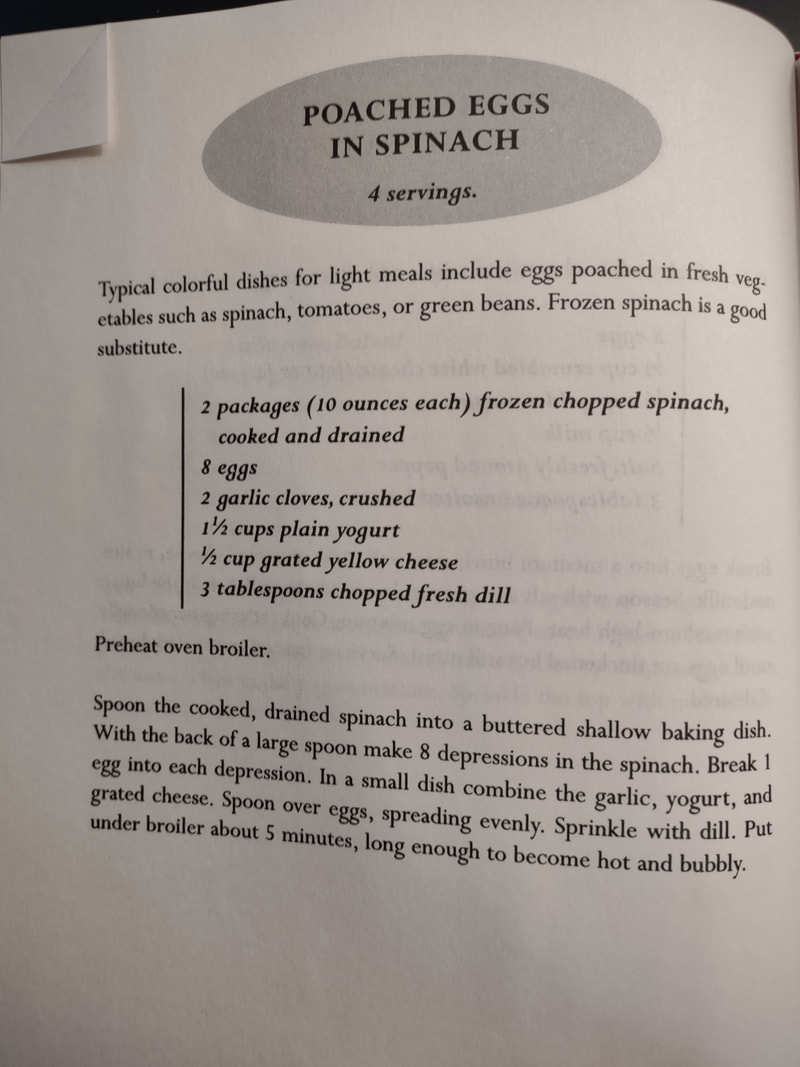 The recipe for "Poached Eggs in Spinach" as it appears in "Cuisines of the Causasus Mountains" by Kay Shaw Nelson (2002). Poached Eggs in Spinach with Garlic and YogurtNelson's original "Poached Eggs in Spinach" recipe is pretty straightforward, and as she remarks in the headnotes, tomatoes and green beans are an alternative vehicle for the poached eggs (similar to Middle Eastern shakshuka). However, her recipe leaves a bit to be desired. Because spinach is the main vehicle of this dish, if you don't season the cooked greens and the eggs well, it will be a flop. Here's my adaptation of her original recipe. 2 packages frozen spinach (10 ounces each), cooked and drained salt, pepper, and whatever other spices you like lemon juice 6 eggs 1 1/2 cups plain yogurt 2 garlic cloves, finely chopped 1/2 cup shredded mozzarella salt pepper dried dill butter for the baking dish Preheat your broiler. Season the spinach with salt, pepper, and lemon juice. Place in a well-buttered baking dish (not glass, which is not broiler safe) and make six indentations for the eggs. Mix the yogurt, garlic, and mozzarella. Crack the eggs into the indentations, then spread the yogurt evenly over the top (I skimped mine a little because I was using fewer eggs, and shouldn't have). Top the yogurt with more salt and pepper and dried dill. Broil for 10-15 minutes or until the yogurt is bubbly and browned and the egg whites are set. 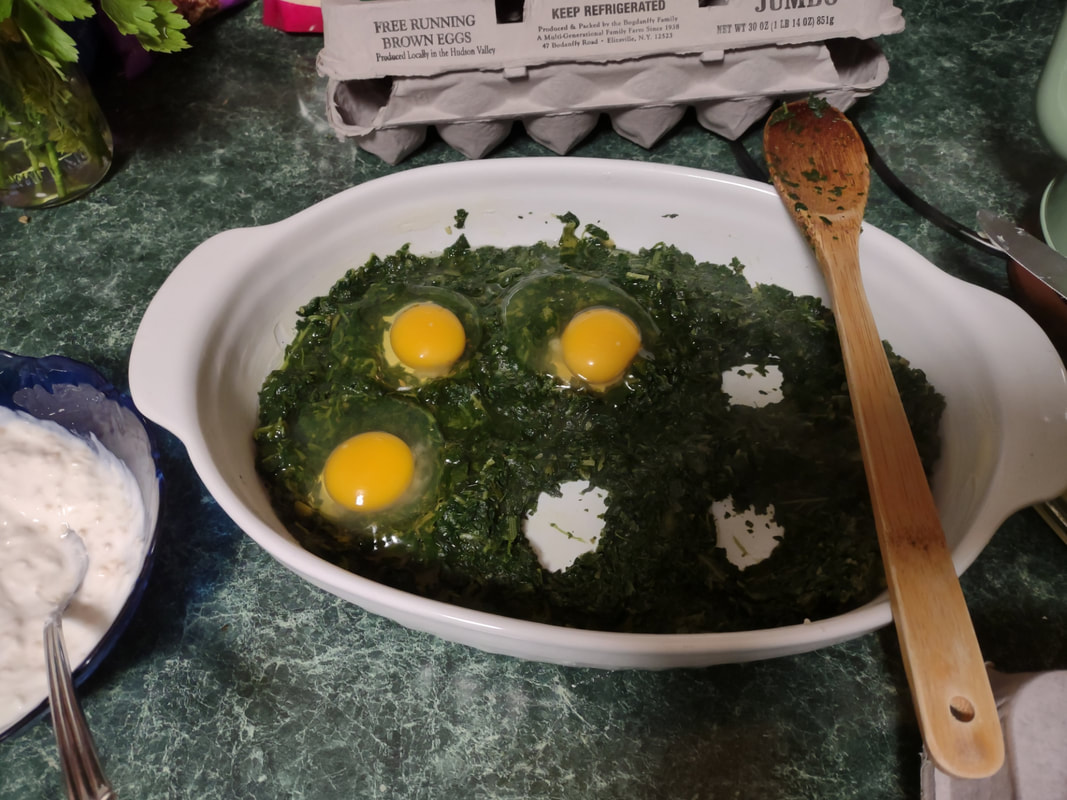 Cracking eggs into the indentations, yogurt sauce at left. 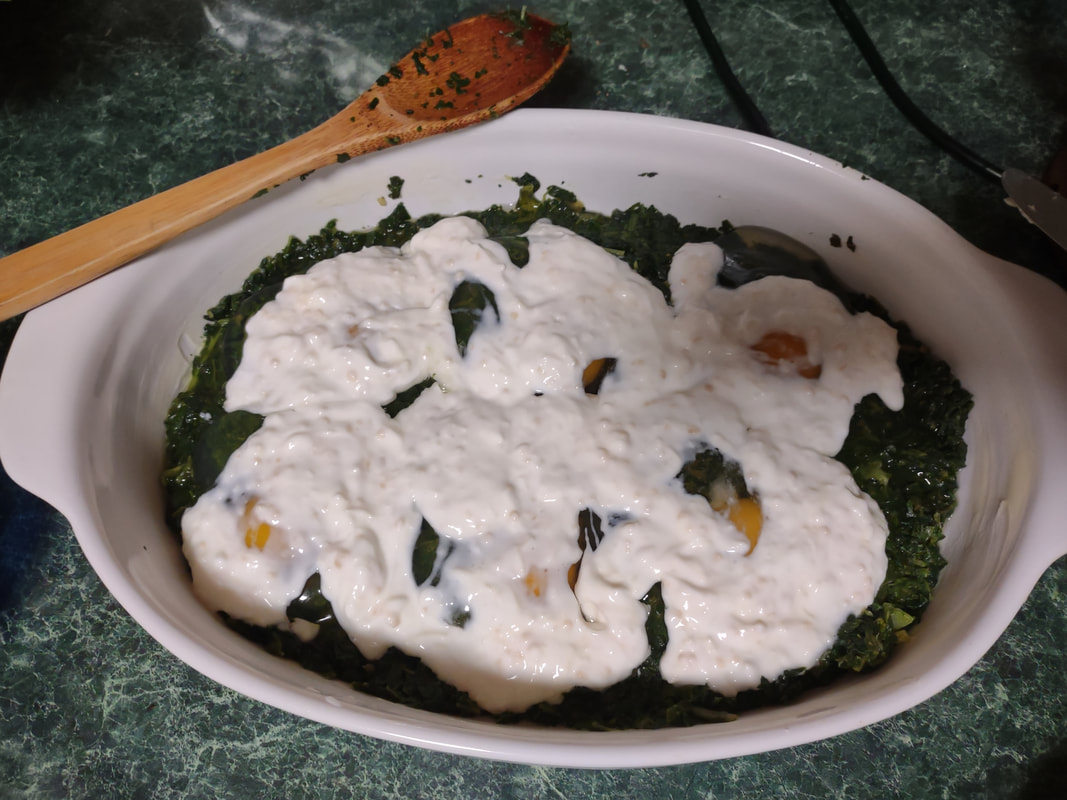 Covering the eggs with inadequate yogurt sauce. 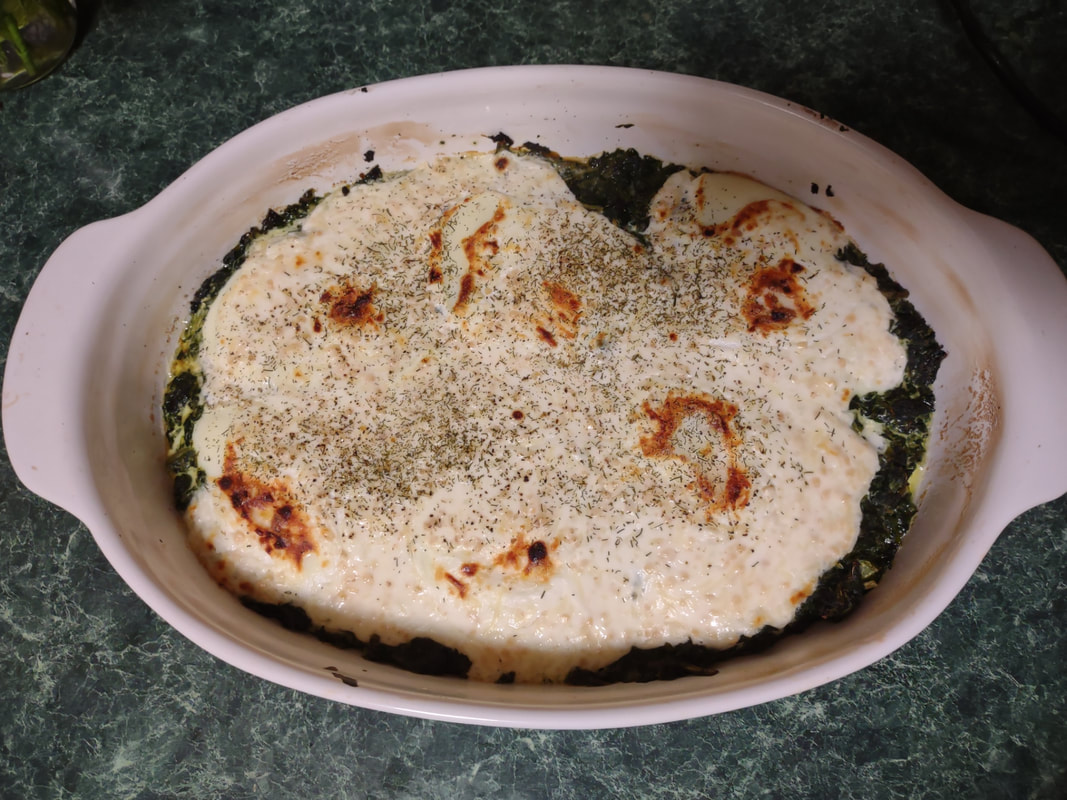 Bubbly and browned. Two eggs per person was plenty, and the leftovers weren't bad, although the egg will obviously cook more once you reheat it. I ate mine all mixed up with some buttered cracked wheat toast (Heidelberg Bread Company in New York makes the BEST toast). 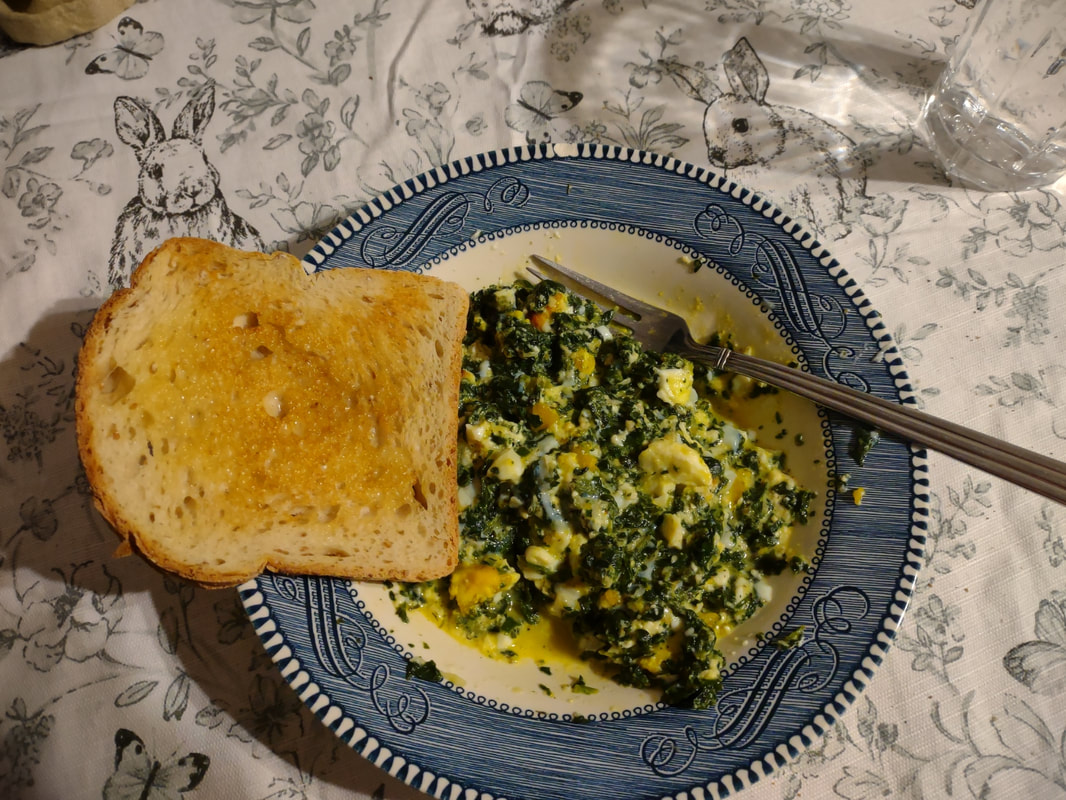 The poached eggs stirred into the spinach, with a slice of buttered wheat toast on the side. This turned out pretty well, all things considered. Without the seasoning it would have been especially bland, so make sure you season your greens! A few things I would change - press more of the water out of the spinach and add more lemon juice, add chopped fresh dill and parsley to the spinach mix, or lemony fresh sorrel if I could find it. I think I would also add onion or more garlic to the spinach itself, instead of just the topping. I would also follow the instructions and use more yogurt for the topping - the places where the egg white wasn't covered it got a little tough in the oven. I think I would still stick with just six eggs, instead of eight, because it was a nice ratio of egg-to-spinach, so the spinach felt like a substantial part of the meal, instead of a garnish for the eggs. I might also try this again in a stovetop-safe vessel like a cast iron skillet, or pre-heat the spinach in the oven before adding the eggs. The bottoms of the eggs were still a little undercooked and the tops were a bit tough. That being said, this was a surprisingly satisfying dish, and anything that gets more dark leafy greens into the diet is always a good thing. I would definitely try this again, but with some changes to make it more flavorful. What do you think - would you try it? The Food Historian blog is supported by patrons on Patreon! Patrons help keep blog posts like this one free and available to the public. Join us for awesome members-only content like free digitized cookbooks from my personal collection, e-newsletter, and even snail mail from time to time! Don't like Patreon? Leave a tip! Tip Jar
$1.00 - $20.00
Like what you read, watch, or hear? Wanna help support The Food Historian, but don't want to commit to a monthly thing, or sign up for Patreon? Then you're in luck! You can leave a tip! This one-time (non-tax-deductible) donation helps keep The Food Historian going and pays for things like webhosting, Zoom, additions to the cookbook library, and helps compensate Sarah for her time and energy in helping everyone learn more about the history of food, agriculture, cooking, and more. Thank you! 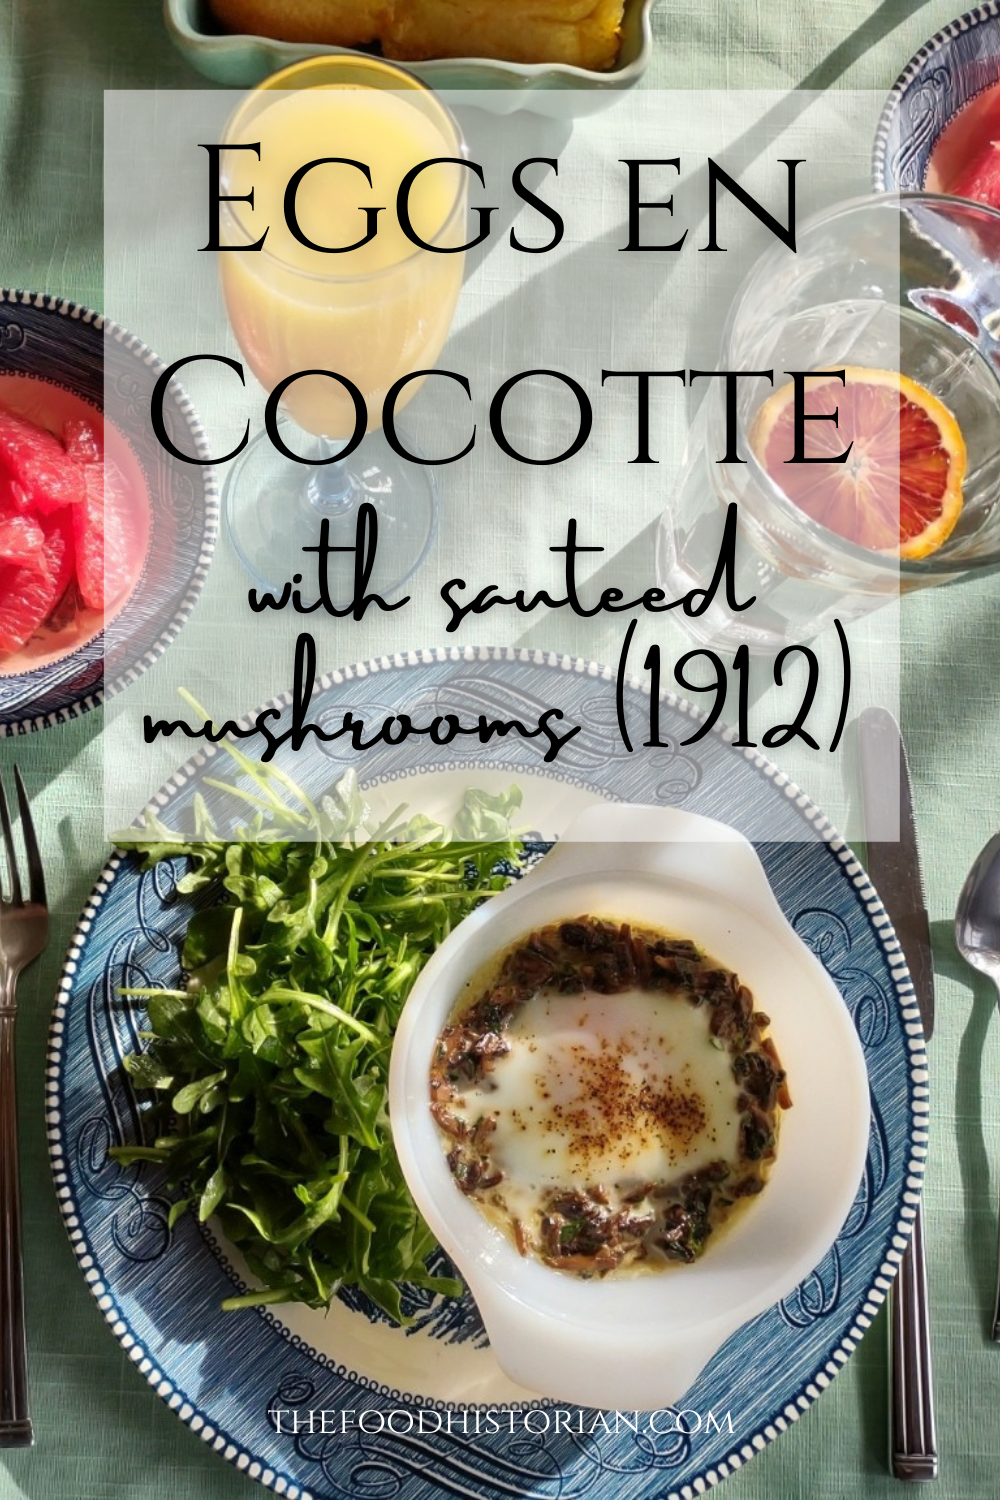 I love brunch. Not the kind you wait in line for, crowded and busy and loud. I love brunch made at home. It's as quiet or loud as you want it to be, the service is usually pretty good, and while there's the effort of making food, if you play your cards right, it's always hot when it gets to the table, and hopefully someone else will do the washing up. Eggs have long been a breakfast staple. If you've a hot skillet, they cook up in a flash. And if you keep chickens, you have a fresh supply every day, at least during the warmer months. But getting a bunch of eggs hot and cooked to order to the table can be a precarious thing when you're hosting. So I took to my historic cookbooks and found a viable solution - eggs en cocotte. Technically, it's oeufs en cocotte, which is French for eggs baked in a type of dish called a cocotte, which may or may not have been round, or with a round bottom and/or with legs. Sometimes also called shirred eggs, which are usually just baked with cream until just set, these days en cocotte generally means the dish spends some time in a bain marie - a water bath. The cookbook recipe I used was from Practical Cooking & Serving by prolific cookbook author Janet McKenzie Hill. Originally published in 1902, my edition is from 1912. You can find the 1919 edition online for free here.  The cover of "Practical Cooking and Serving" by Janet McKenzie Hill, 1912 edition, author's library. A weighty tome of a book, Practical Cooking and Serving is nothing if not practical, and McKenzie Hill is uncommonly good at explaining things. Her section on eggs explains: "Eggs poached in a dish are said to be shirred; when the eggs are basted with melted butter during the cooking, to give them a glossy, shiny appearance, the dish is called au mirroir. Often the eggs are served in the dish in which they are cooked; at other times, especially where several are cooked in the same dish, they are cut with a round paste-cutter and served on croutons, or on a garnish. Eggs are shirred in flat dishes, in cases of china, or paper, or in cocottes. A cocotte is a small earthen saucepan with a handle, standing on three feet." Since my baking dishes were neither the flat oval shirring dishes, nor the handled kind, I guess perhaps they are neither shirred nor en cocotte, according to Hill, but we can afford to be less picky about our dishware. Hill offered two recipes: one more classic version with breadcrumbs (optional addition of chopped chicken or ham) mixed with cream "to make a batter." The buttered cocotte was lined with the creamy breadcrumbs, the egg cracked on top, with the option to cover with more breadcrumb batter. The whole thing was then baked in a hot water bath "until the egg is set." My brunch guest adores mushrooms, and I wanted something a little fancier and more substantial, so I went with Hill's version No. II. Eggs en Cocotte with Sauteed Mushrooms (1912)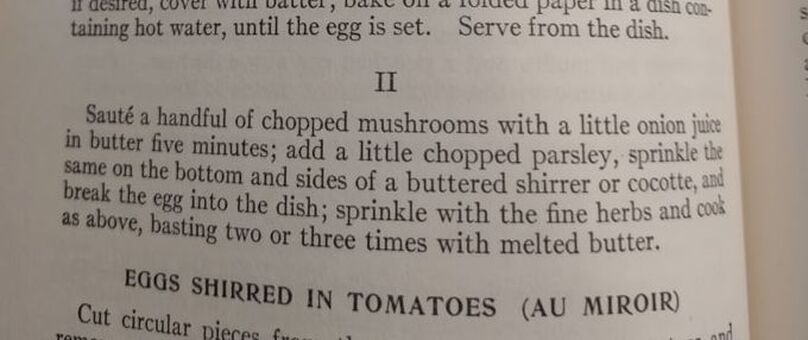 Egg in Cocottes, No. II, from "Practical Cooking and Serving," by Janet McKenzie Hill, 1912. Author's library. Hill's original recipe reads: Sauté a handful of chopped mushrooms with a little onion juice in butter five minutes; add a little chopped parsley, sprinkle the same on the bottom and sides of a buttered shirrer or cocotte, and break the egg into the dish. Sprinkle with the fine herbs and cook as above, basting two or three times with melted butter. I will admit I didn't follow the directions as closely as I should have - I didn't use hot water in my bain marie (oops), and I didn't baste with butter. So the eggs were cooked a little more solid than I would have like, but still turned out deliciously. Here's my adapted recipe: 1 pint white button mushrooms, minced 2 tablespoons butter 1 clove minced garlic salt and pepper 2 tablespoons heavy cream 2 tablespoons fresh flat leaf parsley, chopped 4 eggs Preheat the oven to 350 F. Butter three or four small glass baking dishes. Sauté the mushrooms and garlic in butter, adding salt and pepper to taste. When most of the mushroom liquid has cooked off, add the heavy cream and parsley and stir well. Divide evenly among the baking dishes, make a little well, and then crack eggs into dishes. One or two per dish. Salt and pepper the egg, then place in a 9x13" baking pan with two inches of water (use hot or boiling water). Bake 5-10 minutes, or until the egg white is set and the yolk still runny. For firmer eggs, bake 10-15 mins. I did not use boiling water, so the whole thing took more like 20-30 mins for the water to heat up properly, and the yolks got firmer than I would have liked. Tasted delicious, though! This is a very rich dish, so best served with something green and piquant - I chose baby arugula with a sharp homemade vinaigrette (2 tablespoons olive oil, 2 tablespoons lemon juice, 1 tablespoon dijon mustard was enough for 3 or 4 servings of salad), which was just about perfect. 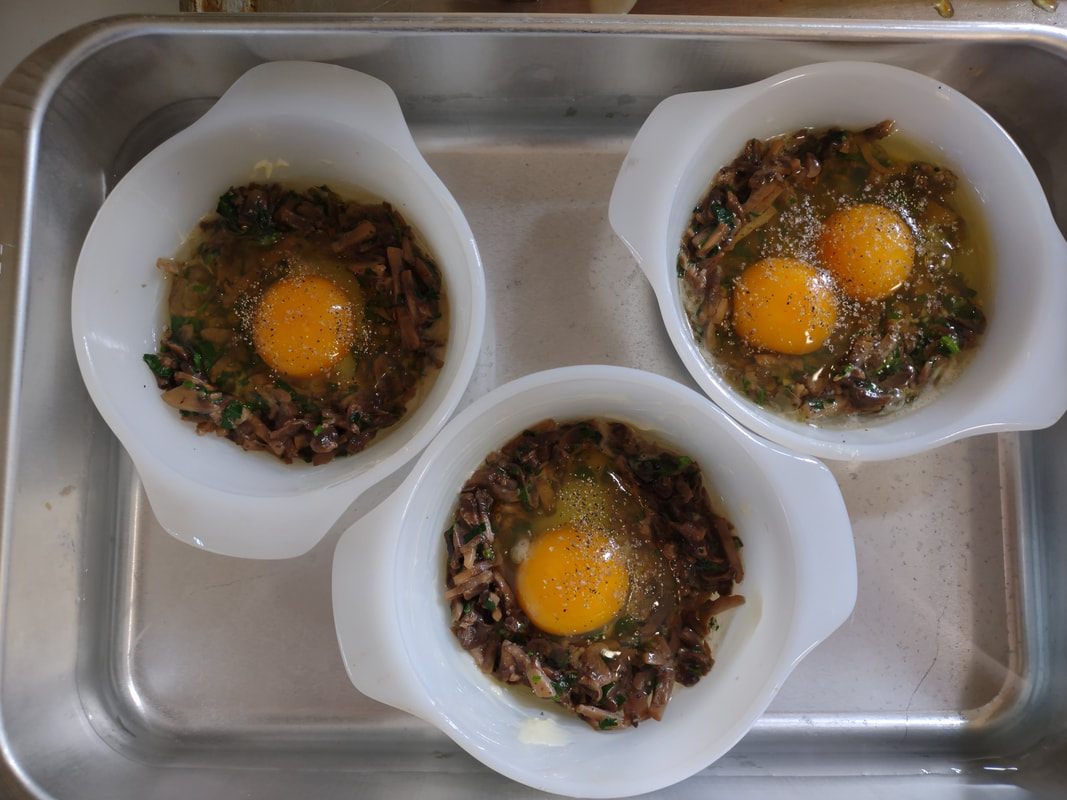 The raw eggs in their cocottes, sitting in their water bath and waiting to go into the oven. You don't have to be a fan of mushrooms to like this dish - white button mushrooms aren't particularly strong-flavored - they just tasted rich and meaty. And despite the fact that eggs en cocotte look and taste incredibly fancy, they were very easy and relatively fast to make. If you were cooking brunch for a crowd, you could certainly prep the mushroom mixture in advance, have the bain marie water on the boil, and make the eggs your last task for a beautiful brunch. With the simple arugula vinaigrette on the side, something sweet and bready (that recipe is coming soon, too) and some fresh fruit and mimosas, you've got yourself a winner. Do you have a favorite egg recipe? 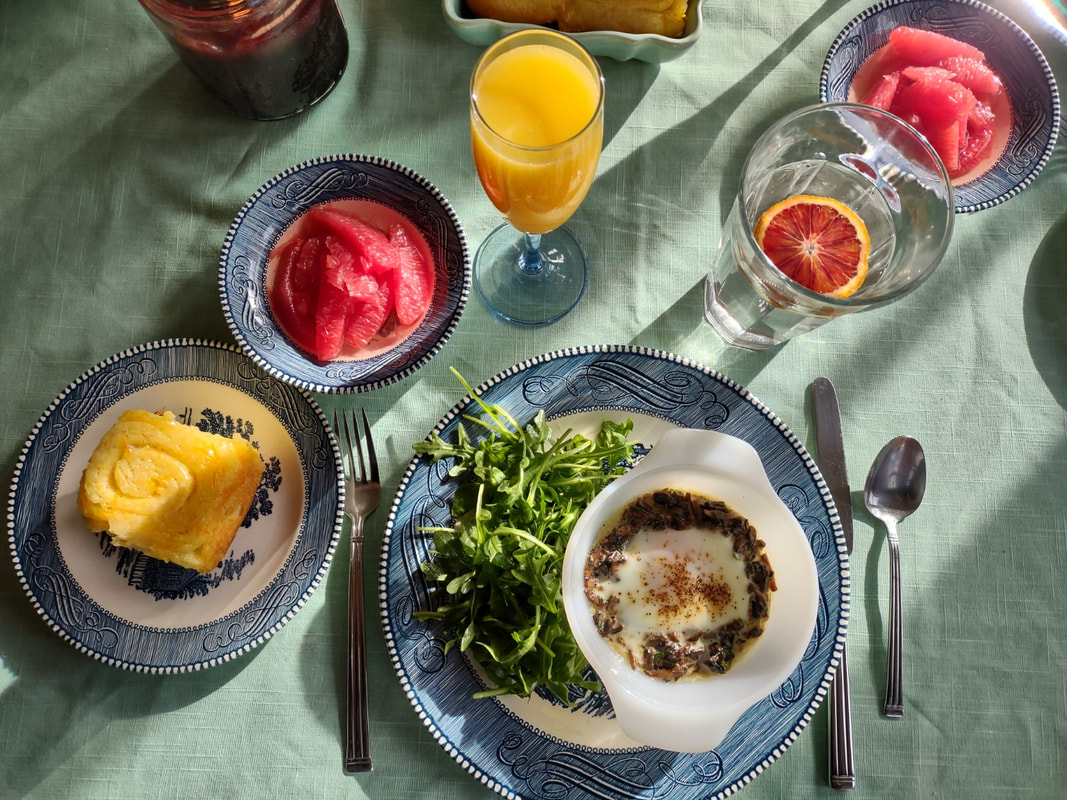 The whole beautiful brunch spread. The Food Historian blog is supported by patrons on Patreon! Patrons help keep blog posts like this one free and available to the public. Join us for awesome members-only content like free digitized cookbooks from my personal collection, e-newsletter, and even snail mail from time to time! Don't like Patreon? You can leave a tip!  Washington Pie HistoryWashington pie is everywhere in 19th century cookbooks. Confusingly, it is not a pie. Gastro Obscura traced the history of Washington pie, but spoiler alert - it was called a pie because it was baked in tin pie pans, which back then had straight sides similar to modern cake pans. WHY it was named after George Washington isn't clear - and the earliest references we can find date to 1850. Gastro Obscura and Patricia Reber trace it back to Mrs. Putnam's Receipt Book and Young Housekeeper, by Elizabeth H. Putnam and published in 1850. But I found another reference from 1850, the Practical Cook Book by Mrs. Bliss (of Boston), also published in 1850, for "No. 1 Washington Cake," which included the note "This cake is sometimes called WASHINGTON PIE, LAFAYETTE PIE, JELLY CAKE, &c." Mrs. Bliss' recipe is preceded by the lovely-sounding "Virginia Cake," which calls for sieved sweet potato and molasses, and "Victoria's Cake," which is a lemon-flavored sponge cake with no mention of the jam and cream commonly found in Victoria Sponge. I did find several earlier references to "Washington Cake," many of which were more a type of white fruit cake with currants (Mrs. Bliss' "No. 2 Washington Cake" is of this type), not a layer cake with jelly, with one exception. "Washington Cake" in Mrs. T. J. Crowen's 1845 Every Lady's Cook Book calls for a similar style cake flavored with lemon and brandy. However it does not say to bake it in layers, nor fill it with jam or jelly. But let's take a harder look at that "Layfayette Pie" reference from Mrs. Bliss. Lafayette Pie, Martha Washington Pie or Cake History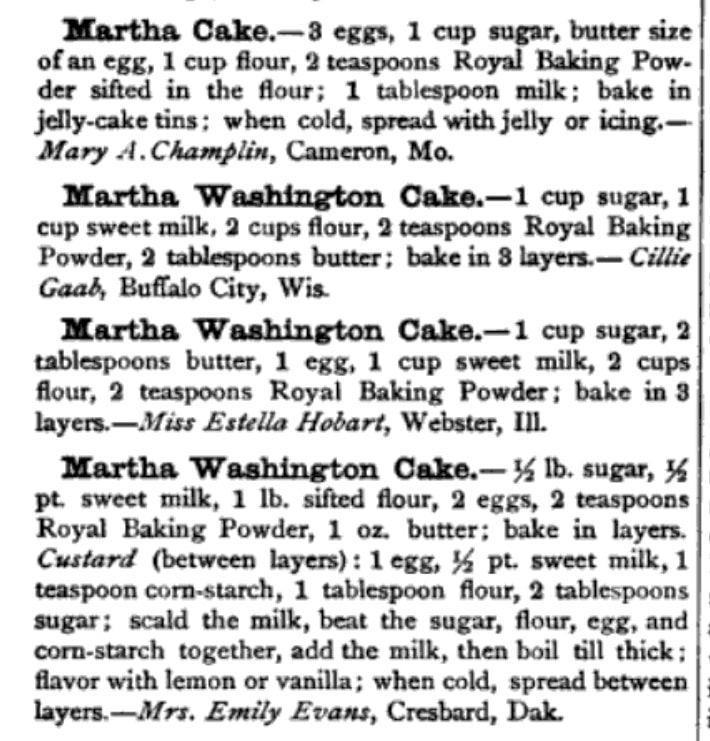 Several references to "Martha Cake" and "Martha Washington Cake" from "My Favorite Receipt," published by the Royal Baking Powder Company in 1886. Although Washington Pie is traditionally made with only jam or jelly, there was another variation that shows up later: the Lafayette or Martha Washington Pie/Cake. Similar to Washington Pie, both "pies" are a simple cake baked in thin layers, but instead of filled with jelly or jam, are filled with custard (or more rarely, whipped cream). Confusingly, though the majority of references to Lafayette Pie and Martha Washington Pie call for custard, I have seen occasional references to jelly options, too. The above recipes, from My Favorite Receipt, published by the Royal Baking Powder Company in 1886 is one of the earliest references I can find to Martha Washington Cake/Pie. The first one, called just "Martha Cake" calls for it to be baked in "jelly-cake tins" and spread with "jelly or icing." The next two recipes are identical, and call for the cake to be baked in three layers, but no reference to fillings. The final version (from a North Dakotan!), is the one which also lists the cooked custard filling, to be flavored with vanilla or lemon. The earliest reference I could find for "Lafayette Pie" is Mrs. E. Putnam's 1867 version of her Mrs. Putnam's Receipt Book, which follows the Washington Cake recipe with "Lafayette Pie," a rather less precise recipe than Washington's, which is "enough for two pies" and is followed with "Filling for the Above Pies," seeming to mean both Washington and Lafayette. It reads "Two ounces of butter, quarter of a pound of sugar, two eggs, and one lemon; beat all together without boiling." At first, I read this to mean uncooked, but instead it must mean heated but not boiled - essentially a rich, lemon-flavored custard. The Methodist Cook Book, published in 1899, contains a recipe for "Lafayette Pie," which calls for being baked in a "Deep pie plate," and then cut in half lengthwise (confusingly, it says to "cut out the center to make room for the filling") and filled with a cornstarch-egg custard. Just like Martha's. Boston Cream Pie History As far as I can tell, Lafayette Pie and Martha Washington Pie/Cake are essentially the same: a simple layer cake baked in pie tins and filled with cooked custard. Sound familiar? Recipes called "Boston Cream Pie" were for decades exactly the same - a thin plain layer cake filled with a cooked custard. Contrary to what Gastro Obscura claims, when Americans made Boston Cream Pie at home in the 19th century, it was WITHOUT a chocolate topping. None of the 19th century recipes I could find titled "Boston Cream Pie" (and there were many) contain chocolate at all - only one Maria Parloa recipe calls for chocolate, and that is named "Chocolate Cream Pie." Chocolate-free Boston Cream Pie recipes continue to be published into the 1940s. As far as cookbooks go, Boston Cream Pie doesn't morph into the chocolate-topped version until the 20th century. The Home Dissertations cookbook, published in 1886, includes a recipe for "Boston Cream Pie" among its pastry recipes, even though it is clearly a cake. It calls for the cake to be baked in "round tins so that the cake will be one inch and a half thick" and filled with a cooked custard made with eggs and cornstarch, flavored with vanilla or lemon. No chocolate in sight. How or why all of these "pies" which are really cakes got their names remains lost to history. Likely, the cake was baked in honor of Washington's birthday, or other patriotic occasions. Washington's Birthday became a federal holiday in 1879, which may explain the popularity of the cake at the end of the 19th century. Lafayette and Martha likely followed as other patriotic homages. Other political figures also got their due, like this "Mrs. Madison's Cake" from 1855, which lists just above a white fruitcake-style "Washington's Cake," "Madison Cake" from 1856, and "Mrs. Madison's Whim," a similar-style cake "good for three months" stays in print as late as 1860. Even Jefferson got his own cake, although only in one 1865 edition of Godey's Magazine, and it reads more like a sweet biscuit than a true cake. Political cakes may have been a thing in the 19th century, because the 1874 The Home Cook Book of Chicago has an Adams Cake, a Clay Cake, two Harrison Cakes, and a Lincoln Cake, and the Adams and Clay cakes (named for President John Adams and Senator Henry Clay, one presumes) read very much like Washington Pie. There are also TWO recipes for "Washington Pie," one of which has a filling that includes apples. I could only find one other "Lincoln Cake" in the 19th century, published in 1863. And Boston? It could be that the patriotic cakes were simply popular in Beantown, which leant its name as the "pies" spread elsewhere (a la Boston Brown Bread, Boston Baked Beans, etc.). Certainly the Parker House Hotel in Boston claims to have invented Boston Cream Pie, although I've yet to see any hard evidence (like a recipe or period description) that indicates it had a chocolate topping in the 1860s. Victoria Sponge Cake History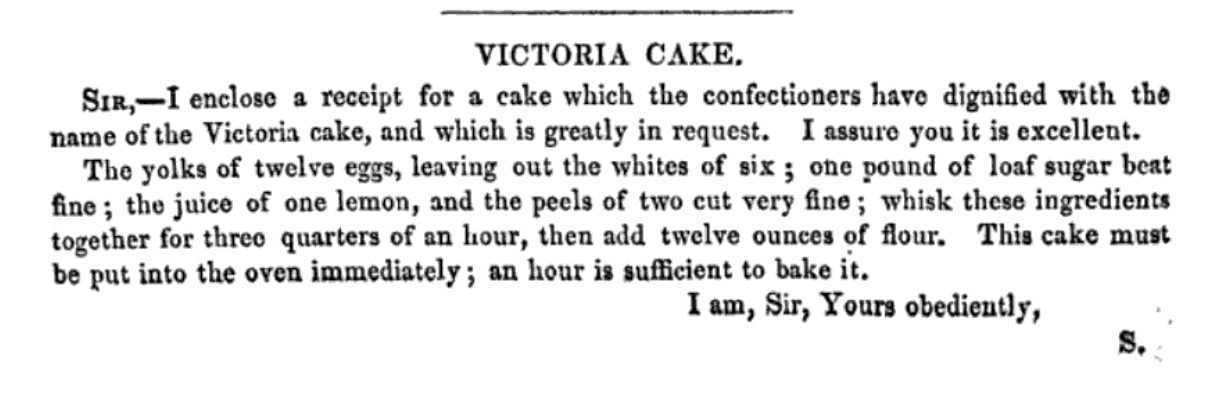 A reader-submitted recipe for "a cake which the confectioners have dignified with the name of the Victoria cake, and which is greatly in request," from "The Magazine of Domestic Economy," 1839. Washington Pie really is quite similar to Victoria Sponge, which if you're a fan of the Great British Bakeoff, you know is one of Britain's (and Queen Victoria's) favorite desserts. And, ironically, not actually a sponge cake, as it calls for butter (true sponge cakes have no fat). Likely developed in the late 1840s, coinciding with the development of baking powder in 1843, and adopted by the Queen in mourning in the 1860s. Like Washington Cake, some of the first references to "Victoria Cake" are much closer to a white fruitcake or pound cake than a sponge, like this recipe from 1842, or this recipe from 1846 by Francatelli. The first recipe to a sponge-style Victoria Cake comes in 1838, the year after she became queen (recipe pictured above) from The Magazine of Domestic Economy. Although it does not call for filling of either jam nor whipped cream. The oft-cited recipe published in The Practical Cook (1845), is identical to the 1838 recipe, down to the letter. Of course, Mrs. Bliss' "Victoria's Cake," published in 1850, while not identical to the letter, is certainly just a slightly re-worded copy. Despite the popularity of the sponge, "Victoria's Cake" continues to be the yeasted fruitcake that Francatelli and later Soyer keep pushing well into the 1860s. "Victoria Sandwiches" come into play in the 1850s, whereby pieces of sponge cake are sandwiched with jam and topped with pink icing, a la The Practical Housewife, published in 1855 by Robert Kemp Philp. Ridiculously, Francatelli's version of "Victoria Sandwiches" are a literal sandwich, made with hard boiled egg and anchovies. Not quite as flattering to the queen. Mrs. Beeton wisely hops on the sponge cake "Victoria Sandwiches" bandwagon in the 1860s. Although curiously none of these early recipes call for whipped cream to accompany the jam. Perhaps because Mrs. Beeton's recipe for Victoria Sandwiches is immediately followed by one for Whipped Cream, maybe someone put two and two together. Which cake was inspired by whose we'll perhaps never know. Unless some manuscript cookbook has in it somewhere "Washington Pie, from Victoria's Cake" or "Victoria Sandwiches, in the style of Washington Pie." Regardless, it was the exact right kind of cake to associate with heads of state, apparently, once everyone got over heavy white fruit cakes laden with lemon and currants and alcohol. In making a birthday brunch for a friend, I wanted to focus on vintage recipes and had Washington Pie already in mind. But unwilling to use the internet (cheating!), I instead consulted my historic cookbooks. I had been on the lookout for another recipe, when I found a recipe for "Washington Cake" in one of my North Dakota community cookbooks, this one dating to the 1940s: The North Dakota Baptist Women's Cook Book. 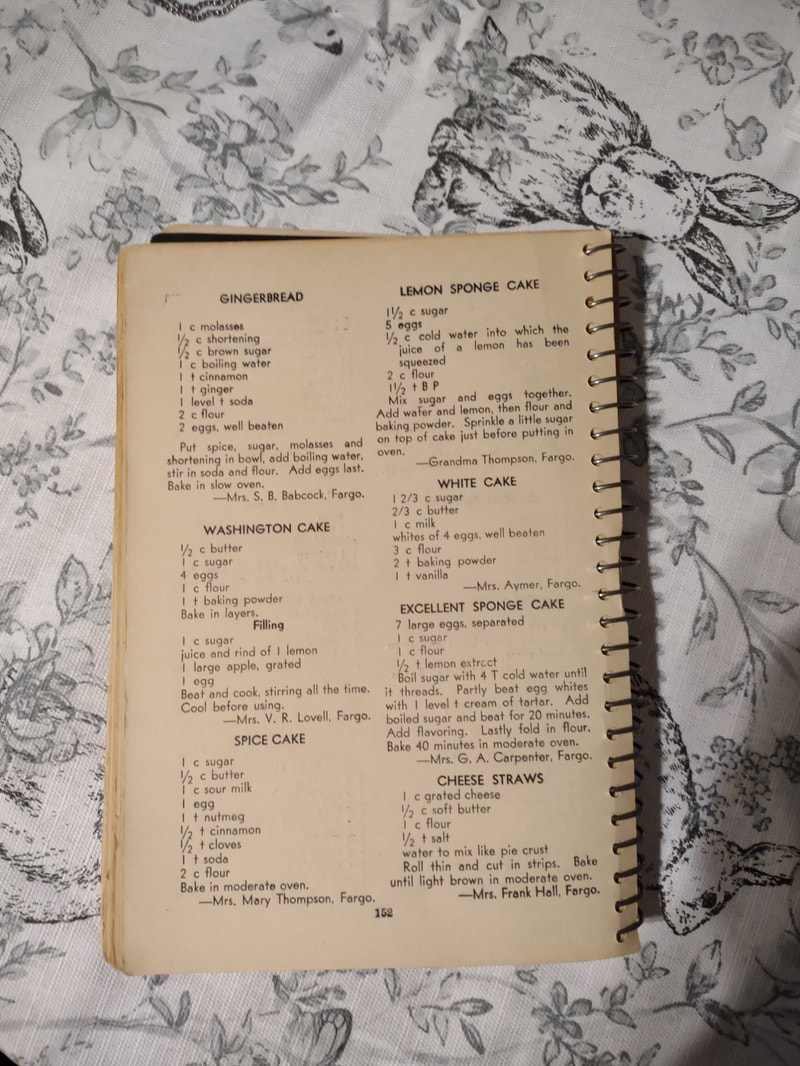 The cookbook does not have a publication date, but there is a reference to 1947 in the frontspiece, and from that and judging by the style of font and print, we can safely date it to the late 1940s, possibly 1950, but not much later. Interestingly, the recipe for Washington Cake was in a section in the back called "1905 Recipes" and dedicated to the women of the First Baptist Church of Fargo, ND, which was built in 1905. The recipes that follow were all written by women of the church for that first construction - likely from an older cookbook. The dedication reads, "In loving memory of those who have made a very definite contribution to the Christian cause through their labors in the First Baptist Church of Fargo, N. D., and who have left behind them fruits that are being utilized in this book, this page is gratefully dedicated." It then lists two biblical references to death and a list of women's names. The recipes read as much older than 1905, with emphasis on things like brown bread, suet pudding, doughnuts, gingerbread, and mincemeat. Likely they were submitted as "colonial" or similar "old-fashioned" recipes that were part of the popular colonial revival that began at the turn of the 20th century. The recipe for "Washington Cake" was contributed by Mrs. V. R. Lovell of Fargo, ND. It reads: 1/2 c butter 1 c sugar 4 eggs 1 c flour 1 t baking powder Bake in layers. Filling 1 c sugar juice and rind of 1 lemon 1 large apple, grated 1 egg Beat and cook, stirring all the time. Cool before using. Not exactly the most descriptive recipe I've ever read, but better than many! I decided not to use the interesting-sounding filling, although I may revisit it at a future date. Instead, I wanted to go the jam-and-cream route. 1905 Washington Cake (or Pie), Adapted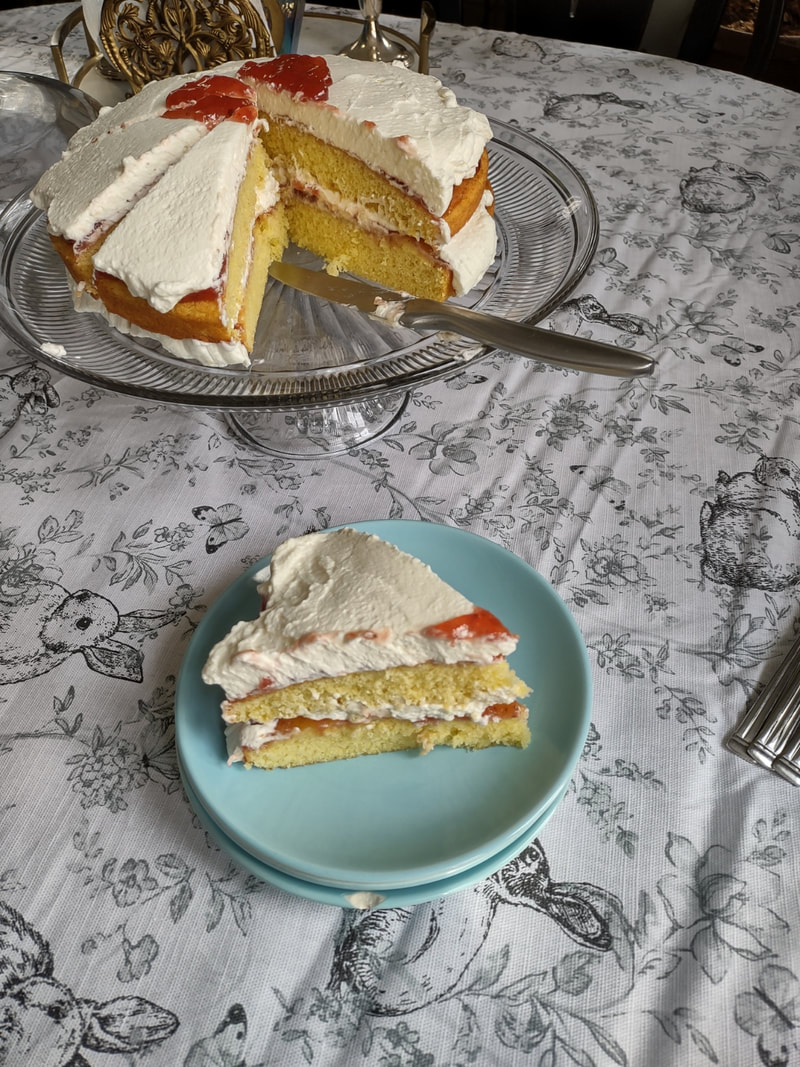 Unlike a traditional sponge cake, which can be quite finicky with separating egg whites, I found this recipe to be just as delicious, but much simpler. As an added bonus, you don't have to split a taller cake evenly lengthwise - the layers are already thin enough to stack as-is. You can use any kind of jam, but I chose my favorite brand of strawberry. 1/2 cup butter 1 cup sugar 4 eggs 1 cup flour 1 teaspoon baking powder 1 teaspoon vanilla (or lemon or extract) Strawberry jam Whipped cream Preheat the oven to 350 F. Butter well two round cake pans. Cream but the butter and sugar together, then add the eggs one at a time, beating after each addition. Add the vanilla (or lemon), then the flour and baking powder, then mix well until everything is well combined. Pour equal amounts into the two cake pans, then bake on the center rack for approximately 30 minutes (check after 20 - when the cake is golden at the edges and the center springs back to the touch, it is done). Tip the cakes out of their pans onto a cooling rack and let cool completely. Then spread strawberry jam on one layer, and top with whipped cream (I stabilized mine with cornstarch - which you could taste, so I would not recommend doing that again), then add the second layer, more strawberry jam, and more whipped cream. If you want this cake to keep better, I would recommend going the traditional Washington Pie route and just filling thickly with strawberry jam, and serving it with whipped cream on top to taste. This cake is very easy, bakes relatively quickly, and tasted delicious. It was VERY sweet, so I might cut back on the sugar slightly if I make it again. But while I'm sure Great British Bakeoff experts would criticize the fact that I didn't weigh my ingredients or make sure my eggs were room temperature, I thought the cake turned out very lovely indeed. And the combination of cake, whipped cream, and sweetened fruit can never be wrong. As for all the other political cakes? I may have to do some more investigative baking for Presidents' Day 2023. The Food Historian blog is supported by patrons on Patreon! Patrons help keep blog posts like this one free and available to the public. Join us for awesome members-only content like free digitized cookbooks from my personal collection, e-newsletter, and even snail mail from time to time! Don't like Patreon? You can leave a tip! 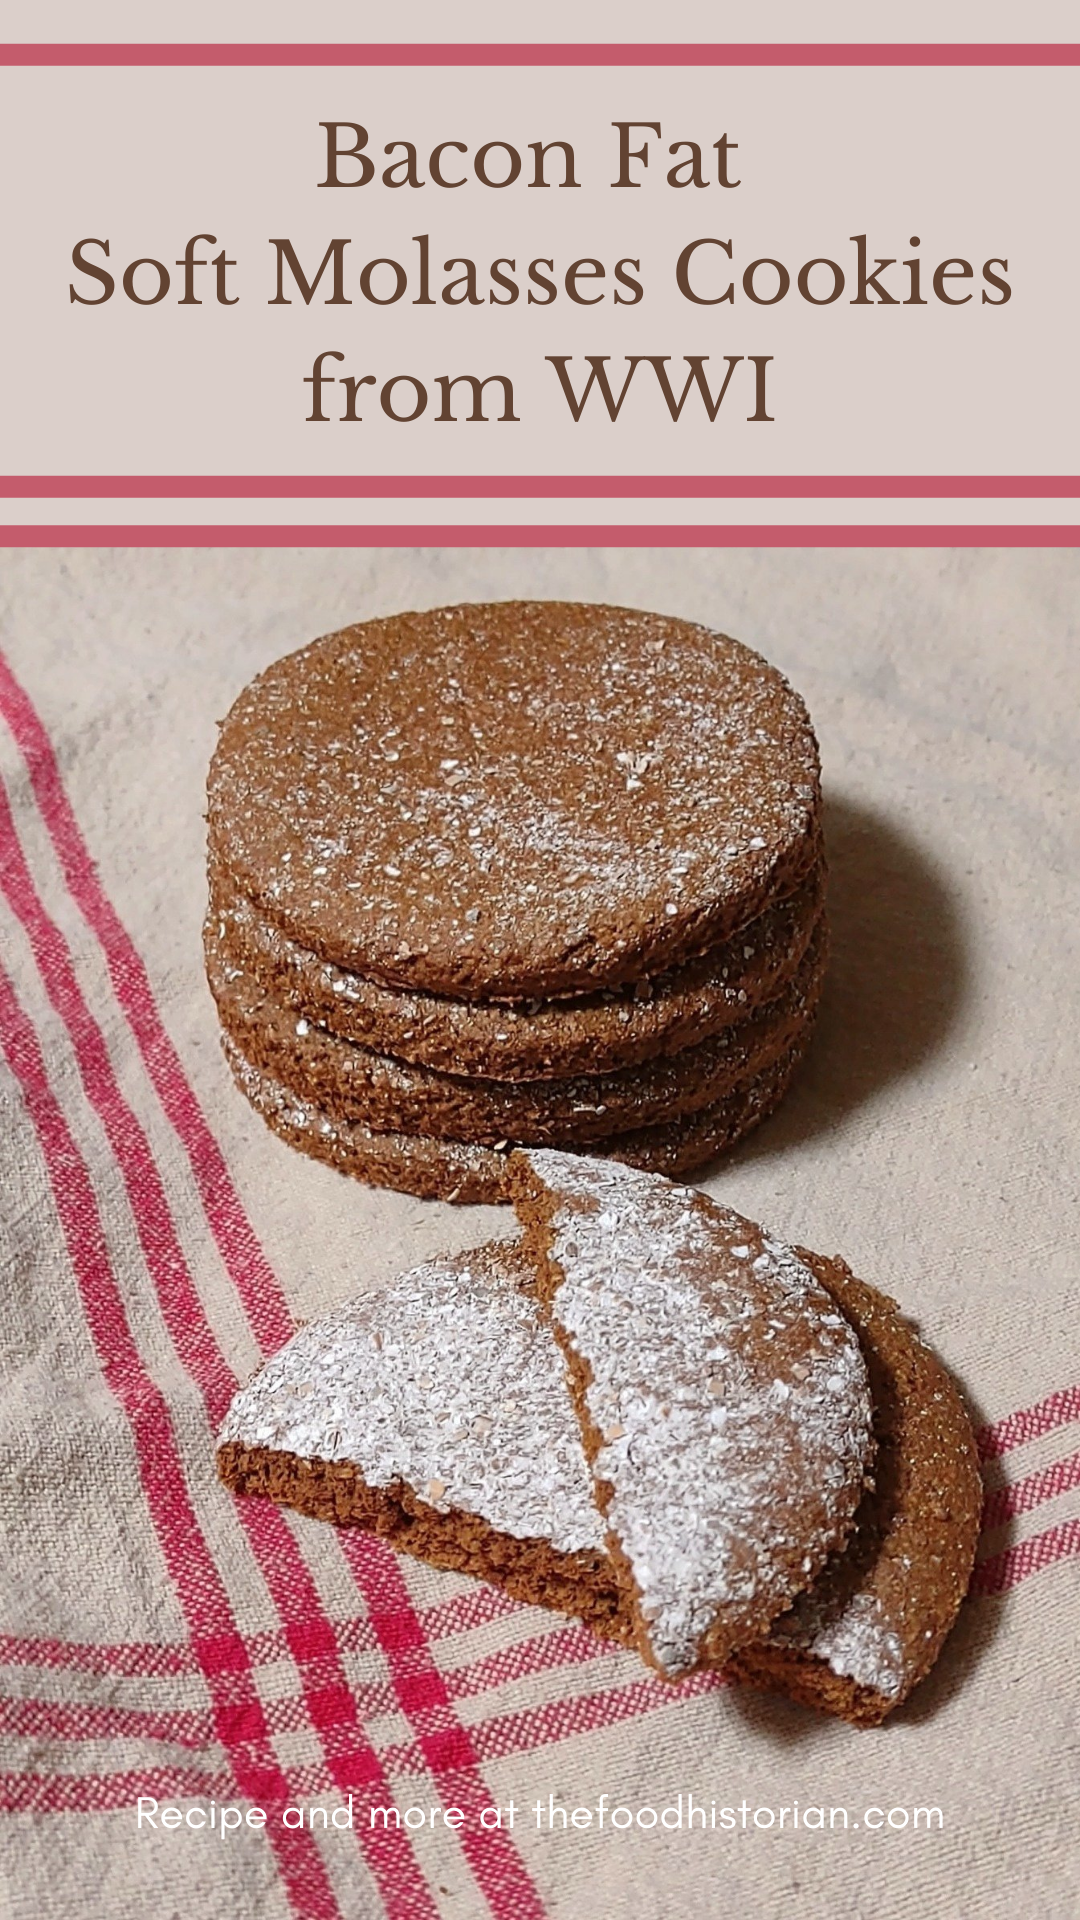 I first ran across bacon fat gingersnaps in the Christmas cookie collection the New York Times posted for December, 2021. Although I'm not a NYT Cooking subscriber, I did a google and found an article about the original recipe, which indicated the recipe was likely historic. Even though I'd just finished my Christmas cookies research, the bug bit again and the hunt was on. I found several historic recipes for bacon fat cookies, some of them gingery, some of them not (scroll to the bottom for the gallery of recipes), but because I am a World War I historian, I decided that the recipe I was most interested in at the moment was the "Soft Molasses Cookies" listed as a "Conservation Recipe" in the February, 1918 issue of American Cookery, formerly the Boston Cooking School Magazine. And it seemed appropriate to be baking them in February, 2022! 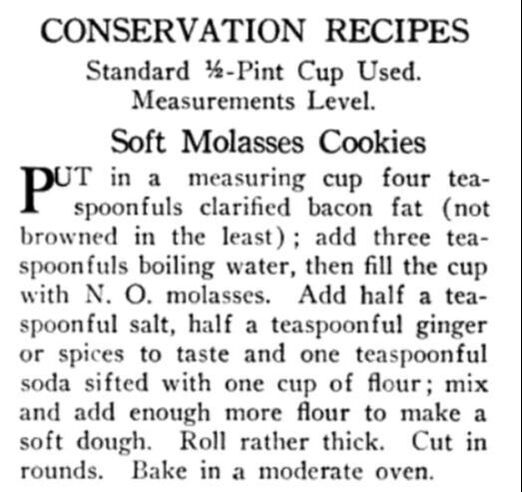 Recipe for "Soft Molasses Cookies" from the February, 1918 issue of "American Cookery" magazine, formerly the Boston Cooking-School Magazine. The recipe is not written in a way we're used to today, but is fairly straightforward. It reads: Put in a measuring cup four teaspoons clarified bacon fat (not browned in the least); add three teapsoonfuls boiling water, then fill the cup with N.O. [New Orleans] molasses. Add half a teaspoonful salt, half a teaspoonful ginger or spices to taste and one teaspoonful [baking] soda sifted with one cup of flour; mix and add enough more flour to make a soft dough. Roll rather thick. Cut in rounds. Bake in a moderate oven. This recipe is sugarless, eggless, and butter-less, and it uses fats that might otherwise go to waste, making it the perfect conservation recipe during a time when Americans were asked to save wheat, sugar, meat, and fats for the war effort. The use of New Orleans molasses was specifically to save space on cargo ships and support American sugar production (molasses is a byproduct of sugar cane processing). By using bacon fat, normally a waste fat, Americans could save on lard and butter. Bacon Fat Soft Molasses Cookies (1918)I will admit that I started this recipe before I realized I was virtually out of all-purpose flour. And since I had a good deal of whole rye flour to use up, and I thought it in keeping with the spirit of the recipe to make this wheatless as well, I used all rye (although in the period rye was not considered an official substitute for wheat, largely because it was in fairly short supply). It did make a rather heartier cookie than I think was intended, but it worked just fine. Here's my translation of the original: 2+ cups flour (I used whole rye) 1 teaspoon baking soda 1/2 teaspoon salt 1/2 teaspoon ground ginger 4 teaspoons bacon fat 3 teaspoons boiling water a little less than 1 cup molasses Preheat the oven to 350 F. In a large mixing bowl, whisk together 1 cup flour, the baking soda, salt, and ground ginger. In a heat-proof measuring cup, place the bacon fat and add the boiling water. Then add molasses enough to make 1 cup. Pour into the flour mixture and beat well. Add more flour (about another cup) until a soft dough forms. You may need more flour as the dough will be very sticky. Knead in a little more flour as needed to make a dough that can be rolled without excessive stickiness. Flour your rolling surface well, and roll out the dough about a half inch thick, or a little thicker. Cut into rounds and bake on a parchment-lined baking sheet (to prevent sticking and save on grease!) at 350 F for 10-12 minutes. My batch rolled relatively thin made just short of 2 dozen largish cookies. Next time I would probably let them be a little thicker and I'd probably end up with a dozen and a half. 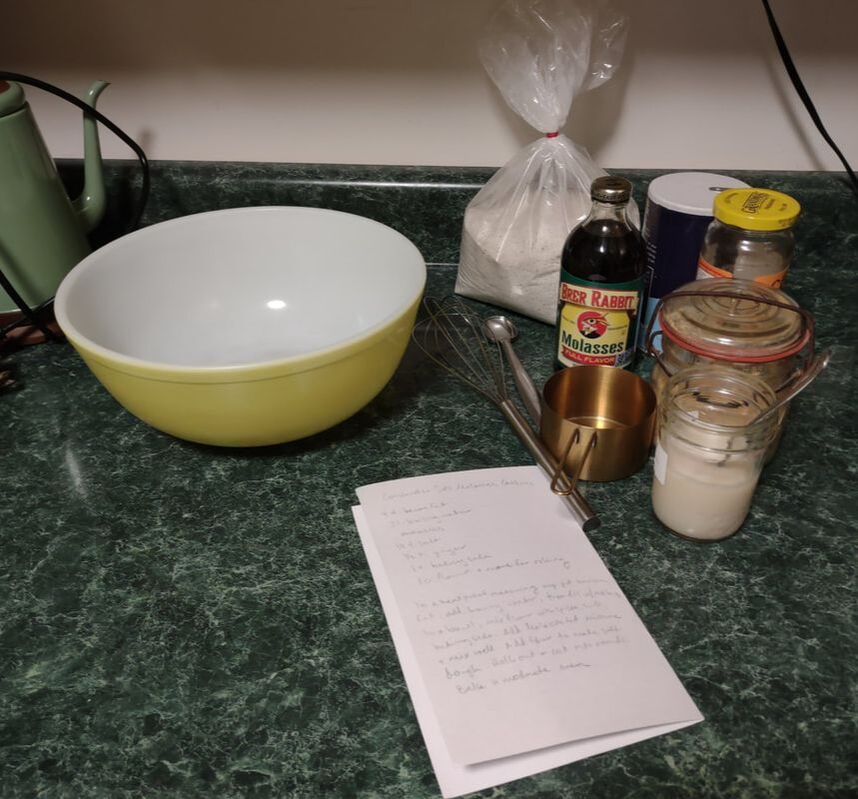 All the ingredients (except baking soda!) and my handwritten recipe translation.  Super wet dough with just 1 cup of flour. 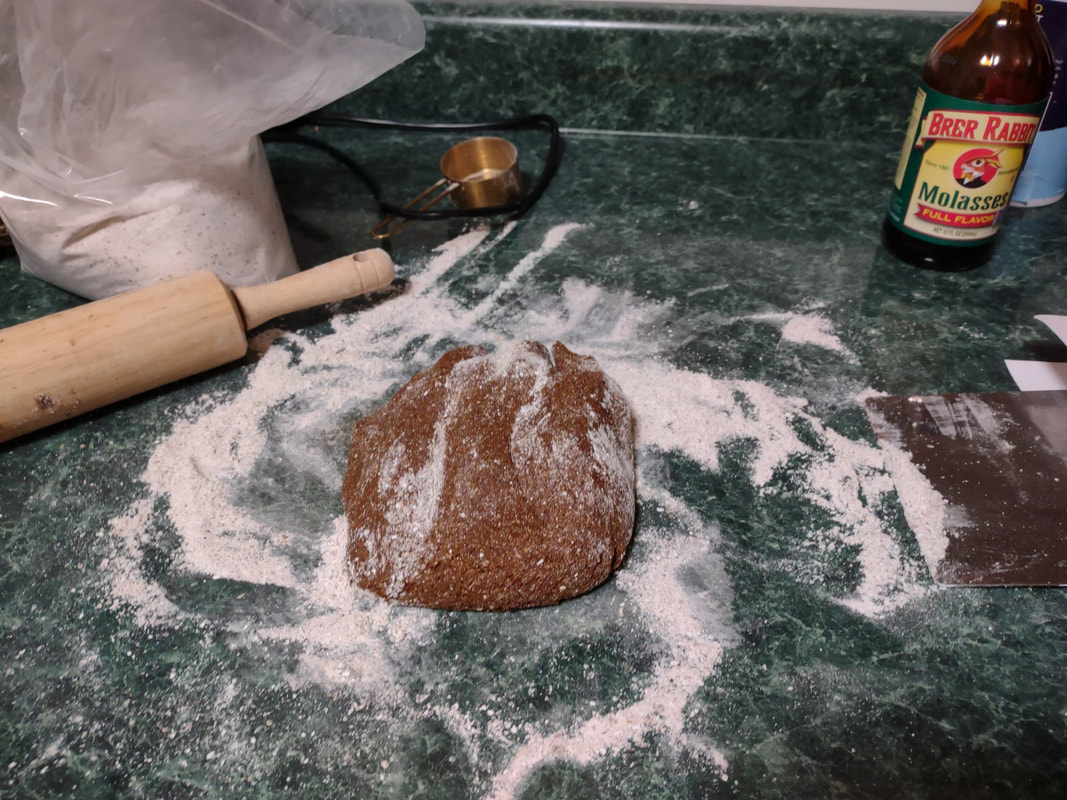 After a fair amount of kneading. All-purpose flour might absorb the molasses better. 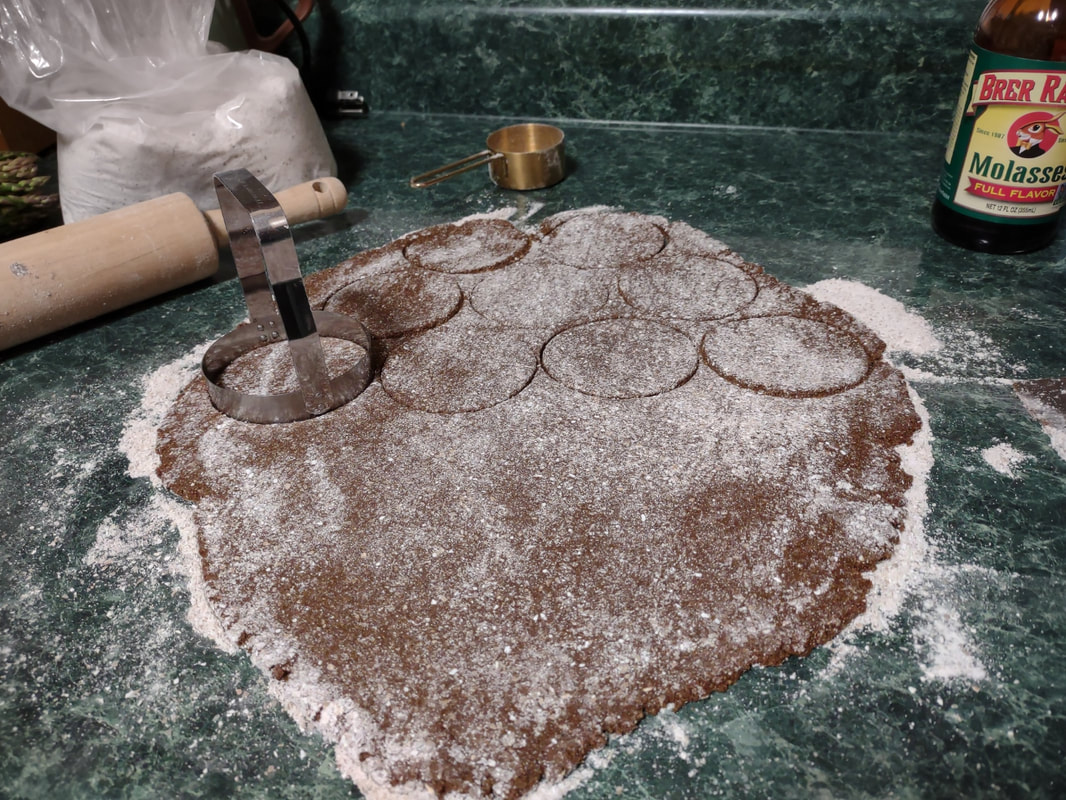 Rolling it out a little thinner than I probably would next time, but look at how much flour I had to use to keep it from sticking to everything! And my poor rolling pin got dough all over it anyway. 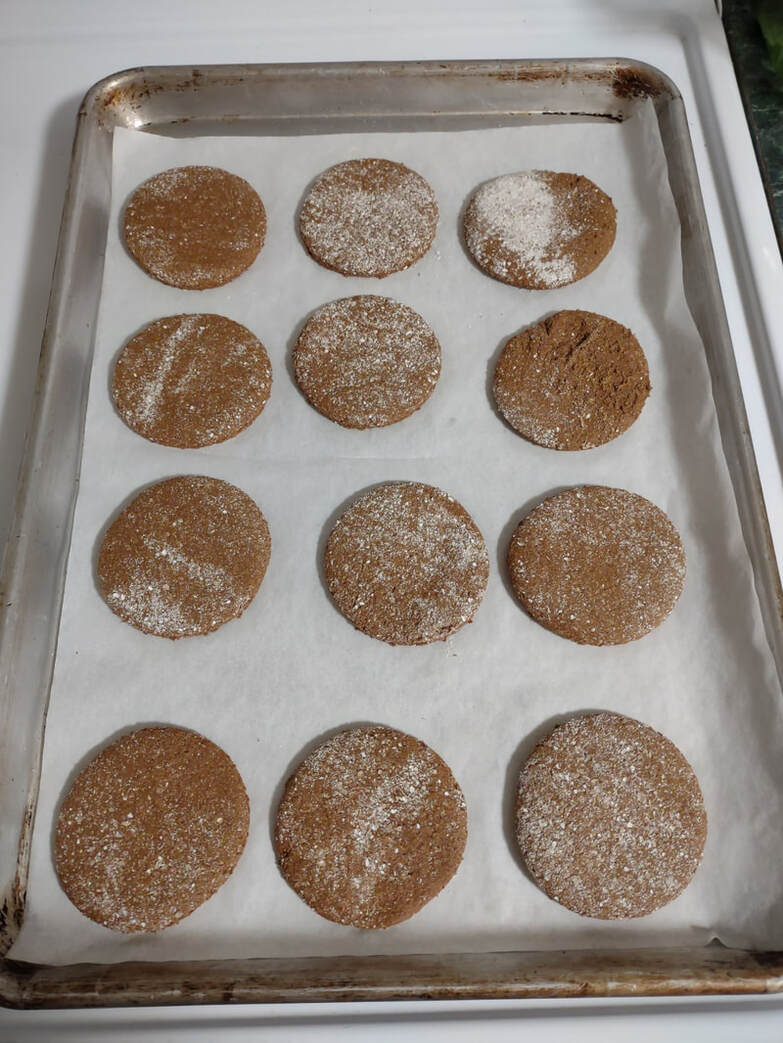 I was hoping the flour would absorb a bit as it baked. It mostly didn't. Oh well. Still tasted good! Although these aren't crisp or particularly sweet, they do taste astonishingly close to the Archway brand of molasses cookies you can find very inexpensively in just about every grocery store. Soft, and a little cakey, with strong molasses flavor and just a hint of gingery spice. I couldn't really taste the bacon fat while they were still warm (though my husband claims he could), but the flavor will likely improve the next day. I did frost a few to dessert-them up a little. Just a few teaspoons of heavy cream mixed with some powdered/icing sugar. Shhh! Don't tell Herbert Hoover! 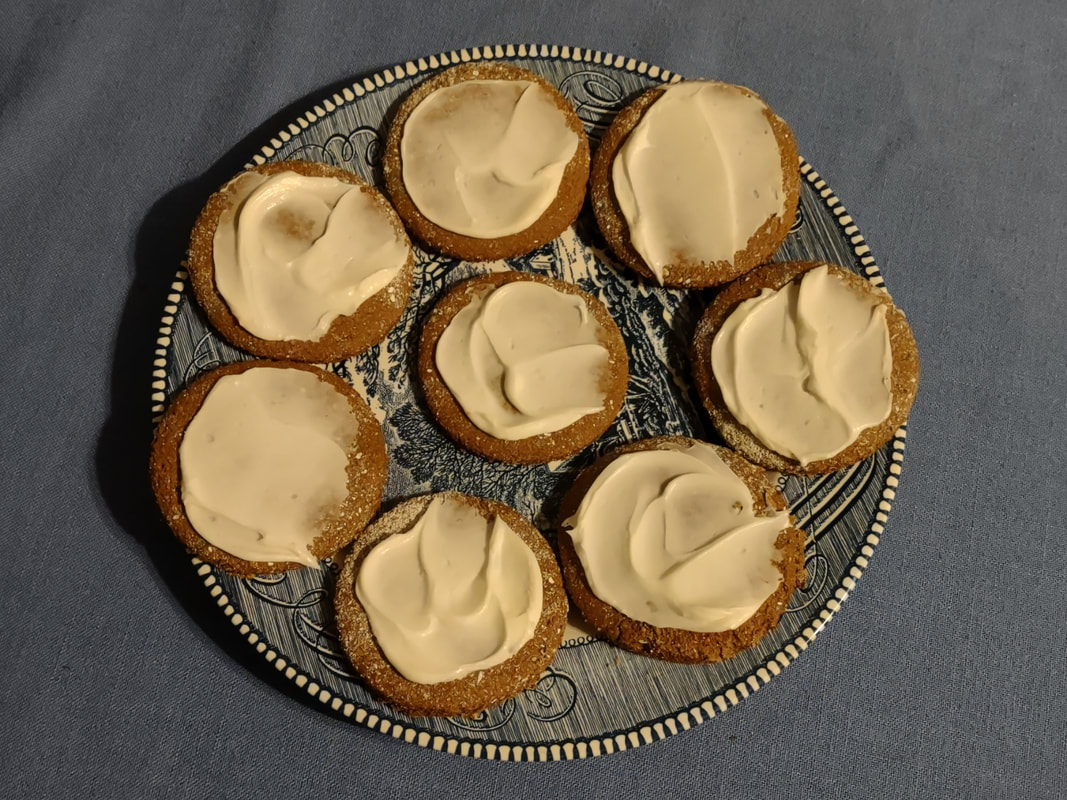 WWI molasses cookies with a little non-ration-friendly icing. Although these are quite soft right out of the oven, they will harden up as they cool, so be sure to store them in an air-tight container to help retain moisture. All things considered, I think this recipe turned out rather well for one that was supposed to be a bit of a privation during the war. Although I don't think it was UN-common to use bacon fat or drippings or any other animal fats as shortening in baking in the 19th century (indeed in the 1800s "shortening" just meant any kind of solid fat - remember we don't get vegetable shortening until the 1870s), we don't really see bacon fat specifically called out in cookbooks until the 1910s. One reason is likely that bacon was an increasingly popular breakfast food. Oscar Mayer, in particular, started selling pre-packaged sliced bacon in 1924. Breakfast was rebranded in the 1920s away from stodgy porridges and even health-food cold cereals and toward bacon, eggs, and tableside electric appliances that made things like waffles, fresh-squeezed orange juice, coffee, and toast. All that bacon frying meant that cooks had a surfeit of grease, and frugal cooks would hate to waste it. And while bacon fat is perfect for frying potatoes into hash, there's only so many things you can fry in bacon fat. Hence, the baking recipes. As you can see from the collection below, they're all for 1915 and later, with most in the 1920s. 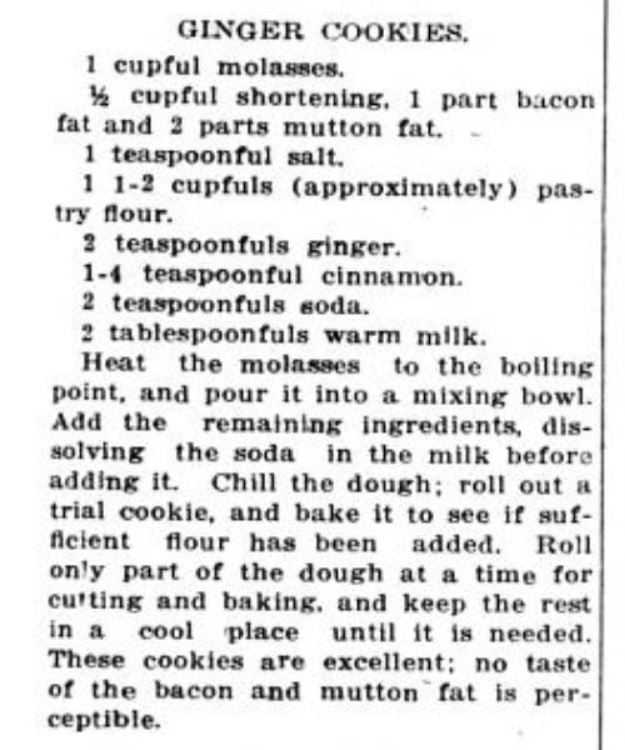 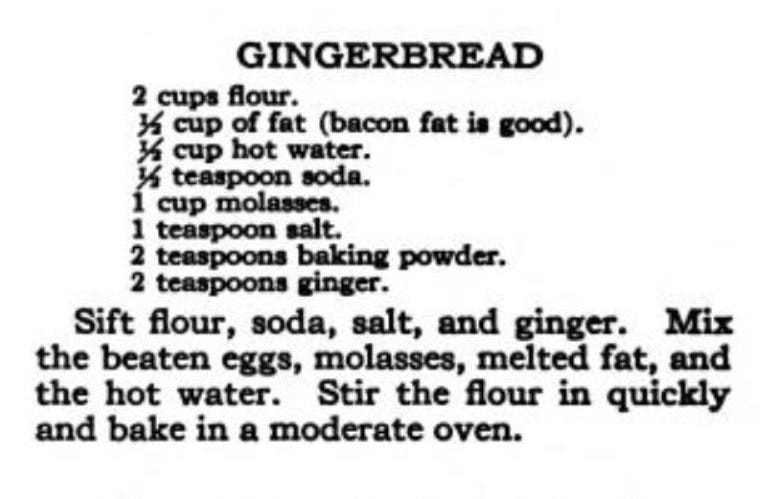 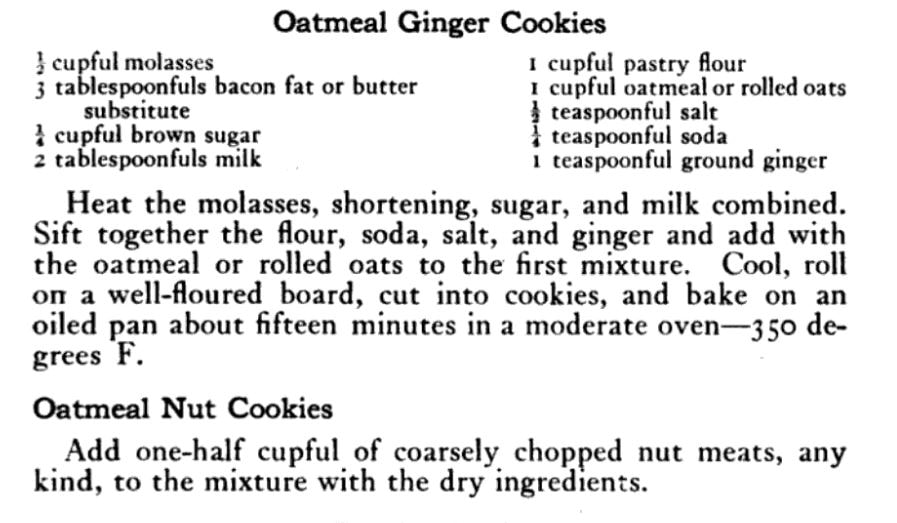 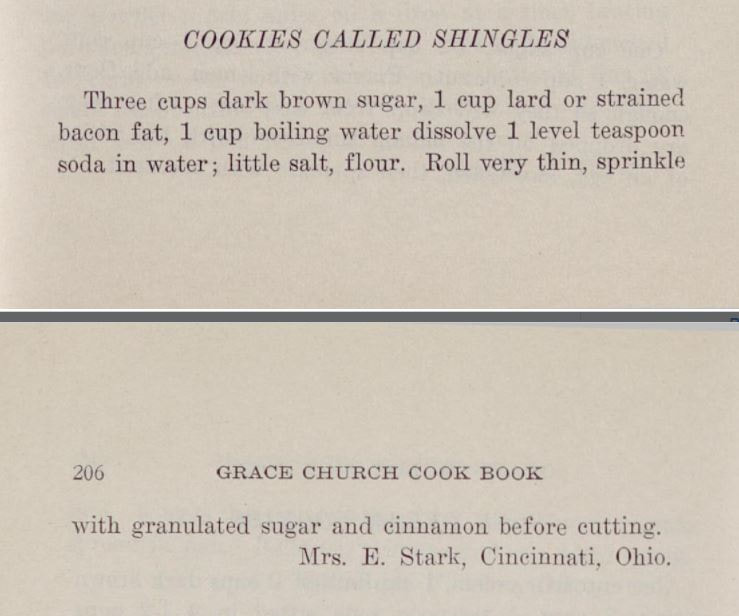 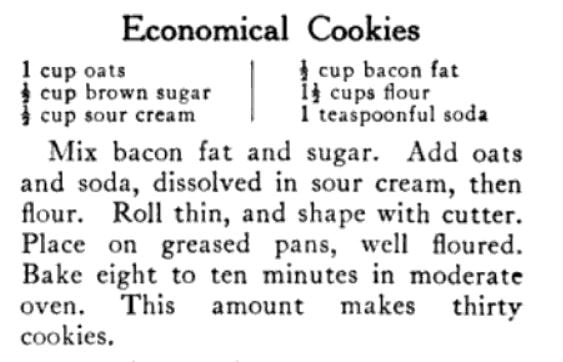 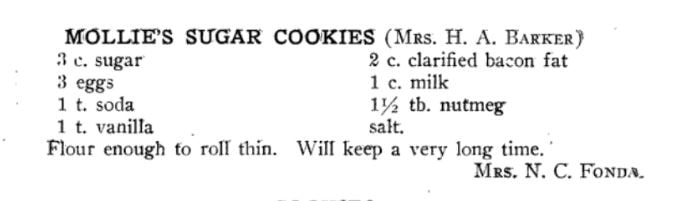 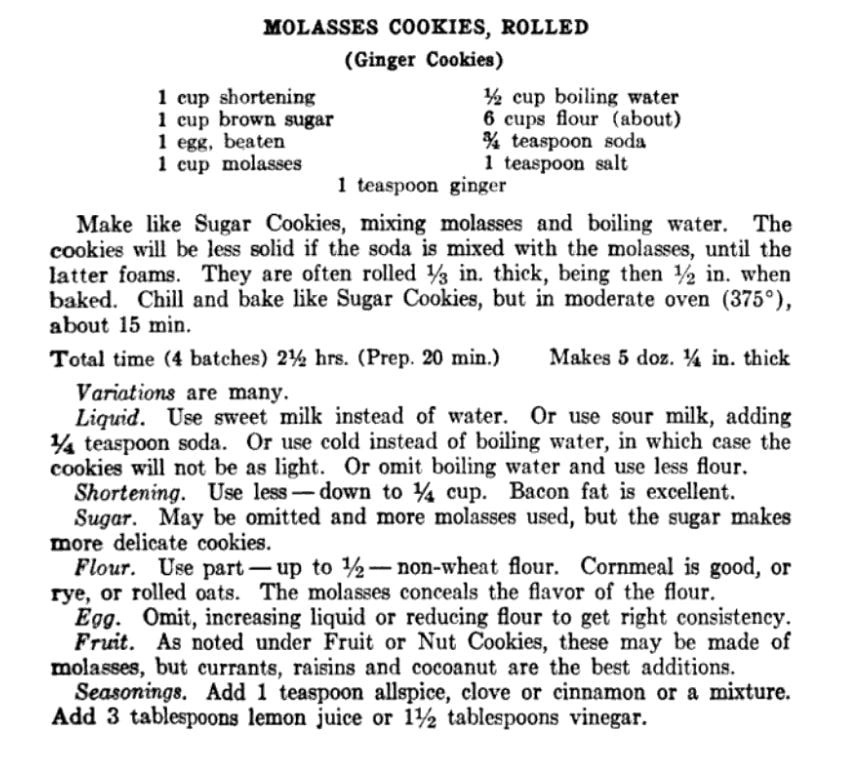 Bacon fat was saved in WWII as well, but housewives were just as likely to save the fat for munitions than bake with it. Once animal fats were connected to heart disease in the 1950s, bacon took a back seat in the United States until its revival in the 2000s (largely coinciding with the popularity of the Atkins Diet). We don't make bacon all that often. Usually it's with a big breakfast or brunch I make on the weekends. But I've made a point lately to save the fat. If you bake your bacon in the oven like I do (450 F for 10-15 mins), you can just pour the fat off of the baking sheet and into a glass jar. Keep the jar in the fridge and you'll have a smoky, salty fat for flavoring beans, potatoes, eggs, and yes, even molasses cookies. Which bacon fat recipe do you think I should try next? I'm leaning towards the sugar cookies... The Food Historian blog is supported by patrons on Patreon! Patrons help keep blog posts like this one free and available to the public. Join us for awesome members-only content like free digitized cookbooks from my personal collection, e-newsletter, and even snail mail from time to time! Don't like Patreon? Just leave a tip |

AuthorSarah Wassberg Johnson has an MA in Public History from the University at Albany and studies early 20th century food history. Archives
September 2023
Categories
All
|
 RSS Feed