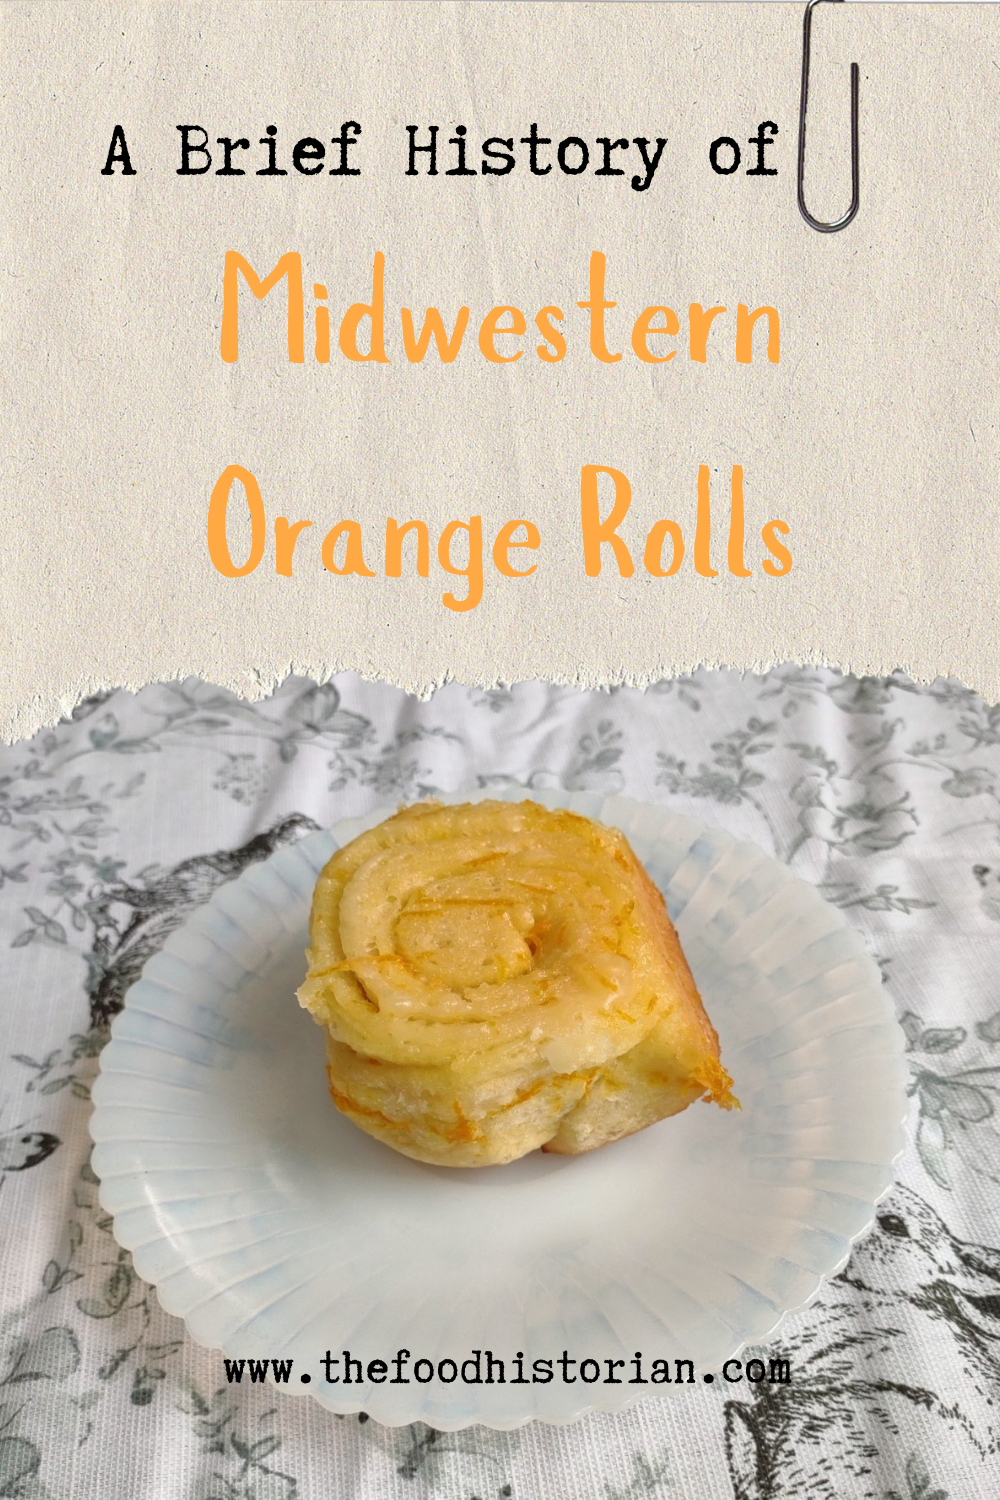
 Last year I wrote about North Dakota Caramel Rolls, which have dominated the state in recent years. But funnily enough, although they are less popular now, orange rolls were equally if not more popular when I was growing up. And I found many more references to them in my historic cookbooks. Orange rolls in the upper Midwest (mainly Eastern North Dakota, where I grew up, and Minnesota) were popular Sunday brunch staples, although they competed about even with caramel rolls in my neck of the woods. Of course, the kind I grew up with were not made from scratch, but rather the frozen kind made by the Rhodes frozen bread company. They came with a delightful orange cream cheese frosting. But despite being a brunch staple of my Midwestern childhood, I didn't know much about these, and I wanted to try a historic recipe for a brunch of my own. The origins of orange rolls and their popularity in the Midwest is, like many things, a bit cloudy. If you search for "history orange rolls" today, you'll likely get a LOT of hits about ALABAMA orange rolls (scroll to the bottom for the links), but nary a one about the Midwestern kind. Truth be told they don't look like they differ much. A sweet roll dough with orange zest and sugar rolled up like a cinnamon roll and topped with an orange glaze. So why did both Alabama and the Upper Midwest develop a love of orange rolls? Oranges aren't grown in either region. Enter the 1910s and '20s orange craze. In the 1870s California orange agriculture exploded, and oranges - once an imported wintertime treat - became increasingly available year-round. "Orange fever" struck Florida around the same time, until a big freeze in 1894 and again in 1895 set the industry back on its heels. In the 1920s the industry got a boost from the Florida real estate boom. Cooperatives like the California Orange Growers Exchange began to market nationally using clever advertising techniques. "Sunkist" - a playful spelling of "sun-kissed" - became synonymous with the California Orange Growers co-op, and later became their official name. 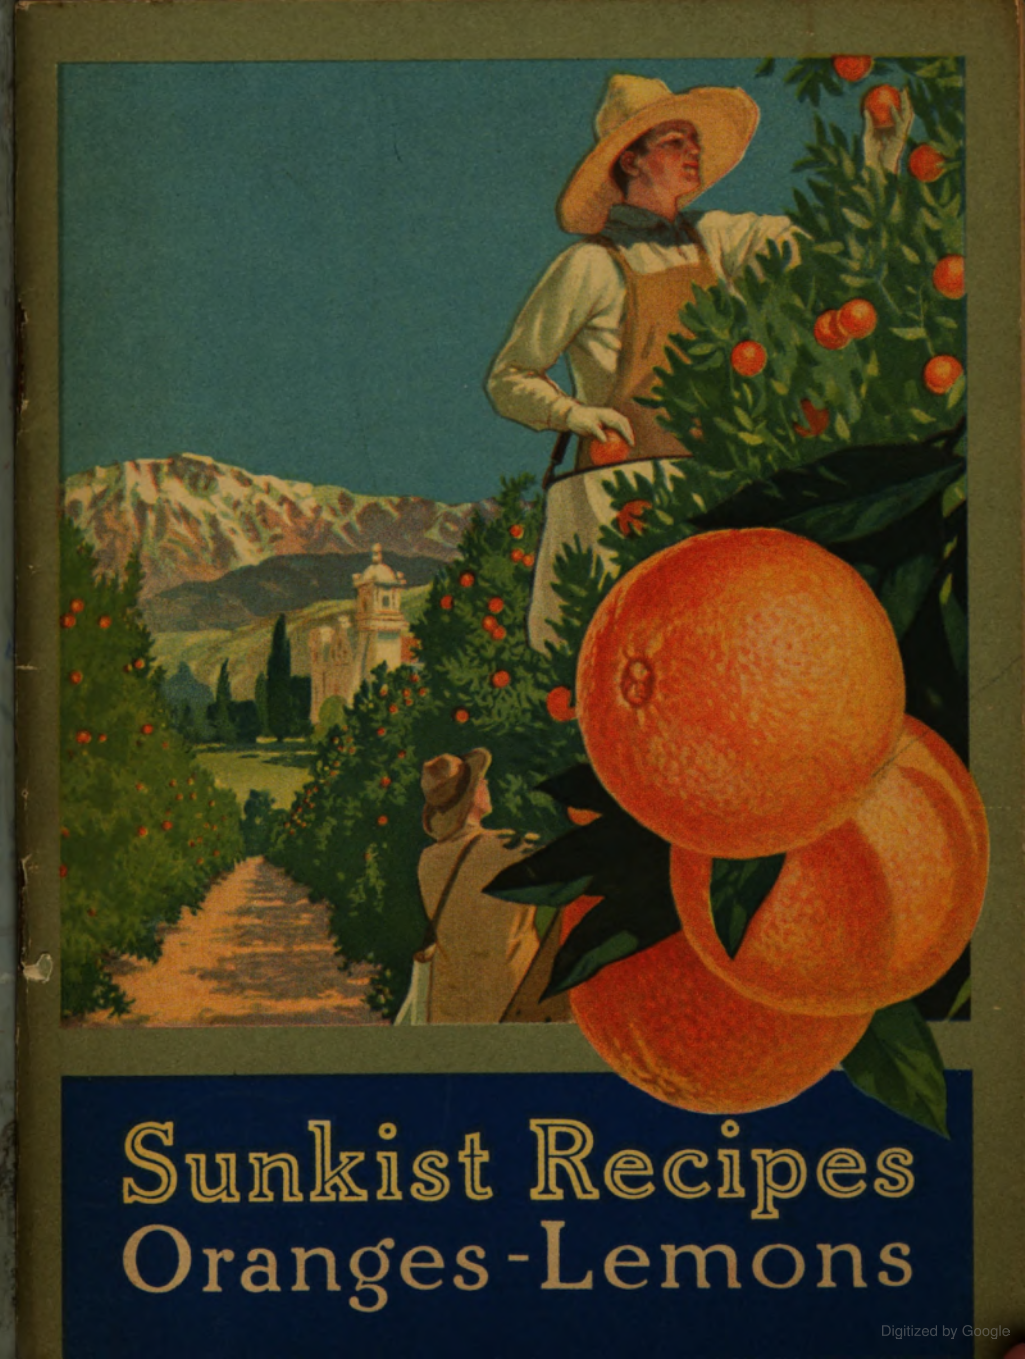 "Sunkist Recipes: Oranges and Lemons," by the California Fruit Growers Exchange, 1916. The earliest recipe for what resembled orange rolls comes from Sunkist Recipes, Oranges - Lemons, published by the California Citrus Growers Exchange in 1916. 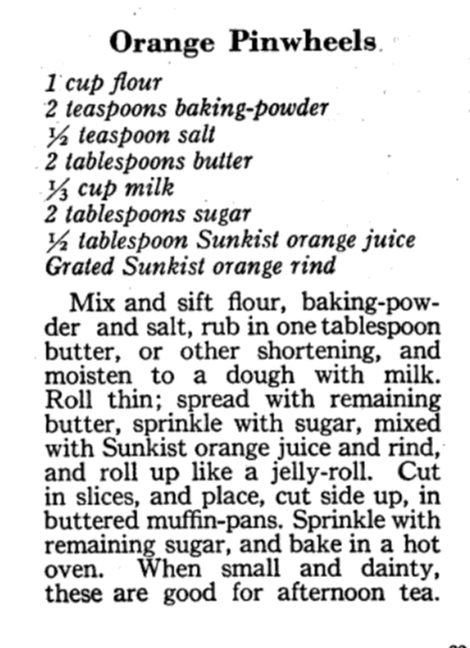 "Orange Pinwheels" are essentially baking powder biscuits, rolled thin, spread with butter and sugar mixed with orange juice and zest, then rolled up and sliced, with more sugar sprinkled on top. The Sunkist biscuit-style recipe survives, with or without attribution, in other cookbooks throughout the 1920s and '30s. Often, the biscuit "rolls" are called "orange rolls," not "pinwheels," which makes the research a bit confusing! The earliest recipe I could find for yeasted orange rolls comes from Mrs. Allen's Cook Book by one of my favorite cookbook authors, Ida Bailey Allen, published in 1917. But even these aren't quite the same as what I was looking for. 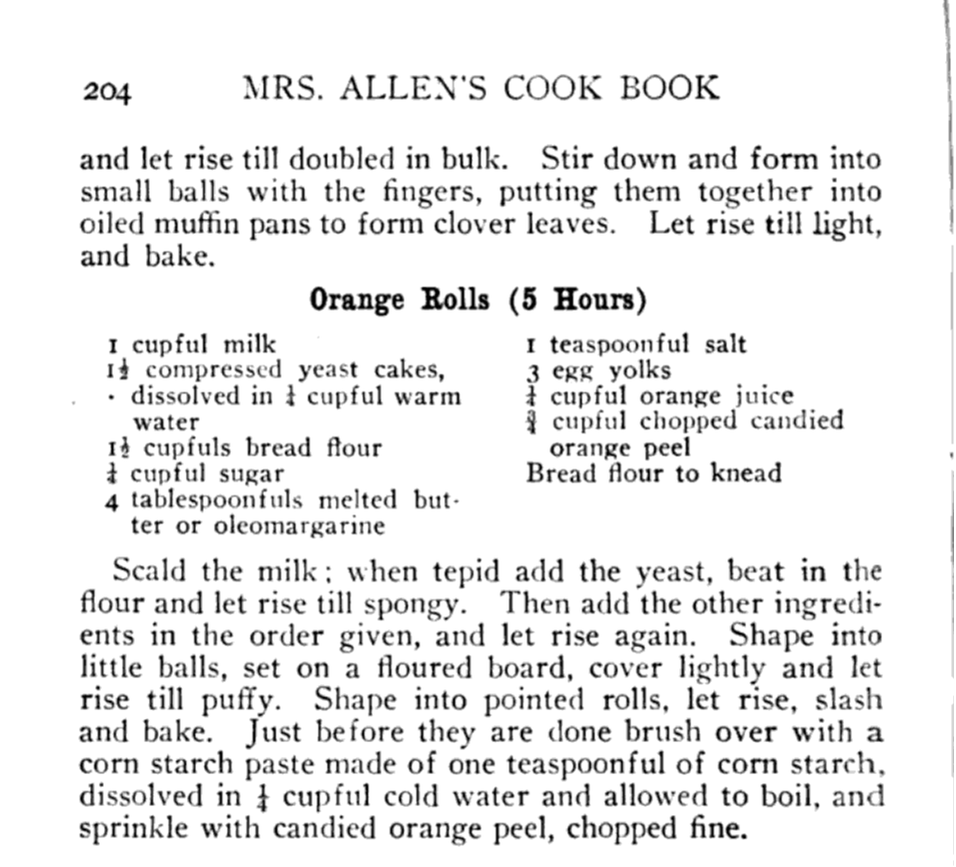 Recipe for "Orange Rolls (5 Hours)" from "Mrs. Allen's Cook Book," by Ida Bailey Allen, 1917. Mrs. Allen's "Orange Rolls (5 Hours)" are not actually rolled up rolls - they're more like buns flavored with orange juice and candied orange peel, and then glazed with more orange peel. Thankfully, Frances Lowe Smith has our back with her More Recipes for Fifty, published in 1918 and containing several wartime-friendly recipes, including this one for "Orange Rolls," which are to be prepared using a yeasted dough and spread with butter and sugar mixed with orange juice and grated rind and then "rolled like cinnamon rolls." The first North Dakota reference I could find is for the biscuit-y kind of orange rolls, in a 1930s North Dakota Agricultural Extension circular. But looking through my cookbook library for vintage midwestern cookbooks, I also found tons of references to orange rolls! Largely from the 1930s and '40s (which is when most of my North Dakota and Minnesota cookbooks date to). I decided to go with this recipe, because it looked fairly easy and definitely quick. No getting up five hours before brunch for these beauties (sorry, Mrs. Allen). Taken from Receiptfully Yours, a community cookbook published by the Ladies' Guild of the Zion Lutheran Church of Duluth, MN, the recipe turned out very nicely! 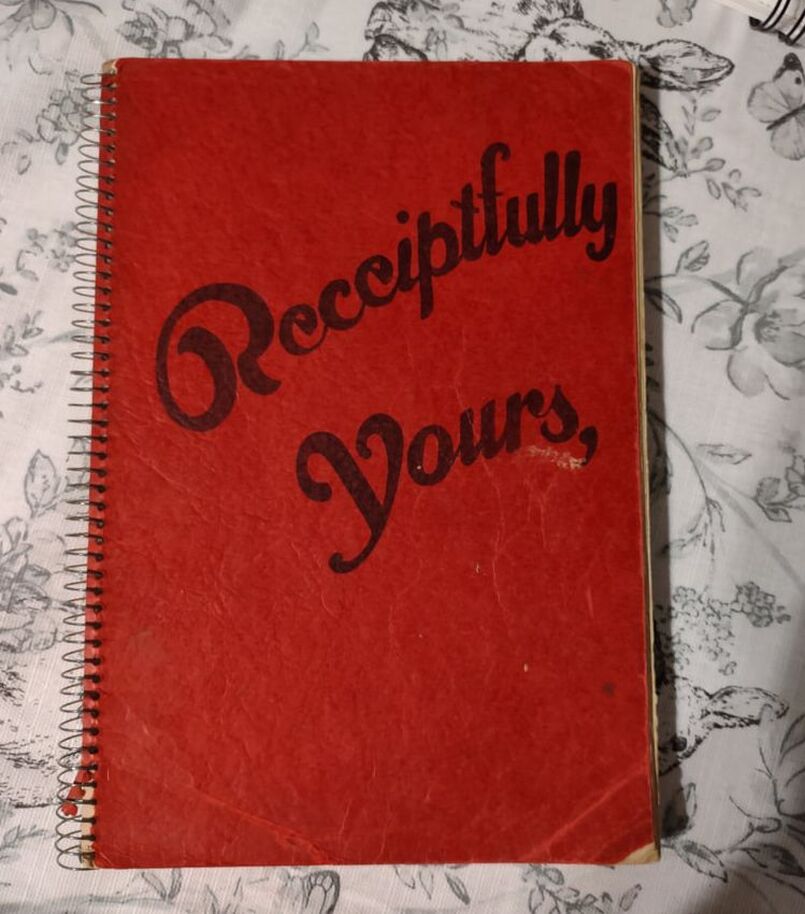 Although Receiptfully Yours, is undated, I'm guessing it dates from the 1940s, judging by the type and the style of binding. Both the Cinnamon Roll recipe and Orange Roll variation were submitted by Ethel Mathison. I love that they used full names, instead of "Mrs. Husband's Name!" 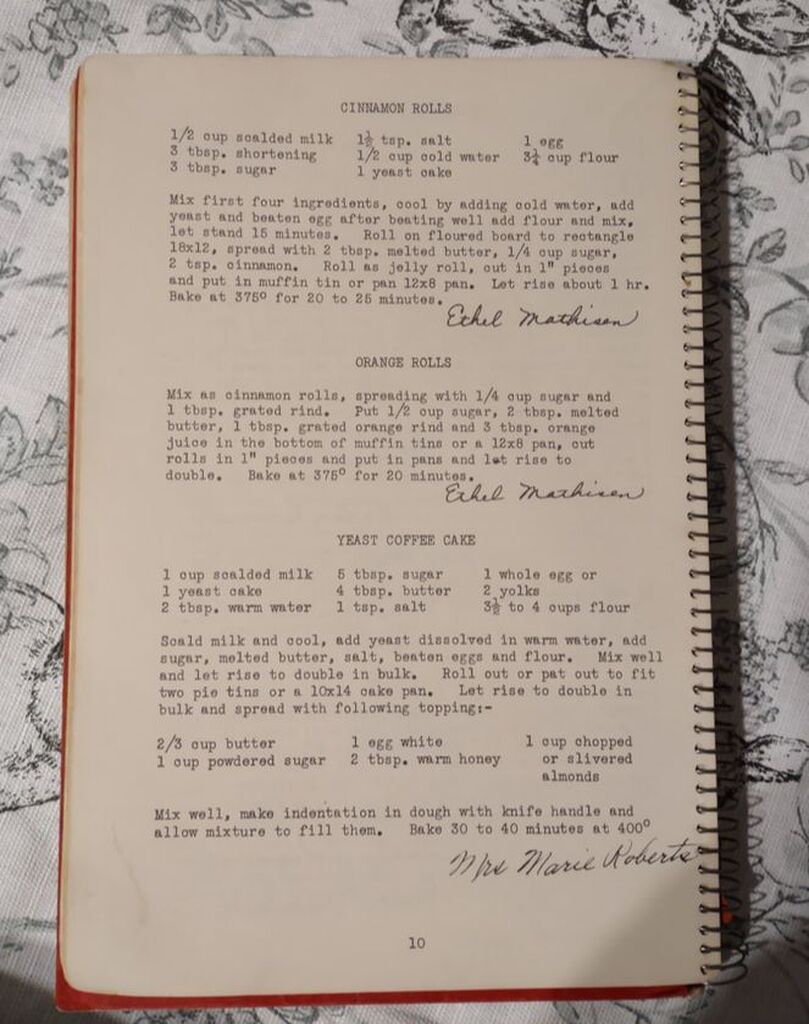 Midwestern Orange Rolls RecipeLike many orange rolls recipes, this one starts as a recipe for cinnamon rolls, with orange rolls listed as a variation. Interestingly, instead of having an orange glaze or cream cheese frosting, this recipe is listed much like caramel rolls! With a butter-sugar-orange-juice mixture cooked in the bottom of the pan. Here is my slight modernization of the recipe: - - For the dough - - 1/2 cup scalded milk 3 tablespoons butter 3 tablespoons sugar 1 1/2 teaspoons salt 1/2 cup cold water 1 envelope quick-rising yeast 1 egg 3 1/4 cups flour - - For the filling and glaze - - 3/4 cup sugar 2 tablespoons grated orange zest 2 tablespoons melted butter 3 tablespoons orange juice Preheat the oven to 375 F. Mix milk, butter, sugar, and salt in a saucepan and heat over medium heat until the butter is just melted. Cool by adding cold water, then add the yeast and egg and beat well. Then add flour and mix until smooth, kneading several times. The dough will be soft. Let the dough rest 15 minutes. Roll the dough out on a floured board (or clean countertop) into a 12" by 18" rectangle. Mix 1/4 cup sugar and 1 tablespoon zest and spread on the dough, then roll as for cinnamon rolls and cut crosswise into 1 inch slices. In a 9"x13" pan, mix 1/2 cup sugar, 2 tablespoons melted butter, 1 tablespoon orange rind, and 3 tablespoons orange juice, then top with the cut dough pieces. Let rise until doubled, then bake for 20 minutes or until golden brown. Flip to serve. 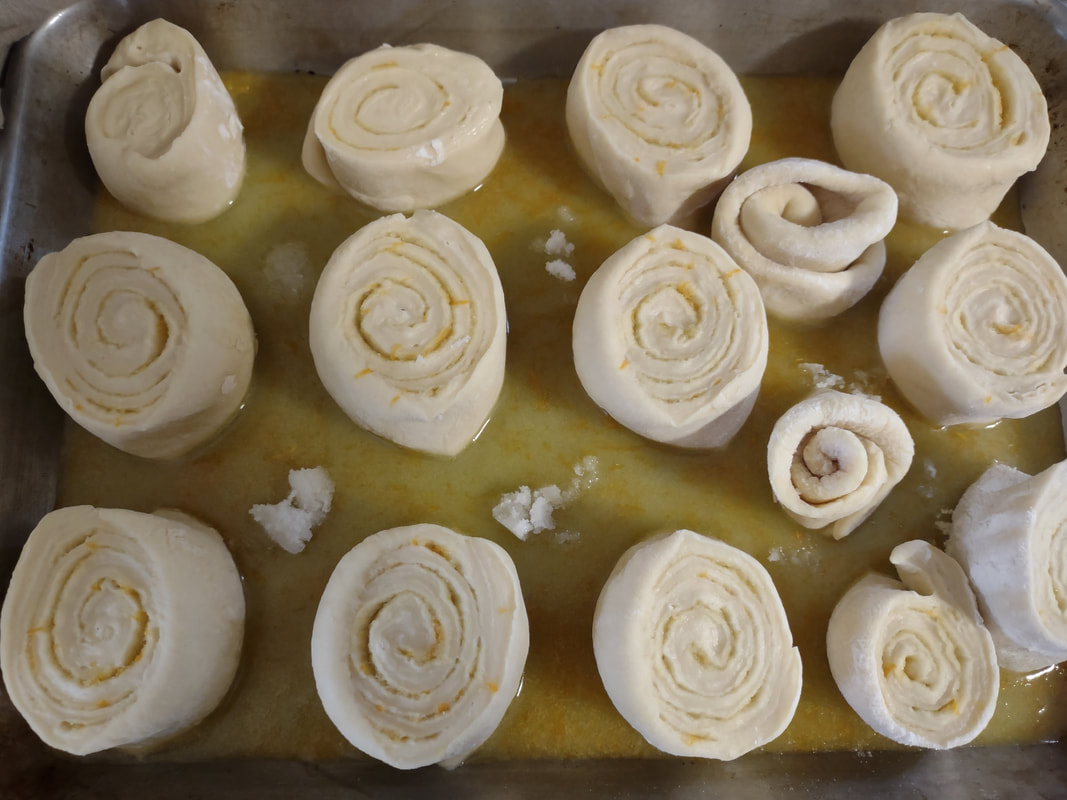 Leaving space between the raw rolls is key! They need enough space to rise. 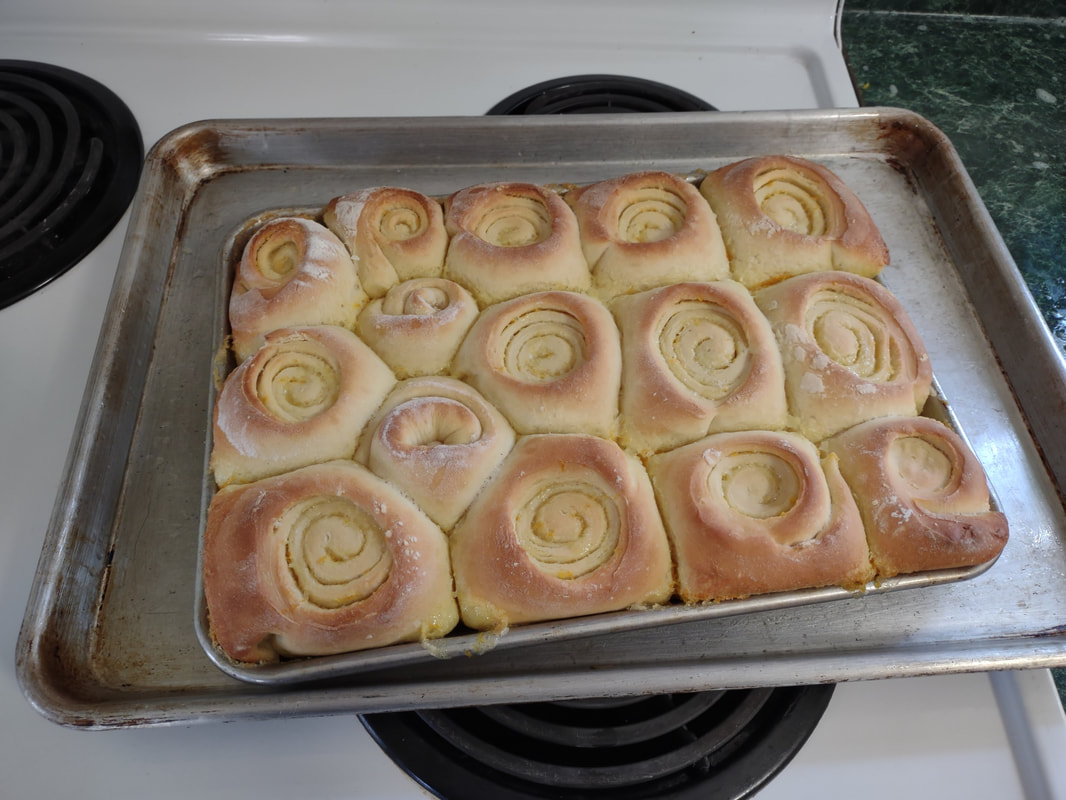 I was worried about the sauce spilling over (and you can see a few spots where we got close!) so I baked these on a baking sheet to catch any spills. But they turned out beautifully. 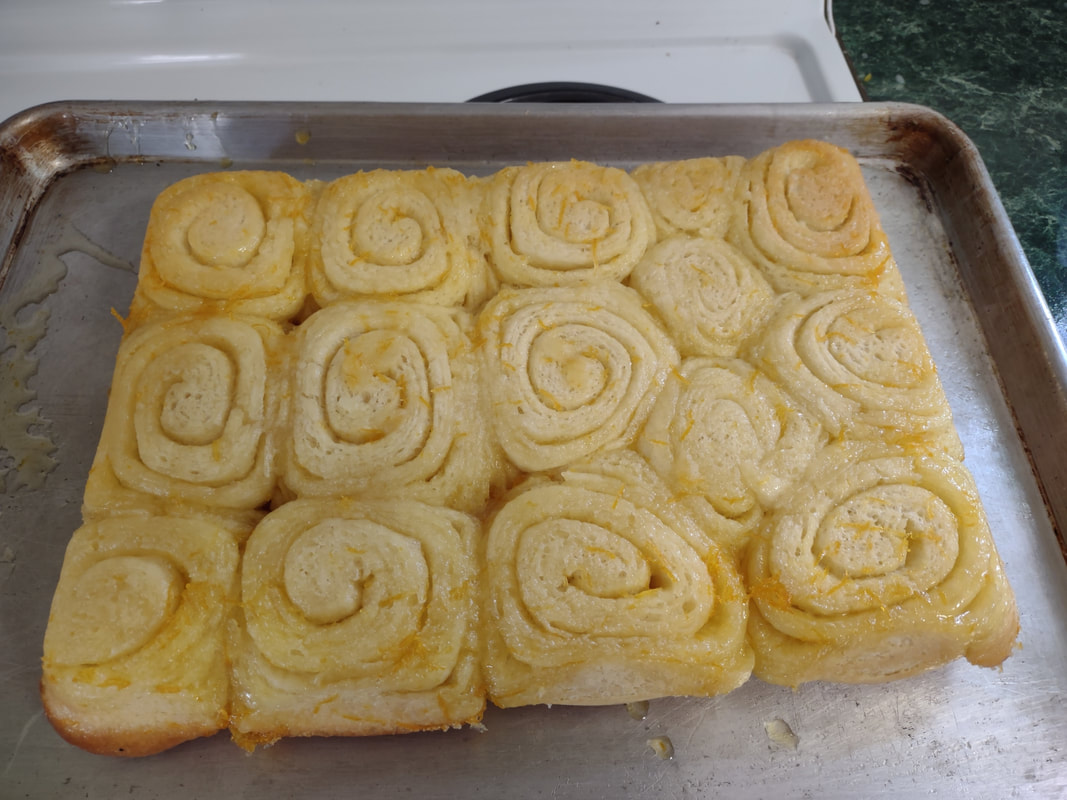 The baking sheet was also useful in flipping them over! Here you can see the syrupy bottoms. These turned out beautifully, although very sweet! I used some very sweet heirloom navel oranges in the recipe, and something with a little more acidity might have been better. When I make them again, I might take a page from some of the other recipes and moisten the sugar for rolling with a little orange juice, and pick some more sour oranges. I may also bake them a smidge longer. Of course, I may also decide to try my hand at some of the other recipes, too! These rolls are perfect for a weekend brunch, bridal or baby shower, or afternoon treat. Have you ever had orange rolls? How do you take yours? 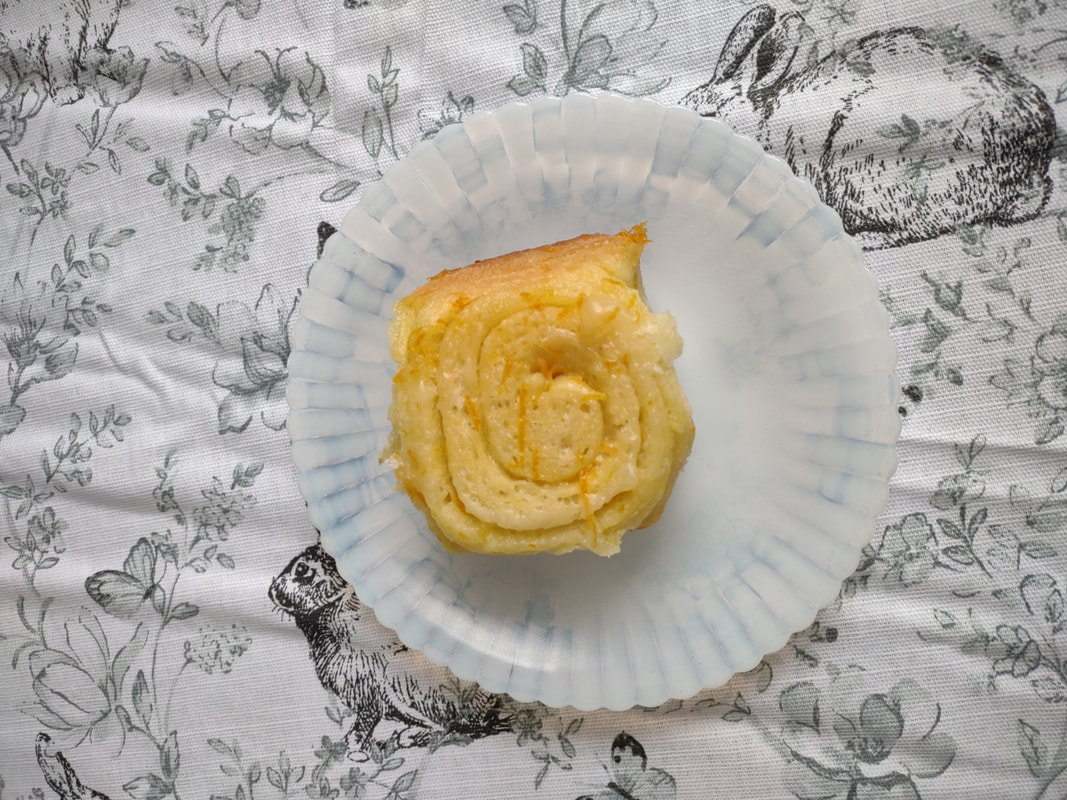 Alabama Orange Rolls History LinksAnd now, as promised, a taste of the rabbit hole I went down in researching this post. The Alabama orange rolls may be more internet famous than the Midwestern ones, but it looks like they laid their claim to fame a bit later - in the 1960s and '70s, to be precise. Read on for more of the back story. The delectable history behind Birmingham’s famous Orange Rolls Why the Alabama Orange Roll is a Southern Classic - Southern Living The sweet story of Millie Ray and her famous orange rolls The Food Historian blog is supported by patrons on Patreon! Patrons help keep blog posts like this one free and available to the public. Join us for awesome members-only content like free digitized cookbooks from my personal collection, e-newsletter, and even snail mail from time to time! Don't like Patreon? Leave a tip!
1 Comment
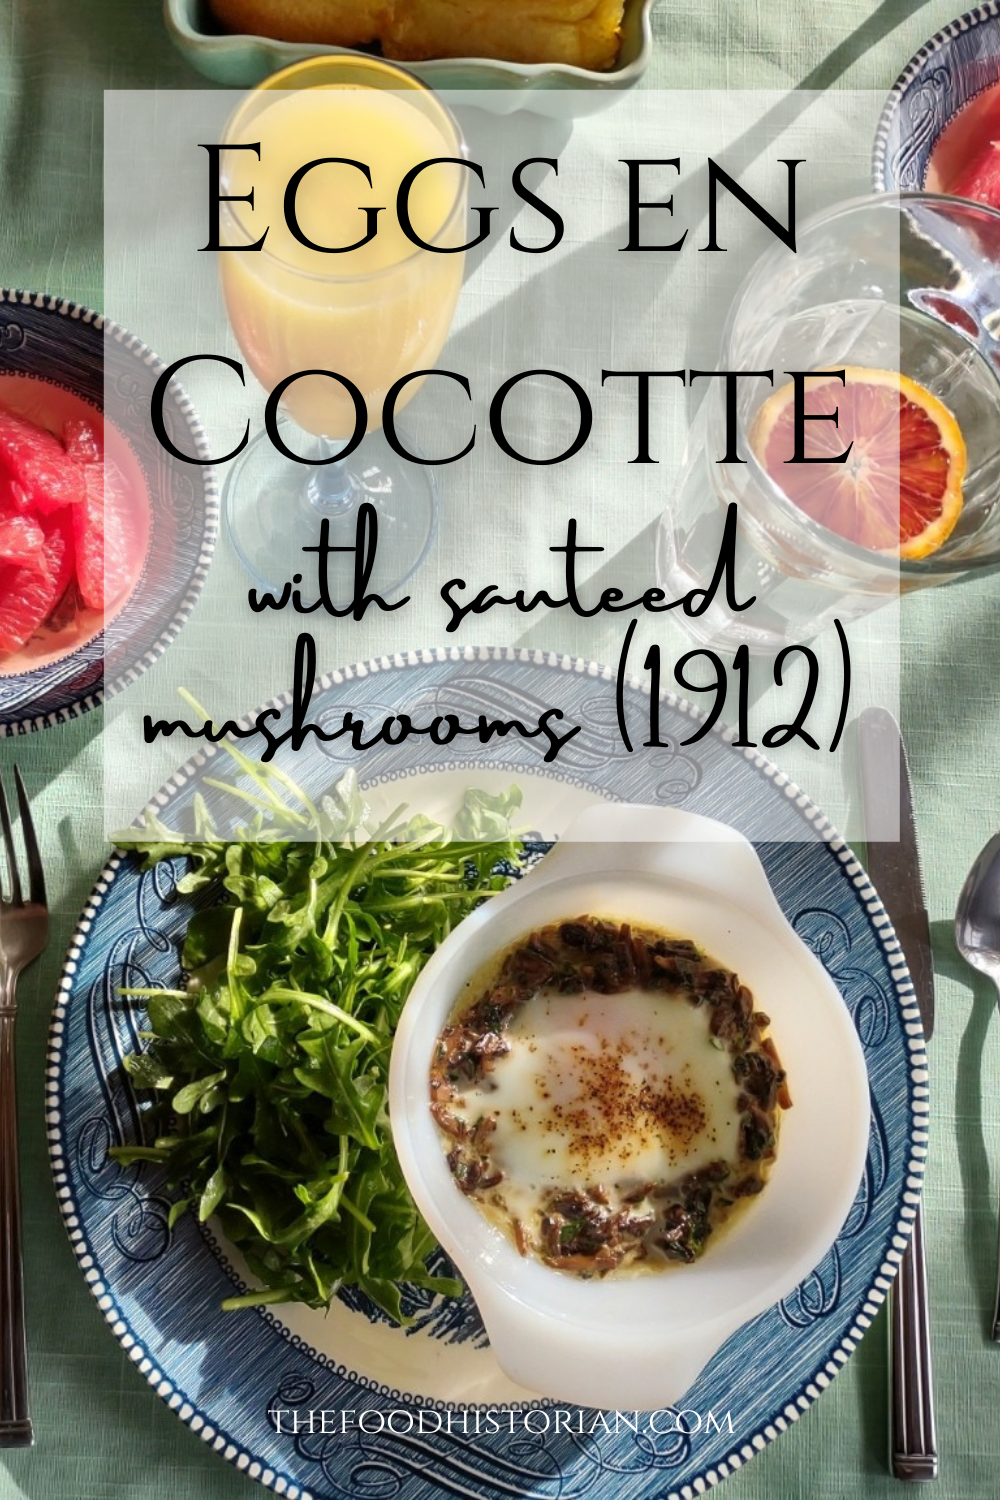 I love brunch. Not the kind you wait in line for, crowded and busy and loud. I love brunch made at home. It's as quiet or loud as you want it to be, the service is usually pretty good, and while there's the effort of making food, if you play your cards right, it's always hot when it gets to the table, and hopefully someone else will do the washing up. Eggs have long been a breakfast staple. If you've a hot skillet, they cook up in a flash. And if you keep chickens, you have a fresh supply every day, at least during the warmer months. But getting a bunch of eggs hot and cooked to order to the table can be a precarious thing when you're hosting. So I took to my historic cookbooks and found a viable solution - eggs en cocotte. Technically, it's oeufs en cocotte, which is French for eggs baked in a type of dish called a cocotte, which may or may not have been round, or with a round bottom and/or with legs. Sometimes also called shirred eggs, which are usually just baked with cream until just set, these days en cocotte generally means the dish spends some time in a bain marie - a water bath. The cookbook recipe I used was from Practical Cooking & Serving by prolific cookbook author Janet McKenzie Hill. Originally published in 1902, my edition is from 1912. You can find the 1919 edition online for free here.  The cover of "Practical Cooking and Serving" by Janet McKenzie Hill, 1912 edition, author's library. A weighty tome of a book, Practical Cooking and Serving is nothing if not practical, and McKenzie Hill is uncommonly good at explaining things. Her section on eggs explains: "Eggs poached in a dish are said to be shirred; when the eggs are basted with melted butter during the cooking, to give them a glossy, shiny appearance, the dish is called au mirroir. Often the eggs are served in the dish in which they are cooked; at other times, especially where several are cooked in the same dish, they are cut with a round paste-cutter and served on croutons, or on a garnish. Eggs are shirred in flat dishes, in cases of china, or paper, or in cocottes. A cocotte is a small earthen saucepan with a handle, standing on three feet." Since my baking dishes were neither the flat oval shirring dishes, nor the handled kind, I guess perhaps they are neither shirred nor en cocotte, according to Hill, but we can afford to be less picky about our dishware. Hill offered two recipes: one more classic version with breadcrumbs (optional addition of chopped chicken or ham) mixed with cream "to make a batter." The buttered cocotte was lined with the creamy breadcrumbs, the egg cracked on top, with the option to cover with more breadcrumb batter. The whole thing was then baked in a hot water bath "until the egg is set." My brunch guest adores mushrooms, and I wanted something a little fancier and more substantial, so I went with Hill's version No. II. Eggs en Cocotte with Sauteed Mushrooms (1912)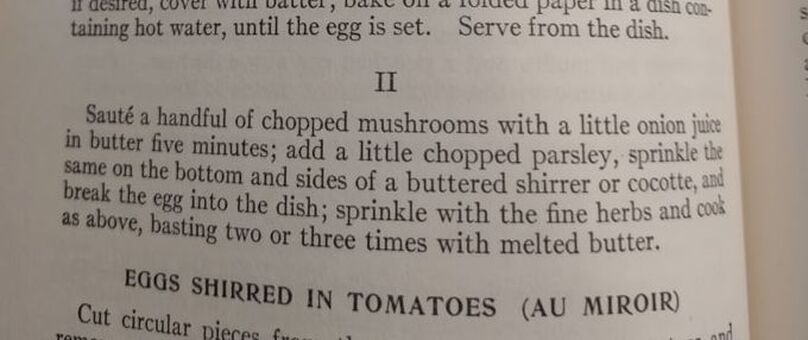 Egg in Cocottes, No. II, from "Practical Cooking and Serving," by Janet McKenzie Hill, 1912. Author's library. Hill's original recipe reads: Sauté a handful of chopped mushrooms with a little onion juice in butter five minutes; add a little chopped parsley, sprinkle the same on the bottom and sides of a buttered shirrer or cocotte, and break the egg into the dish. Sprinkle with the fine herbs and cook as above, basting two or three times with melted butter. I will admit I didn't follow the directions as closely as I should have - I didn't use hot water in my bain marie (oops), and I didn't baste with butter. So the eggs were cooked a little more solid than I would have like, but still turned out deliciously. Here's my adapted recipe: 1 pint white button mushrooms, minced 2 tablespoons butter 1 clove minced garlic salt and pepper 2 tablespoons heavy cream 2 tablespoons fresh flat leaf parsley, chopped 4 eggs Preheat the oven to 350 F. Butter three or four small glass baking dishes. Sauté the mushrooms and garlic in butter, adding salt and pepper to taste. When most of the mushroom liquid has cooked off, add the heavy cream and parsley and stir well. Divide evenly among the baking dishes, make a little well, and then crack eggs into dishes. One or two per dish. Salt and pepper the egg, then place in a 9x13" baking pan with two inches of water (use hot or boiling water). Bake 5-10 minutes, or until the egg white is set and the yolk still runny. For firmer eggs, bake 10-15 mins. I did not use boiling water, so the whole thing took more like 20-30 mins for the water to heat up properly, and the yolks got firmer than I would have liked. Tasted delicious, though! This is a very rich dish, so best served with something green and piquant - I chose baby arugula with a sharp homemade vinaigrette (2 tablespoons olive oil, 2 tablespoons lemon juice, 1 tablespoon dijon mustard was enough for 3 or 4 servings of salad), which was just about perfect. 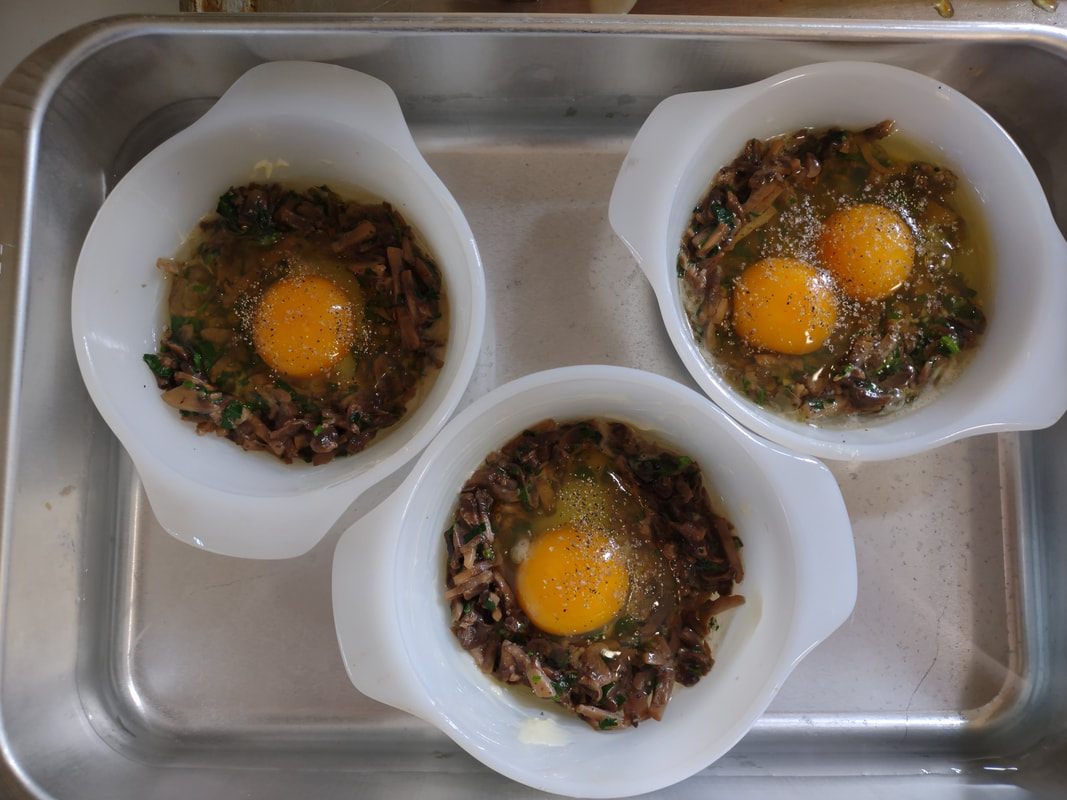 The raw eggs in their cocottes, sitting in their water bath and waiting to go into the oven. You don't have to be a fan of mushrooms to like this dish - white button mushrooms aren't particularly strong-flavored - they just tasted rich and meaty. And despite the fact that eggs en cocotte look and taste incredibly fancy, they were very easy and relatively fast to make. If you were cooking brunch for a crowd, you could certainly prep the mushroom mixture in advance, have the bain marie water on the boil, and make the eggs your last task for a beautiful brunch. With the simple arugula vinaigrette on the side, something sweet and bready (that recipe is coming soon, too) and some fresh fruit and mimosas, you've got yourself a winner. Do you have a favorite egg recipe? 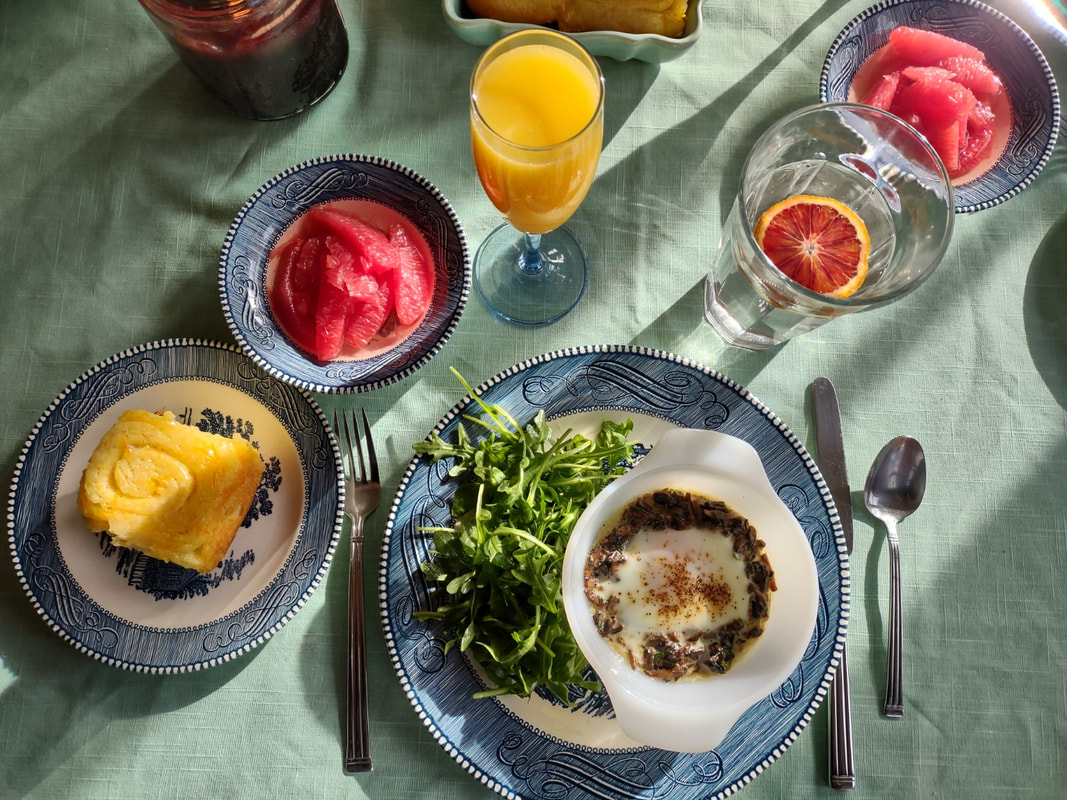 The whole beautiful brunch spread. The Food Historian blog is supported by patrons on Patreon! Patrons help keep blog posts like this one free and available to the public. Join us for awesome members-only content like free digitized cookbooks from my personal collection, e-newsletter, and even snail mail from time to time! Don't like Patreon? You can leave a tip! Meatless Monday: Brunch with Rosemary & Sage Roasted Potatoes and Gorgonzola Garlic Cream Sauce2/7/2022  It's been so bitterly cold lately, I thought I would finally share this stunner of a vegetarian brunch with everyone. A few weeks ago we had a friend over for brunch. It had been a long couple of post-holiday weeks, and everyone was playing catchup at work. So I thought having something delicious and comforting for brunch would help take the edge off. A favorite local Italian restaurant of ours has an appetizer I adore - waffle fries fried with sage and rosemary with a side of gorgonzola cream sauce for dipping. It's divine. I wanted to replicate something similar at home, but brunchified, and with a little lighter hand. So I decided to roast some red potatoes with sage and rosemary and olive oil. I had intended to pick out the herbs as I'm generally not a fan of whole rosemary leaves, but everything fried up in the olive oil so beautifully that we devoured the herbs alongside the potatoes. I topped the potatoes with a fried egg, to make things feel more breakfast-y, with a side of broiled grapefruit for a vintage feel and to cut the fat a little. Sadly I used brown sugar, so instead of caramelizing it just melted everywhere. Still tasted yummy though. We had faux mimosas (the friend doesn't drink alcohol) which were also delicious. The star of the show, though, was the potatoes and cream sauce. Divine. 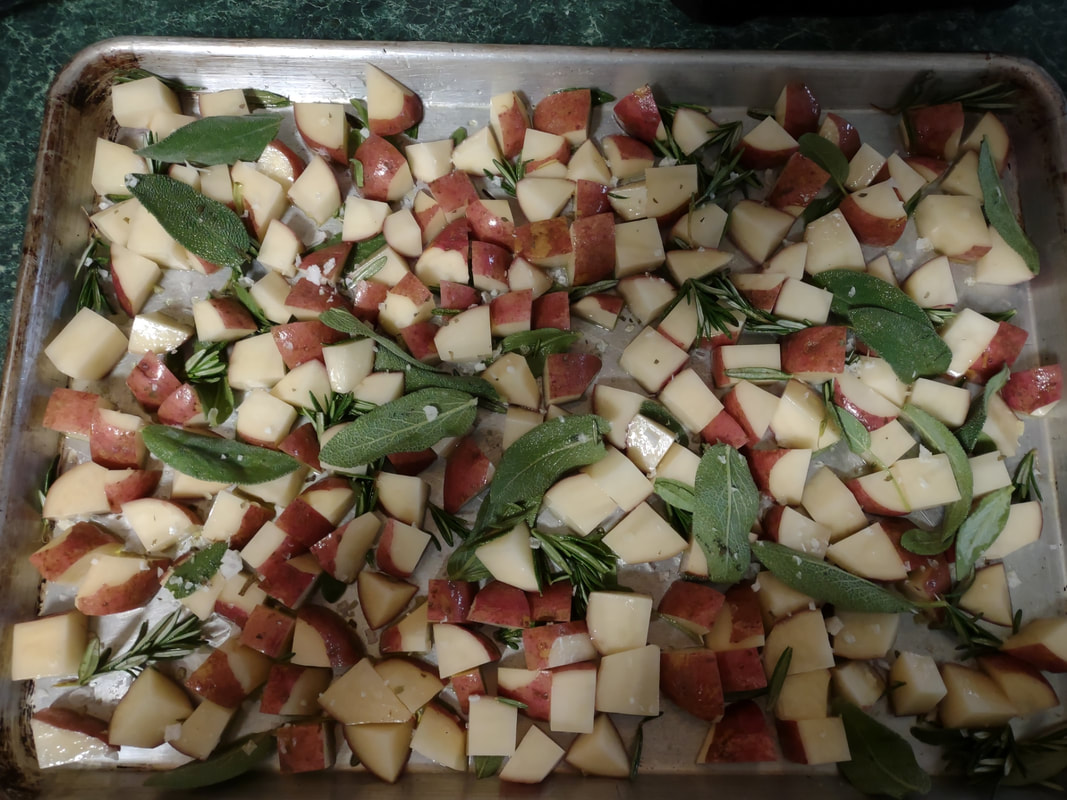 The beautiful potatoes and herbs, pre-roasting, in my very poorly lit kitchen. Rosemary & Sage Roasted PotatoesI used a fancy flake salt flavored with wild garlic, so if you're using regular sea salt, maybe add just a dash of garlic powder or some minced garlic. 6-8 medium red potatoes 1 container/bunch fresh sage 1 container/bunch fresh rosemary olive oil coarse sea salt Preheat oven to 450 F. Scrub the potatoes, cut off any eyes or bad parts, and cut into similarly-sized cubes. Wash the herbs and strip the leaves off of the rosemary stems. Pop the sage leaves off of their longer stems. On a large half sheet pan, spread the potatoes, and drizzle with olive oil. Add the herbs and using your hands, gently toss everything to combine (you can do this in a bowl if it's easier) and spread out in one layer, making sure the potatoes all have a cut end facing down. Sprinkle with salt and put in the oven. Roast for 20-30 minutes, or until potatoes are perfectly tender, with crisp brown bottoms. When ready to serve, use a very flat spatula to scrape up the crispy bits and put the whole shebang, potatoes, herbs, and all, into a serving dish. Garlicky Gorgonzola Cream SauceOne of the miracles of heavy cream is that if you reduce it, it turns into this silky sauce with no need for a roux in sight. 1 pint heavy cream (use more if you like!) 2 cloves garlic 1+ cup crumbled gorgonzola salt & pepper to taste With the flat side of a knife slightly crush your peeled garlic cloves, and add them to the heavy cream in a heavy-bottomed saucepan and cook over medium heat. Let the cream simmer, but do not boil, until reduced slightly (it should coat a spoon) and fragrant with garlic. Fish out the garlic cloves and discard. Add the gorgonzola and stir to melt. Give it a taste and add salt and pepper as needed. Keep hot until ready to use. To make brunch, pile some potatoes on a plate, add a ladle of gorgonzola sauce, and top with a fried egg. If you're like me (over medium, please!), you like to break the runny yolk. 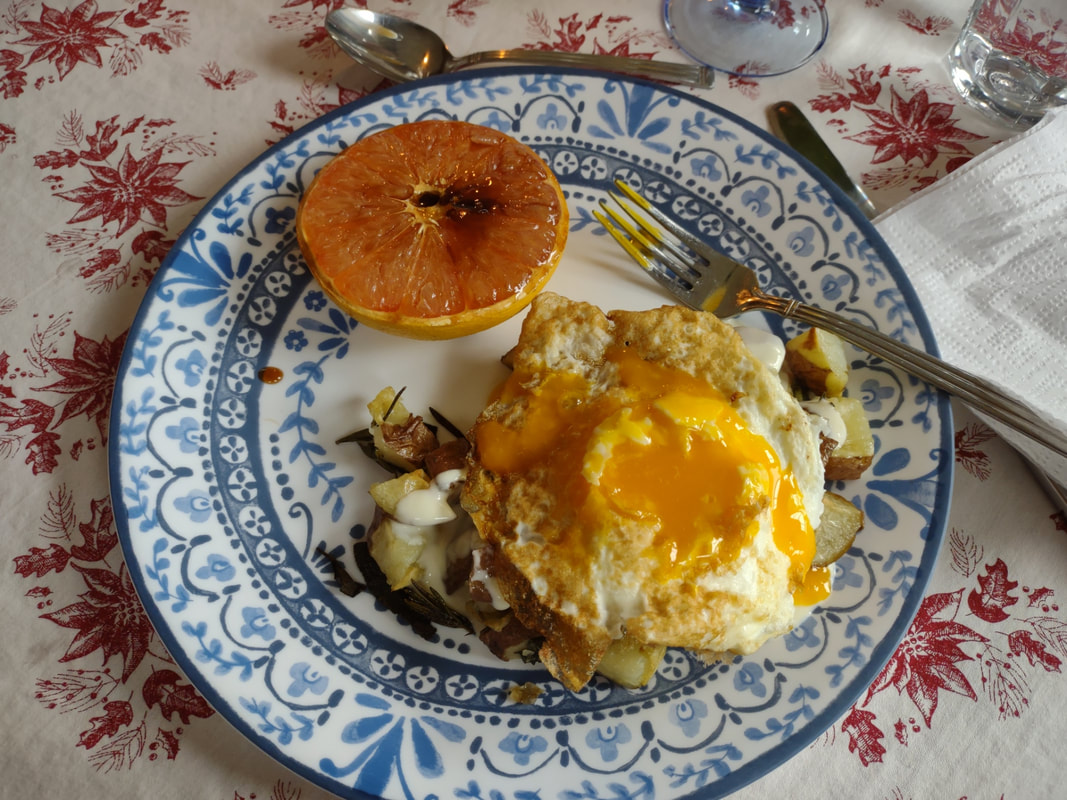 Runny fried egg with the yolk broken on top of the rosemary & sage roasted potatoes and gorgonzola cream sauce. Don't mind the Christmas tablecloth. Virgin MimosasIf you're entertaining folks for brunch who don't want or can't have alcohol, virgin mimosas are delightful. We had sparkling cider from New Year's Eve that had gone un-opened, but you could just as easily use ginger ale or 7-up instead. 1 part sparkling cider 1 part high-quality orange juice champagne flutes Are they really mimosas without the champagne flutes? Pour half and half into each flute, and don't worry about drinking too many. Broiled GrapefruitDo as I say, not as I did. Brown sugar does not work. Lesson learned! 1/2 fresh grapefruit per person 1 tablespoon granulated white sugar per half grapefruit Set the broiler to high. Cut grapefruit in half and place on a metal sheet pan or other broiler-safe dish (do not use glass baking dishes under the broiler!). Gently smooth the tablespoon of sugar over the top. Place under the broiler and cook 1-2 minutes (watch them!) until the sugar is caramelized. Serve with grapefruit spoons, if you have them. Otherwise a dessert spoon or butter knife works, too. 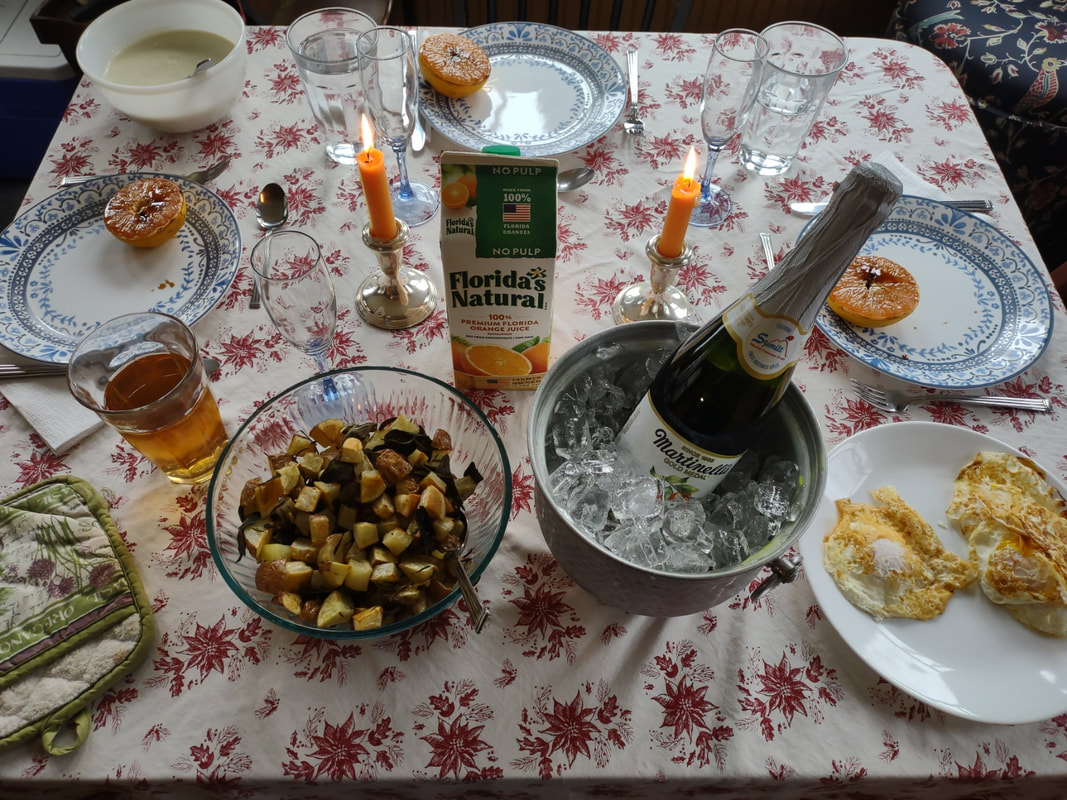 The accidentally Christmassy brunch setup - complete with ice bucket for the sparkling cider and champagne flutes. In the bleak midwinter, a sunny brunch can really lift the spirits. But don't skimp on the trappings. Light some taper candles. Pull out the champagne flutes and an ice bucket. Dig out the grapefruit spoons (I don't have any yet!). It can really make the difference. Don't have any of that? Make a list and keep your eyes peeled once you feel it's safe to go antiquing again. Fancy glassware can usually be had for a song at thrift shops, and since glass is inert, a quick wash in hot soapy water and it will be fit for use, no matter what shape it was in when you got it (so long as it's not broken or cracked!). Have you been doing anything special lately to make winter seem less dreary? The Food Historian blog is supported by patrons on Patreon! Patrons help keep blog posts like this one free and available to the public. Join us for awesome members-only content like free digitized cookbooks from my personal collection, e-newsletter, and even snail mail from time to time! Don't like Patreon? Just leave a tip! 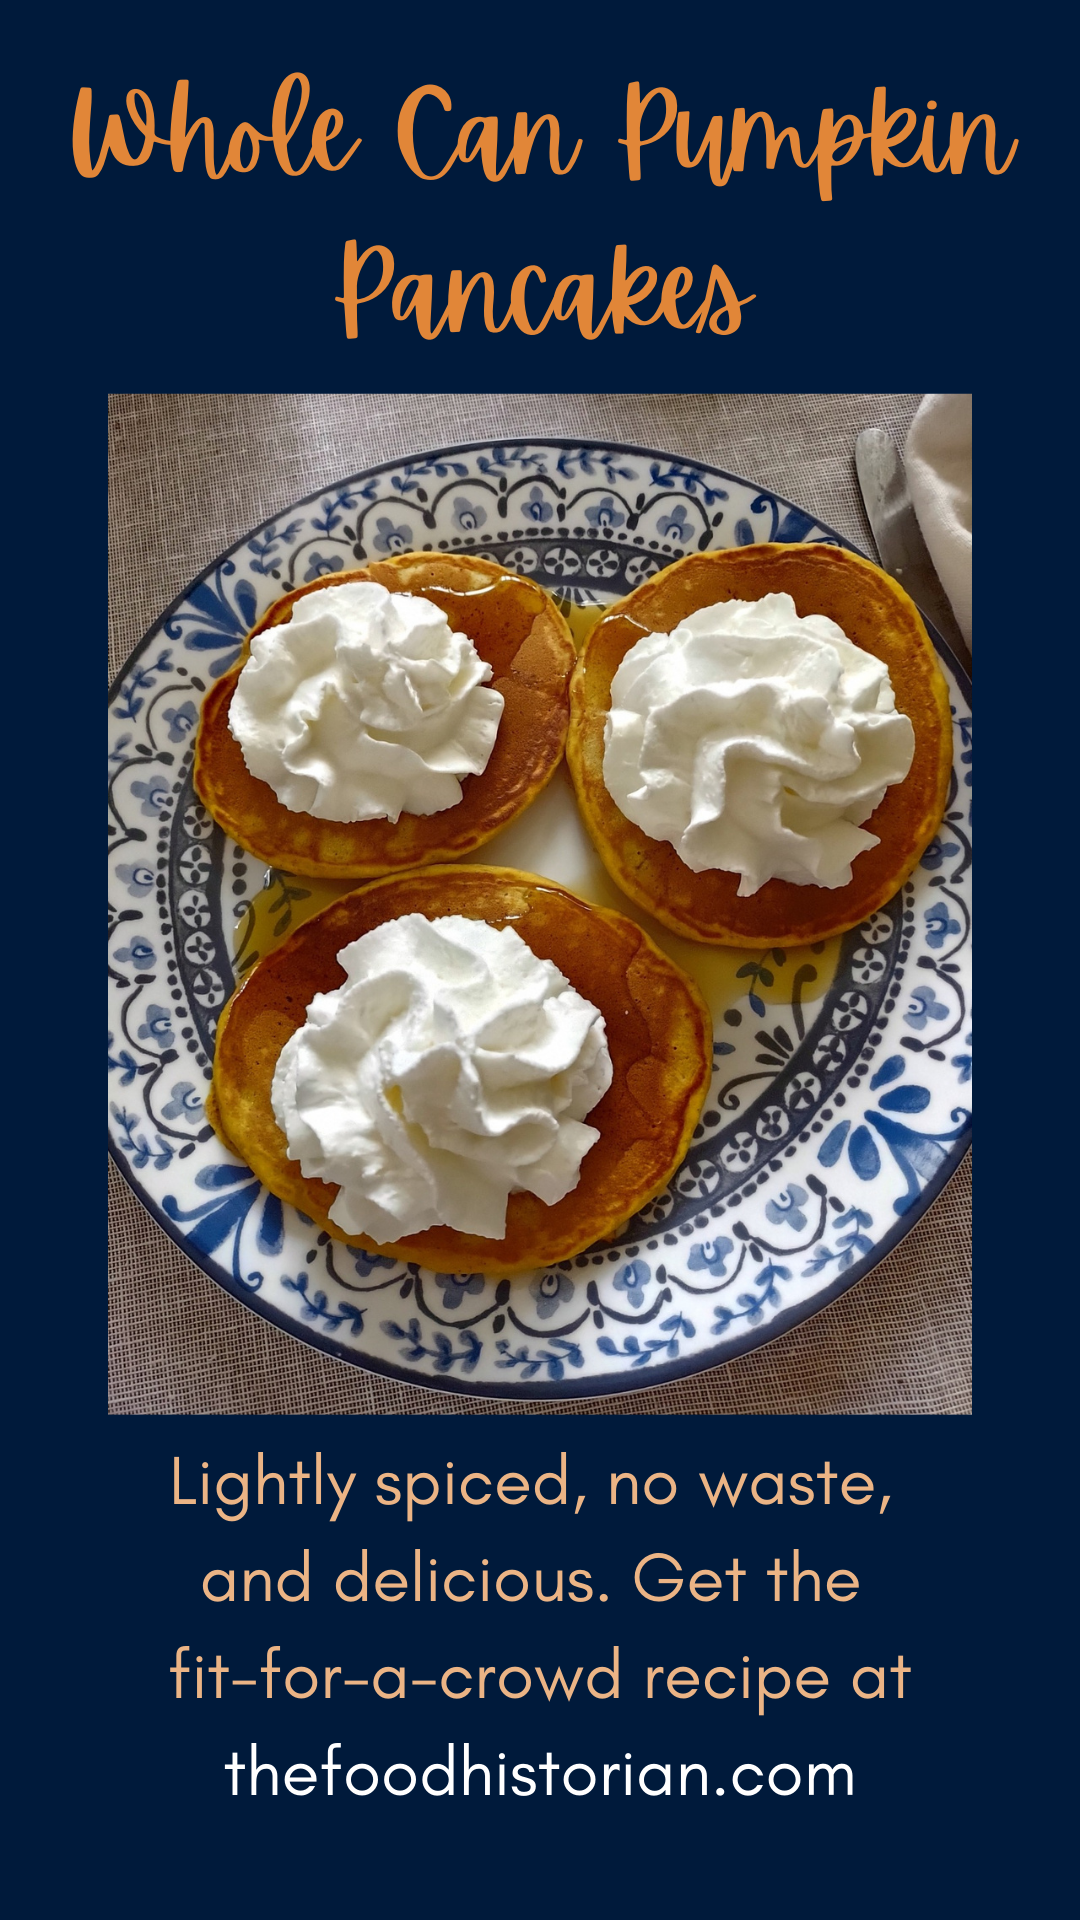 It's no secret that my husband and I love pancakes. Like a lot. I've adapted a single recipe endlessly - apple cinnamon oatmeal pancakes, black forest pancakes, whole grain pancakes, pear ginger pancakes, gingerbread pancakes, almond pancakes, blueberry pancakes - you name it. But I think pumpkin pancakes are one of our very favorites. This is definitely a recipe for your days off, in large part because making pancakes is time consuming, but also because this is a huge recipe and makes approximately 30 pancakes. But Sarah! you might be thinking, how can two people eat 30 pancakes in one sitting? Well, dear reader, we can't. However, these pancakes are absolutely delicious as leftovers, staying tender even days later. You can pop them in the toaster for a reheated morning treat, or eat them cold as a snack. You can make them into a sandwich with butter and fig jam, or cover them in whipped cream (my husband's favorite). Pumpkin pancakes are one of those things you'll never regret having too many of. And if you've got a big family or are having a crowd for brunch? They're perfect. And don't worry, I've got tips for hot to keep the pancakes piping hot while you cook. Whole Can Pumpkin Pancakes RecipeThis recipe is about triple the original Joy of Cooking recipe I've adapted endlessly over the years. So feel free to cut it in half. But then it won't use a whole can of pumpkin. You can also cut back on the butter too, if you like, or substitute some vegetable oil. 4 1/12 cups flour (you can sub up to 2/3rds whole grain flour) 1/2 cup sugar 4 teaspoons baking powder 3 teaspoons salt 1-2 teaspoons pumpkin spice and/or cinnamon 3 eggs 1 stick (1/2 cup) melted butter 1 can (16 oz.) pureed pumpkin 3 1/2 - 4+ cups milk Preheat your griddle over medium heat. If using cast iron, grease it lightly. I prefer to use an electric griddle which can handle 5-6 pancakes at a time. I set the control to 350 F and let it preheat. Whisk the flour, sugar, baking powder, salt, and spices together until well blended in a VERY large bowl. In a separate bowl, whisk the pumpkin, eggs, and butter to combine, then add to the dry ingredients. Add 3 cups milk and whisk, incorporating the flour slowly, add more milk as necessary to make a smooth, lump-free batter. Using the measuring cup you used to add the milk, pour the batter in about 1/3 cup amounts onto the griddle. When bubbles form near the center of the pancake, flip and let brown on the other side. 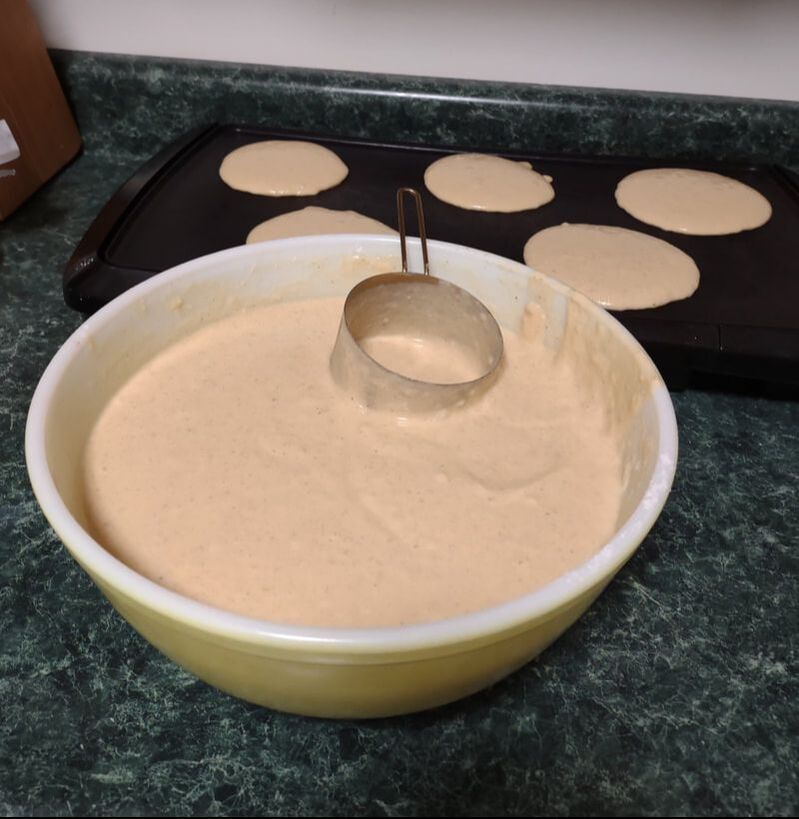 Gotta break out the big yellow Pyrex bowl for this recipe. Now for the savvy tip taught to me by my mother. Use a dish towel to keep your pancakes hot! Using a flat-weave dish towel, place one end on the plate you're using to pile the pancakes, and leave the long tail to cover them. Add the pancakes in an overlapping circle and keep covered by the towel in between. The towel combined with the pile of the pancakes themselves will keep everything piping hot until it's ready to go to the table.  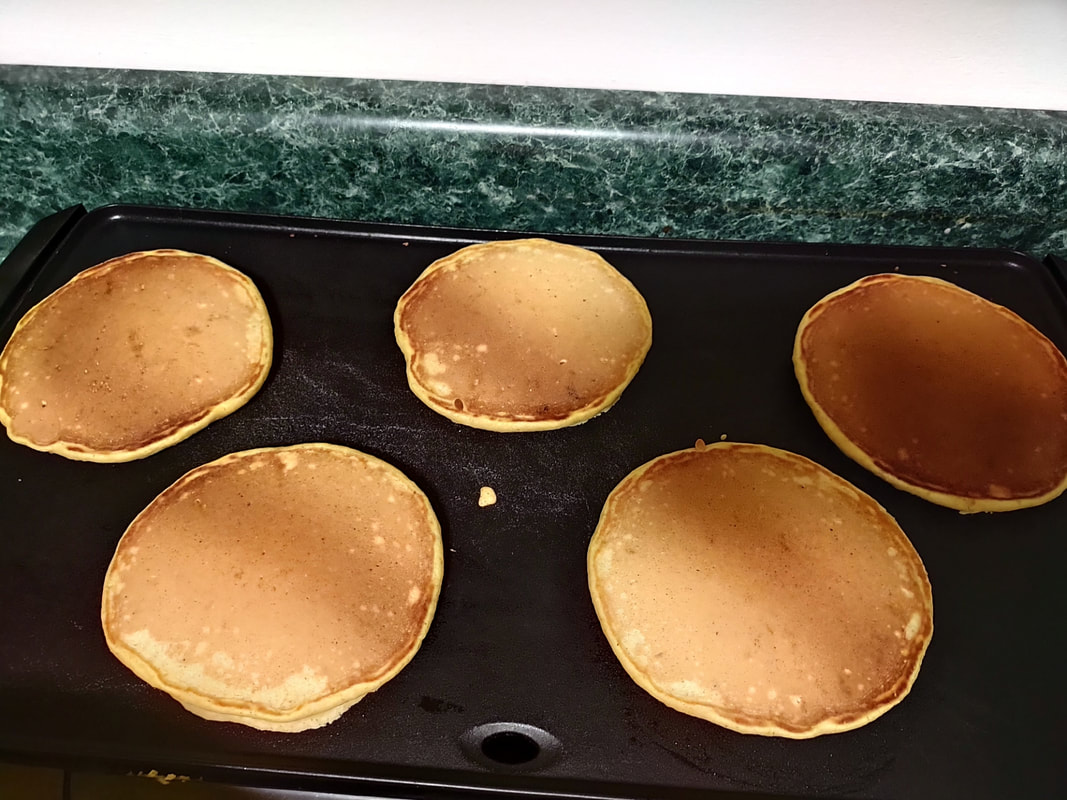 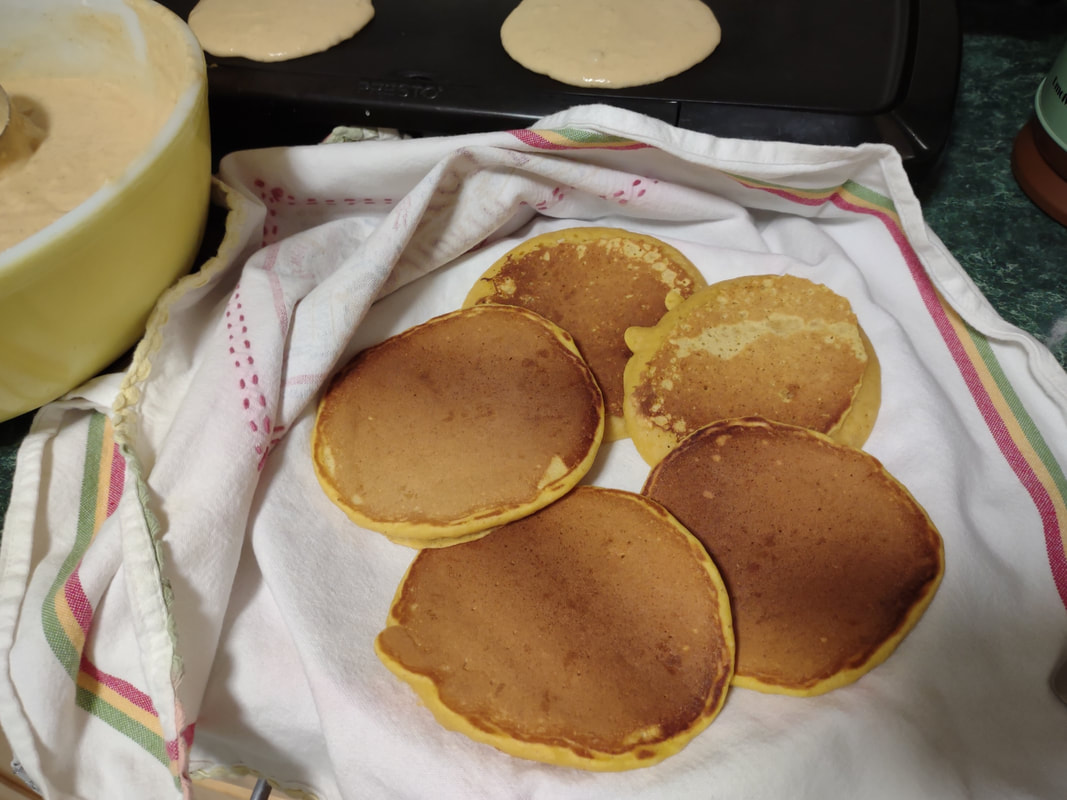  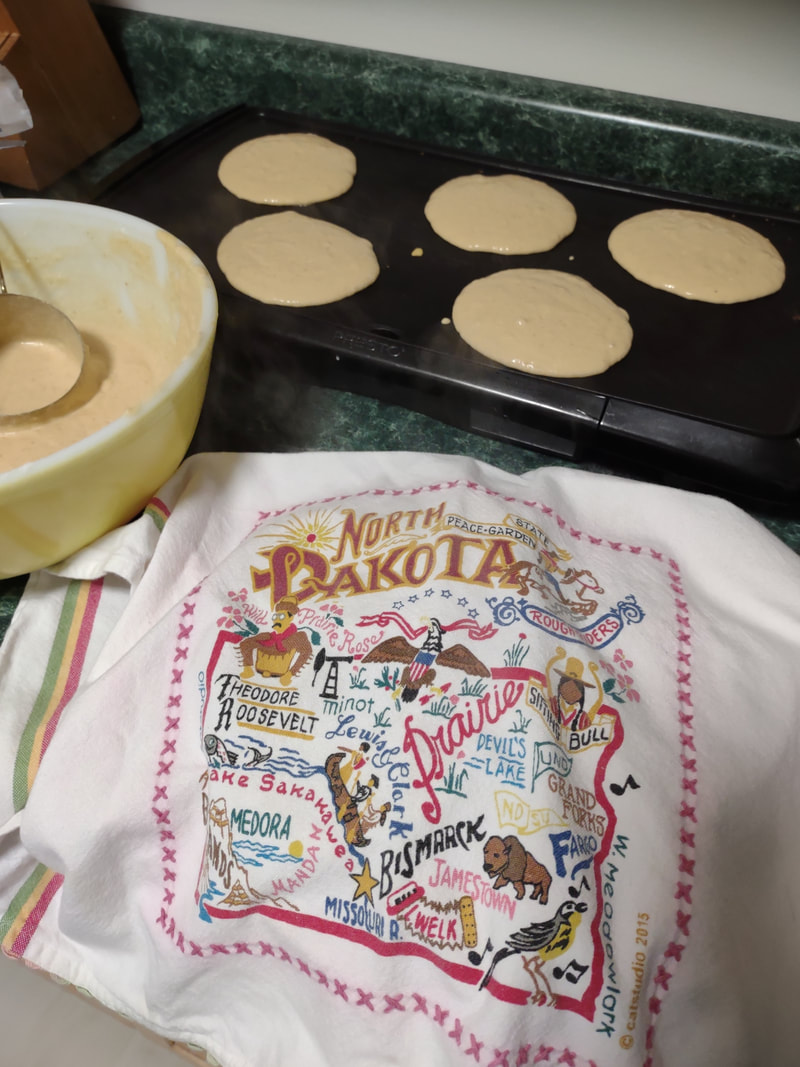 Gotta represent with this North Dakota dish towel Mom got me for Christmas one year. Serve with butter, real maple syrup, and whipped cream for a decadent brunch. Let the leftovers cool to room temp and store in a closed container to keep them from drying out. They will keep at room temp for a few days, so if you don't plan to eat them right away, refrigerate or freeze for future use. A third cup of batter will make a pancake small enough to fit inside a conventional toaster, should you want to reheat them. 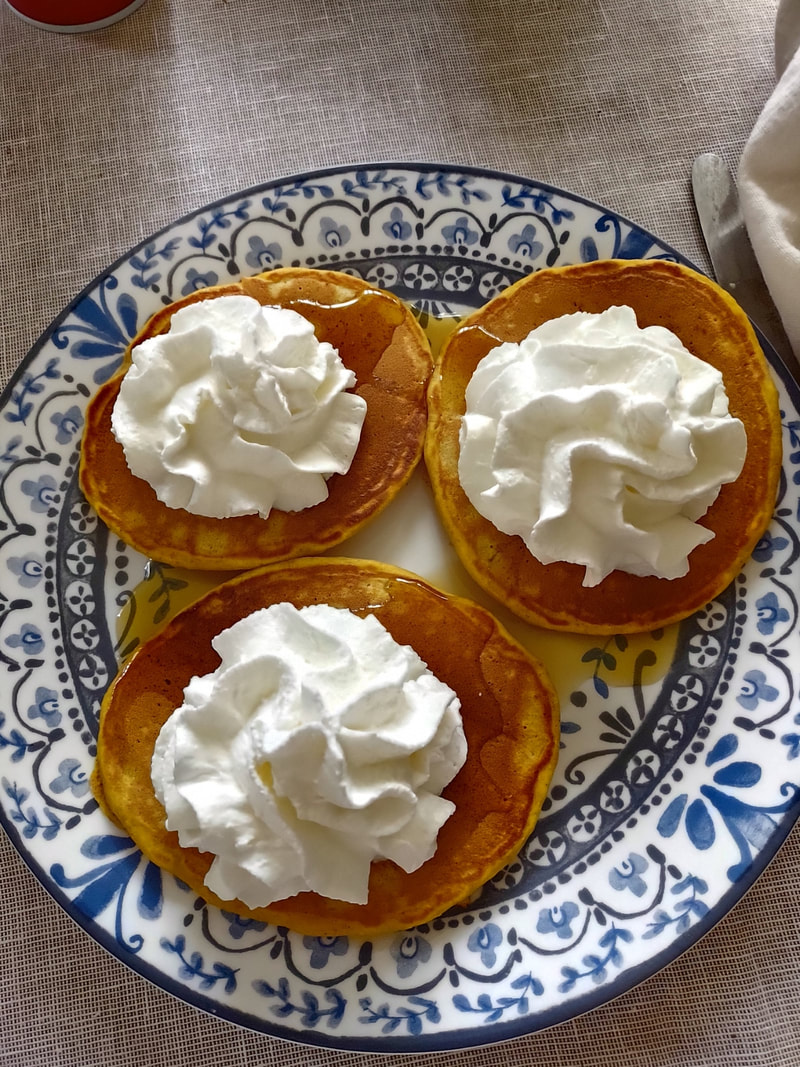
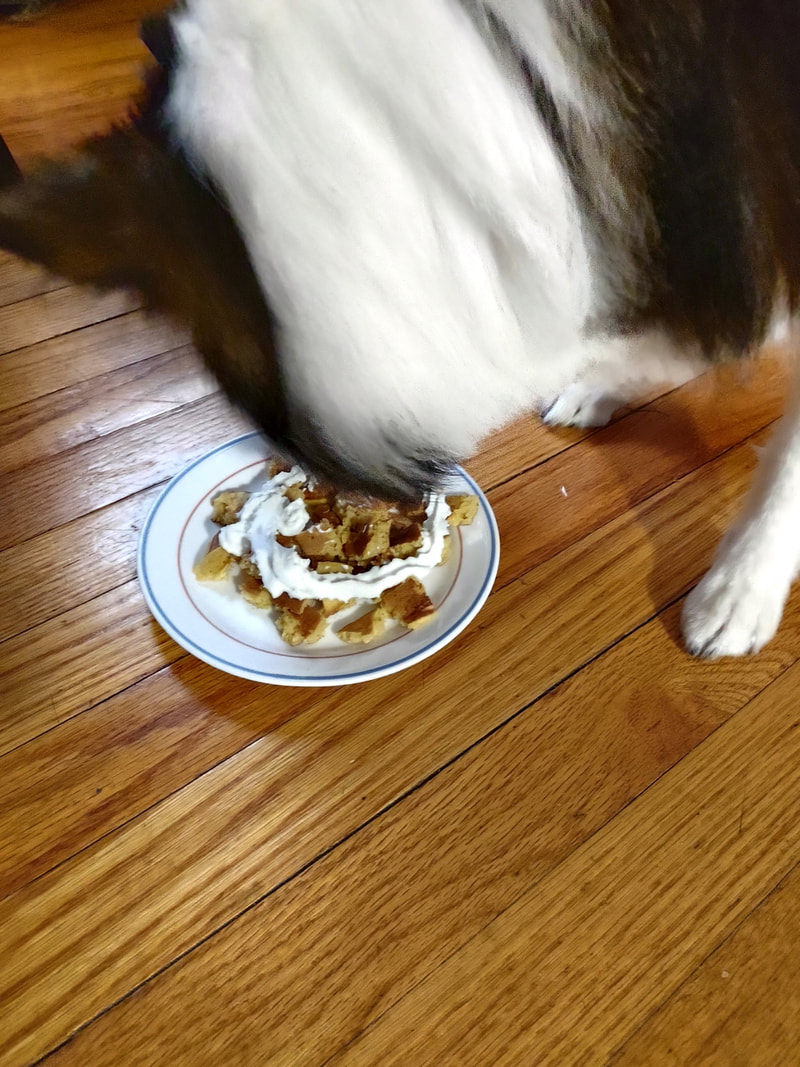
I hope you enjoy these pancakes as much as we do. I'm off to eat one as a snack before heading out to do some grocery shopping. Happy eating! The Food Historian blog is supported by patrons on Patreon! Patrons help keep blog posts like this one free and available to the public. Join us for awesome members-only content like free digitized cookbooks from my personal collection, e-newsletter, and even snail mail from time to time! Don't like Patreon? Join with an annual membership below, or just leave a tip! |

AuthorSarah Wassberg Johnson has an MA in Public History from the University at Albany and studies early 20th century food history. Archives
July 2024
Categories
All
|

 RSS Feed