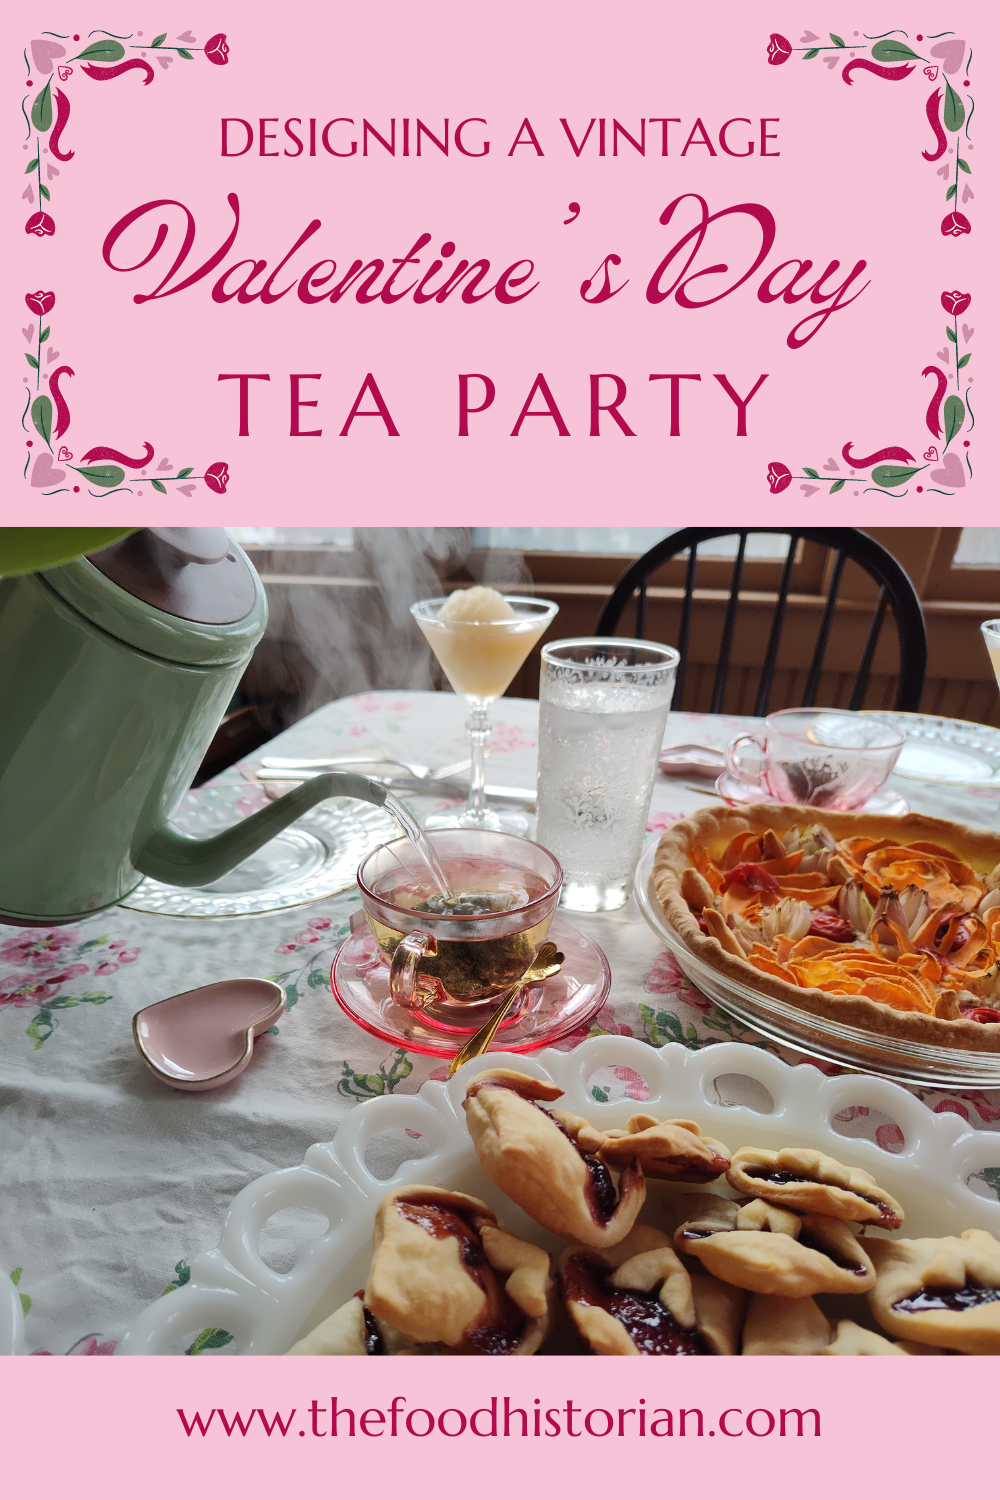
 This post contains Amazon affiliate links. Happy Valentine's Day, dear readers! I'm not typically one for Valentine's Day (although I've written about it here and here), but this year we decided to celebrate a friend's birthday with a Valentine's Day-themed tea party! I will admit the idea started with cute pink tea cups, spoons, and tea bag rests I saw at Target, and it kind of snowballed from there. But if you've been a longtime reader you'll know how much I enjoy designing and putting on tea parties (see: here, here, and here). I have an addiction to vintage dishes and linens, so it only seems fair that I drag them out every now and again. This tea party does not have any particular historical recipes attached to it, although every time I throw one I feel I am following firmly in the footsteps of my home economics predecessors, many of whom enjoyed a themed party even more than I do. Designing Your Tea PartyHalf the fun of throwing parties is dreaming them up and bringing together all the various accoutrements that make it nice. I've mentioned the pink teacups and saucers, golden flower spoons, and heart-shaped tea bag rests already. Those were the catalyst. But I also pulled from my collection of vintage pretties, all of it thrifted: a cherry blossom tablecloth, my favorite lace-edged milk glass platter and coordinating dessert plates, a gold-edged glass platter and coordinating luncheon plates, gold-rimmed etched highball glasses, vintage martini glasses, a beautiful cut glass footed compote I picked up recently, and one of my many milk glass vases for two bunches of fresh tulips. I did splurge on a few more things - I got some cute Valentine's Day decorations; a garland of felt hearts for the living room and a table runner for the coffee table. A set of heart-shaped cookie cutters in a variety of very useful sizes. My favorite purchase was a set of beautiful pink glass nesting bowls rimmed in gold. We only used one bowl for the tea party, but I love them so much. And the one that got the most comments was this rose-shaped ice cube tray, which turned grapefruit juice into gorgeous icy roses. I probably could have used more, but much of my milk glass got put away last Christmas and is now up under the eaves. One of my spring cleaning projects is to organize all my totes of spare dishes and decorations and put them all in the more easily-accessible basement, clearly labeled, so I can find things and use them more often. If you are in search of your own tea party collection, my best advice is to buy what you love, and damn the naysayers. My second-best advice is to buy things that coordinate with a variety of themes. Which is why I love milk glass so much, because it knows no season, and white dishes can always be spruced up with special touches of color. What every tea party needs:
Of course the most important ingredient for a tea party is at least one guest! Tea parties are always better with conversation. Menu planning is also a great deal of fun for me, and I love the challenge of coming up with something new each time I throw a party, alongside tried-and-true recipes. For this party, the tried-and-true recipe was for my Russian-style pie crust, which was used for both the savory pie and the letter cookies. The new was the vegetarian "chorizo," which was a riff on my lentilwurst recipe, and which turned out VERY well! The vegetable flower pie I knew would work in theory, but the execution was more difficult than I expected. If I did it again, I would definitely want a Y-style vegetable peeler like this one for the sweet potatoes. Valentine's Day Tea Party MenuFIRST COURSE: Savory Vegetable Flower Pie Heart Shaped "Chorizo" Sandwiches Hot Pink Salad SECOND COURSE: Strawberry Rhubarb Pie a la Mode Love Letter Cookies Red Fruit Salad BEVERAGES: Ice water Grapefruit Mocktail Cherry Blossom or Valentine's Day Tea 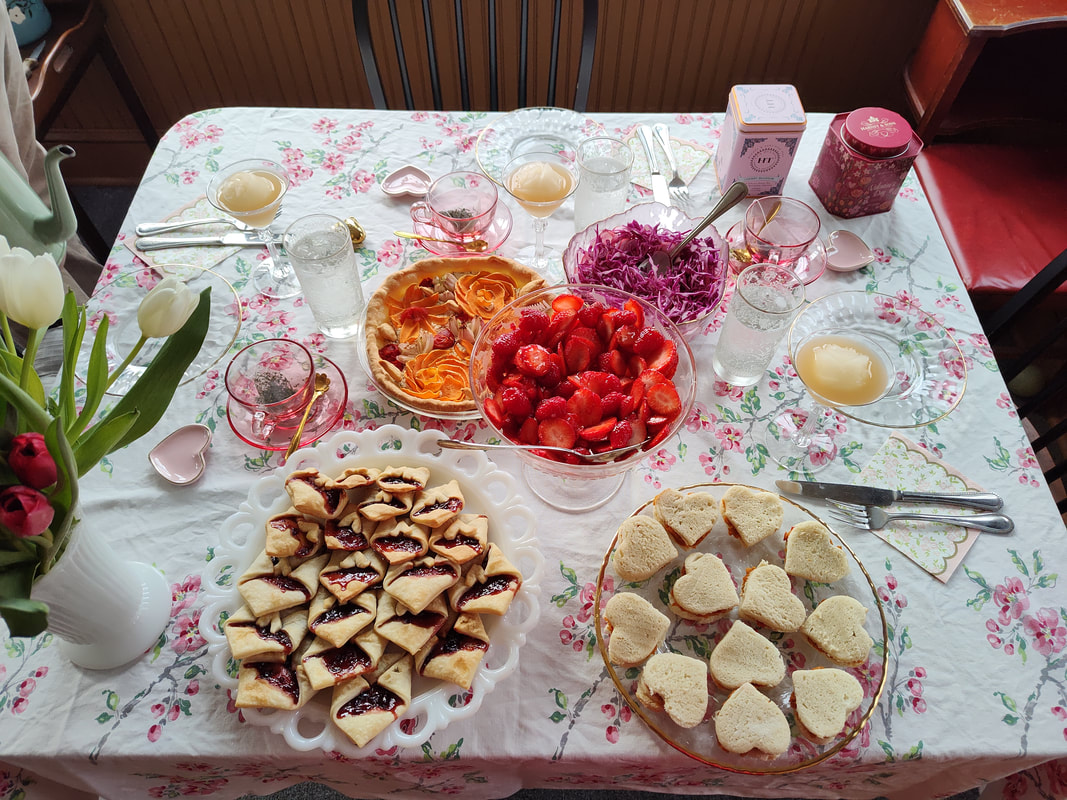 Sadly my time these days is far more limited than it used to be, so my dreams of an almond cake with rose petal jam filling, lavender shortbreads, rose meringues, and other tasty treats fell victim to my schedule. Still, although some of these were a struggle, I was delighted in how they turned out. Normally I would make these separate posts, but for you, I'll lump all the recipes into one. The only thing that was store bought was the pie, which was purchased from a local farm who makes the best pies. And since our birthday girl loves pie more than cake, that was her birthday treat, in addition to the homemade ones. Savory Vegetable Flower Pie Recipe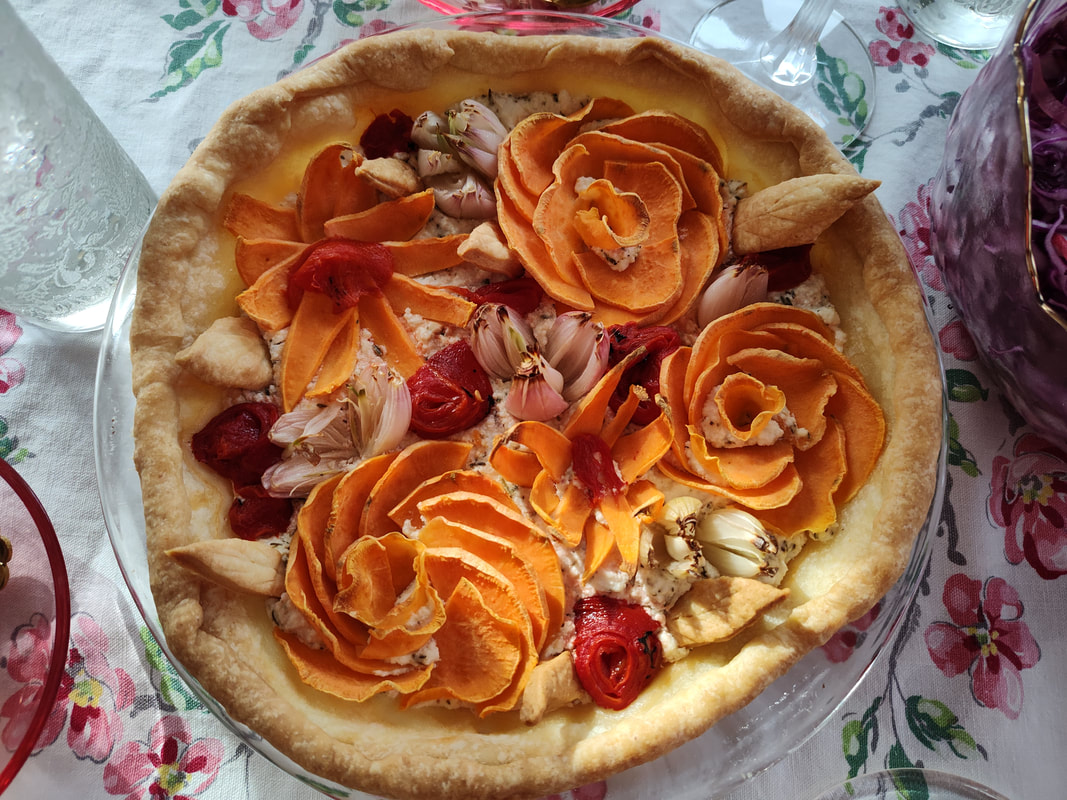 This flavor combination sounds unusual, but it's delicious. Crust: 1 stick butter 1/4 pound fresh ricotta or farmer cheese 1 cup flour Filling: 1 cup ricotta 1/2 cup feta garlic salt dried thyme Topping: sweet potato small shallots roasted red pepper Preheat oven to 350 F. Cream softened butter and ricotta, then stir in 1 cup flour. Knead well and let rest. Whirl the ricotta and feta to blend and then add seasonings. Peel the sweet potato and cut into paper-thin slices. Peel the shallots cut off the tops, and then cut through them lengthwise but not through the root end. Cut multiple times to make "petals." Then trim the root end without cutting all the way through. Roll the dough out thinly and drape in a pie plate. Fill with ricotta filling, then arrange sweet potato slices into roses, add the shallots and spread the "petals," and then fill any extra spaces with slices of roasted red pepper rolled into rosebuds. Trim pie crust and crimp. Use remaining crust to cut out "leaves" and bake separately. Bake pie 30-40 mins or until sweet potatoes and shallots are cooked through and crust is golden brown. Vegetarian Lentil "Chorizo" Recipe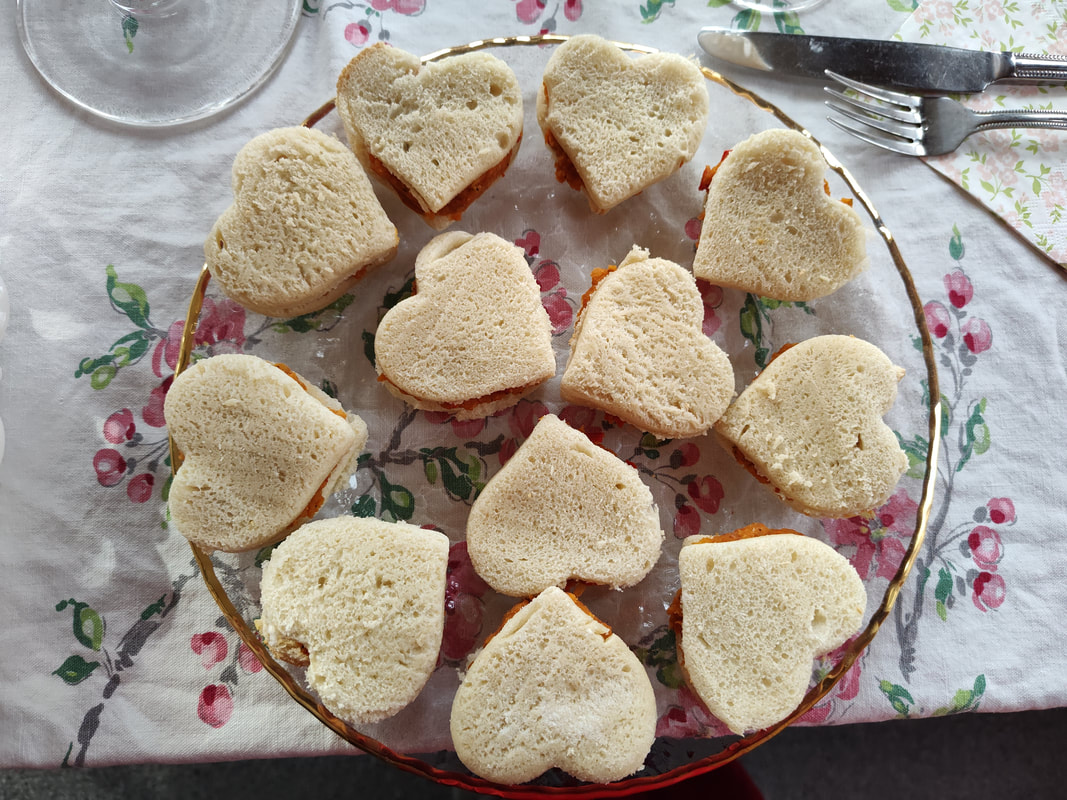 Sweet heart tea sandwiches with a spicy filling. This recipe is a riff off my lentilwurst revelation. It turned out splendidly. 1 cup red lentils 1 1/2 cups water 1/4 cup butter (or olive or coconut oil) 1 small onion 1 red bell pepper 2 teaspoons smoked paprika 1 teaspoon chili powder 1 teaspoon garlic powder 1/2-1 teaspoon garlic salt 1/2 teaspoon oregano 1/4 teaspoon cumin 1/4 teaspoon black pepper Combine the lentils and water in a small stockpot. Bring water to a boil, then reduce heat and simmer 20ish minutes, or until the water is absorbed and the lentils are very soft. Peel the onion and seed the pepper, then mince very finely or whirl in a food processor until finely cut. In a stock pot, melt the butter over medium heat and add the onion and pepper. Cook until the butter is mostly absorbed and the vegetables very tender. Add the spices and lentils and cook to combine. When fully blended, taste and add more salt if needed. To make sandwiches, thinly slice white bread and cut into heart shapes, then spread with the lentil filling. Pink Salad Recipe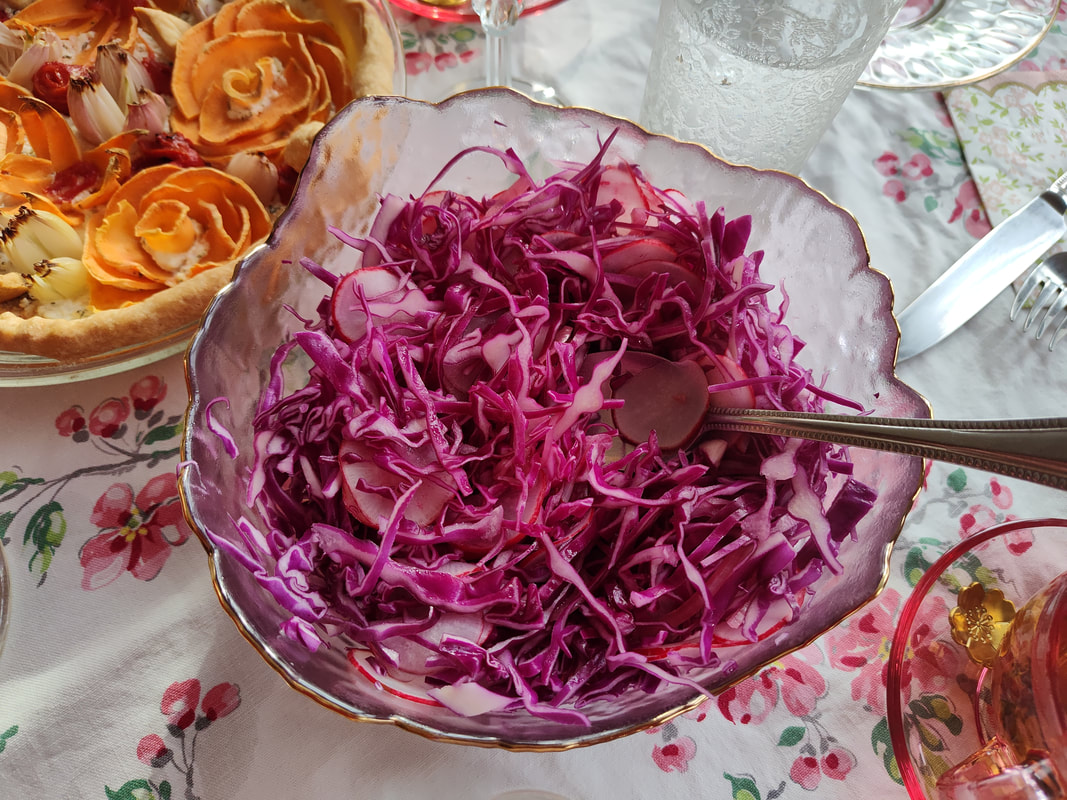 Of course a Valentine's Day salad has to be PINK! I like to have something a little lighter for tea parties, usually a salad. But of course for Valentine's Day I didn't want any-old green salad! Plus, one of the challenges I set for myself was to keep this at least partially seasonally-appropriate. So this was my answer. 1/4 head red cabbage 8 red radishes 1/4 cup pickled red onion salt olive oil lemon juice Finely shred the cabbage and slice the radishes paper-thin. Toss with salt and let rest, then add a little olive oil and lemon juice. You can make this in advance if you want it to be extra-pink and slightly less crunchy, but be forewarned that the purple juices will stain just about everything, so eat carefully! Love Letters Cookie Recipe The imperfect-but-delicious love letter cookies. I'll admit - I saw this on Pinterest and thought it was too cute. I used my fool-proof ricotta pie crust instead of traditional butter crust, and while delicious, the letters did puff up a bit in the oven. Plus those little hearts are a pain to cut out by hand! 1 stick (1/4 cup) butter 1/4 pound ricotta or farmer cheese 1 cup flour cherry jam (I like Bonne Maman) Cream butter and ricotta and stir in flour. Knead well until combined. Roll out very thin and cut into squares. Place a teaspoon of jam in the center, then fold up one side and the other two to make an envelope. Add a heart cut out of crust to keep the edges from popping up. Bake at 350 F on parchment paper for 15-18 minutes, or until golden brown. Grapefruit Mocktail Recipe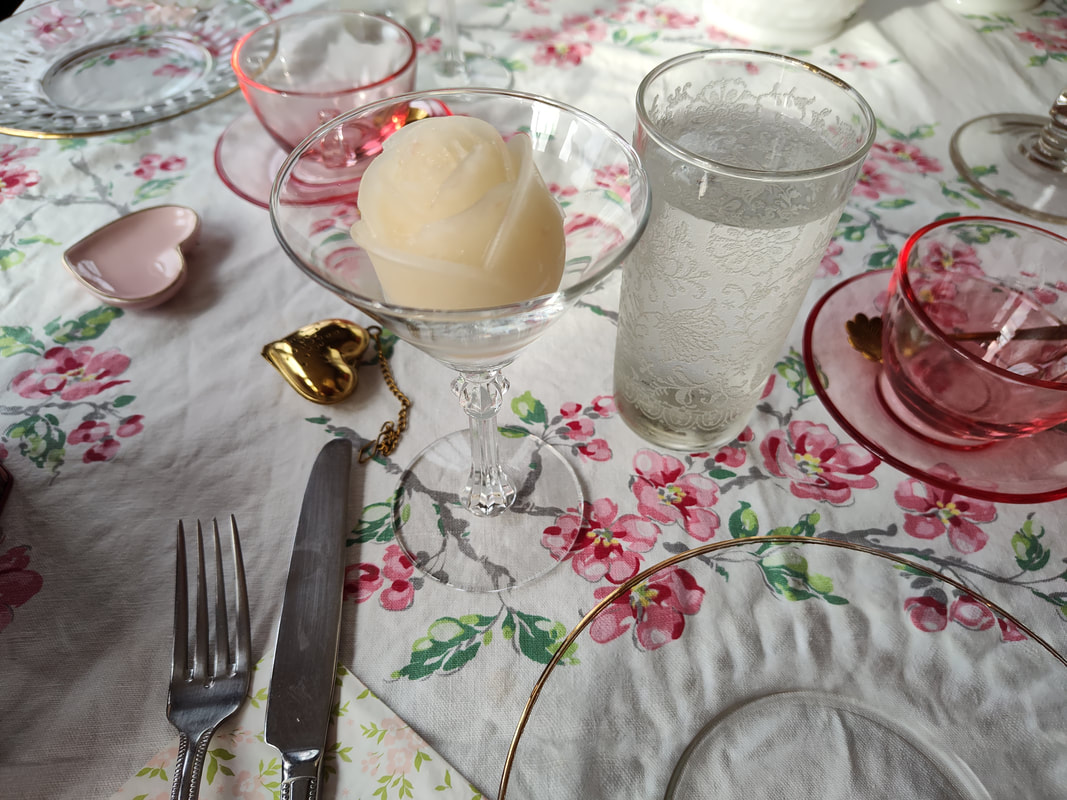 We are admiring the perfect rose ice cube in this empty martini glass. This is one of my favorite mocktail recipes and it is dead easy, you ready? 1 part grapefruit juice 1 part gingerale And that's it! I like to use Simply Grapefruit, as I think it has a nice balance of sweetness and bitterness, but you could use any kind. The combination tastes so much more sophisticated than it is - not too sweet, not too bitter, not too bubbly, and curiously addictive for the adult palate. For folks who don't drink alcohol, it's a great alternative to a mixed drink that isn't sugary-sweet. 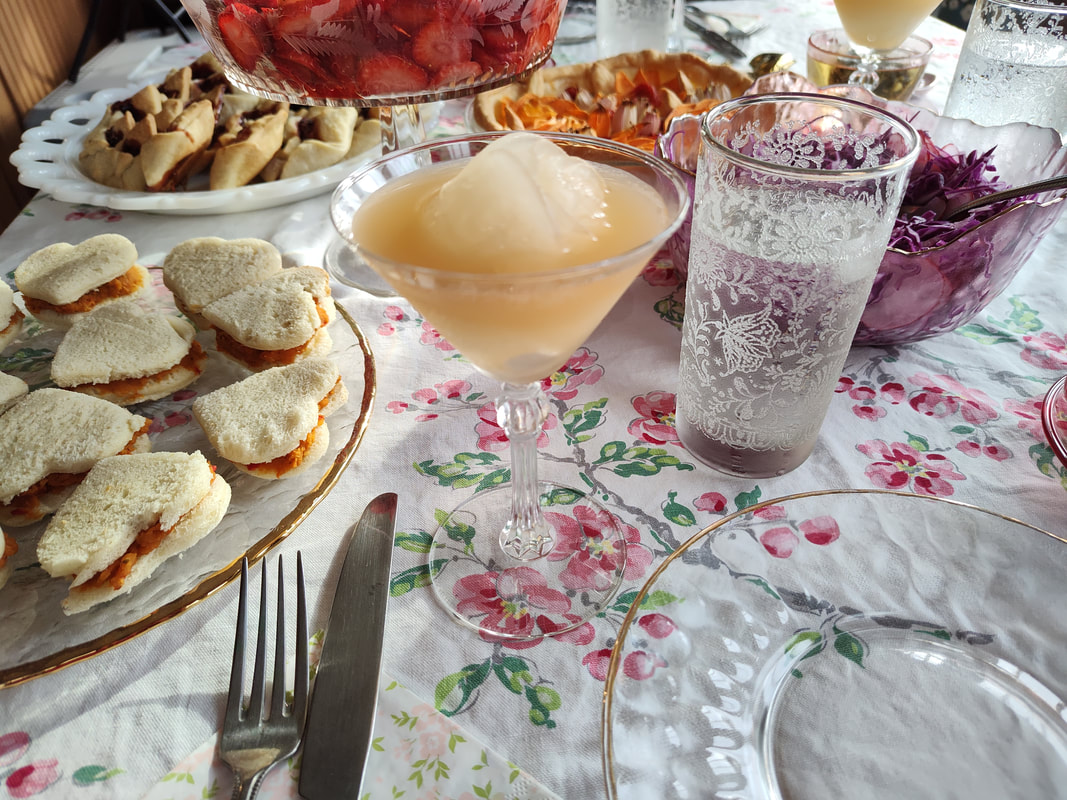 Sadly the pointy bottom of the martini glass meant our beautiful rose ice cube TIPPED once the mocktail was added. Oh well. It still tasted delicious. Selecting Teas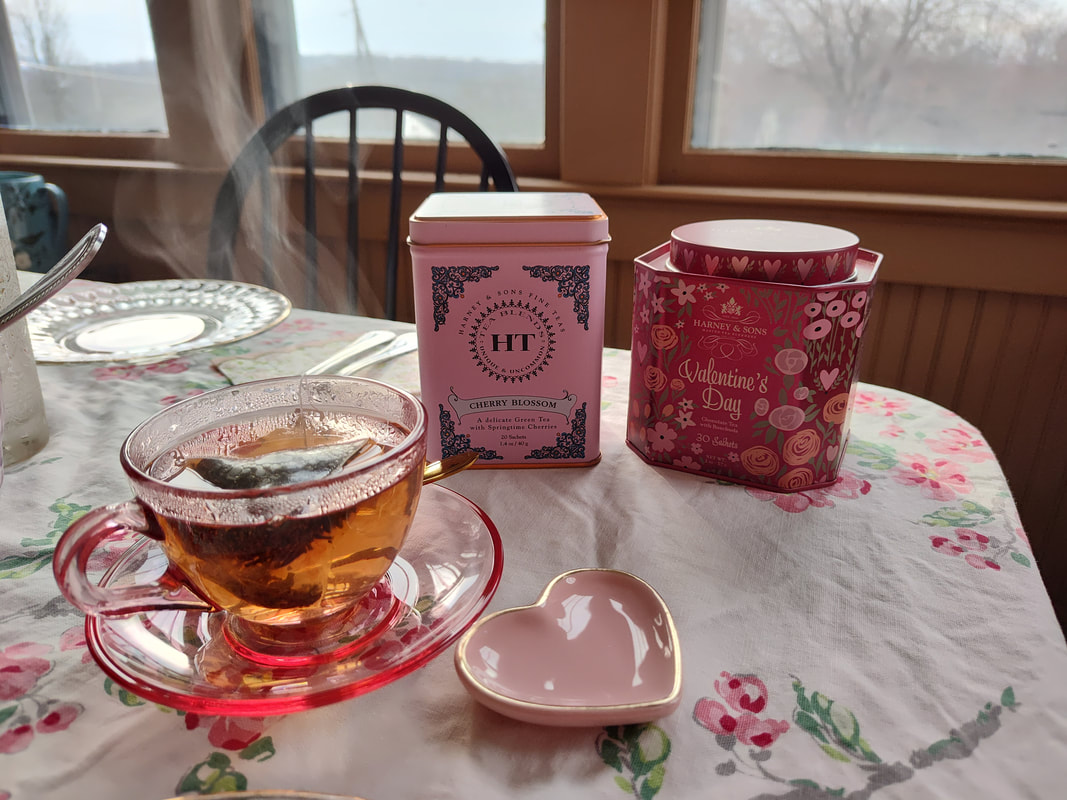 Tea parties traditionally feature just black tea, but as a non-traditional person and someone who doesn't enjoy a lot of caffeine, I don't usually drink black tea. However, since this was a special event, I decided to bring out some special teas just for Valentine's Day. Harney & Sons is a New York-based tea producer (and therefore local for me) who makes delicious blends. I did a big order last year around this time and got their "Valentine's Day" blend for free. I was skeptical at first, but it's a delicious blend of black tea, chocolate, rose, and other fruity flavors. Curiously addictive. The birthday girl is a big fan of green tea, so when I saw the Cherry Blossom variety, which is a mix of green tea with cherry and vanilla flavors, I decided to get that as well. Both were excellent and did not need any sweetener or milk to accompany the rest of the menu. 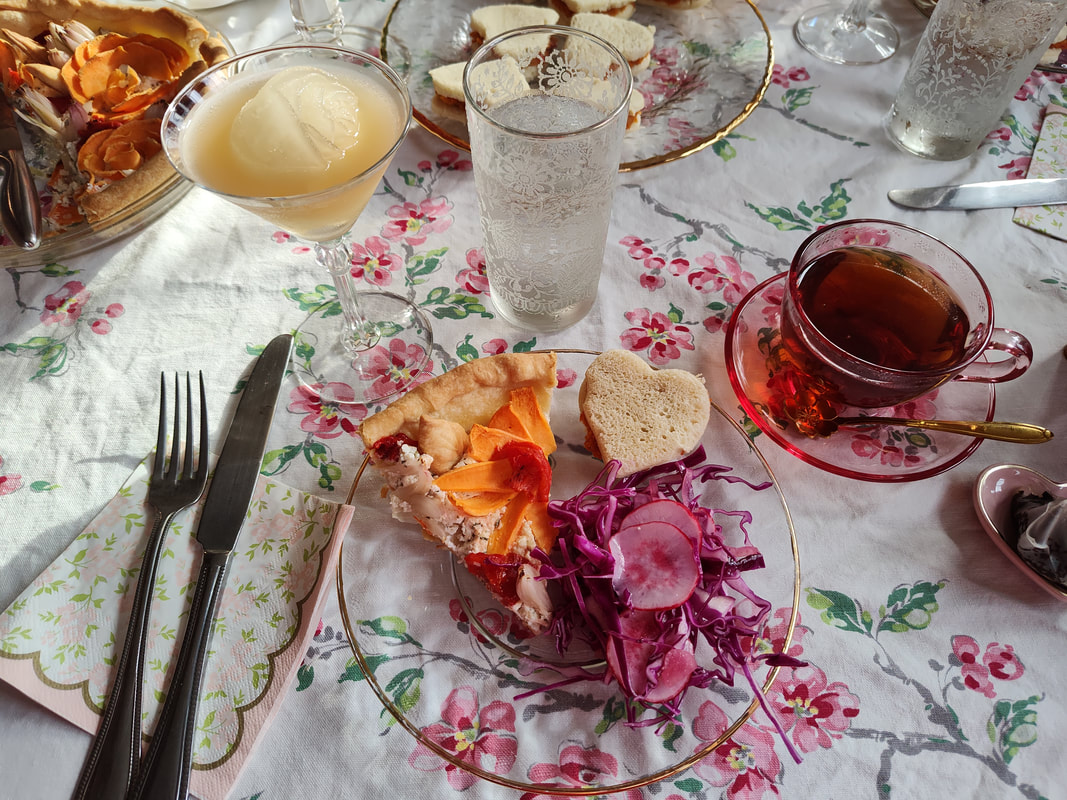 My first, savory course. I may or may not have had multiple sandwiches. And grapefruit mocktails. Delicious. 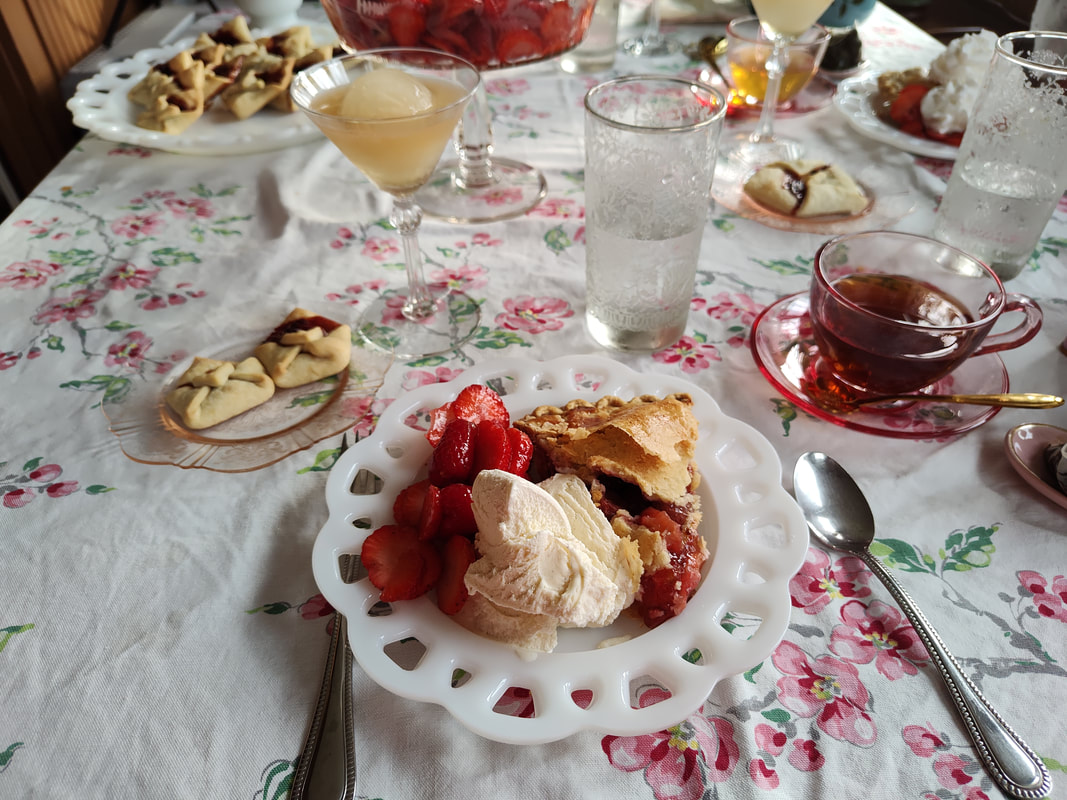 And my sweet course - love letter cookies on pink Depression glass, and strawberry rhubarb pie with a side of red fruit salad (strawberries and raspberries in strawberry jam) and vanilla ice cream on a lacy milk glass plate. All in all it was a delightful afternoon. The birthday girl was happy, the husband was happy, and I was happy! We went for a post-party walk in delightful weather and did a little shopping at a nearby town, got caught in a rainstorm, then headed for home. Later that night we ran some more errands and I treated myself to some adorable jigsaw puzzles, because they remind me of my mom and I need some non-screen time activities! They've been fun, but man my back is not up for too much hovering over a table searching for pieces!
It always gives me joy to built a beautiful table for family and friends. My best Valentine's Day present to myself! How are you celebrating?
1 Comment
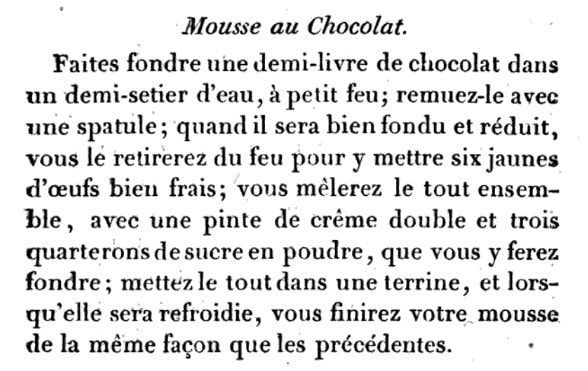
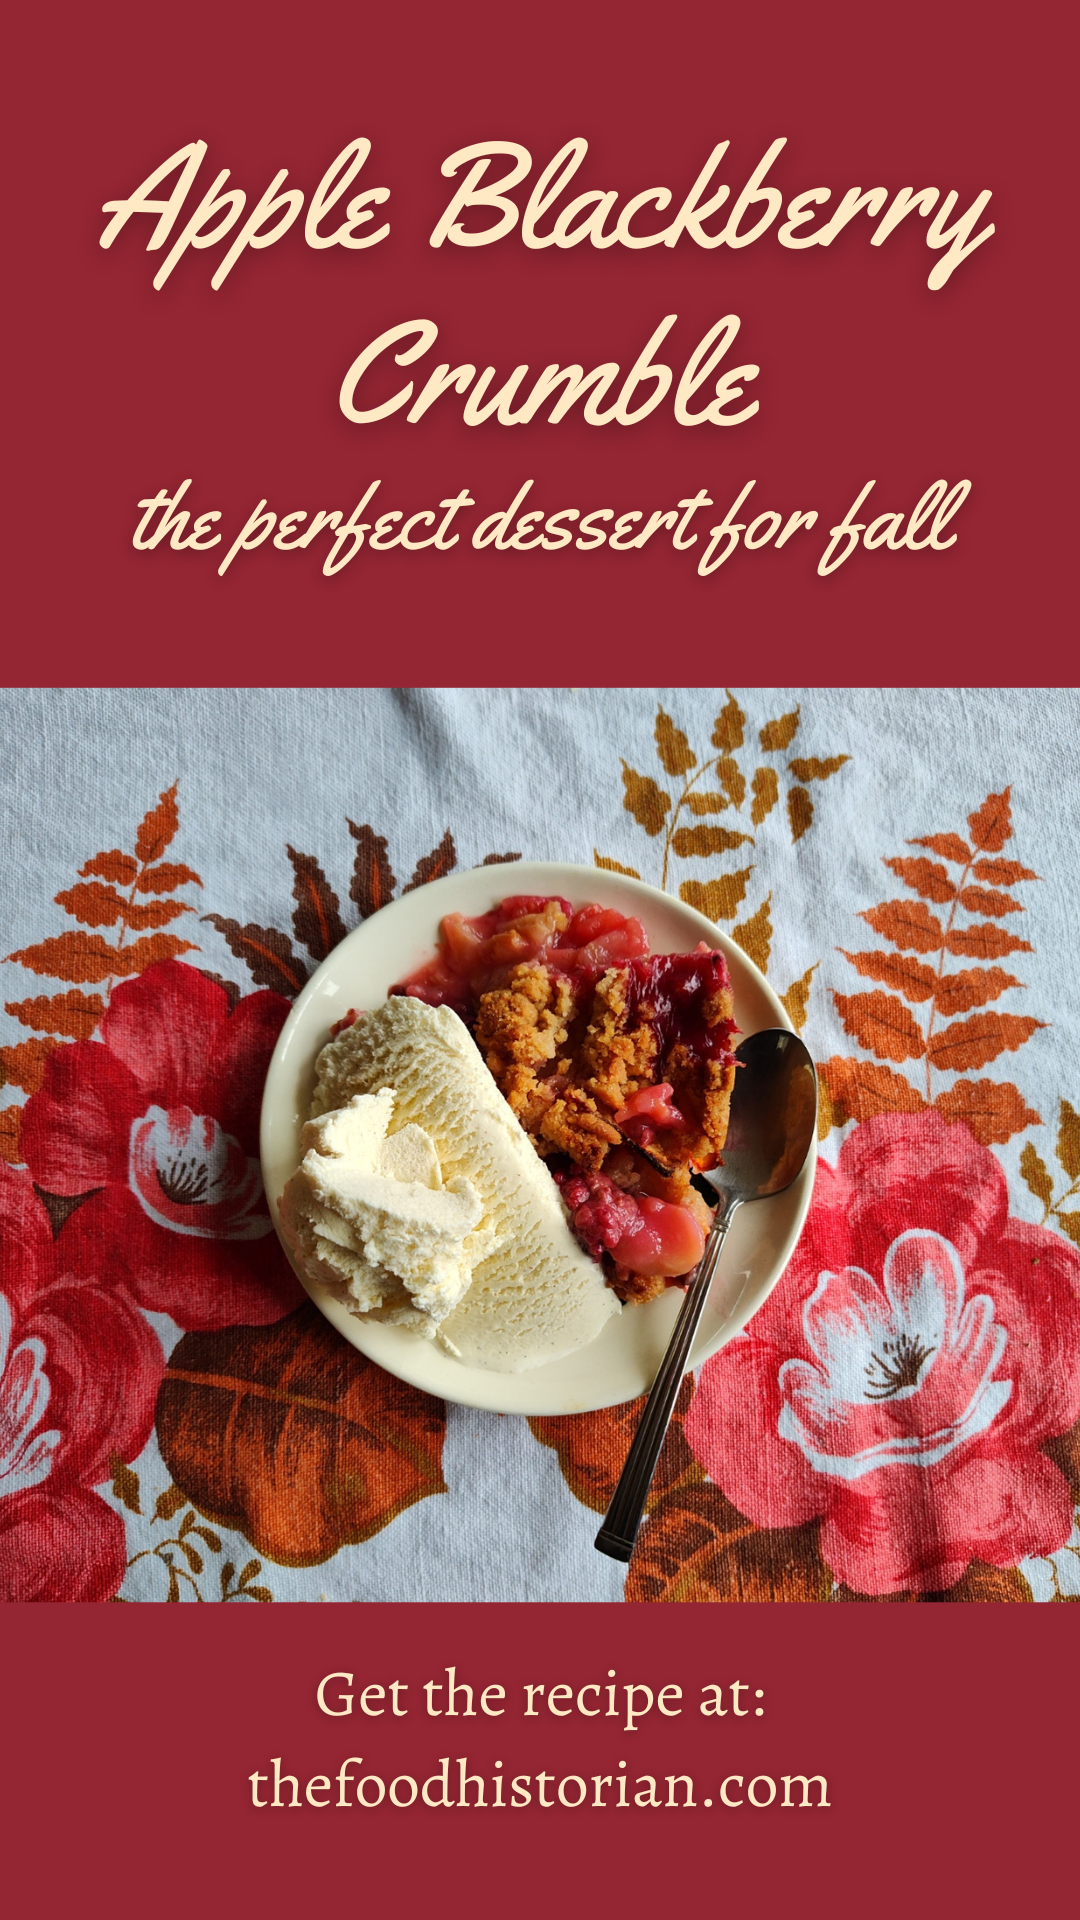 In throwing an Autumnal Tea Party (see yesterday's post!), I wanted a simple but impactful dessert. Apples are plentiful in New York in September, but plain apple crisp, while delicious, didn't feel quite special enough for a tea party. The British have a long tradition of gleaning from hedgerows in the fall. Hedgerows often have apple trees, sloes, blackcurrants, and blackberries in fall. Sloes and blackcurrants are hard to find here in the US, but blackberries seemed like the perfect accent to the American classic. This recipe is endlessly adaptable as the crumble topping is great with any kind of fruit. You do need quite a lot of fruit for a crumble, which makes it nice in that it feels a little lighter on the stomach than cake or pie. These sorts of desserts were common in areas where fruit was plentiful and sugar and butter weren't. 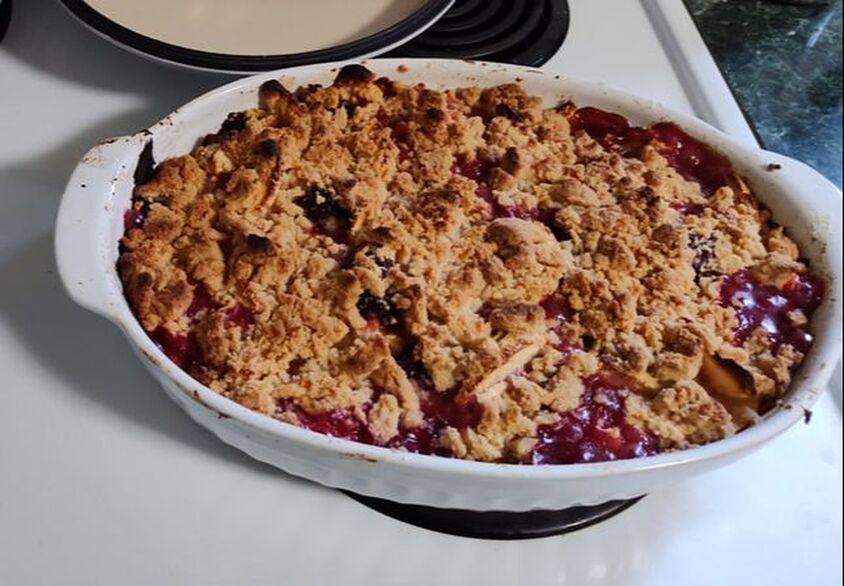 Crumble fresh out of the oven. I baked mine at 425 to go with the biscuits, so it got a little overdone. Apple Blackberry Crumble RecipeI never sweeten the fruit for a crumble (similar to a crisp, but without rolled oats) unless it is a very sour fruit like rhubarb or fresh cranberries. This topping has quite a lot of sugar, which is what helps make it so crunchy and delicious, but you definitely do not need additional sugar in the fruit, especially when pairing with ice cream. You can substitute whole grain flour for part or all of this to good effect as well. If you prefer a crisp, use 1/2 cup of flour and 1 heaping cup of rolled oats. 8+ small apples (I used a mix of gingergold and gala) 1 pint (2 small packages) fresh blackberries 1 1/2 cups all-purpose flour (plus more for the fruit) 1 scant cup white sugar 1/2 cup coldish butter 1/2 teaspoon salt 1/2 teaspoon pumpkin spice Preheat the oven to 400 degrees F. Peel the apples, cut into quarters, cut out the core, and slice. Wash the blackberries and drain. Toss the apples and blackberries with flour to coat (this will thicken the juices). Add to the baking dish. Then make the crumble. Mix the flour, sugar, salt, and pumpkin spice. Then cut the butter into small cubes, toss in the flour mix, and using your hands squeeze and rub it into the flour mix until it holds together when squeezed. Crumble gently over the fruit in an even mix, then bake for 40-50 minutes, or until the fruit is bubbly and thick and the crumble is golden brown. Serve warm with vanilla ice cream. 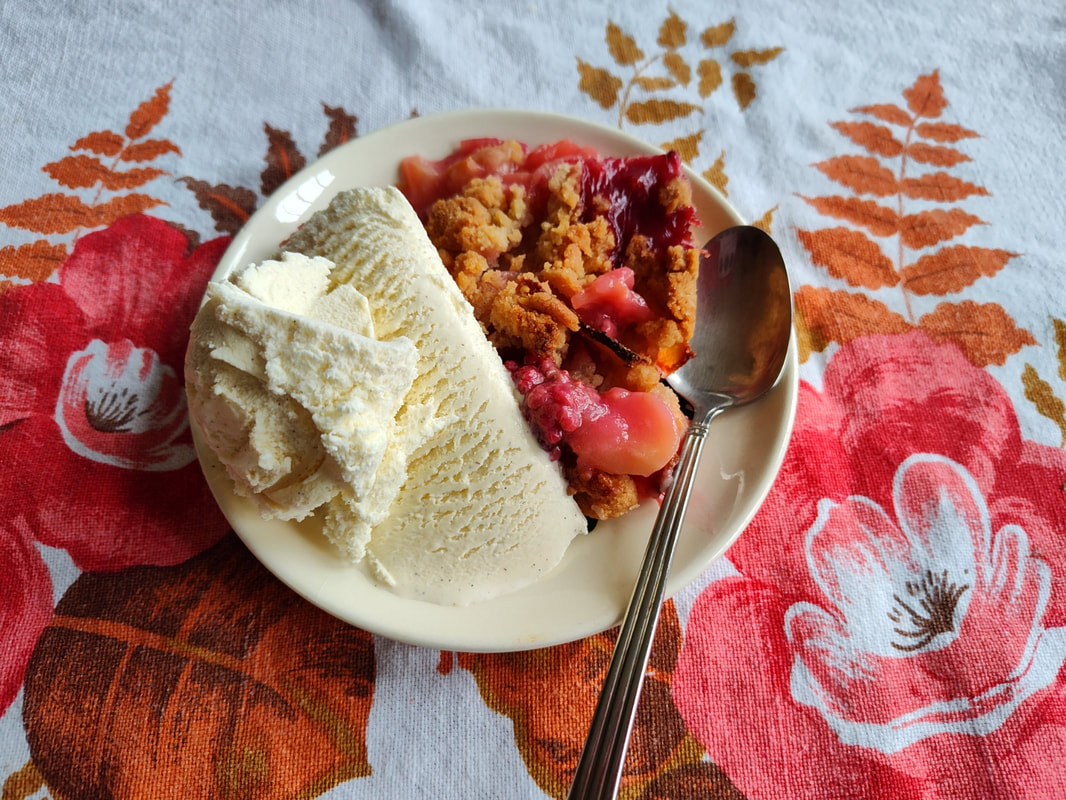 The absolutely gorgeous crumble, which matched the tea party tablecloth perfectly! There's nothing like a warm crisp with cold vanilla ice cream, and I think this is my new favorite kind. Blackberries and apples seem like a match made in heaven. What's your favorite autumnal dessert? The Food Historian blog is supported by patrons on Patreon! Patrons help keep blog posts like this one free and available to the public. Join us for awesome members-only content like free digitized cookbooks from my personal collection, e-newsletter, and even snail mail from time to time! Don't like Patreon? Leave a tip! 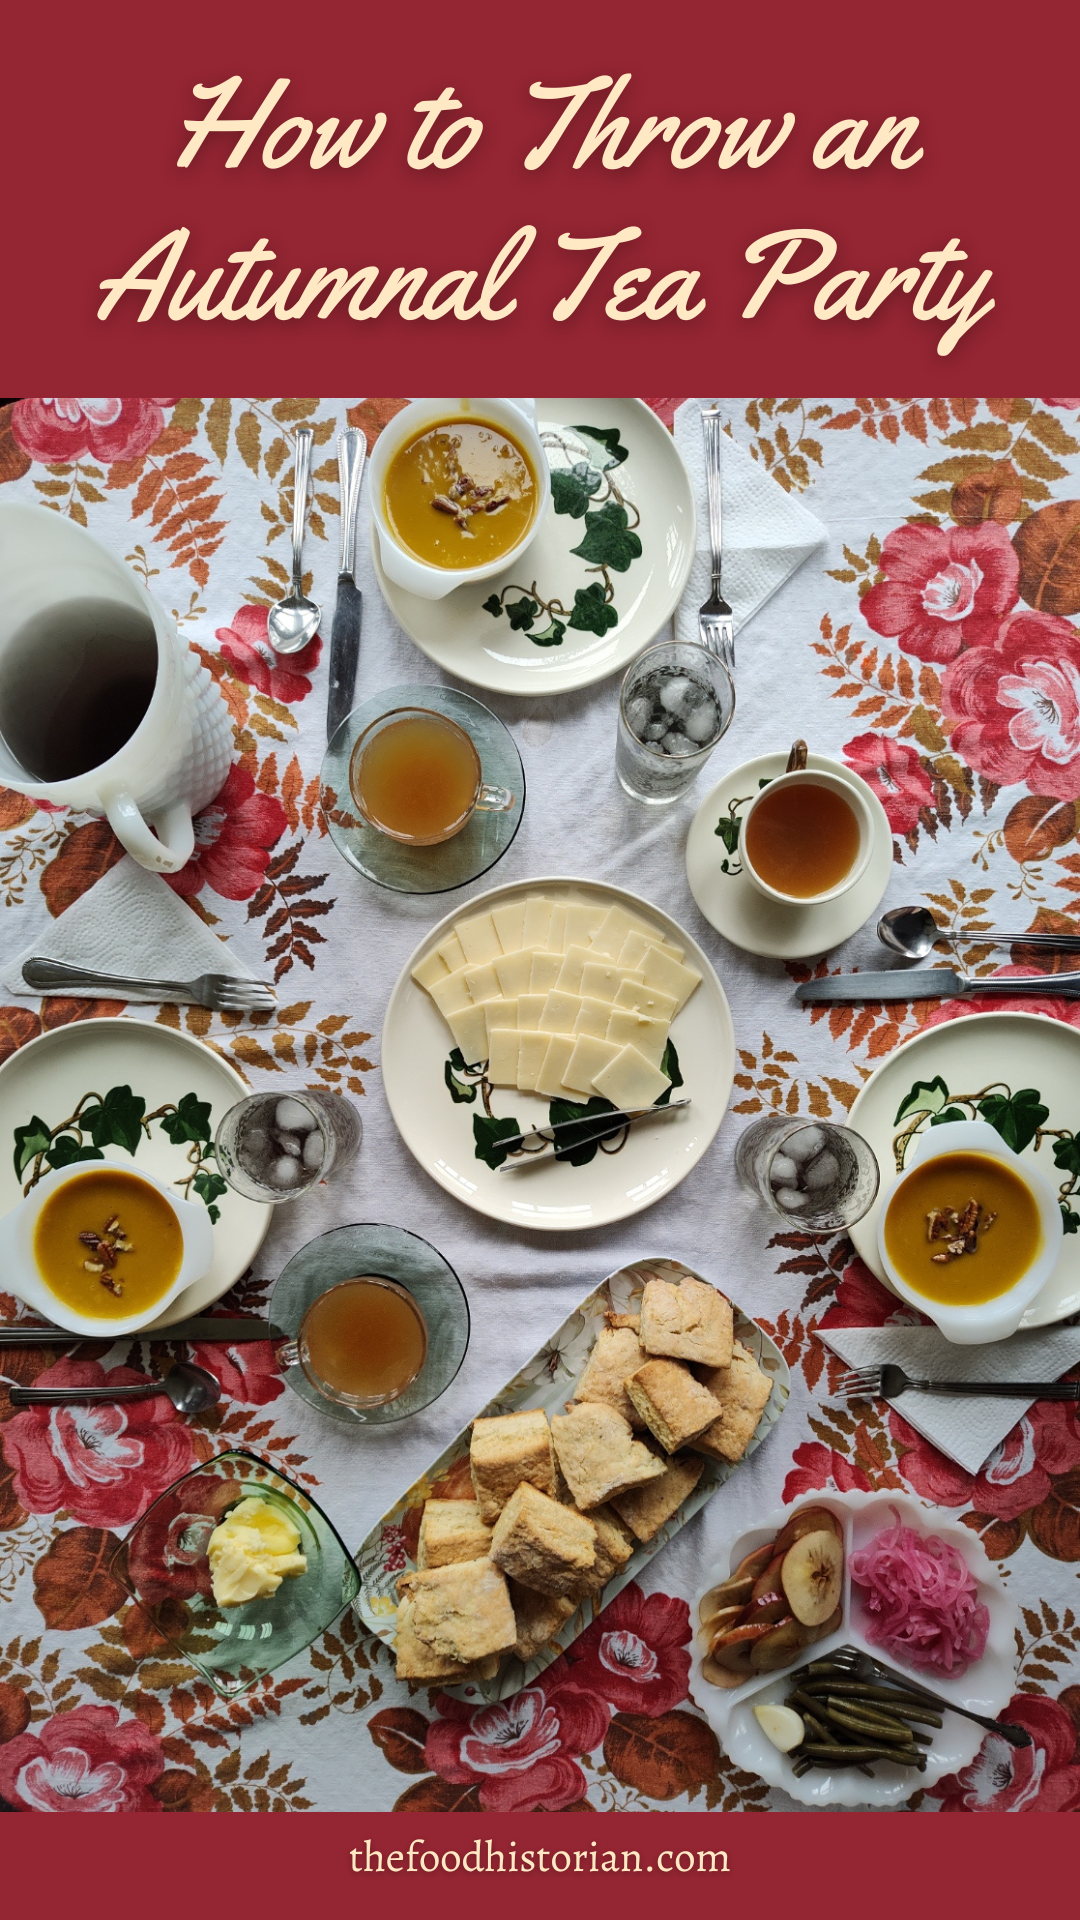 The weather has finally turned, dear readers, and so I felt it was time for another tea party! I've had a long couple of weeks, and I wasn't really looking forward to spending one of my days off cleaning the house and cooking, but it was very much worth the effort and I'm glad we did it. Tea parties can be incredibly complicated, or very simple. My process is to think about the theme, and the flavors, and then come up with way too many ideas and then pare it down to what's possible. I wanted to honor the flavors of early fall, with something pumpkin or squash, apples, blackberries, and a savory bread. My original list also had gingerbread and shortbread cookies with jam, and scotch eggs, but that was too much! I wanted to keep the menu fairly simple, because I was quite sleep deprived after a big event over the weekend at work. So I maximized flavor and minimized effort, to great acclaim! The party (just three of us) ended up delicious, with a chilly, drizzly day with beautiful overcast light on our front porch. Ironically, we ended up having mulled cider, instead of tea, but I'm enjoying a cup of tea as I write this a few hours later, so I suppose it still counts! 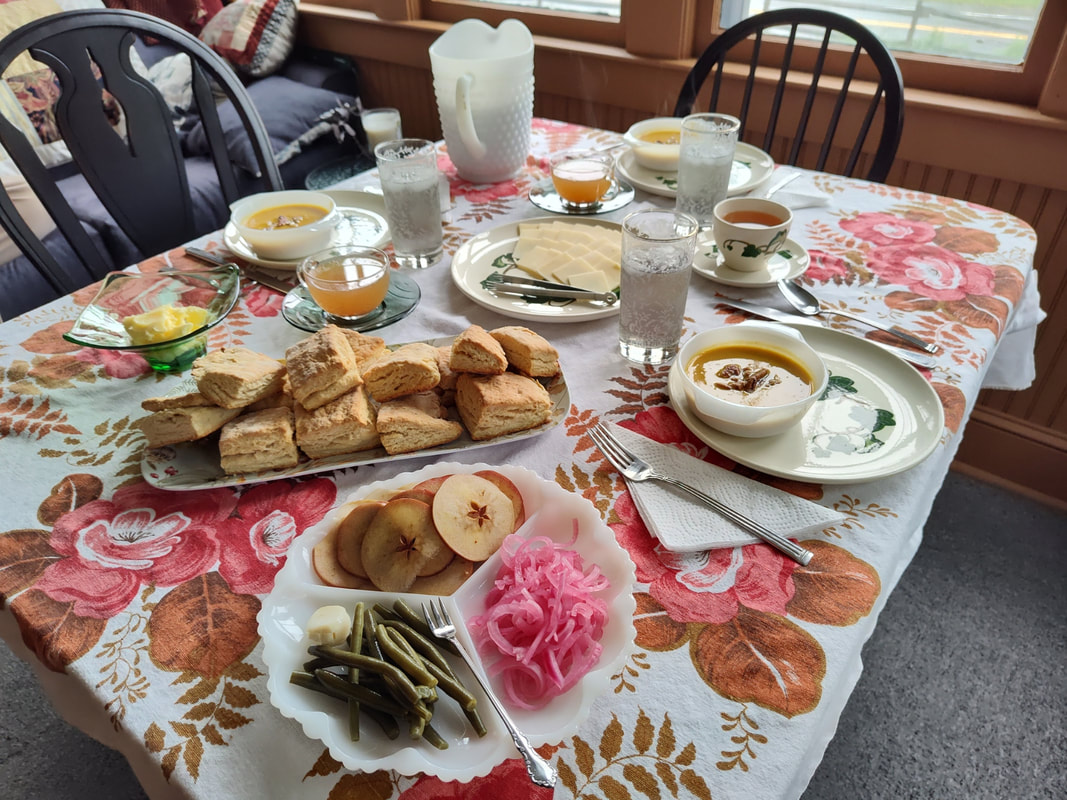 The beautiful tea table on our front porch. Autumnal Tea Party DecorIt can be tempting to go out and buy a lot of supplies for parties. I'm definitely as susceptible to that impulse as the next person! But I find what makes parties special is not how much everything matches, but the quality of your decor. I decorated my mantel with some of my favorite fall decorations - a coppery leaf garland, my favorite vintage china pheasant, a pretty vase with some fake flowers, a little green ceramic pumpkin. But when it comes to decking the table, nothing is better than nice tablecloth and real dishes. I grew up shopping thrift stores and garage sales and flea markets with my mom, so I've amassed quite a collection of vintage dishes and tablecloths over the years. Because I actually use my collection, I don't spend a lot of money on it. It pains me enough when a vintage piece gets chipped or broken. My frugal soul would be even more deeply wounded if it was a piece I had spent a lot of money on. This ended up being a very grandmother-focused display. The Metlox California ivy plates and a single surviving teacup I inherited from my grandmother Eunice, along with the green glass bowl I used for butter and the green glass saucers. My grandma Ruby found me the beautiful etched water glasses. The glass teacups embossed with leaves I picked up at a garage sale for a dollar for the pair. The milk glass is from my thrifted collection, and the beautiful tablecloth is a vintage one I forget where I found but it's probably one of my absolute favorites. I did not intend for the food to match the tablecloth, but that's kind of how it happened! When it comes to collecting, it's important to buy things you love, instead of focusing on what things are worth. Who cares how expensive it was if you think it's ugly? It's also important to choose things that are relatively easy to care for. I do not recommend putting vintage dishes in the dishwasher, but a lot of vintage tablecloths are meant to be washed. I find vintage textiles with a stain or two are often much less expensive than the pristine stuff, and then if you get a stain on them you don't feel quite so bad! 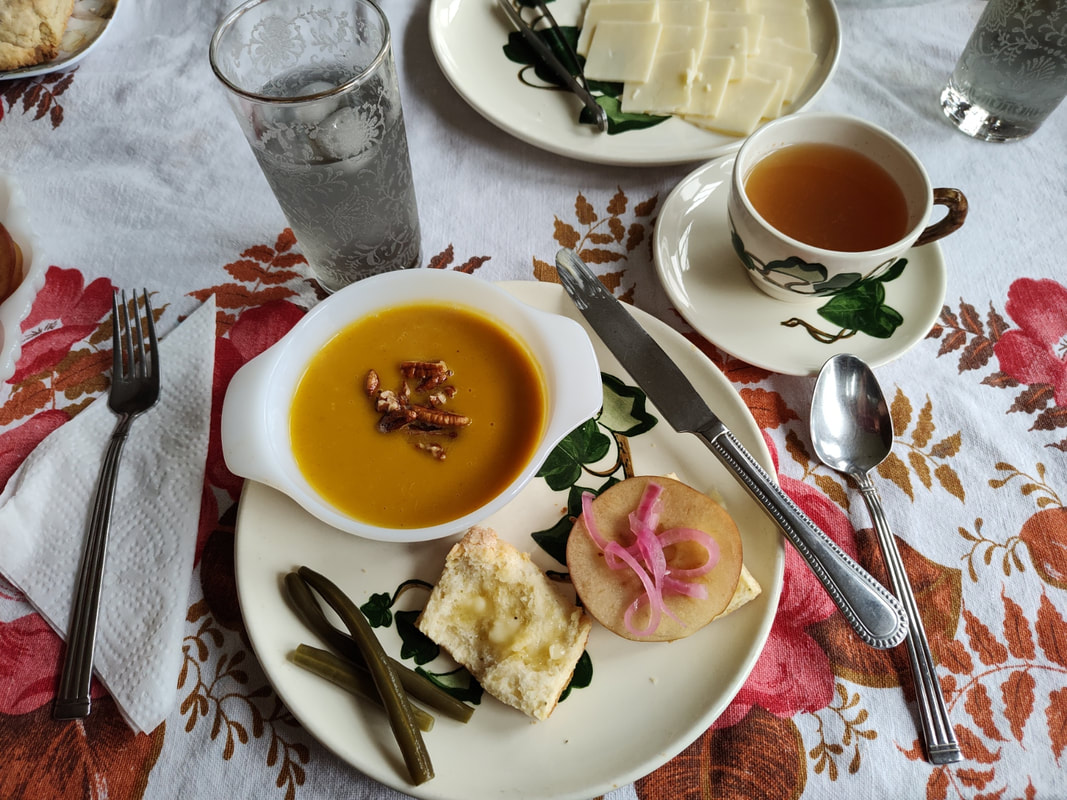 My beautiful luncheon plate! Autumnal Tea Party MenuButternut Squash Soup with buttered pecans Sage Cream Biscuit Sandwiches with pickled apple, pickled onions, and sharp cheddar Dilly Beans Mulled Cider Blackberry Raspberry Hibiscus Water Apple Blackberry Crumble with vanilla ice cream Although I love to cook from scratch, the butternut squash soup was store-bought from one of my favorite soup brands: Pacific Foods Butternut Squash Soup, and I got the low-sodium version (affiliate link). I don't usually like butternut squash soup, but I know lots of people love it, so I thought I would give it a go. This one was so delicious, I was surprised how much I enjoyed it. I felt it needed a little something extra, so I toasted some chopped pecans in a little butter and salt, and the butter got a little browned. It was the perfect garnish. The blackberry raspberry hibiscus water was also store-bought, a simple cold water infusion from Bigelow tea which I found at the store the other day (affiliate link). It turned out lovely - not as strong as tea, just a hint of flavor to cold water. Very refreshing. Sadly, the color, which was a beautiful purple as it steeped, got diluted to a kind of washed purple-gray, which was less beautiful. But still delicious! 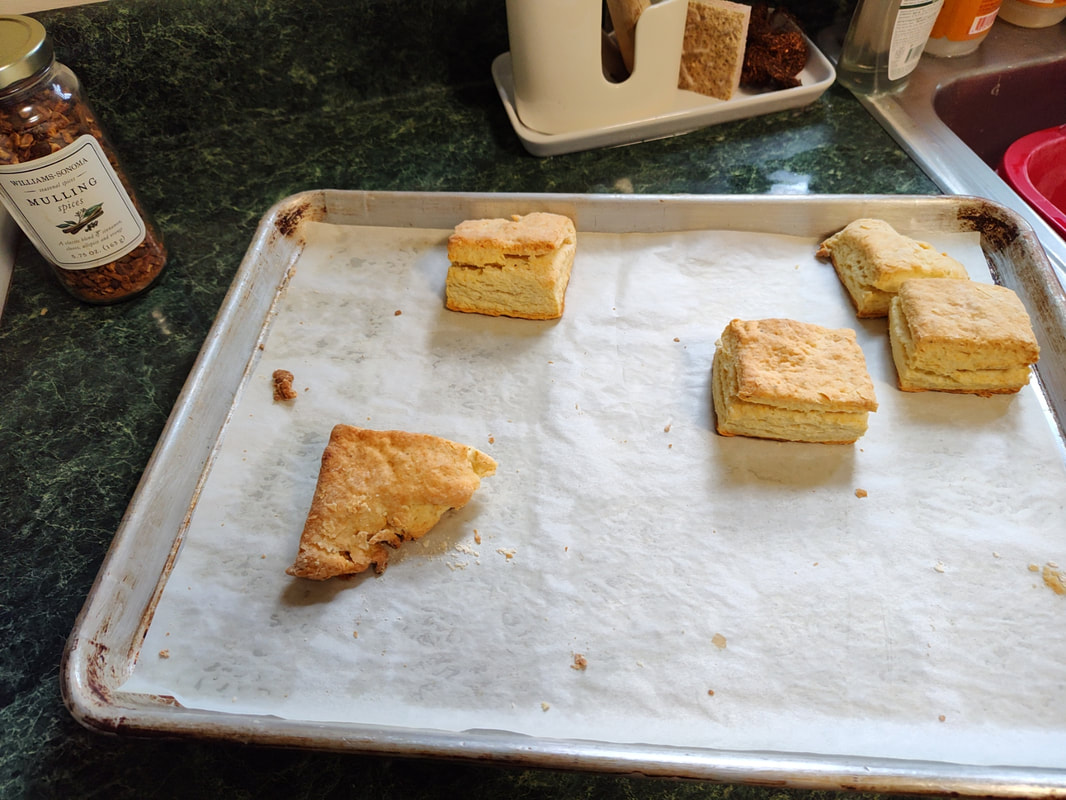 The remaining biscuits that didn't fit on the tray. Look at those lovely layers! Sage Cream BiscuitsI had thought about making scones for this tea party, but I don't have a reliable savory scones recipe, and since I was doing sandwiches, I thought biscuits would be better. This is an adaptation of my tried-and-true Dorie Greenspan cream biscuit recipe. It's almost fool-proof. This one is doubled. 4 cups of all-purpose flour 2 tablespoons baking powder 2 teaspoon sugar 1 1/2 teaspoons salt 1 heaping teaspoon dried sage (not ground) 2 1/2 cups heavy cream Preheat the oven to 425 F. Whisk all the dry ingredients together, and then add the heavy cream, tossing with a fork until most of the flour is absorbed. Knead gently with your hands (don't overwork!), then pour out onto a clean, floured work surface and knead, folding often, until it comes together. Pat into a large rectangle and cut into squares. Place on a parchment-lined baking sheet and bake 15-20 minutes or until golden brown. Serve warm, and to make the sandwiches, split the biscuits, butter them, and add sliced sharp cheddar cheese, a slice of pickled apple, and a few strands of pickled red onion. Top with more cheddar and the other half of the biscuit and devour. Serve with butternut squash and a side of dilly beans and mulled cider. 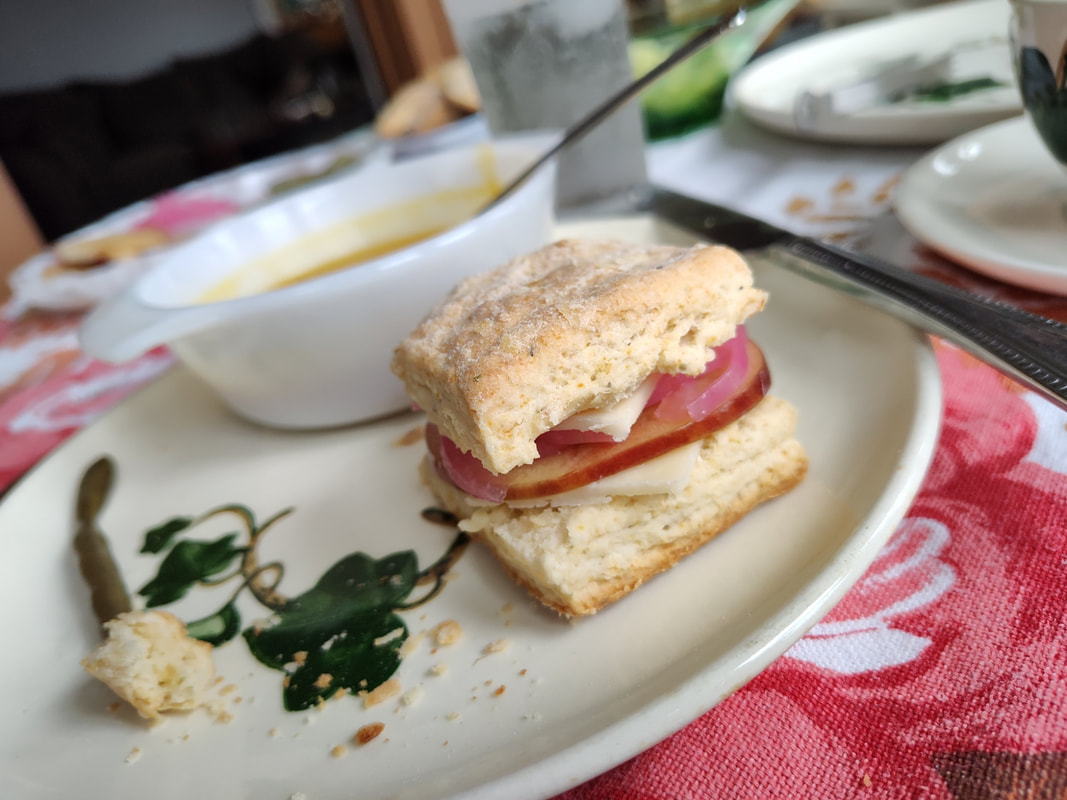 I may or may not have eaten three of these little sandwiches. I'll be following up with the recipe the apple blackberry crumble tomorrow, and the recipes for refrigerator dilly beans, pickled apples, and pickled onions will be available to patrons on my Patreon tomorrow as well. Do you like to have tea parties? What's your favorite autumnal food? The Food Historian blog is supported by patrons on Patreon! Patrons help keep blog posts like this one free and available to the public. Join us for awesome members-only content like free digitized cookbooks from my personal collection, e-newsletter, and even snail mail from time to time! Don't like Patreon? Leave a tip!  Dear Reader, I finally did it, and not in a good way. A few weeks ago I hosted a beautiful (albeit hot and humid) French Garden Party, a belated celebration of Bastille Day, for approximately 30 people. The decorations were gorgeous and the food was fabulous and I did not take a single. solitary. photograph. My consternation was extreme. My beautiful screen porch was set with tables dressed in blue and white striped linens. It was BYOB - bring your own baguette, and folks brought fancy cheeses to go with the goat cheese and paper-thin ham I provided. I made homemade mushroom walnut pate and TWO compound butters - fresh herb and garlic, and lemon caper. I made beautiful French salads: potato and green bean vinaigrette, lentils vinaigrette with shallot and parsley and a hint of fresh rosemary, cucumber with tarragon and sour cream, celery with black olives and anchovies, peach basil. We had honeydew melon and both sweet dark AND Queen Anne cherries. We had wine and spritzers a-plenty. A friend brought chocolate cream puffs. I made lemon pots de crème and earl grey madeleines. But the absolute star of the show was this chocolate mousse, which I flavored with rose water. And since I had one little glass pot left over from the party, I snapped a few photographs a few days later to give you the incredibly easy recipe so that you, too, may feature this glorious star, and have your guests talking about it for days afterwards (no really - they did). But course, I wouldn't be a food historian if I didn't give you a little context, and I was curious about the history of chocolate mousse, so here you go: A Brief History of Chocolate Mousse "Mousse au chocolat" recipe as it appears in "L'art de bien faire les glaces d'office..." (1768). Goodness there is a lot of nonsense out on the internet about chocolate mousse! Way, WAY, too many sources say it was invented by Toulouse Lautrec, and that it was called "mayonnaise de chocolat." People. Chocolate mousse dates back to at least the 18th century, if not earlier, so it was around long before Monsieur Lautrec. I did, to my surprise, find a couple of recipe references to "mayonnaise au chocolat." It sounds so ridiculous as to be fake, but this was apparently a real recipe, albeit a name I can only date to the 20th century. One recipe is from a 1909 French cookbook, which calls for melting chocolate with egg yolks and adding beaten egg whites, and offers a clue to the name: it says at the end to mix the egg whites and the chocolate mixture "like ordinary mayonnaise." A few references in the 1920s and '30s, and then where it was probably popularized in America - a reference from a 1940 issue of Gourmet magazine (not readable online, alas - if anyone tracks down a hard copy of the original, let me know!). Another recipe is from a 1951 French cookbook, with not very detailed directions. According to my translation, "mayonnaise au chocolat" mixes melted chocolate with egg yolks and a few tablespoons of cream which is then cooked and then mixed with egg whites (unclear whether or not they are beaten stiff or not, but likely yes) and chilled. Another is from the 1961 edition of Mastering the Art of French Cooking by Julia Child and Simone Beck, which has a recipe for "Moussline au Chocolat, Mayonnaise au Chocolat, Fondant au Chocolat" (yes, three names for the same recipe!) the subheading of which reads "Chocolate Mousse - a cold dessert." Mousseline is actually a sauce mixed with whipped cream (for instance, you can turn hollandaise sauce into a mousseline by adding whipped cream), whereas mousse is a thickened chilled dessert made with whipped cream. The Julia Child recipe conflates the two, and her recipe calls for an egg yolk cooked custard mixed with melted chocolate, with whipped egg whites folded in. It is then served with crème anglaise or whipped cream. So, none of these recipes are truly chocolate mousse, because the mixtures contain no whipped cream whatsoever. But Toulouse Lautrec and a crazy-to-Americans name like "chocolate mayonnaise" is so much more dramatic than doing actual historical research and looking at primary sources. SIGH. People. We can do better. The earliest references to "chocolate mousse" I could find date to 1687 and refer to the habit of Indigenous peoples in Central America of frothing their chocolate beverages with either a mollinio or by pouring them between cups. A habit which Europeans apparently adopted. A 1701 French dictionary continues the reference to frothy chocolate beverages in its definition of "mousser" or "to foam." The earliest reference I could find to the dessert mousse we know and love today comes from the 1768 French cookbook, "L'art de bien faire les glaces d'office ou les vrais principes pour congeier tous les rafraichissemens" or The Art of Making Ice Cream Well, or the True Principles for Freezing All Refreshments. And lest you think it is just about ice cream, the extremely long title adds, "Ave Un Traite Sur Les Mousses," or "With A Treatise On Mousses." Chocolate mousse (as pictured above) is simply one of dozens of mousse recipes listed, but the early versions are quite similar to the modern. Grate the chocolate and melt it in a saucepan over low heat, then add cream, little by little, to thin it down. Pass it through a sieve, sweeten it, and then let cool and whisk to a foam.
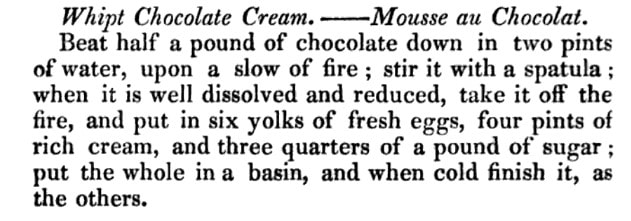
By the 19th century, we're adding egg yolks to make a smoother, more custard-y base, as you can see from this pair of recipes by early French restauranteur Antoine Beauvilliers, who published his 1814 "The Art of Cooking" as a French cookbook that became foundational to generations of French chefs and home cooks. English cooks, however, had access before that, judging by this 1812 recipe, which also called for egg yolks. We're still adding large amounts of whipped cream, though, keeping in classic mousse style. It took a bit longer for Americans to adapt to chocolate mousse, although they were prodigious chocolate drinkers, and certainly by the mid-19th century were consuming chocolate custards and ice creams. It wasn't really until (as far as I and the Food Timeline can tell) celebrity cookbook author and cooking school teacher Maria Parloa intervened that it got popular. The Food Timeline cites a 1892 article with Miss Maria Parloa lecturing on chocolate mousse, among other things, but I found a reference dating back to 1885 where she's lecturing on chocolate mousse in Buffalo, NY. However, it doesn't seem to be QUITE the same as we consider chocolate mousse today. Her 1887 recipe for it calls for freezing it like ice cream, albeit without stirring. Regardless of whether the recipe calls for egg yolks or not, or whether it's frozen or not, chocolate mousse in the modern style is easier to make than you'd think. Chocolate Rose Mousse Recipe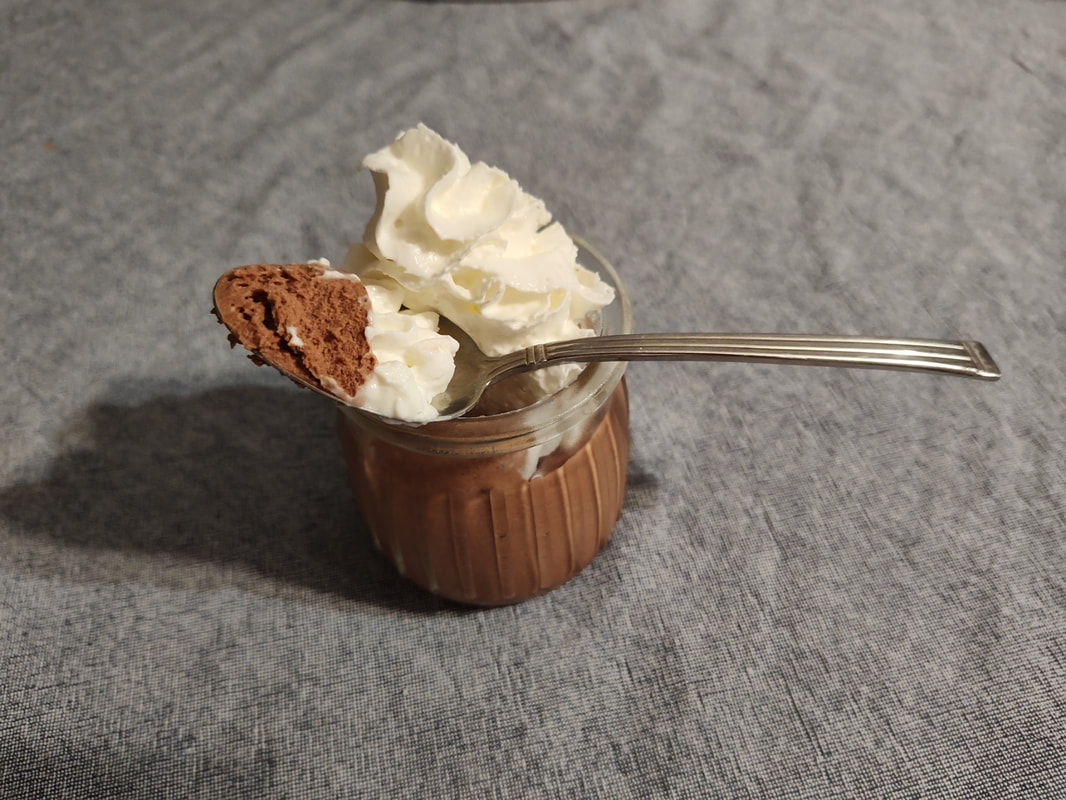 A French Garden Party called for something easy to prepare and delicious for dessert. Because it was a garden party, I decided on chocolate pots de crème or mousse flavored with rose fairly early on. I used to dislike floral flavors, but after making an Egyptian rosewater dessert last year, and trying Harney & Sons seriously divine Valentine's Day tea, which was chocolate black tea with rosebuds (affiliate link), I was smitten. After realizing how many eggs I'd go through making a triple batch of both lemon AND chocolate pots de crème, I decided to do just the lemon (15 pots) and do the rest as chocolate mousse (15 pots). I found these adorable little glass pots with covers on Amazon, should you care to purchase them yourself from this affiliate link. I adapted several recipes online, and since I didn't want to mess with steeping the cream with rosebuds or rose petals or any other options, I decided to go the less expensive and way easier rose water direction. Rose water is used frequently in Middle Eastern cooking, and is often less expensive in the "ethnic" section than in the spice aisle. In preparing for the party, in which I was attempting a brand new recipe, I didn't want to try to mess with egg yolks any more than I already had to with the lemon pots de crème (which turned out only okay). So the simple mixture of heavy cream, dark chocolate, and a little icing sugar seemed best. I then added rose water to taste, which turned out about perfect. Here's the reasonable-serving recipe, which I tripled to get 15 generous servings for the party. This makes more like 6 servings, 4 if you're being greedy. 1 1/2 cups heavy cream (I used a local dairy brand, which is richer than national brands) 1 cup high-quality dark chocolate chips (like Guittard) 1/4 cup powdered sugar 1 teaspoon rose water Heat a saucepan of water over medium heat, bringing it to a simmer. Place a heat-proof bowl (glass or metal) over the simmering water and add 3/4 cup heavy cream and the chocolate chips. Stir gently until the chocolate chips are completely melted. Remove from heat. In a large bowl, beat the remaining 3/4 cup heavy cream until you get soft peaks, then add the 1/4 cup powered sugar and beat until you get stiff peaks. Add the rose water and beat to combine. 1 teaspoon should be enough to stand up to the chocolate, but taste the whipped cream. The rose water should be present, but not overpowering. If faint, add another 1/2 teaspoon and beat again. Then, using a ladle, add approximately 1/3 cup of the cooled chocolate-cream mixture to your whipped cream, one ladle at a time, and gently fold to combine using a rubber spatula. To fold, use the spatula to cut down the center of the whipped cream mixture and scrape up from the bottom. Rotate the bowl slightly, and repeat the action, until the chocolate is incorporated. Add another ladle of chocolate and continue until you have folded in all of the chocolate without totally deflating the whipped cream. Spoon into small glass jars or custard cups and refrigerate until ready to serve. It was so gorgeous. Light but rich, with a subtle hint of rosewater, which added fascinating depths to the chocolate. Folks gobbled it all up, and it was by far the best dessert of the party. The one lonely little pot left allowed me to take the above photo the following day, so you're welcome! I didn't serve it with whipped cream during the party, and it's admittedly a little overkill, but it does look pretty. So now you have the recipe AND some history, plus some food history mythbusting! So do yourself a favor and go splurge on some high-quality ingredients and treat yourself and your loved ones to this easy and stunningly delicious dessert. To quote Julia, quoting the French, Bon Appetit! The Food Historian blog is supported by patrons on Patreon! Patrons help keep blog posts like this one free and available to the public. Join us for awesome members-only content like free digitized cookbooks from my personal collection, e-newsletter, and even snail mail from time to time! Don't like Patreon? Leave a tip!
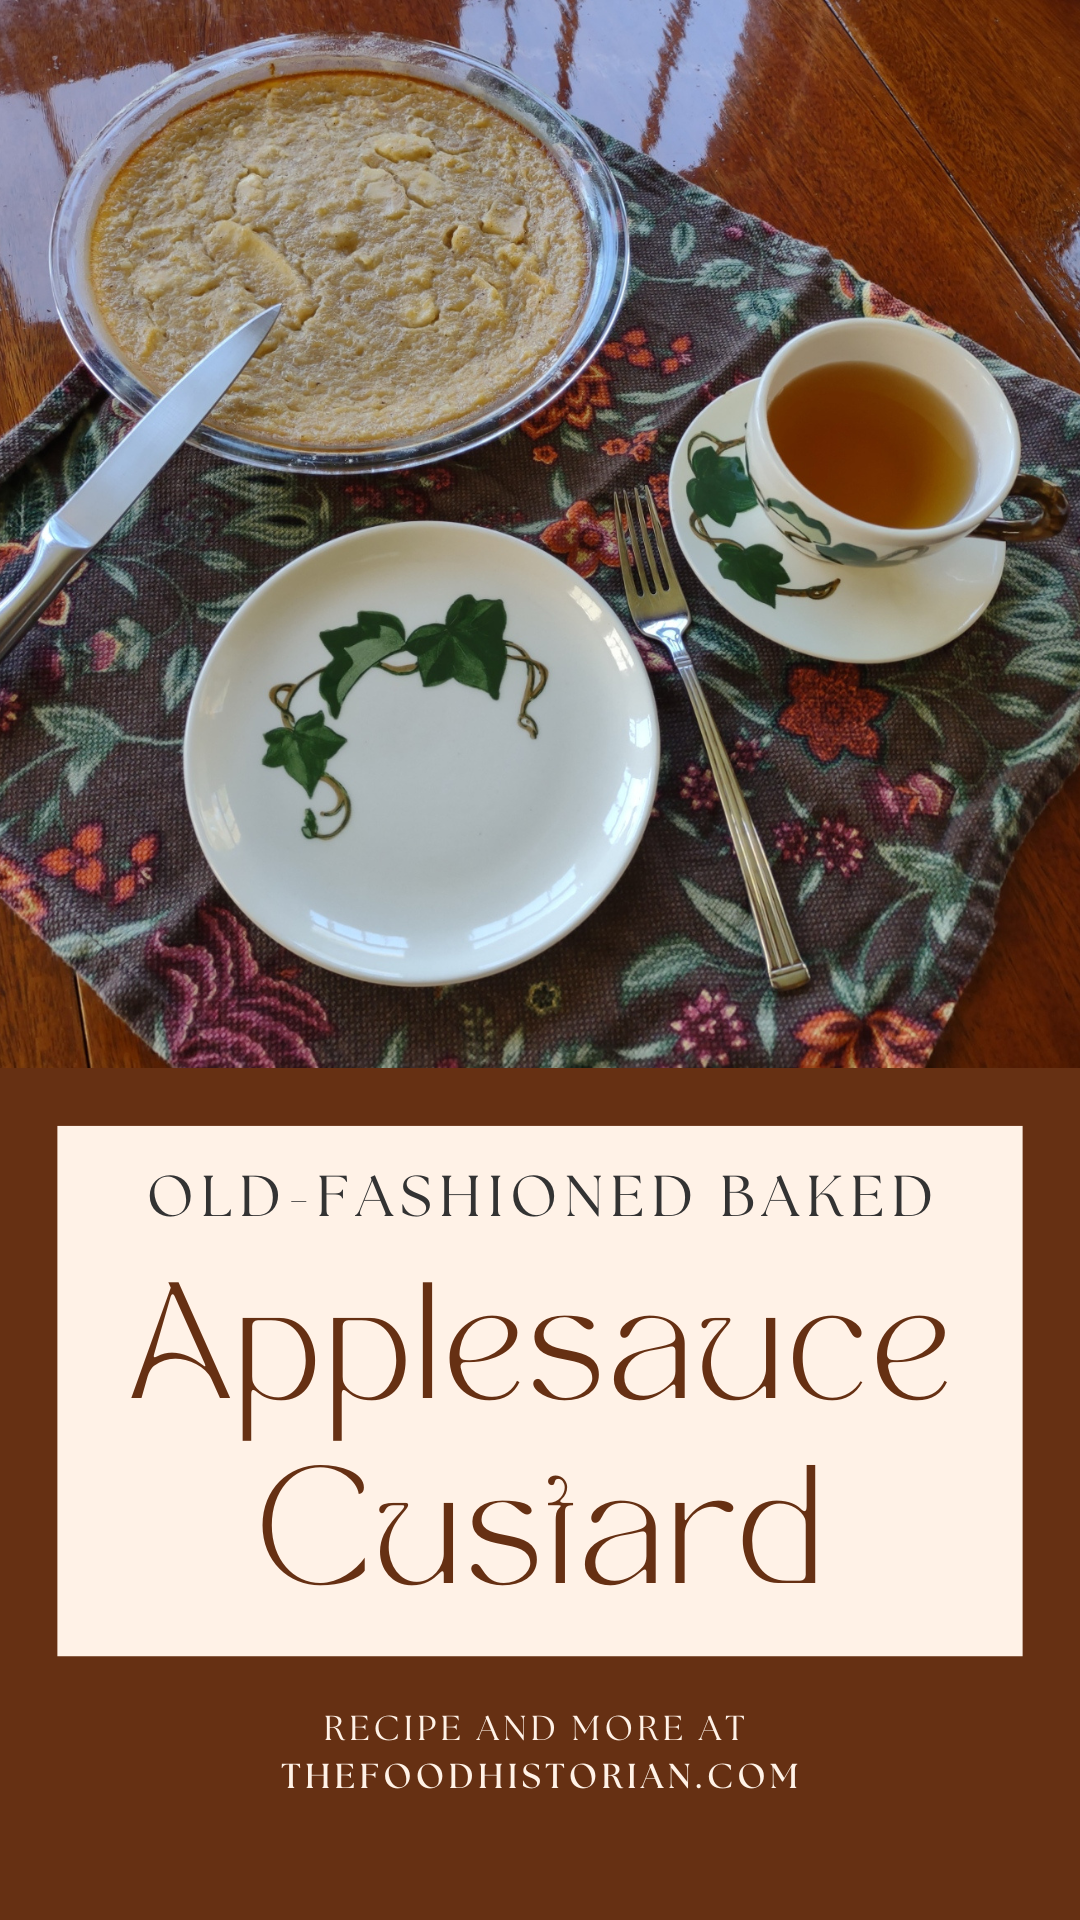 I call this old-fashioned baked applesauce custard because while it's not from a historic recipe, it does hearken back to several styles of historic recipes. Its antecedents are:
Apples plus dairy seem to be a recurring theme, and while apple crisp with ice cream and apple pie with whipped cream are a delight, I wanted to try something a little different. Enter, baked apple custard. As you may have noticed, I've been on an apple kick lately, and this custard just doesn't disappoint. I had most of a quart jar of homemade applesauce in my fridge that needed using up as I hadn't canned it, and it had been made over a week ago. If you leave applesauce in the fridge long enough, it will start to ferment! And I didn't want that work to go to waste. I also felt like cooking something a bit more dessert-y than just eating plain applesauce with a little maple syrup or cream. This recipe is a mash-up of two, mainly - an applesauce custard pie recipe, and crustless custards. It was an experiment that turned out eminently delightful. Old-Fashioned Baked Applesauce Custard Recipe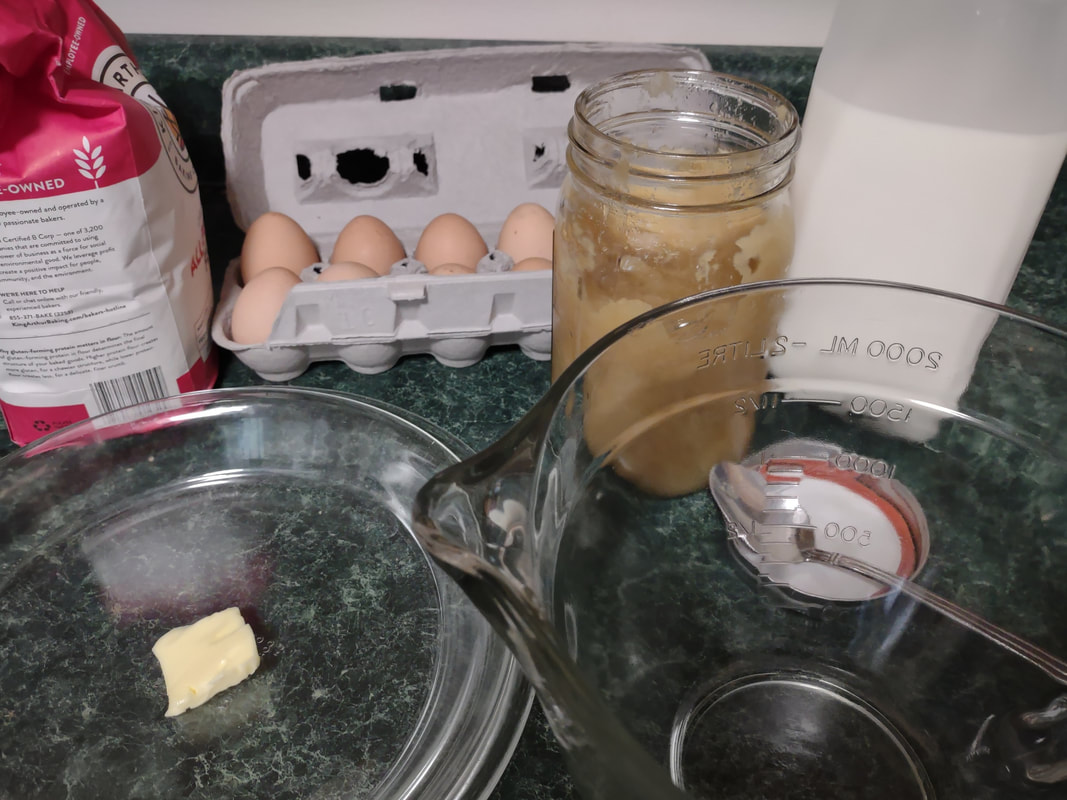 Most of the ingredients, flour, eggs, homemade applesauce, and milk. This recipe starts with a very simple applesauce recipe, although you can use unsweetened store-bought applesauce if you prefer. But I liked the chunky kind, like my mom used to make. Start with apples you like. Most modern dessert apples will not need sweetening. Peel them, quarter, and cut out the cores (I use a sharp paring knife to make a V-shape around the seeds, like my mom used to do). Slice them lengthwise into a pot and cook over medium-low heat, uncovered, stirring occasionally. If the apples seem dry, add two tablespoons of water to get them started. The bottom ones will cook into mush, and the ones closer to the top will stay firmer. If you prefer, you can mix cooking apples like McIntosh with a crisper apple like Honeycrisp or Gala to get the same result. I used a mixture of Gingergolds, Golden Supremes, and Winesaps - some of my favorite locally available apples. Once all the apples are fork-tender or sauce, et your applesauce cool fully, and you're ready to start the recipe. 2 eggs 1/3 cup sugar or maple syrup 1 tsp. cinnamon 1/4 teaspoon salt 2 tbsp. flour 1 cup milk 1 1/2 cups homemade, unsweetened applesauce Preheat the oven to 350 F. Grease a glass pie plate generously with butter, and flour it (sprinkle with flour and tap and rotate the pie plate to coat it with a thin layer of flour - discard any extra, or use it in the recipe). In a large bowl with a pouring spout, whisk the eggs, sugar, cinnamon, and salt together until well-combined. Add the flour and whisk well to prevent lumps. Then stir in milk and applesauce. Pour into the buttered and floured pie plate, and carefully place in the oven. Cook 30-40 minutes or until the center is set. The top will be sticky. Let it cool slightly and serve warm, or chill and serve cold. 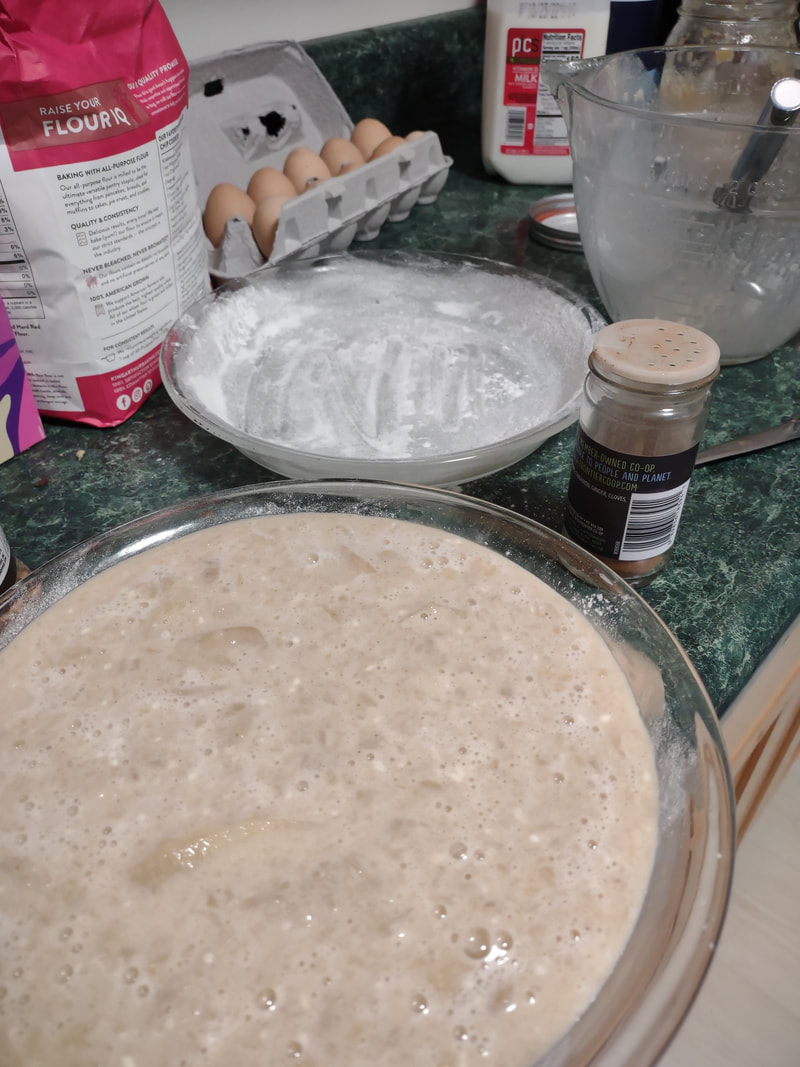 A slightly blurry pic of one pie plate filled with applesauce custard, another to go. Ignore the lumps of flour - I nearly forgot on the first one and added it last! Don't make my same mistake - the second version was better. This recipe is easy to double, like I did, but the high applesauce ratio means it's very soft and delicious, but it won't cut up into a nice, neat pie slices (as you'll see below). Better to make it in a pretty oval baking dish and serve with a large spoon instead of in slices. It doesn't need it, but add some whipped cream if you're so inclined. 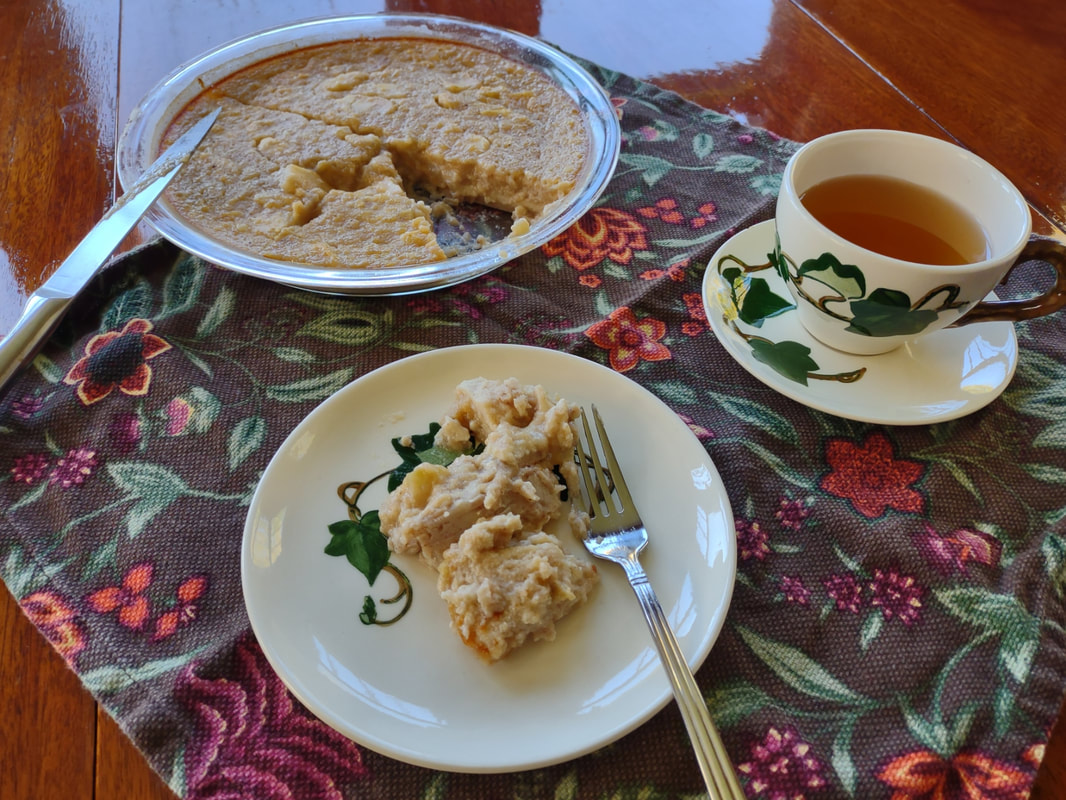 The first slice was kind of a mess, but delicious.  The second slice didn't come out any better. Oh well, it was so delicious it wasn't a hardship at all to eat another. Old-Fashioned Baked Applesauce Custard is simple and homey, creamy and delicious whether served warm or cold. It tastes of fall and childhood, and that particular poignant longing for a past or place you know never existed that seems so endemic to autumn. It's the perfect dish for that transition between fall and winter, when November gets misty and the blazing leaves turn brown, and the days get darker. Who needs the fuss of pie crust? It makes a perfect after-school snack, weekend breakfast, or comforting dessert after a long work day. It doesn't look like much, but you could gussie it up for Thanksgiving too, if you've a mind. And while it's almost certainly better with homemade sauce, it's probably pretty darned good with the store-bought kind, too. Happy eating, friends. The Food Historian blog is supported by patrons on Patreon! Patrons help keep blog posts like this one free and available to the public. Join us for awesome members-only content like free digitized cookbooks from my personal collection, e-newsletter, and even snail mail from time to time! Don't like Patreon? Leave a tip!  Advertisement for Sun-maid Raisins, c. 1918, one of several from this time period. This one features Indian pudding with raisins as the headline image. Public domain. I don't remember when I first encountered "Indian pudding." Derived from the Colonial name for cornmeal - "Indian meal" - it's an iconic dish of New England, though it isn't often made anymore. Combining Indigenous foodways, European cooking techniques, and molasses, a ubiquitous sweetener made cheap by the brutal labor of enslaved Africans, Indian pudding reflected the kind of stick-to-your-ribs cooking common in the Colonial period when people ate less frequently and engaged in harder labor, and with less access to heating than they do today. The above advertisement by Sun-maid Raisins from 1918 is a good illustration of this. "Note How Plain Foods Become Enticing," the ad reads, showing how Indian Pudding could be spiced up with raisins, and then goes on to show just how inexpensive raisins were. Historically, raisins were rather expensive, and had to be stoned (remove the seeds) by hand, a labor-intensive step that continued until the early 20th century. By the time Sun-maid is advertising in 1918, you no longer had to stone raisins - they came seedless. Clearly Sun-maid was trying to convince people that raisins were a more economical purchase than previously believed. Also, the use of Indian Pudding to illustrate the "plain foods" shows how it was viewed by most Americans at that time - plain, cheap, and filling. Indian pudding also fit nicely into rationing suggestions to use less sugar, refined white flour, and fats. With its ingredients of cornmeal and molasses, Indian pudding fit the bill. I first ran across a recipe for Apple Indian Pudding when researching the history of the Farm Cadets in New York State. The article right next to it was about the establishment of the Farm Cadet Corps under the State Military Training commission. Published in the Buffalo Evening News on April 19, 1917, just two weeks after the United States entered the war, it was included as part of a column called "Lucy Lincoln's Talks" and was one of many recipes. Although the United States Food Administration was not yet formed and no rationing recommendations had been issued, President Wilson had been publicly discussing the role of food in the war effort. Throughout the First World War, the United States Food Administration and home economists hearkened back to the Colonial period for several reasons. First, it appealed to Americans' sense of patriotism. Following the American Civil War, Northern reformers made a concerted effort to re-unite the nation and define what it meant to be American. Thanks to the unconscious bias of white supremacy, that idea became closely connected to New England and the mythology around the Pilgrims and the founding of the nation (despite the fact that Spanish Florida, Virginia, parts of Canada, and even New York had been settled earlier). Second, hearkening back to the Colonial period allowed ration supporters to encourage the substitution of non-rationed food items like cornmeal and molasses which had deep Colonial roots, for rationed foods like refined white flour and refined white sugar, which were needed for the war effort. Third, these ingredients were often very inexpensive. By connecting them to the honored founders of the country, food reformers could convince middle and upper class people to eat what may have been previously only associated with the poor and working class, in the name of patriotism. Despite the lack of actual rationing recommendations at this point, the recipe for Apple Indian Pudding would have fit very nicely into the requirements. It used cornmeal, which saved wheat. It used molasses and apples for sweetener, which saved sugar. It used two quarts of milk, which would help use up the milk surplus and add protein. It was also extremely inexpensive and filling, which meant it had appeal for folks on a budget or with large families. The recipe does, however, call for 1/3 cup of butter, which would become one of the recommended ration items in just a few months. Apple Indian Pudding Recipe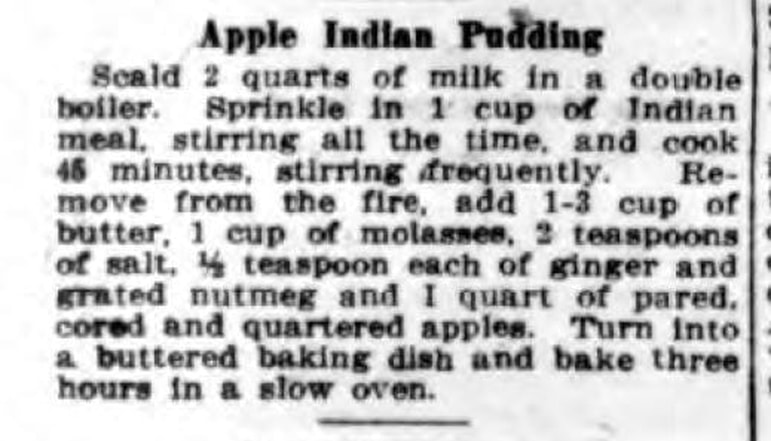 Recipe for Apple Indian Pudding, published in the "Buffalo Evening News," Buffalo, NY, on April 19, 1917. I have made Indian Pudding before for a talk, and it's lovelier than you'd think. Here's the original recipe: "Scald 2 quarts of milk in a double boiler. Sprinkle in 1 cup of Indian meal, stirring all the time, and cook 45 minutes, stirring frequently. Remove from the fire, add 1/3 cup of butter, 1 cup of molasses, 2 teaspoons of salt, 1/2 teaspoon each of ginger and grated nutmeg, and 1 quart of pared, cored, and quartered apples. Turn into a buttered baking dish and bake three hours in a slow oven." And here's a modern translation: 8 cups (or a half gallon) whole milk 1 cup cornmeal 1/3 cup butter 1 cup molasses 2 teaspoons salt 1/2 teaspoon ground ginger 1/2 teaspoon grated fresh nutmeg 3-4 apples Preheat the oven to 300 F. In a double boiler or heavy-bottomed pot, heat the milk, but do not boil. Once hot, slowly whisk in the cornmeal and cook, stirring frequently, for 30-45 mins or until the cornmeal is fully cooked and has absorbed the milk. Remove from heat and while hot, stir in the butter, molasses, salt, and spices. Peel, core, and slice the apples thickly. Stir the apple slices into the cornmeal mixture, and tip it all into a buttered glass or ceramic baking dish. Place in the oven and let bake for 3 hours, uncovered. Serve hot or warm plain (ration-friendly) or with vanilla ice cream or unsweetened liquid cream (not-so ration-friendly). Although the original recipe calls for quartered apples, most modern apples are very large, and a quarter might be too big, which is why I suggest slicing them instead. If you're in an area of the world that gets cold in the fall and winter, Apple Indian Pudding is the perfect, homey dessert to attempt on a day when you'll be puttering around the kitchen or the house all day. Pop some baked beans in with it if you really want a traditional New England supper (and a ration-friendly one!). It really does take three whole hours to bake (other versions included steaming like plum pudding), but the long, slow heat turns the normally crunchy cornmeal into melting softness. There's a reason why it's still so popular in New England. If you want to know more about the history of Indian Pudding, including how to make a historic recipe, check out my lecture below! The Food Historian blog is supported by patrons on Patreon! Patrons help keep blog posts like this one free and available to the public. Join us for awesome members-only content like free digitized cookbooks from my personal collection, e-newsletter, and even snail mail from time to time! Don't like Patreon? Leave a tip! Welcome to The Food Historian's 31 Days of Halloween extravaganza. Between social media (Facebook, Instagram, Twitter) and this blog, I'll be sharing vintage Halloween content nearly every day this month! 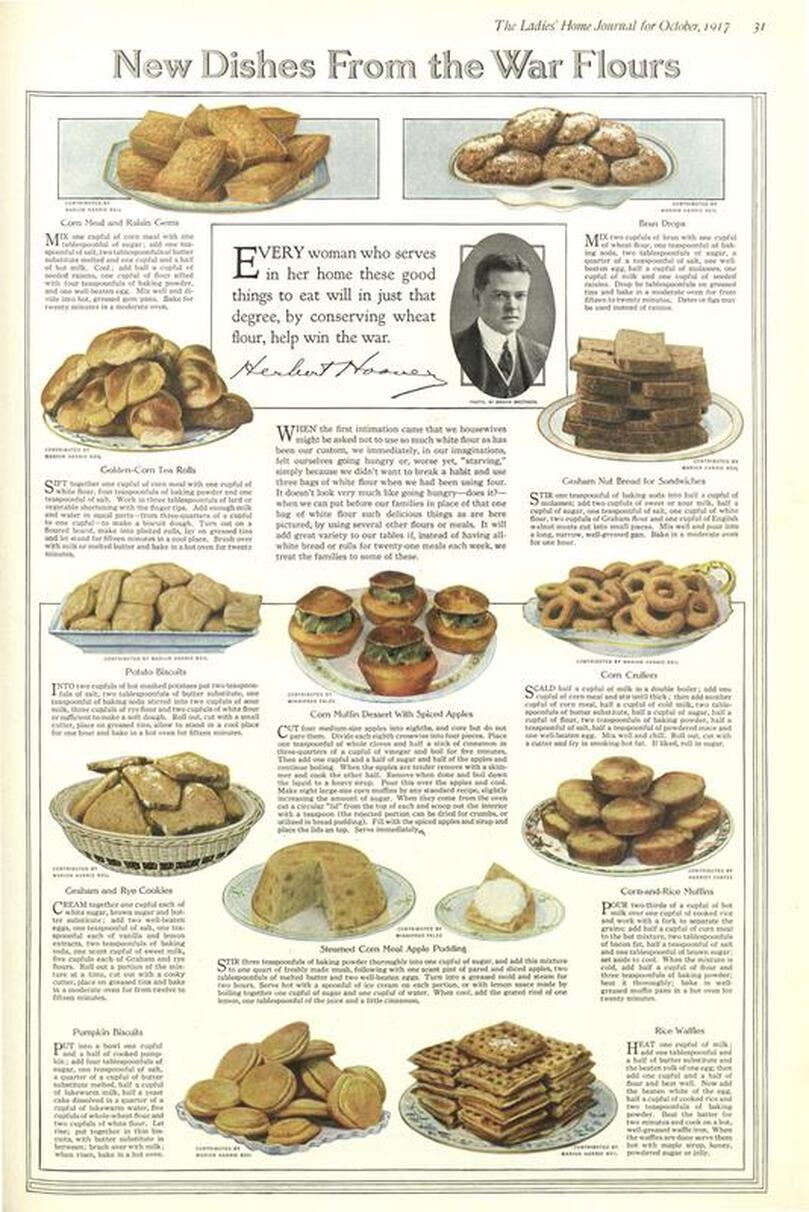 "New Dishes from War Flours" illustrated recipes from the "Ladies' Home Journal," October, 1917 issue. We're revisiting the October, 1917 issue of the Ladies' Home Journal this week with some very fall-ish recipes. The beautiful color plate featured in the magazine contains a number of recipes for baked goods using wheat substitute flours. Refined white flour was a shelf stable product necessary for the war effort to feed both American troops and our French, British, and Belgian allies. But the 1916 wheat harvest was poor throughout the Americas, and the United States joined the war in April, 1917 - too late to increase wheat crops for the year. Herbert Hoover, United States Food Administrator, asked Americans to voluntarily reduce their consumption of wheat (along with meat, fats, and sugar). This page of helpful recipes bears Hoover's portrait and purportedly a quote from him as well, reading "Every woman who serves in her home these good things to eat will, in just that degree, by conserving wheat flour, help win the war." Not the snappiest quote from Hoover, but the emphasis on using wheat substitutes, especially corn, were popular at the time. Although rationing was voluntary, not mandatory, many Americans tried to make their baking more patriotic and reduce their reliance on refined white flour. Because this is from 1917, we don't have mandatory sugar rationing, as we see by the fall of 1918. But cornmeal, rice, rye flour, graham flour (today sometimes called entire wheat flour - made from whole wheat berries and different from modern whole wheat flour, which is white flour with some wheat germ added back in), oatmeal and oat flour, and barley flour were all used to help reduce the reliance on white flour. Of them all, cornmeal and rice were the most plentiful. In the Halloween spirit, I've transcribed two of the most festive recipes on the list - the unimaginatively named "Corn Muffin Dessert with Spiced Apples" and "Pumpkin Biscuits." Enjoy these seasonal treats! Corn Muffin Dessert with Spiced Apples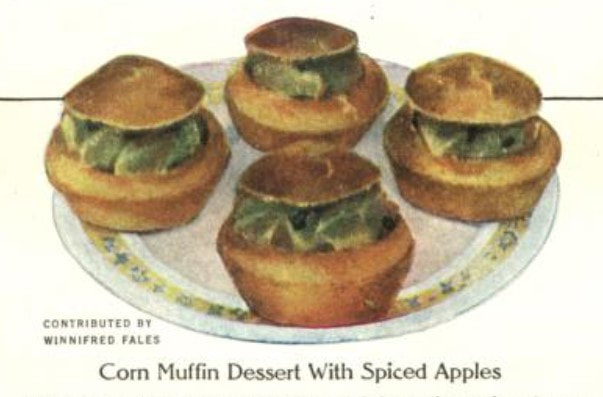 Cut four medium-size apples into eighths, and core but do not pare them. Divide each eighth crosswise into four pieces. Place one teaspoonful of whole cloves and half a stick of cinnamon in three-quarters of a cupful of vinegar and boil for five minutes. Then add one cupful and a half of sugar and half of the apples and continue boiling. When the apples are tender remove with a skimmer and cook the other half. Remove when done and boil down the liquid into a heavy sirup. Pour this over the apples and cool. Make eight large-size corn muffins by any standard recipe, slightly increasing the amount of sugar. When they come from the oven, cut a circular "lid" from the top of each and scoop out the interior with a teaspoon (the rejected portion can be dried for crumbs, or utilized in bread pudding). Fill with the spiced apples and sirup and place the lids on top. Serve immediately. My translation of the recipe: 4 apples 3/4 cup cider vinegar 1 teaspoon whole cloves half stick cinnamon 1 1/2 cup sugar 8 corn muffins (homemade or store bought) Cut the apples into quarters and then again in half to form eighths. Core, but leave skin on. Cut crosswise into thick slices. Bring the vinegar and spices to a boil and let boil for five minutes. Then add sugar, stirring well to dissolve. Add half the apples and cook until apples are tender (can be easily pierced with a fork or sharp knife). Remove to a dish with a slotted spoon, then add the remaining apples and cook until tender. Remove to dish and continue cooking spiced vinegar syrup until it is thick. Pour over apples and let cool. Cut tops from muffins and use spoon to carefully hollow out, leaving at least an inch of muffin on all sides. When apples are cool, spoon into muffin cases. Serve cold for dessert. Pumpkin Biscuits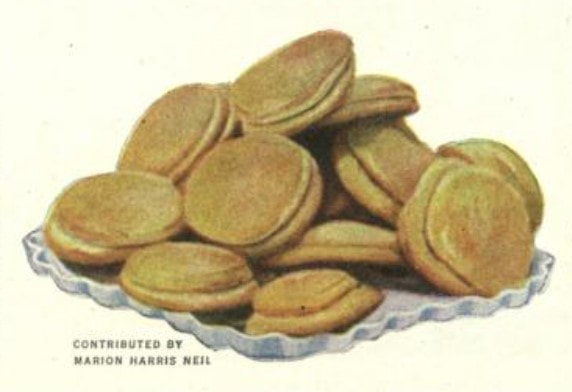 Put into a bowl one cupful and a half of cooked pumpkin; add four tablespoons of sugar, one teaspoonful of salt, a quart of a cupful of butter substitute melted, half a cupful of lukewarm milk, half a yeast cake dissolved in a quarter of a cupful of lukewarm water, five cupfuls of whole-wheat flour and two cupfuls of white flour. Let rise; put together in thin biscuits, with butter substitute in between; brush over with milk; when risen, bake in hot oven. An here's my modern translation: 1 1/2 cups pureed pumpkin (or 1 can) 4 tablespoons sugar 1 teaspoon salt 1/4 cup (half a stick) butter or margarine, melted 1/2 cup milk, warmed 1/2 teaspoon active dry yeast 1/4 cup lukewarm water 5 cups whole wheat flour 2 cups white flour. Mix pumpkin, sugar, salt, melted butter, and milk. In a separate bowl bloom yeast in warm water - if it foams it is ready to use. Add to pumpkin mix, then add flour gradually (start with white flour). Knead well. Cover and let rise in a warm place. When doubled in bulk, punch down and roll out thin. Cut into rounds with biscuit cutter. Spread one round with softened butter or margarine, then stick another round on top. Brush top round with milk. Preheat oven to 425 F. Let rise again, then bake in hot oven, 12-15 minutes or until golden brown. What do you think? Would you try either of these recipes? The Food Historian blog is supported by patrons on Patreon! Patrons help keep blog posts like this one free and available to the public. Join us for awesome members-only content like free digitized cookbooks from my personal collection, e-newsletter, and even snail mail from time to time! Don't like Patreon? Leave a tip! Welcome to The Food Historian's 31 Days of Halloween extravaganza. Between social media (Facebook, Instagram, Twitter) and this blog, I'll be sharing vintage Halloween content nearly every day this month!  Pop culture these days seems dominated by arguments over whether or not the pumpkin spice latte (or PSL) is "basic" or not, whether or not enjoying pumpkin spice flavored things can only happen during the few short months of autumn, and whether "fall creep" plays a role in "ruining" some people's summers. But have you ever wondered WHY we eat pumpkin pie spice - and other sweet spices - mostly in the fall? Pumpkin pie spice is a mixture of sweet spices - cinnamon, nutmeg, ginger, and either cloves and/or allspice. With the exception of allspice, all of these spices are native to Southeast Asia, especially the so-called "Spice Islands," more commonly known as the Maluku Islands (or Molucca Islands) near Indonesia, where nutmeg trees (which also provide mace) and clove trees originated. Cinnamon is native to Sri Lanka, and ginger is native to Maritime Southeast Asia. Allspice is also a plant of the tropics, native to the Caribbean and Central Mexico. So why do we so strongly associate these flavors with cold fall and winter months in the Northern hemisphere? A Brief History of the Spice Trade This map of the Moluccas Islands was published in 1630 by Willem Jansz. Blaeu (1571-1638). This map clearly shows that very little was known at the time about the Indonesian Archipel. The map shows the islands close together though in reality they are often thousands of miles apart. From the collections of the Koninklijke Bibliotheek. As with many things, it all has to do with money. Prior to the 16th century, all of these spices were available in Europe traveling via trade routes across Asia. Chinese and Arab traders traveled overland via the Silk Road or on ships from the Red Sea across the Indian Ocean. Cinnamon, ginger, and black pepper (native to the Malabar coast of India) were all known in Europe as far back as Ancient Rome. For centuries, Venice controlled much of the flow of spices into Europe, and the wealth gained by the spice trade may have helped spark the Renaissance. But when the Ottoman Empire wrested control of the spice trade from Europeans in 1453, things changed. European nations, spurred by improvements in naval technology, started to search for their own routes to control the lucrative spice trade. Indeed, most of the European "explorers" who ended up in the Americas were searching for a shortcut to Asia and a way to bypass the control of the Muslim Ottoman Empire and cut out the middleman altogether, ensuring massive profits. Instead of dealing with existing trade relationships, as Asian and Arab traders had for centuries, Europeans simply took what they wanted by force. The Dutch were particularly violent as they tried to take control of the Spice Islands through genocide and enslavement. Even after the plants that produced these valuable spices were successfully propagated outside their native habitats, the plantations which grew them commercially were often owned by foreign Europeans and also used enslaved labor to produce the spices more cheaply than ever. Like sugar and chocolate, the plantation economy allowed spices to be produced in massive quantities quite cheaply. The flavors that were once the purview only of wealth European aristocrats were, by the end of the 18th century, much more widely affordable by ordinary people. By the middle of the 19th century, ginger, cinnamon, nutmeg, mace, and cloves (along with sugar and cocoa) were positively common. Which is why foods like gingerbread cake, spice cake, and spiced pumpkin and apple pies became such indelible parts of American food history. But why the association with fall? In European cuisine, the most expensive foods were served around special feast days, like Christmas and Twelfth Night. Fruit cakes were rich in spices, spices flavored custards and puddings, and cookies flavored with ginger, cinnamon, mace, nutmeg, and cloves were all staples of the winter holidays. As spices became less expensive over time, they were used in other applications, but their association with the holidays - and cold weather - continued. In the United States, Americans flavored the prolific native squash with the now-familiar mixture of spices in a smooth custard pie. Pumpkin pie was born. Creating "Pumpkin Pie Spice"The name "pumpkin pie spice" refers to the mix of spices used to flavor pumpkin pies - among other things. Sadly, the mix itself contains no actual pumpkin, which is quite confusing when it is used as a flavoring agent sans pumpkin. Developed to flavor the smooth squash custards in a flaky crust we've all come to associate with Thanksgiving, the mixture of sweet, exotic spices was extremely popular. But as the 19th century turned to the 20th, the idea of hand grinding whole spices in a mortar and pestle was not only time-consuming, it threatened the use of spices altogether. Spice and extract companies like McCormick had been around since the late 19th century, but the 20th century brought a whole host of other companies to the scene, especially post WWII. The spice mix itself was commercialized first during the early 20th century, as spice and flavorings companies brainstormed ways to make baking easier and more economical for customers. 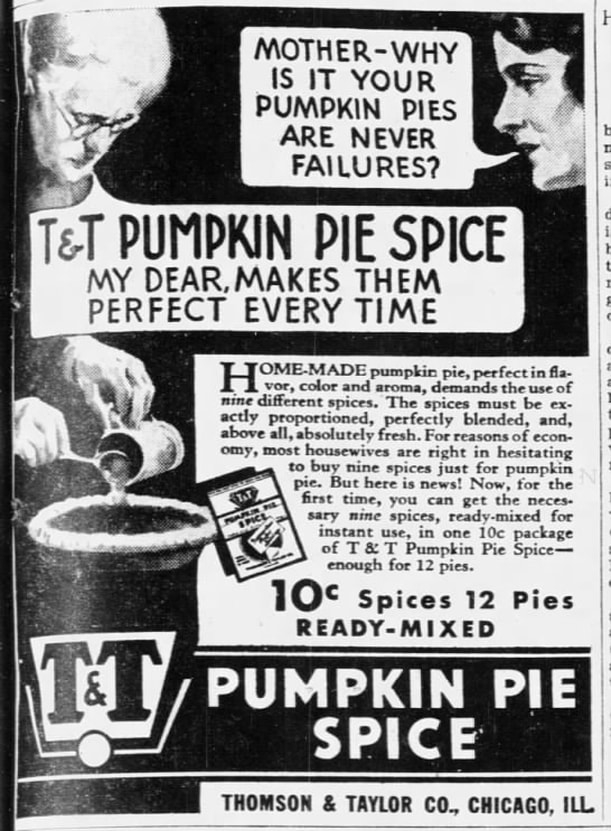 Advertisement for T&T Pumpkin Pie Spice, from the St. Louis Post-Dispatch, October 13, 1933. Thompson & Taylor spice company was the first to create "ready-mixed pumpkin pie spice." The above advertisement, first published in 1933, features a woman asking an older woman with glasses "Mother - Why is it your pumpkin pies are never failures?" The older woman, who is spooning something into a pie crust, answers, "T&T Pumpkin Pie Spice my dear, makes them perfect every time." The advertisement goes on to read, "Home-made pumpkin pie, perfect in flavor, color and aroma, demands the use of nine different spices. The spices must be exactly proportioned, perfectly blended, and, above all, absolutely fresh. For reasons of economy, most housewives are right in hesitating to buy nine spices just for pumpkin pie. But here is news! Now, for the fist time, you can get the necessary nine spices, ready-mixed for instant use, in one 10c package of T&T Pumpkin Pie Spice - enough for 12 pies." Of course, they don't want to tell you what those nine spices are! But likely it was a mixture of cinnamon, ginger, nutmeg, allspice, and cloves, and perhaps also mace, cardamom, star anise, and black pepper. 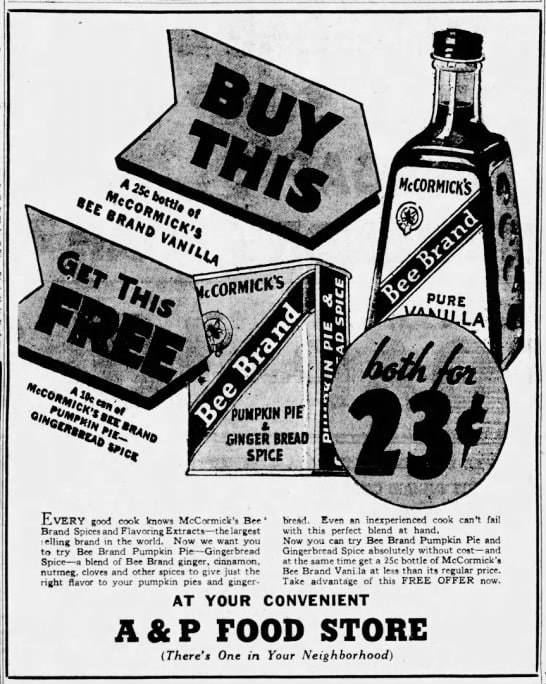 Newspaper advertisement for McCormick's “Pumpkin Pie & Gingerbread Spice” The Evening Sun, Baltimore, Maryland, November 14, 1935. Two years later, McCormick advertised their own "Pumpkin Pie & Ginger Bread Spice," a blend of "ginger, cinnamon, nutmeg, cloves and other spices." I love that it is advertised as good for both pumpkin pie and gingerbread. Although we often associate gingerbread with Christmas, it was also often served at Halloween and throughout the colder months. As canned pumpkin grew in popularity in the 20th century, other pumpkin desserts were also developed to use the same spice profile, including pumpkin spice cake. 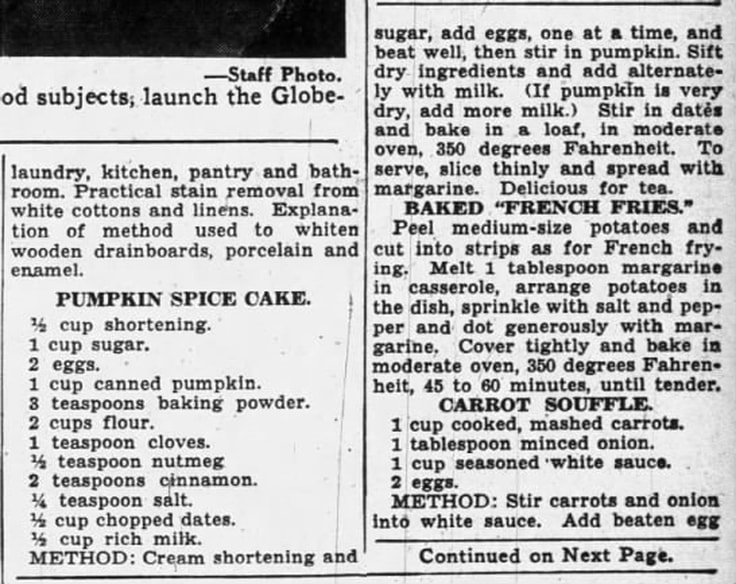 Recipe for Pumpkin Spice Cake, "St. Louis Dispatch," November 20, 1935. Here's the recipe as written in the St. Louis Dispatch. Feel free to substitute shortening (and the margarine!) for butter. Pumpkin Spice Cake 1/2 cup shortening 1 cup sugar 2 eggs 1 cup canned pumpkin 3 teaspoons baking powder 2 cups flour 1 teaspoon cloves 1/2 teaspoon nutmeg 2 teaspoons cinnamon 1/4 teaspoon salt 1/2 cup chopped dates 1/2 cup rich milk METHOD: Cream shortening and sugar, add eggs, one at a time, and beat well, then stir in pumpkin. Sift dry ingredients and add alternately with milk. (If pumpkin is very dry, add more milk.) Stir in dates and bake in a loaf, in a moderate oven, 350 degrees Fahrenheit. To serve, slice thinly and spread with margarine. Delicious for tea. Spiced pumpkin foods were largely relegated to desserts for most of the 20th century - pumpkin bars, cakes, muffins, and cookies were all popular, especially after the Second World War. But we weren't at peak pumpkin spice saturation just yet. Enter, the Pumpkin Spice Latte. The Pumpkin Spice Latte and Beyond Founded in 1971 near Pike Place Market in Seattle, Washington, Starbucks originally started as a whole bean coffee company. But the specialty coffee business caught on in the dot com boom of the 1990s and franchises spread all over the country. In the 1980s, Starbucks had developed the popular holiday eggnog latte. The addition of a peppermint mocha in the early 2000s piqued corporate interest in specialty holiday drinks available for a limited time. They trialed a variety of drinks with focus groups, and the pumpkin spice latte was the surprise favorite. Released in 2003, it became a national phenomenon that only grew with time. Starbucks was not the first to develop a pumpkin spice flavored latte, but they certainly popularized it. Nowadays September and October bring the onset of just about everything pumpkin spice flavored, regardless of the weather conditions where you live. And that's the weird thing about pumpkin spice - today it is totally divorced from its geography and history. Born in the tropics, the product of genocide, enslavement, and greed, and associated for centuries with wealth and holidays, today it represents shorthand for a near-fictional concept of autumn that most Americans don't experience. Even in stereotypical New England, where pumpkin pie spice was arguably born, climate change is making autumn shorter and warmer. I'm all for letting people love what they love, and PSL and pumpkin spice are no different. I love a good spiced pumpkin dessert, don't get me wrong. But for all the fuss about pumpkin spice, I'm an apple cider girl myself. Just don't tell Starbucks or the people who seem to think everything from breakfast cereals to hand soap should be flavored with pumpkin spice. What do you think? Are you a fan of pumpkin spice? Tell me how you really feel in the comments! And if you want to learn more about the history of pumpkin pie, check out my talk "As American As Pumpkin Pie: From Colonial New England to PSL" - available on YouTube. The Food Historian blog is supported by patrons on Patreon! Patrons help keep blog posts like this one free and available to the public. Join us for awesome members-only content like free digitized cookbooks from my personal collection, e-newsletter, and even snail mail from time to time! Don't like Patreon? Leave a tip! 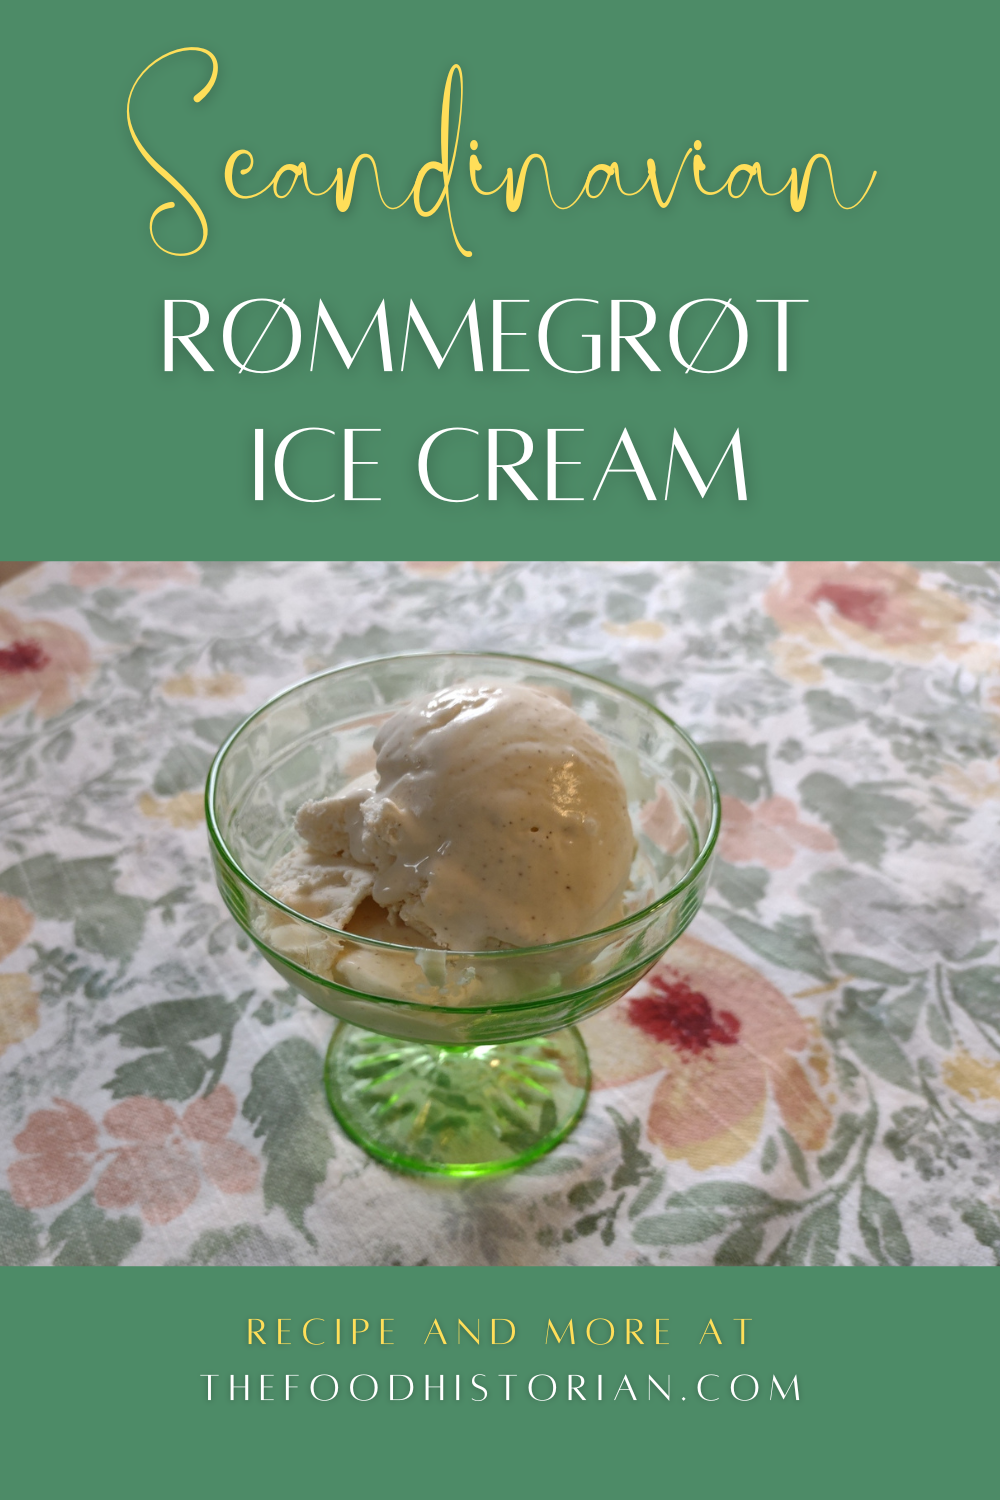 I can take zero credit for coming up with this genius recipe. That 100% goes to Nevada and her North Wild Kitchen, which is where I first found her recipe for rømmegrøt ice cream. You may be asking yourself, what on earth is rømmegrøt? Rømmegrøt is a traditional Norwegian porridge made from flour and heavy cream, usually served with cinnamon and sugar at Christmastime. The term rømmegrøt means "sour cream porridge," and in Norway the traditional recipe often calls for a mixture of sour cream and milk. But for whatever reason, here in the States, it is almost exclusively made with plain heavy cream. Interestingly, as far as I can tell, the taste is not particularly different, because this ice cream is made with sour cream and it tastes exactly like the rømmegrøt I grew up eating. (If you're interested in the original rømmegrøt, check out my patrons-only post on Patreon, complete with a recipe!) The "real" rømmegrøt is incredibly rich. The flour makes for a smooth, creamy pudding-like texture and as it cooks with the heavy cream it "splits" and "makes" its own melted butter sauce as the flour binds to the dairy proteins in the heavy cream. Historically its richness made it the perfect food for winter holidays, which is why it is so often associated with Christmas. This is also perhaps why soured cream was used, instead of fresh. Cows generally stop producing milk once their offspring are weaned, so winter is the time a lot of cows would "dry up" until they got pregnant again. If a family only had one cow, it would be impossible to get fresh dairy year-round. Rømmegrøt is also a traditional dish for new mothers - the rich but easily digested food helped them recover from the trauma of childbirth, and ensured they got enough calories to keep their babies well-fed. But while this food is, indeed, delicious, eating a rich, stick-to-your-ribs dish in the summer heat is not exactly appealing. Enter the genius rømmegrøt ice cream. Any purchases from links below will result in a small commission for The Food Historian. Rømmegrøt Ice CreamI'm giving you this recipe because although Nevada's North Wild Kitchen recipe is marvelous, I tweaked hers just a little. Fair warning that you will need an ice cream maker for this one. (We got this one as a wedding present and love it.) 12 ounces full fat dairy sour cream (1/2 of a 24 ounce carton) 1 1/2 cups heavy cream 3/4 cup granulated sugar 1/2 teaspoon ground cinnamon In a pourable container, mix all ingredients and whisk well to combine (you could stop at this point and just eat the pourable mix with a spoon, and I always lick the bowl). Pour into the ice cream maker and start. When the ice cream is no longer turning over in the maker, it's pretty much done. You can pack it into a freezer container (these are nice) or serve immediately. Rømmegrøt ice cream has a tangy sweet flavor and including the cinnamon in the ice cream makes all the difference, for me. You can eat it on its own, but it also pairs well with apple pie or crisp, blueberry, blackberry, rhubarb, or strawberry desserts, and gingerbread. I had originally intended to make a big strawberry rhubarb crisp for the party to go with this ice cream, but ran out of time. And since I made two batches of rømmegrøt ice cream in advance, it almost got forgotten altogether! I pulled it out last minute for anyone who had room for a little more dessert. While everyone enjoyed it, I think I was the only one who had ever tasted rømmegrøt before, so perhaps it's slightly less of a delight without the taste memories to work with. I guess this just means I'll have to throw a Scandinavian Christmas party to introduce everyone to the joys of original rømmegrøt! 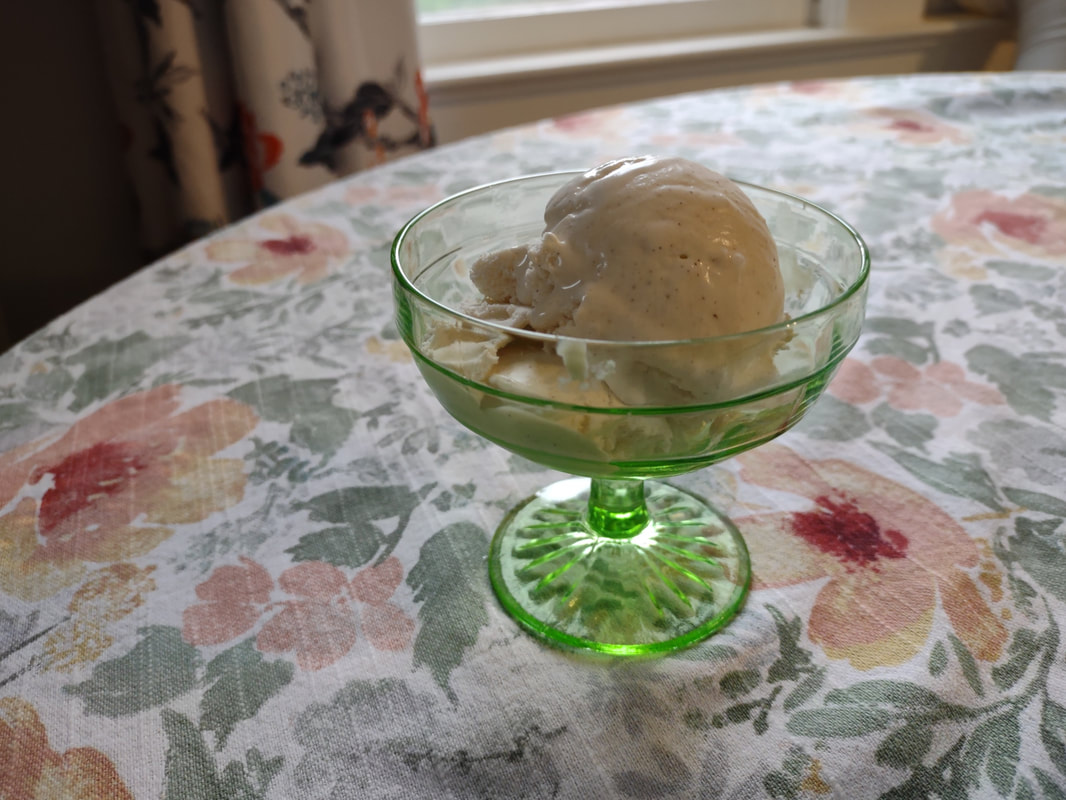 A lonely little vintage green uranium glass sherbet cup of rømmegrøt ice cream. Not quite forgotten! And so delicious. The Food Historian blog is supported by patrons on Patreon! Patrons help keep blog posts like this one free and available to the public. Join us for awesome members-only content like free digitized cookbooks from my personal collection, e-newsletter, and even snail mail from time to time! Don't like Patreon? Leave a tip! 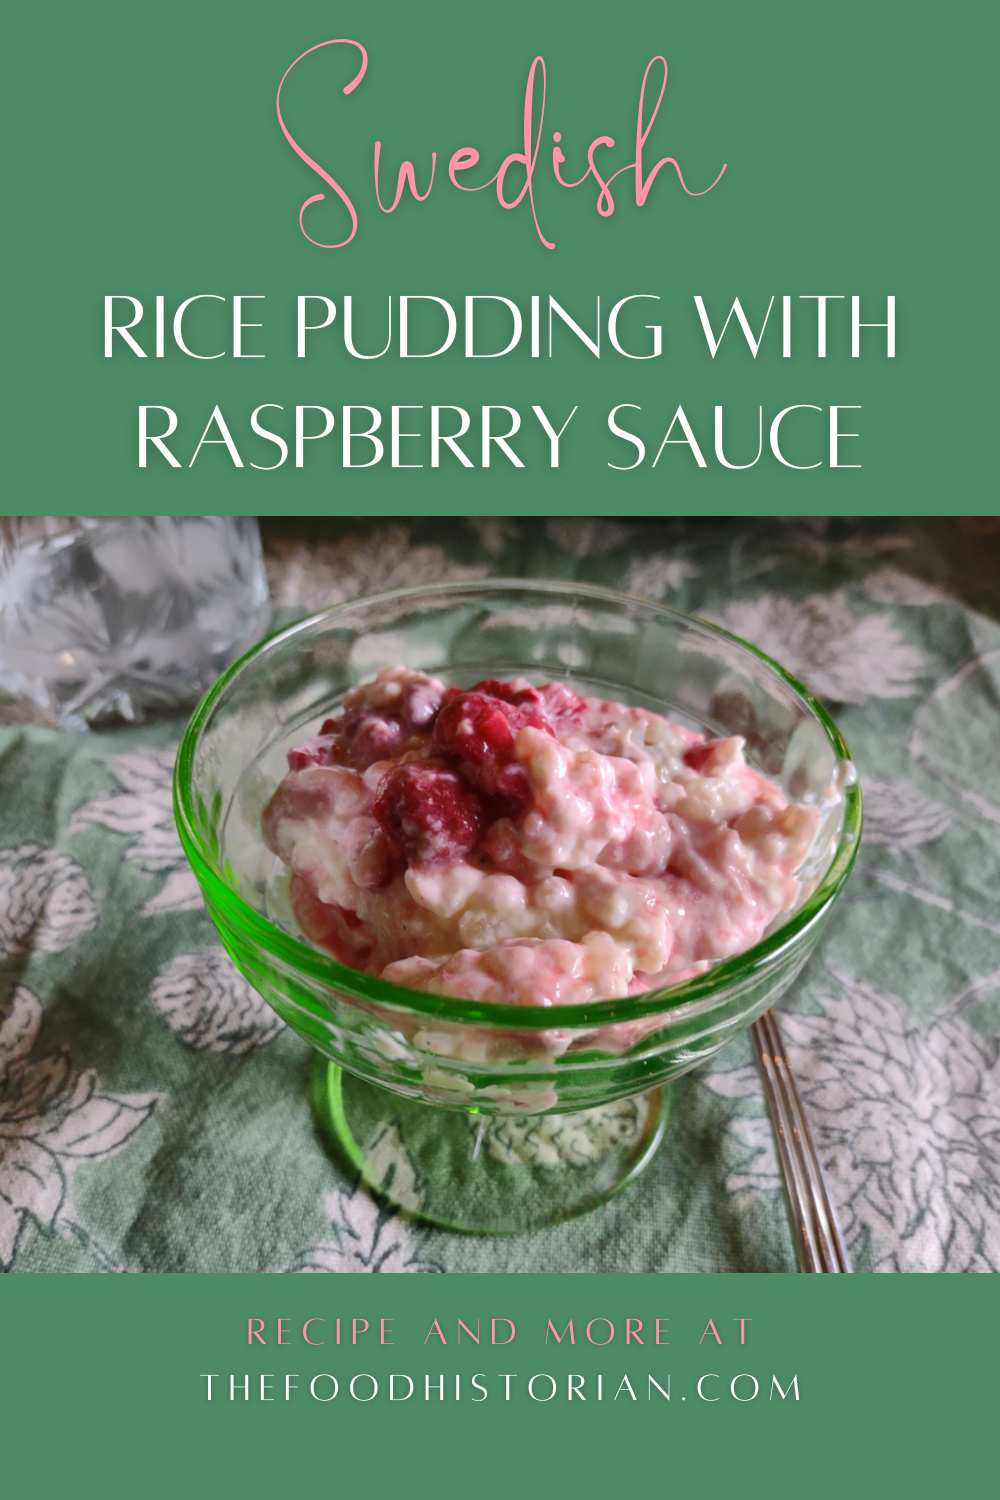 Nothing says midsummer to me like creamy, cold, Swedish rice pudding with raspberry sauce on top, so I knew this had to be one of the desserts I made for my Scandinavian Midsummer Porch Party, as it's one of my favorite desserts. Rice pudding is very typically a Scandinavian Christmas dish, but I grew up eating it much more often at midsummer than any other time of year. Our local Swedish Society would always make vats of it (and still does!) for the Scandinavian Festival in my hometown every year. Although I've been offered it in the past, I sadly don't have that original recipe! So I did the best I could doctoring up my favorite recipe for rice pudding, and it turned out better than I imagined, so I'm not sure I'll ever go back. Scandinavia has a long history of porridge - grains cooked in water or milk - and the stick-to-your-ribs-ness of porridge spills over into holiday traditions. Christmas was an especially important time to consume a lot of calories, not only to celebrate, but to keep warm. But rice is not native to Scandinavia, so what gives? This article gives a great overview of the history of Christmas rice pudding in Scandinavia in general, but suffice to say that, like most European Christmas traditions, it all goes back to the Medieval period and expensive imports from the Far East. Rice replaced locally grown grains like barley and its relative expense and scarcity joined other imported goods like cinnamon (and ginger, black pepper, and cardamom), sugar, raisins, and almonds supplemented by butter, cream, and milk to make up the bulk of holiday ingredients for what are now traditional Scandinavian treats. As Swedes got wealthier and rice and sugar got cheaper and more widely available, rice pudding became more of a year-round treat. In the Midwest, you're more likely to find people with memories of eating "glorified rice" (basically a rice and cool whip "salad" with canned fruit, especially maraschino cherries) outside of the holidays than cold rice pudding. But although I also loved glorified rice growing up, it is the taste of creamy, cold, eggless rice pudding topped with sweet-tart raspberry sauce that brings back so many fond memories. It doesn't hurt that it's absolutely delicious. Swedish Rice Pudding with Raspberry SauceThis is a very straightforward recipe, with just a few changes from my original version. I also did 1.5 times the original recipe, as I knew I was serving a crowd. We still had quite a bit leftover, but I didn't mind in the least, and the leftovers disappeared after just a few days. 1 1/2 cups arborio rice (also known as "pudding rice" or "risotto rice") 9 cups whole milk 3/4 cup sugar 1 cup golden raisins 1 cinnamon stick 1+ cups heavy cream 1 bag frozen raspberries, thawed sugar In a large, heavy-bottomed pot, combine the rice, sugar, raisins, cinnamon stick, and milk, and give it a stir to make the rice separate. Bring the pot to a near-boil (the milk goes from flat to boiling over in an instant, so keep an eye on it!), stirring occasionally to keep it from sticking/burning, then reduce the heat to a low simmer and continue to cook, stirring occasionally at first and more frequently later on until most of the milk is absorbed and the remaining liquid has thickened into a sauce. Because you want to serve this chilled, leave it to be fairly soupy, as the rice will continue to absorb liquid as it cools. Once the pudding is cool and you are ready to serve it, add the now very-thick rice pudding to a very large bowl (I used one closer in size to a punch bowl than a mixing bowl) and with a wooden spoon stir in heavy cream until the rice pudding is soft and creamy again. Open the bag of raspberries and add a few tablespoons of sugar and stir to combine. You can do this before you add the heavy cream to the rice pudding so that the thawed raspberries have time to macerate in the sugar. When ready to serve, top the extra-creamy rice pudding with the raspberries and devour. You probably won't have the same memories I do, but your tastebuds will thank you. 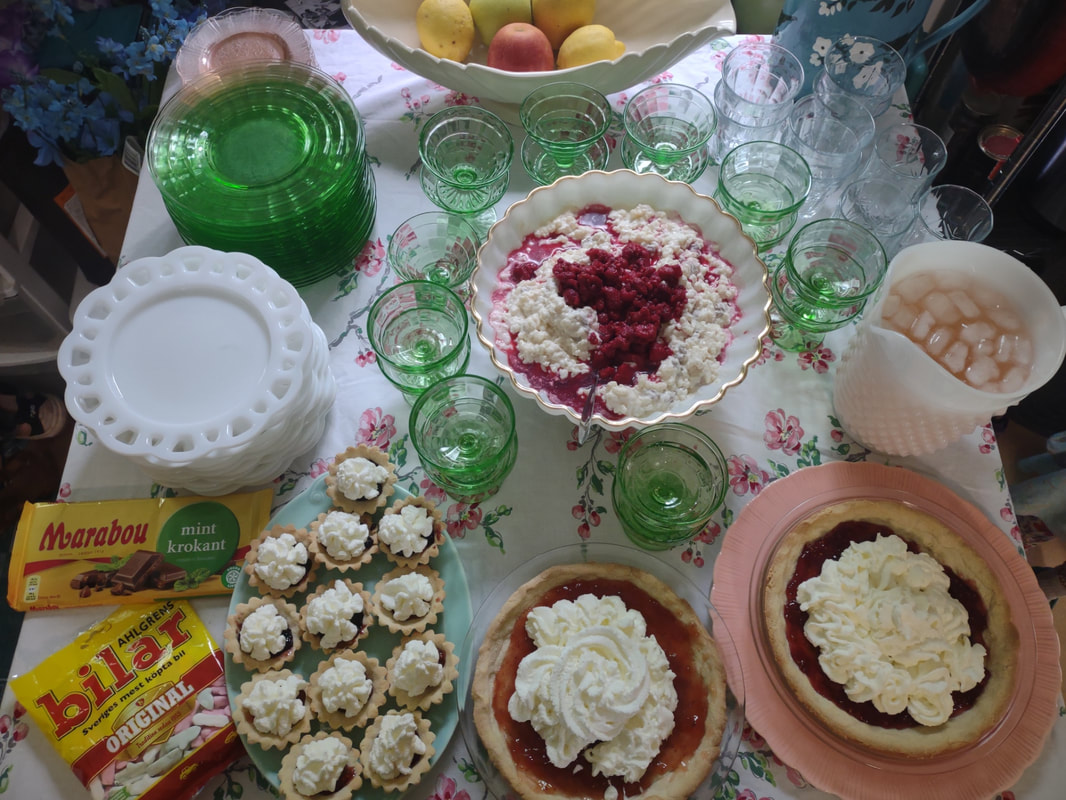 The giant milk glass bowl of rice pudding and raspberry sauce is the centerpiece of this dessert table, which also includes sandbakkelse and Swedish chocolate and gummies. 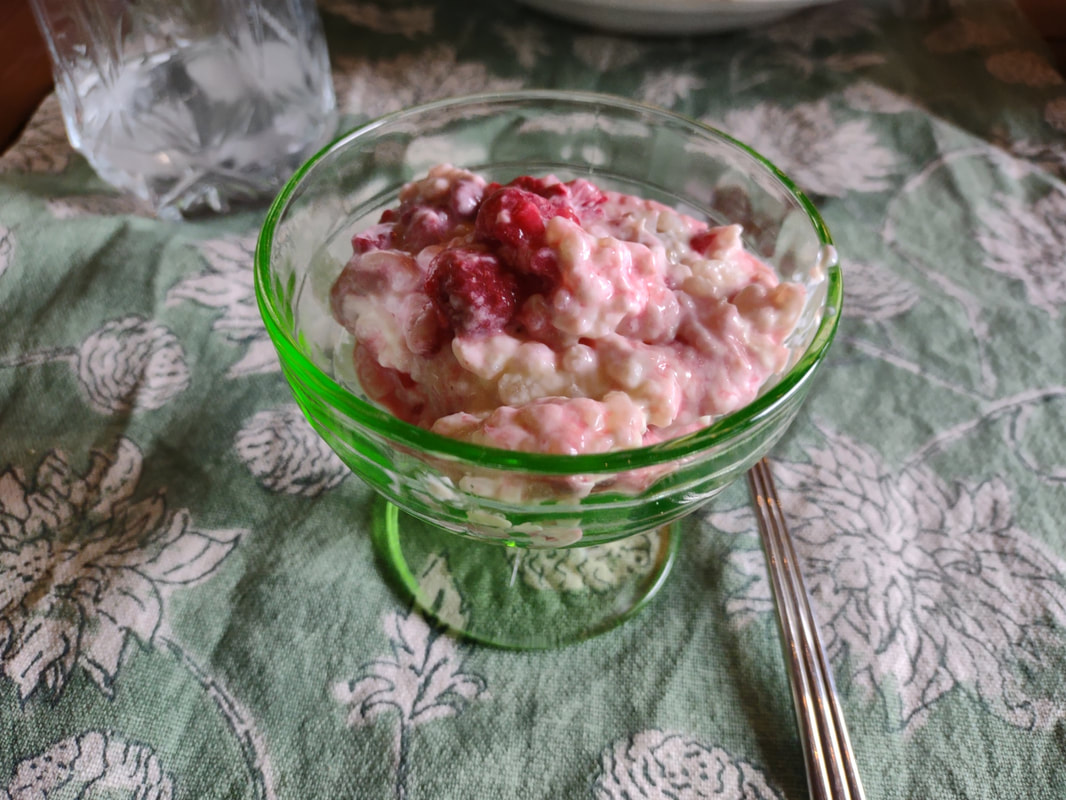 A scoop of rice pudding with raspberries in a vintage green uranium glass sherbet cup. I may or may not have had three of these bad boys over the course of the evening. The Food Historian blog is supported by patrons on Patreon! Patrons help keep blog posts like this one free and available to the public. Join us for awesome members-only content like free digitized cookbooks from my personal collection, e-newsletter, and even snail mail from time to time! Don't like Patreon? Leave a tip! |

AuthorSarah Wassberg Johnson has an MA in Public History from the University at Albany and studies early 20th century food history. Archives
July 2024
Categories
All
|
 RSS Feed