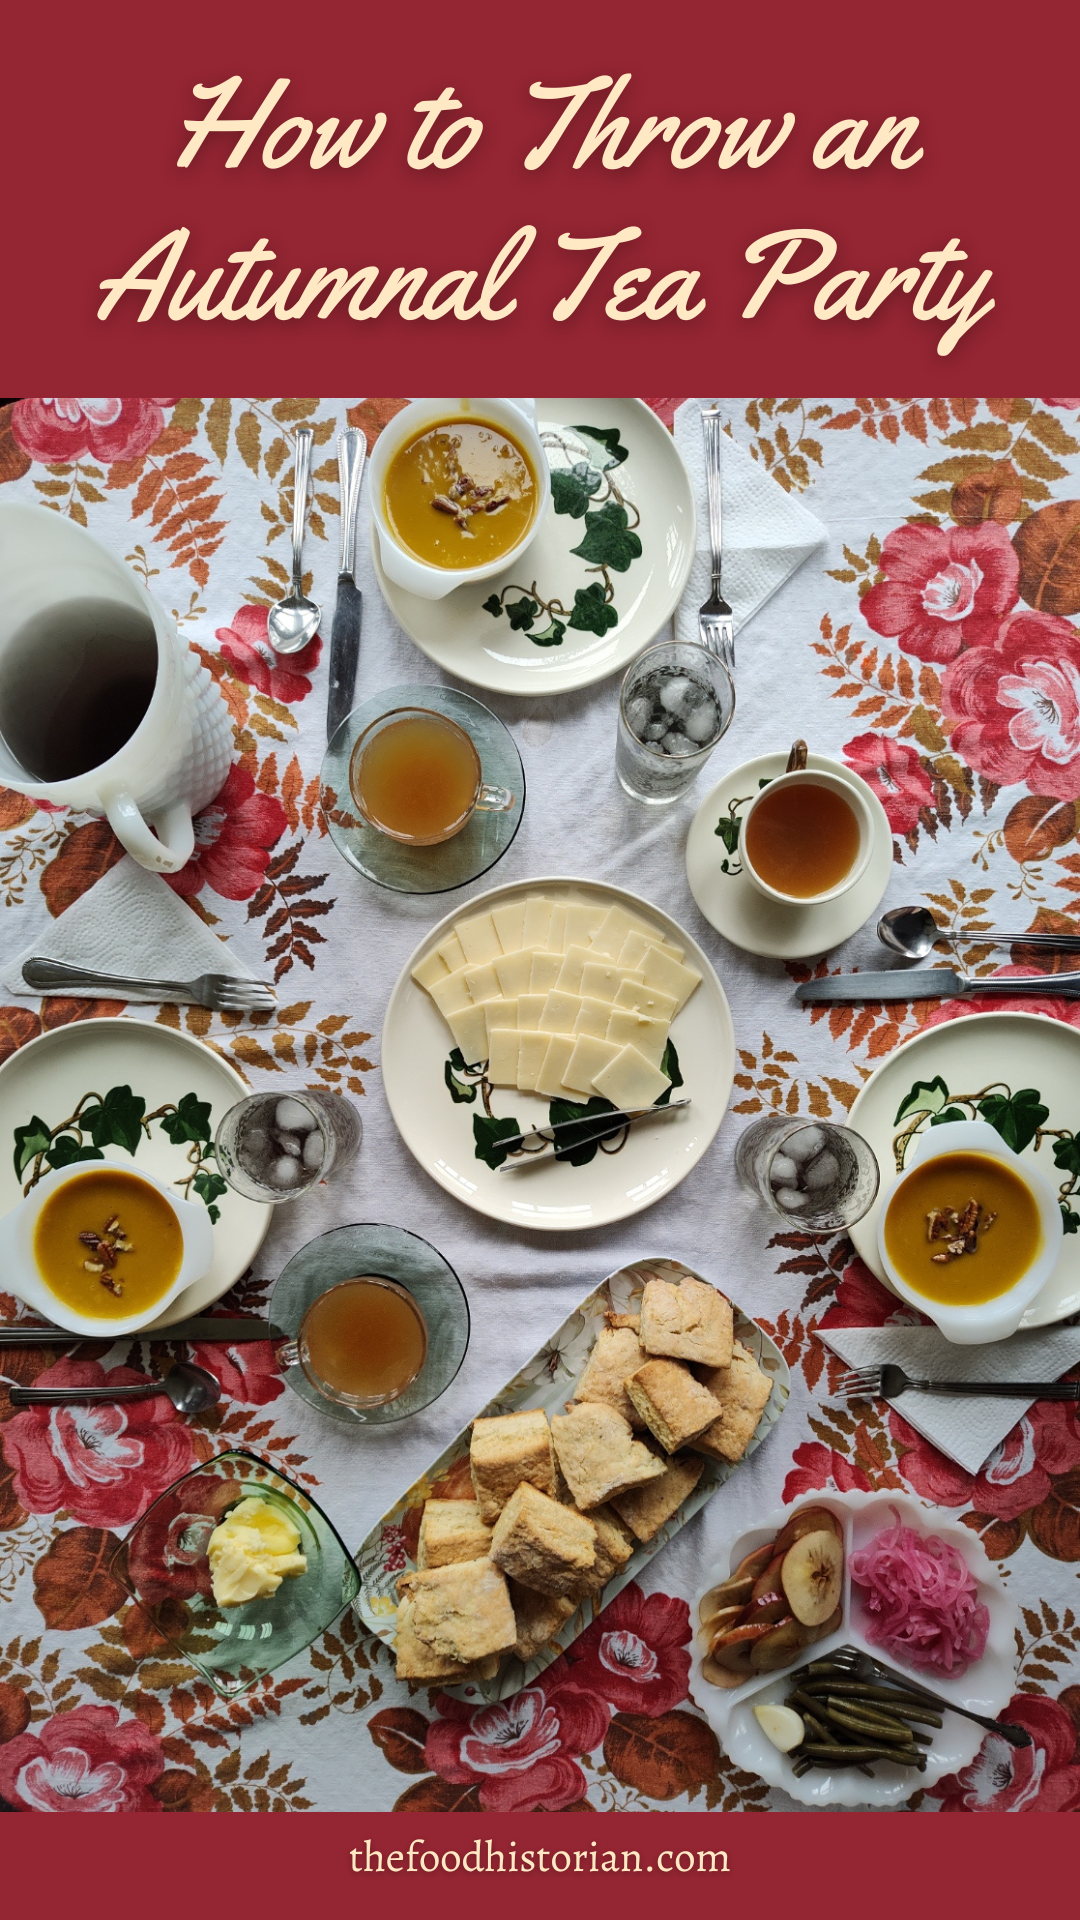
 The weather has finally turned, dear readers, and so I felt it was time for another tea party! I've had a long couple of weeks, and I wasn't really looking forward to spending one of my days off cleaning the house and cooking, but it was very much worth the effort and I'm glad we did it. Tea parties can be incredibly complicated, or very simple. My process is to think about the theme, and the flavors, and then come up with way too many ideas and then pare it down to what's possible. I wanted to honor the flavors of early fall, with something pumpkin or squash, apples, blackberries, and a savory bread. My original list also had gingerbread and shortbread cookies with jam, and scotch eggs, but that was too much! I wanted to keep the menu fairly simple, because I was quite sleep deprived after a big event over the weekend at work. So I maximized flavor and minimized effort, to great acclaim! The party (just three of us) ended up delicious, with a chilly, drizzly day with beautiful overcast light on our front porch. Ironically, we ended up having mulled cider, instead of tea, but I'm enjoying a cup of tea as I write this a few hours later, so I suppose it still counts! 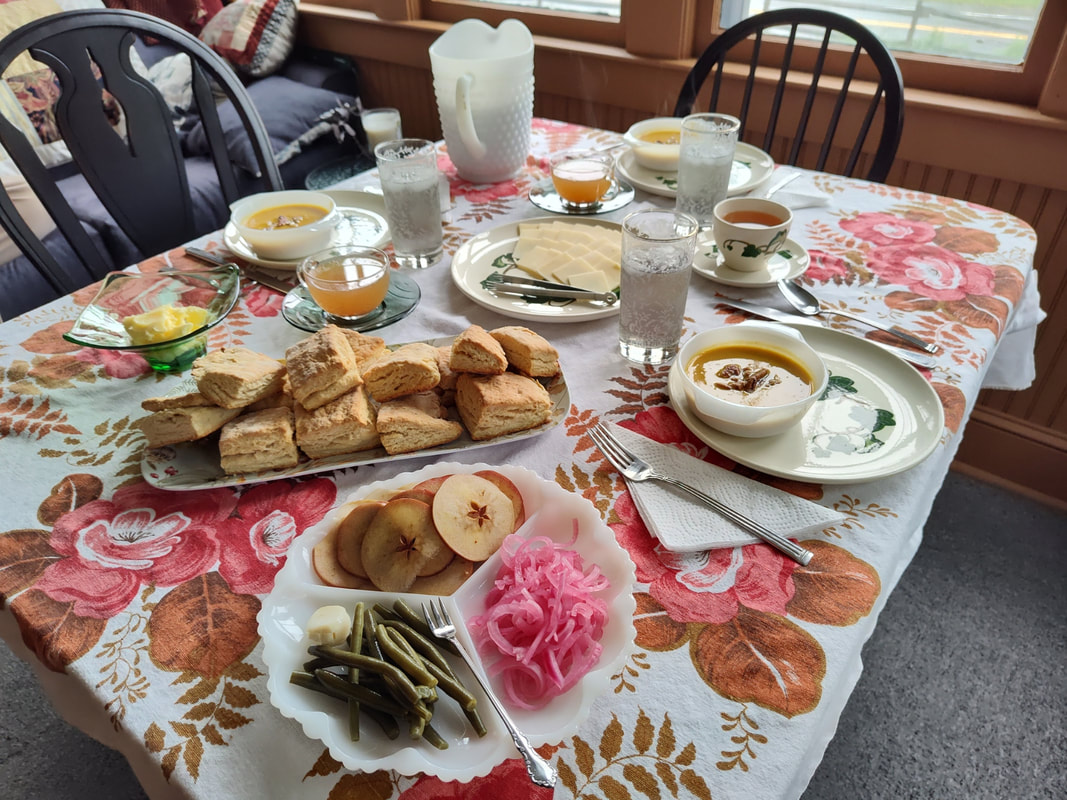 The beautiful tea table on our front porch. Autumnal Tea Party DecorIt can be tempting to go out and buy a lot of supplies for parties. I'm definitely as susceptible to that impulse as the next person! But I find what makes parties special is not how much everything matches, but the quality of your decor. I decorated my mantel with some of my favorite fall decorations - a coppery leaf garland, my favorite vintage china pheasant, a pretty vase with some fake flowers, a little green ceramic pumpkin. But when it comes to decking the table, nothing is better than nice tablecloth and real dishes. I grew up shopping thrift stores and garage sales and flea markets with my mom, so I've amassed quite a collection of vintage dishes and tablecloths over the years. Because I actually use my collection, I don't spend a lot of money on it. It pains me enough when a vintage piece gets chipped or broken. My frugal soul would be even more deeply wounded if it was a piece I had spent a lot of money on. This ended up being a very grandmother-focused display. The Metlox California ivy plates and a single surviving teacup I inherited from my grandmother Eunice, along with the green glass bowl I used for butter and the green glass saucers. My grandma Ruby found me the beautiful etched water glasses. The glass teacups embossed with leaves I picked up at a garage sale for a dollar for the pair. The milk glass is from my thrifted collection, and the beautiful tablecloth is a vintage one I forget where I found but it's probably one of my absolute favorites. I did not intend for the food to match the tablecloth, but that's kind of how it happened! When it comes to collecting, it's important to buy things you love, instead of focusing on what things are worth. Who cares how expensive it was if you think it's ugly? It's also important to choose things that are relatively easy to care for. I do not recommend putting vintage dishes in the dishwasher, but a lot of vintage tablecloths are meant to be washed. I find vintage textiles with a stain or two are often much less expensive than the pristine stuff, and then if you get a stain on them you don't feel quite so bad! 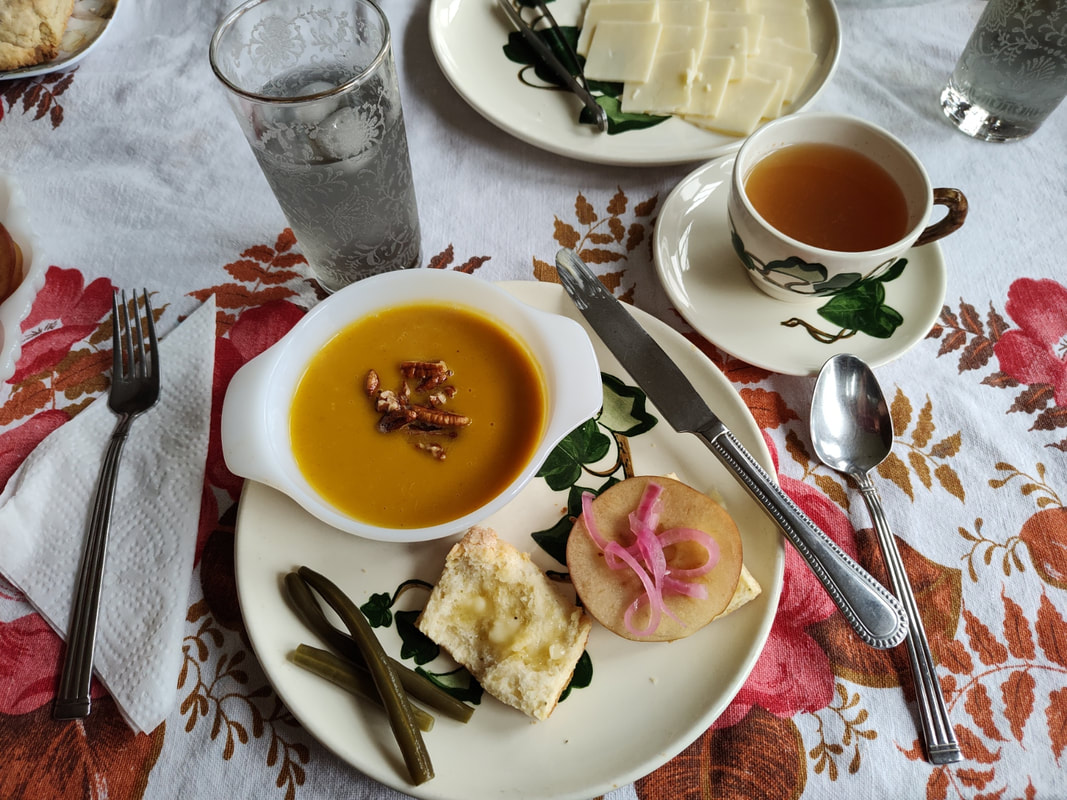 My beautiful luncheon plate! Autumnal Tea Party MenuButternut Squash Soup with buttered pecans Sage Cream Biscuit Sandwiches with pickled apple, pickled onions, and sharp cheddar Dilly Beans Mulled Cider Blackberry Raspberry Hibiscus Water Apple Blackberry Crumble with vanilla ice cream Although I love to cook from scratch, the butternut squash soup was store-bought from one of my favorite soup brands: Pacific Foods Butternut Squash Soup, and I got the low-sodium version (affiliate link). I don't usually like butternut squash soup, but I know lots of people love it, so I thought I would give it a go. This one was so delicious, I was surprised how much I enjoyed it. I felt it needed a little something extra, so I toasted some chopped pecans in a little butter and salt, and the butter got a little browned. It was the perfect garnish. The blackberry raspberry hibiscus water was also store-bought, a simple cold water infusion from Bigelow tea which I found at the store the other day (affiliate link). It turned out lovely - not as strong as tea, just a hint of flavor to cold water. Very refreshing. Sadly, the color, which was a beautiful purple as it steeped, got diluted to a kind of washed purple-gray, which was less beautiful. But still delicious! 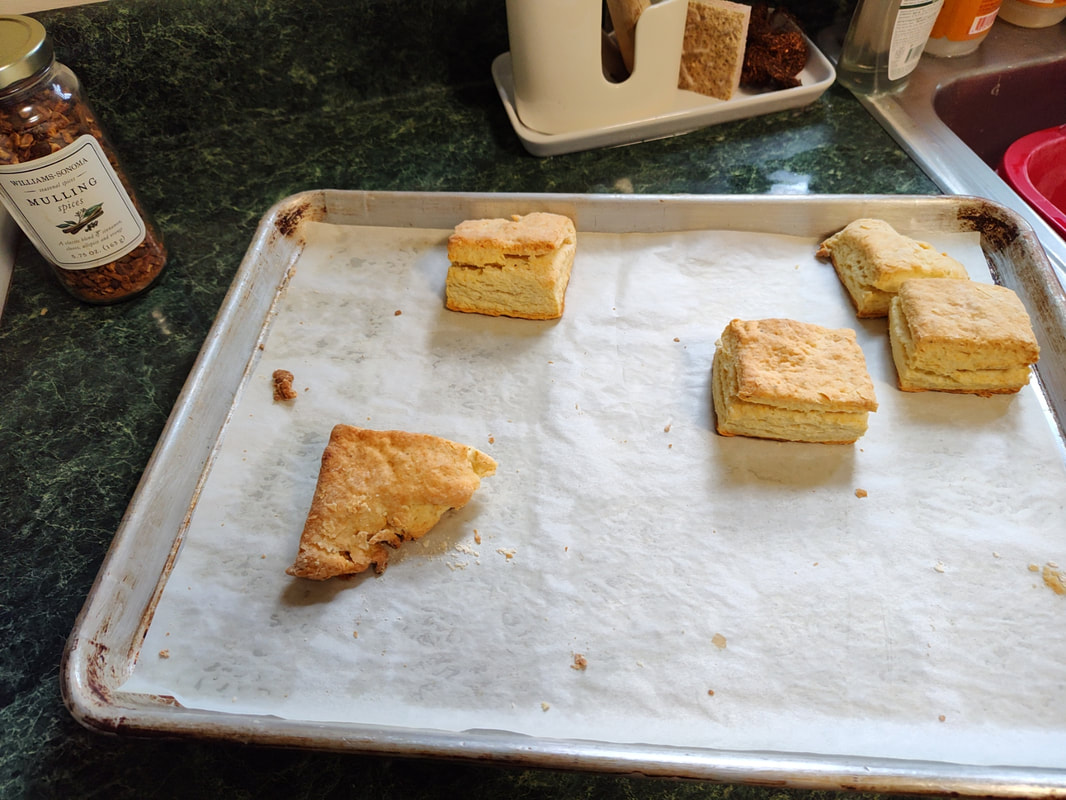 The remaining biscuits that didn't fit on the tray. Look at those lovely layers! Sage Cream BiscuitsI had thought about making scones for this tea party, but I don't have a reliable savory scones recipe, and since I was doing sandwiches, I thought biscuits would be better. This is an adaptation of my tried-and-true Dorie Greenspan cream biscuit recipe. It's almost fool-proof. This one is doubled. 4 cups of all-purpose flour 2 tablespoons baking powder 2 teaspoon sugar 1 1/2 teaspoons salt 1 heaping teaspoon dried sage (not ground) 2 1/2 cups heavy cream Preheat the oven to 425 F. Whisk all the dry ingredients together, and then add the heavy cream, tossing with a fork until most of the flour is absorbed. Knead gently with your hands (don't overwork!), then pour out onto a clean, floured work surface and knead, folding often, until it comes together. Pat into a large rectangle and cut into squares. Place on a parchment-lined baking sheet and bake 15-20 minutes or until golden brown. Serve warm, and to make the sandwiches, split the biscuits, butter them, and add sliced sharp cheddar cheese, a slice of pickled apple, and a few strands of pickled red onion. Top with more cheddar and the other half of the biscuit and devour. Serve with butternut squash and a side of dilly beans and mulled cider. 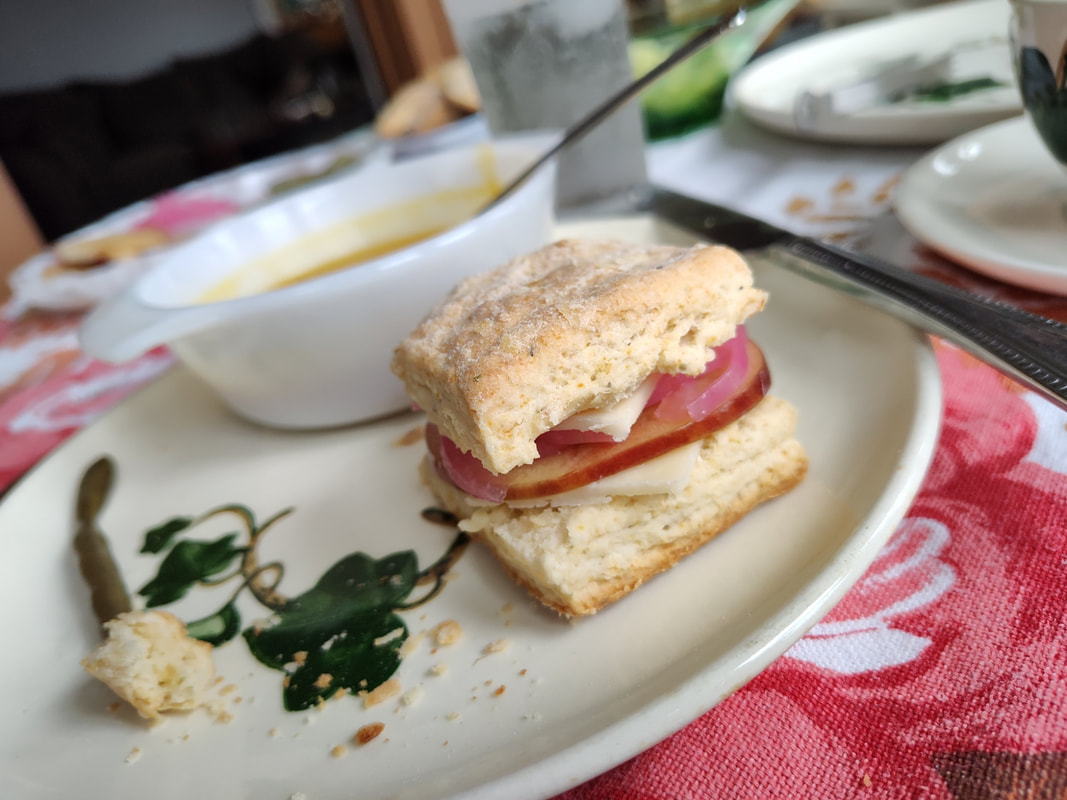 I may or may not have eaten three of these little sandwiches. I'll be following up with the recipe the apple blackberry crumble tomorrow, and the recipes for refrigerator dilly beans, pickled apples, and pickled onions will be available to patrons on my Patreon tomorrow as well. Do you like to have tea parties? What's your favorite autumnal food? The Food Historian blog is supported by patrons on Patreon! Patrons help keep blog posts like this one free and available to the public. Join us for awesome members-only content like free digitized cookbooks from my personal collection, e-newsletter, and even snail mail from time to time! Don't like Patreon? Leave a tip!
0 Comments
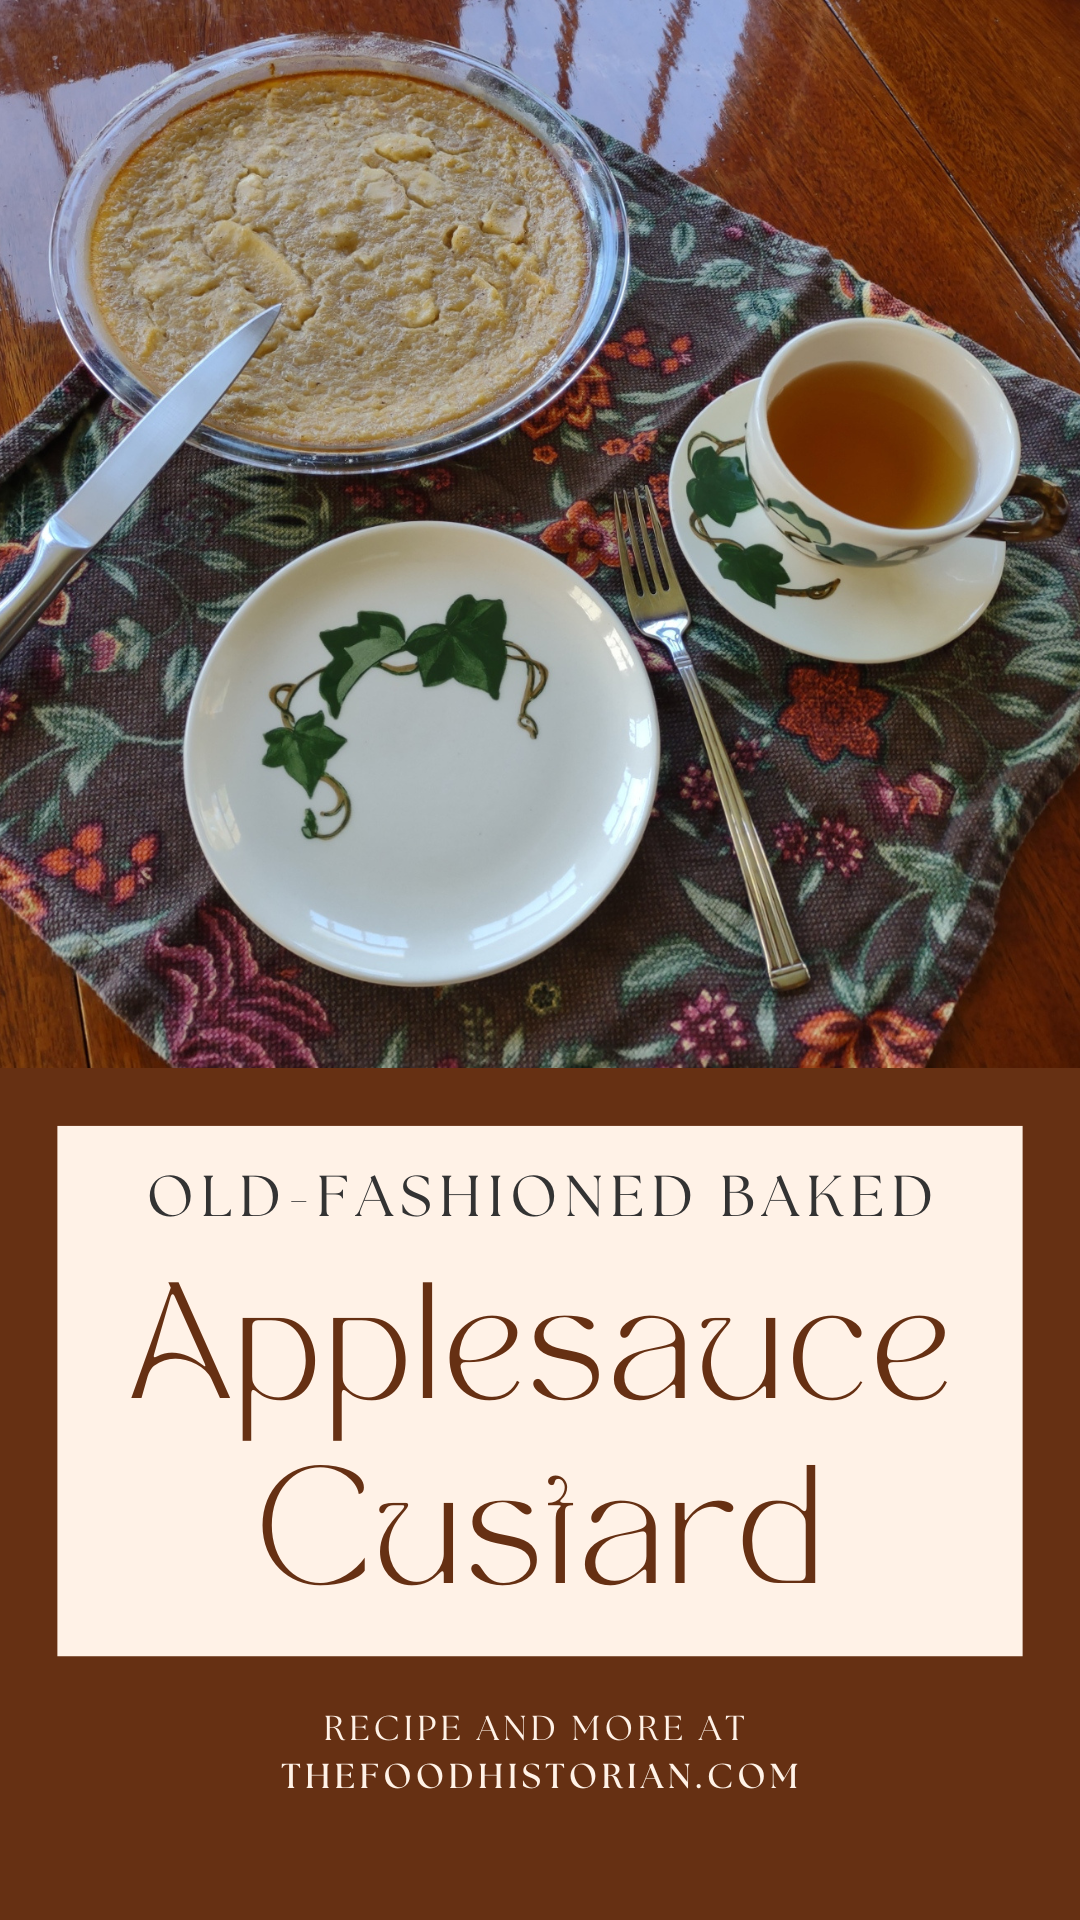 I call this old-fashioned baked applesauce custard because while it's not from a historic recipe, it does hearken back to several styles of historic recipes. Its antecedents are:
Apples plus dairy seem to be a recurring theme, and while apple crisp with ice cream and apple pie with whipped cream are a delight, I wanted to try something a little different. Enter, baked apple custard. As you may have noticed, I've been on an apple kick lately, and this custard just doesn't disappoint. I had most of a quart jar of homemade applesauce in my fridge that needed using up as I hadn't canned it, and it had been made over a week ago. If you leave applesauce in the fridge long enough, it will start to ferment! And I didn't want that work to go to waste. I also felt like cooking something a bit more dessert-y than just eating plain applesauce with a little maple syrup or cream. This recipe is a mash-up of two, mainly - an applesauce custard pie recipe, and crustless custards. It was an experiment that turned out eminently delightful. Old-Fashioned Baked Applesauce Custard Recipe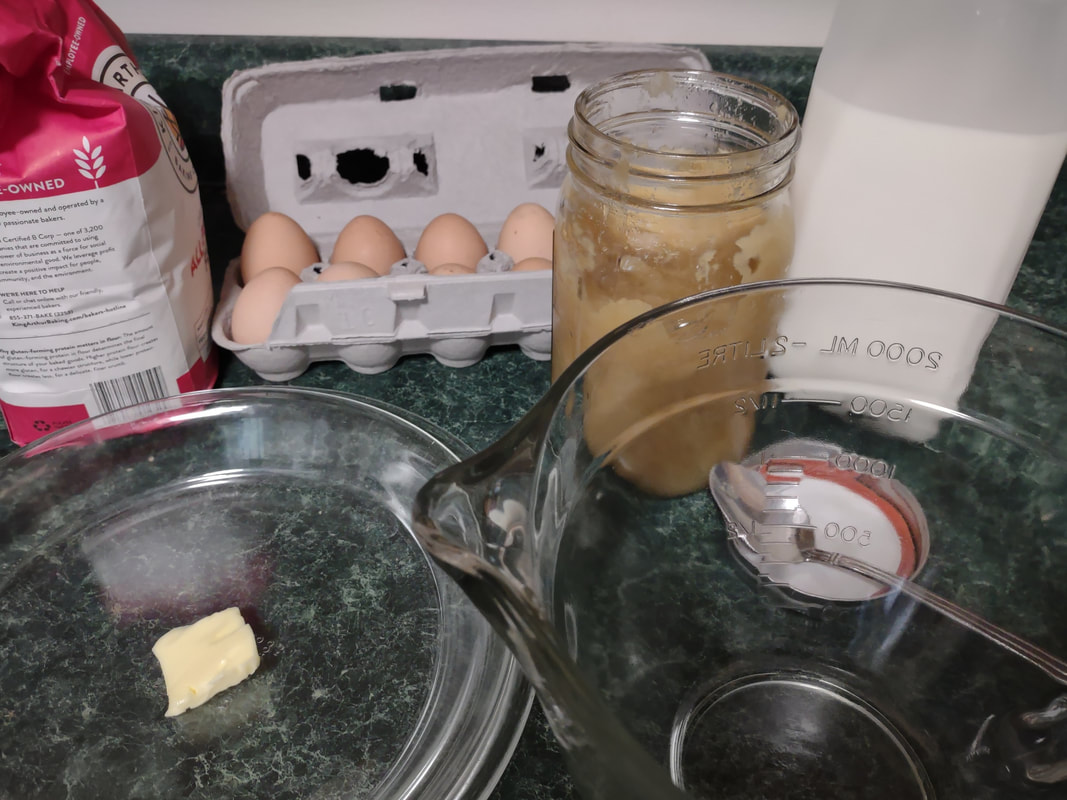 Most of the ingredients, flour, eggs, homemade applesauce, and milk. This recipe starts with a very simple applesauce recipe, although you can use unsweetened store-bought applesauce if you prefer. But I liked the chunky kind, like my mom used to make. Start with apples you like. Most modern dessert apples will not need sweetening. Peel them, quarter, and cut out the cores (I use a sharp paring knife to make a V-shape around the seeds, like my mom used to do). Slice them lengthwise into a pot and cook over medium-low heat, uncovered, stirring occasionally. If the apples seem dry, add two tablespoons of water to get them started. The bottom ones will cook into mush, and the ones closer to the top will stay firmer. If you prefer, you can mix cooking apples like McIntosh with a crisper apple like Honeycrisp or Gala to get the same result. I used a mixture of Gingergolds, Golden Supremes, and Winesaps - some of my favorite locally available apples. Once all the apples are fork-tender or sauce, et your applesauce cool fully, and you're ready to start the recipe. 2 eggs 1/3 cup sugar or maple syrup 1 tsp. cinnamon 1/4 teaspoon salt 2 tbsp. flour 1 cup milk 1 1/2 cups homemade, unsweetened applesauce Preheat the oven to 350 F. Grease a glass pie plate generously with butter, and flour it (sprinkle with flour and tap and rotate the pie plate to coat it with a thin layer of flour - discard any extra, or use it in the recipe). In a large bowl with a pouring spout, whisk the eggs, sugar, cinnamon, and salt together until well-combined. Add the flour and whisk well to prevent lumps. Then stir in milk and applesauce. Pour into the buttered and floured pie plate, and carefully place in the oven. Cook 30-40 minutes or until the center is set. The top will be sticky. Let it cool slightly and serve warm, or chill and serve cold. 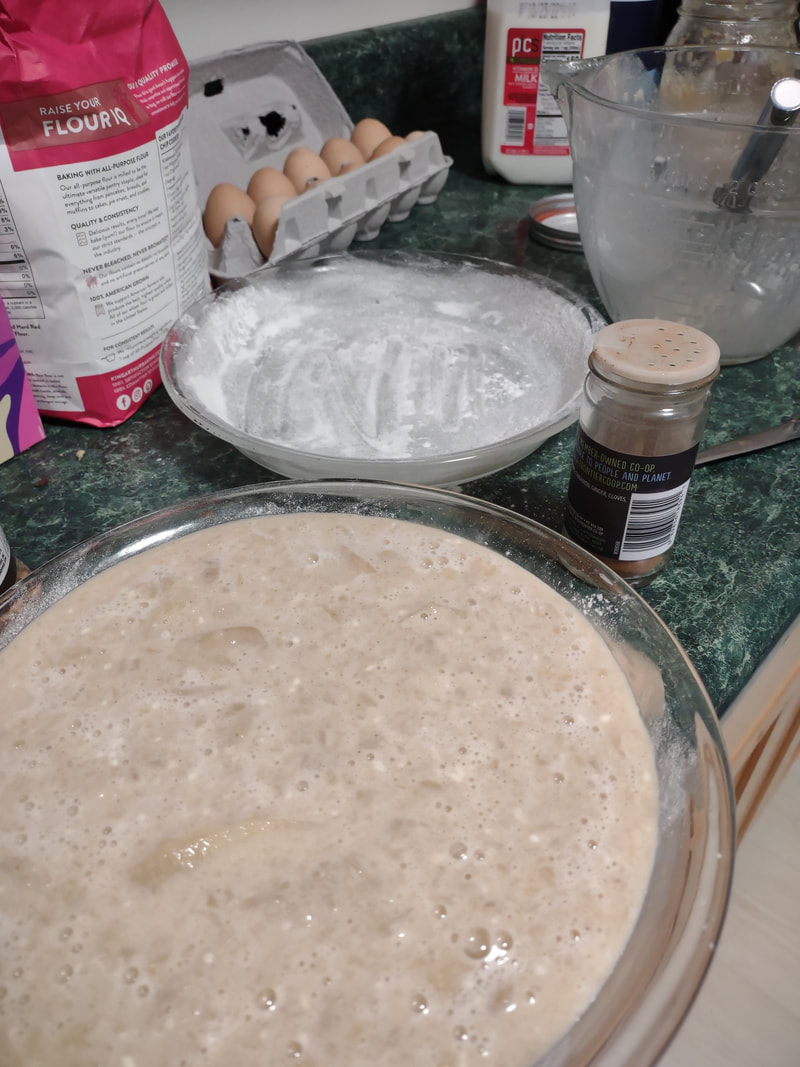 A slightly blurry pic of one pie plate filled with applesauce custard, another to go. Ignore the lumps of flour - I nearly forgot on the first one and added it last! Don't make my same mistake - the second version was better. This recipe is easy to double, like I did, but the high applesauce ratio means it's very soft and delicious, but it won't cut up into a nice, neat pie slices (as you'll see below). Better to make it in a pretty oval baking dish and serve with a large spoon instead of in slices. It doesn't need it, but add some whipped cream if you're so inclined. 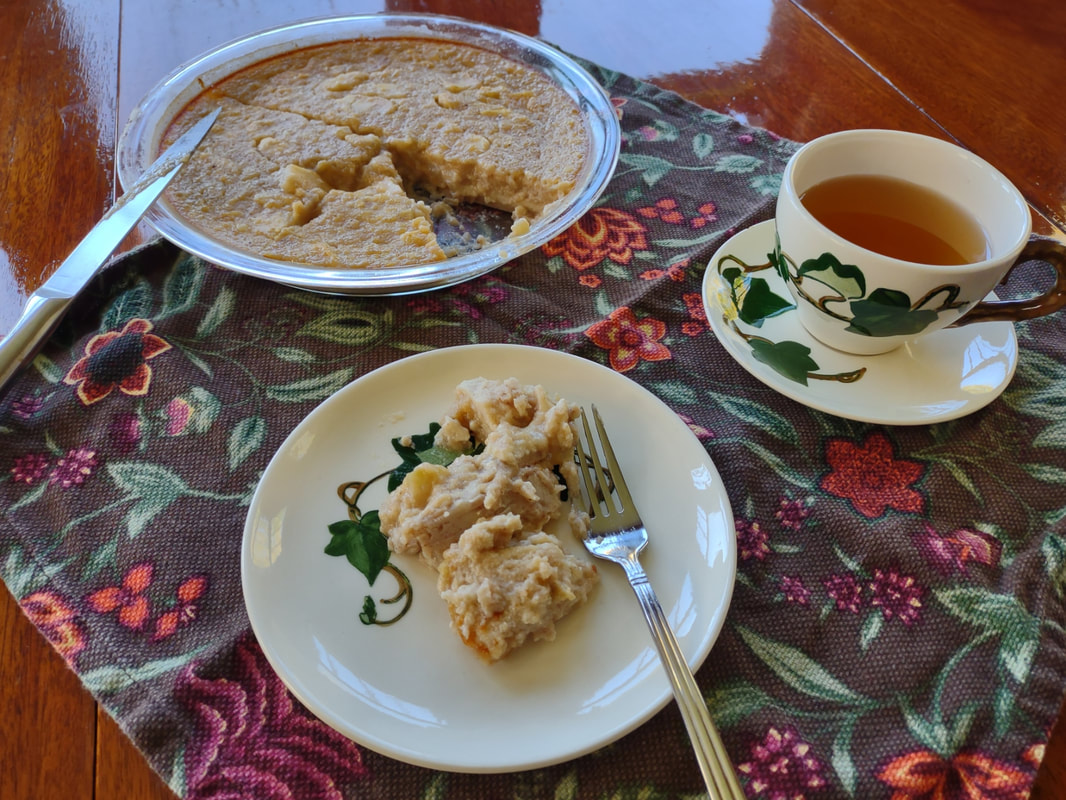 The first slice was kind of a mess, but delicious.  The second slice didn't come out any better. Oh well, it was so delicious it wasn't a hardship at all to eat another. Old-Fashioned Baked Applesauce Custard is simple and homey, creamy and delicious whether served warm or cold. It tastes of fall and childhood, and that particular poignant longing for a past or place you know never existed that seems so endemic to autumn. It's the perfect dish for that transition between fall and winter, when November gets misty and the blazing leaves turn brown, and the days get darker. Who needs the fuss of pie crust? It makes a perfect after-school snack, weekend breakfast, or comforting dessert after a long work day. It doesn't look like much, but you could gussie it up for Thanksgiving too, if you've a mind. And while it's almost certainly better with homemade sauce, it's probably pretty darned good with the store-bought kind, too. Happy eating, friends. The Food Historian blog is supported by patrons on Patreon! Patrons help keep blog posts like this one free and available to the public. Join us for awesome members-only content like free digitized cookbooks from my personal collection, e-newsletter, and even snail mail from time to time! Don't like Patreon? Leave a tip! 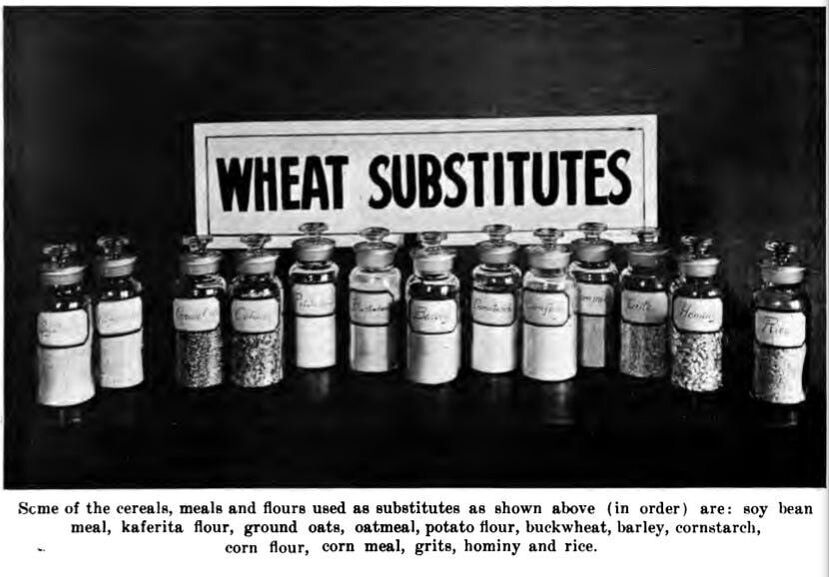 "Wheat Substitutes" as illustrated in "Liberty Recipes" (1918). Caption: "Some of the cereals, meals and flours used as substitutes as shown above (in order) are: soy bean meal, kaferita flour, ground oats, oatmeal, potato flour, buckwheat, barley, cornstarch, corn flour, corn meal, grits, hominy, and rice." Last time for World War Wednesday, we discussed how important it was during the First World War to save wheat and reduce bread consumption. During the war a number of cookbooks were published to help Americans reduce their consumption of wheat, meat, butter, and sugar and how to go without or reduce the use of scarce or expensive ingredients like eggs. When it came to bread, there were very few recipes that used no wheat flour at all, but instead most recipes used alternative grains like barley, rye, corn, and oatmeal or other ingredients like mashed potatoes or cooked rice to reduce the overall ratio of wheat flour used. Liberty Recipes was written by Amelia Doddridge, who the title page lists as "Formerly, Instructor of Cooking, Manual Training High School, Indianapolis, Indiana; and Emergency City Home Demonstration Agent, Wilmington, Delaware. Now, Head of Home Economics Department, Wooster College, Wooster, Ohio." The book was published by Stewart & Kidd Company in Cincinnati, Ohio in 1918. I wasn't able to find much more on Amelia herself. I found a dissertation that notes that several classes in food and household management at Wooster College were taught by Amelia, who was then Acting Dean of Women. But those classes were apparently only offered temporarily during the war, "These particular classes were offered only between 1918-1919 during the "confused period of war, fuel shortages, S.A.T.C., Spanish flu, and demobilization." Which seems to indicate that Amelia herself may not have survived as an instructor after the war. A reference from 1922 places an Amelia Dodderidge in Montevallo, Alabama as head of the home economics department "at Montevallo," which possibly meant the college located there. I found a reference to an Amelia Doddridge teaching high school home economics in Ohio in 1924. And another to an Amelia Dodderidge working at a Farm Bureau in Pennsylvania and/or as a county home economics representative, and/or as the Home Economics Extension representative from the state college, all in Pennsylvania, all in 1926. In 1929 there's a Miss Amelia Dodderidge in Modesto, California, acting as an "assistant home department agent." By the 1950s she appears to be living, retired, in Franklin, Indiana and throughout the late 1950s and 1960s there are numerous articles in the Franklin Star authored by Amelia Dodderidge. A 1962 article indicates she was working for the Methodist Home (likely a home for the elderly) in Franklin, IN and, indeed, most of the articles she published in the Franklin Star were called "The Home Window," apparently reporting on the activities and events of the Methodist Home. The trail runs cold at the very end of 1963. The last reference to Amelia is published on December, 31. It's unclear whether the newspaper simply did not run her column again or if the newspaper itself ceased publication or if it simply wasn't digitized past 1963. Although it's tough to prover all these Amelia Dodderidges were the same person, it is very likely. Amelia apparently continued her home economics work throughout her life, even after "retirement." But back to Liberty Recipes. The cookbook is a fascinating one, and I particularly love some of the slogans listed in the frontspiece; my two favorites are "Place meat and buns behind the guns" and "Husband your stuff; don't stuff your husband." Also interesting are the references in the foreword to the cookbook itself being much more convenient for reference by housewives rather than taking "too much trouble to hunt in a pile of leaflets for the recipes she wishes at the particular time she needs it" - a reference to the numerous bulletins and cookbooklets being published by the USDA and other government agencies. In addition, the foreword claims that although the recipes listed are designed for the "present emergency," "they should be usable and still practical even after the war clouds pass and Freedom is ours." There are numerous bread recipes in the cookbook - both yeast and quick breads. In addition, the cookbook focuses on meatless and meat-saving recipes, a few salads, and numerous sugarless, low-sugar, and wheat- and fat-saving dessert recipes. This recipe for Sweet Potato Bread seemed quite modern, and a fun recipe to share in the lead-up to Thanksgiving. Although I have not had time in a while to bake yeast bread, I thought I would share it anyway. Maybe I can take a stab over the holiday. World War I Sweet Potato Bread (1918)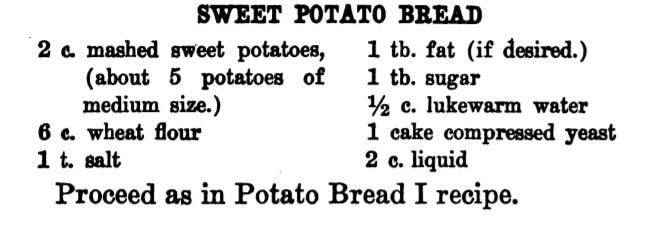 "Sweet Potato Bread" recipe from "Liberty Recipes" (1918). The original recipe makes references to other recipes, so I've combined the instructions for your convenience. A cake of yeast is about the same as dried yeast packets that are sold today. Although you can try it with RediRise or similar fast-acting yeast, I recommend plain ol' active dry yeast. 2 cups mashed sweet potatoes (about 5 potatoes of medium size.) 6 cups wheat flour 1 teaspoon salt 1 tablespoon fat (if desired.) 1 tablespoon sugar 1/2 cup lukewarm water 1 cake compressed yeast (or 1 envelope active dry yeast) 2 cups liquid Use the potato water for the liquid. Pour it gradually over the hot mashed potatoes. When lukewarm add the softened yeast, salt, sugar, and fat. Stir in the rest of the flour gradually. When the dough becomes too stiff to stir, work in the remainder of the flour by kneading with the hands. It may take a little more flour or a little less depending upon the kind of flour used. The dough should be of such a consistency that it will not stick to the hands or to the bowl. Knead 10 or 15 minutes until the dough is smooth and elastic. Place in a bowl, cover, and keep it in q warm temperature (75 to 85 F). When risen twice its bulk, cut down and knead again. Then shape into loaves, place in greased pans, and set in a warm place. When light and doubled in bulk it is ready to bake. To prevent a crust from forming over the top of the loaf while rising, rub the surface with a little melted fat. Watch the rising and put into the oven at the proper time. If risen too long, it will make a loaf full of holes; if not risen enough, it will make a heavy bread. Bake 45 minutes to 1 hour in a moderately hot oven (375 to 400 F). If oven is too hot, the crust will brown before the heat has reached the center of the loaf and will prevent further rising. The loaf should raise well during the first 15 minutes of baking; then it should begin to brown, and continue browning for the next 15 or 20 minutes. The last 15 to 30 minutes, it should finish baking and the heat may be reduced. When done, the bread will not cling to the sides of the pan. If a tender crust is desired, brush the bread over with a little melted fat as soon as it is taken from the oven. If you end up making this recipe, let us know in the comments how it turned out! There are lots of other interesting recipes to be had in Liberty Recipes, including a potato biscuit pie crust recipe, buckwheat spice cake, and cornmeal gingerbread, to name a few! Are there any recipes in there that you want to try? The Food Historian blog is supported by patrons on Patreon! Patrons help keep blog posts like this one free and available to the public. Join us for awesome members-only content like free digitized cookbooks from my personal collection, e-newsletter, and even snail mail from time to time! Don't like Patreon? Join with an annual membership below, or just leave a tip! 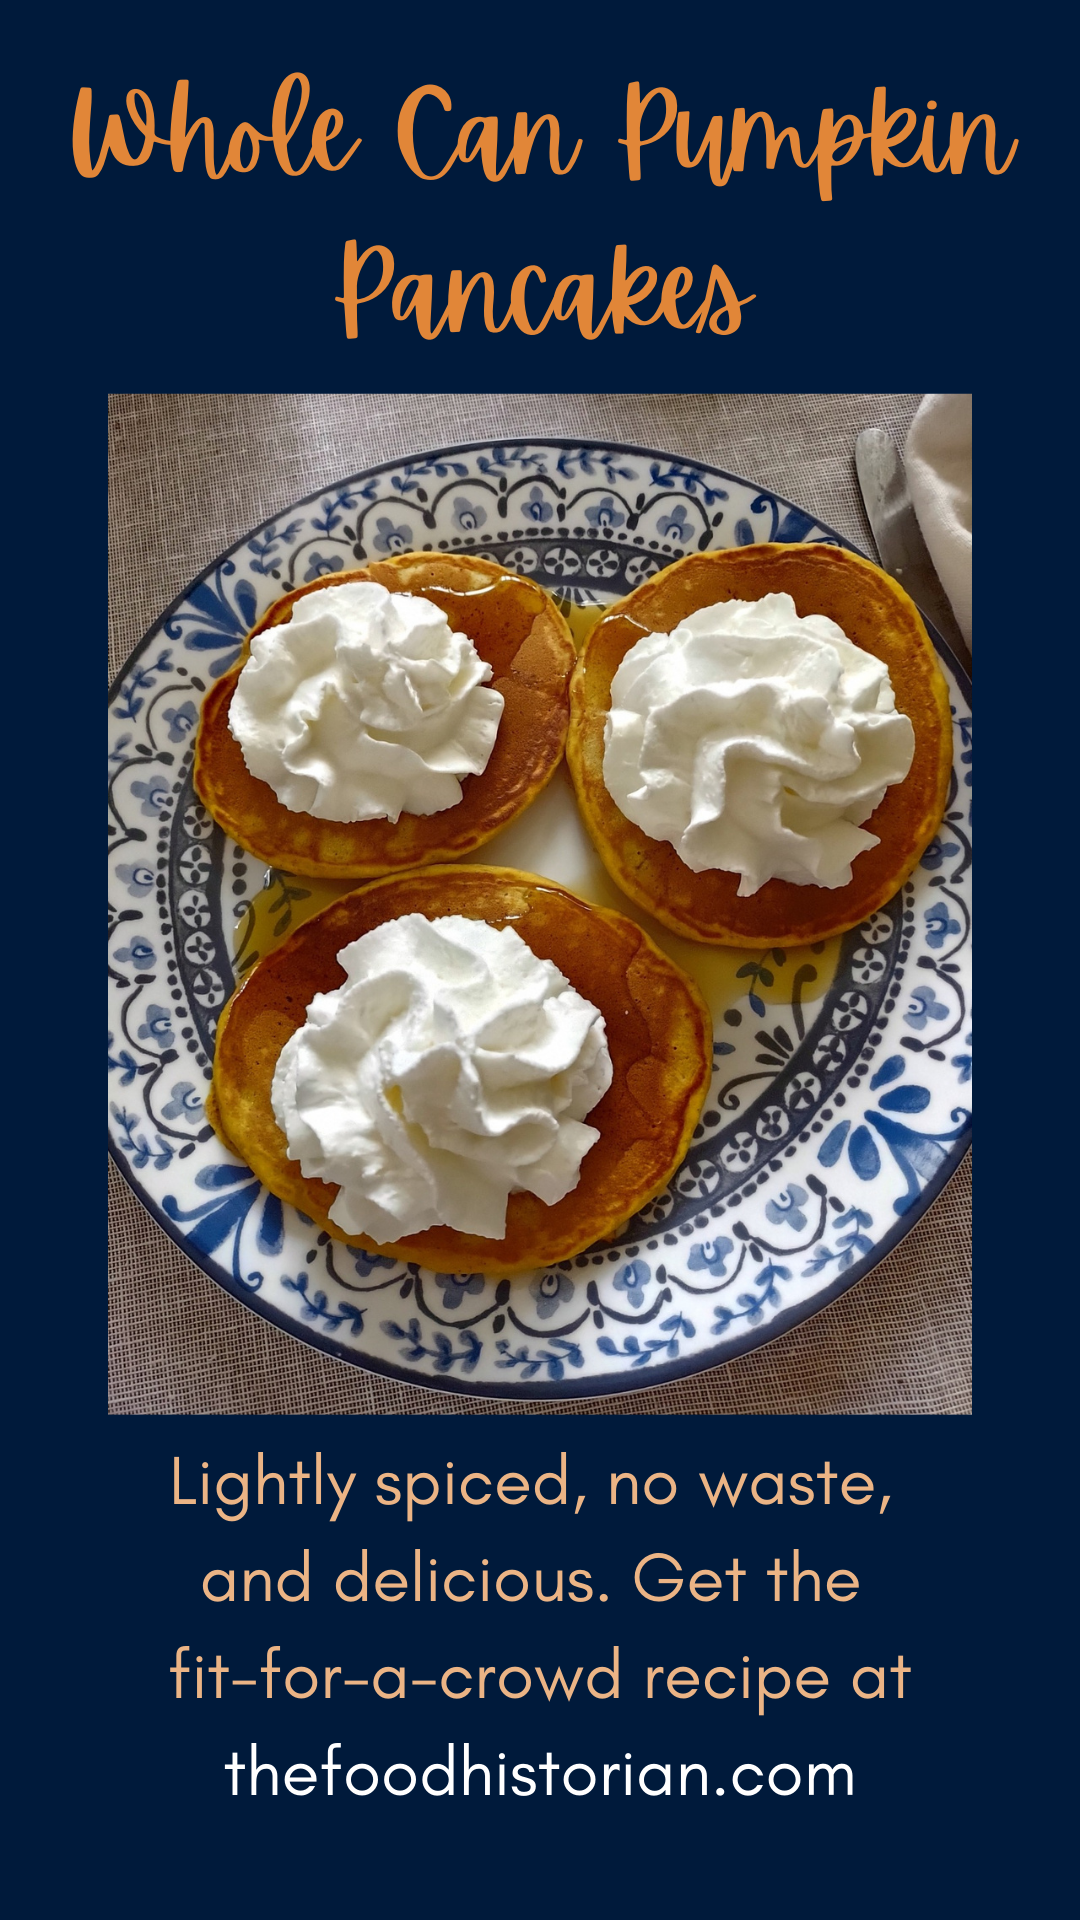 It's no secret that my husband and I love pancakes. Like a lot. I've adapted a single recipe endlessly - apple cinnamon oatmeal pancakes, black forest pancakes, whole grain pancakes, pear ginger pancakes, gingerbread pancakes, almond pancakes, blueberry pancakes - you name it. But I think pumpkin pancakes are one of our very favorites. This is definitely a recipe for your days off, in large part because making pancakes is time consuming, but also because this is a huge recipe and makes approximately 30 pancakes. But Sarah! you might be thinking, how can two people eat 30 pancakes in one sitting? Well, dear reader, we can't. However, these pancakes are absolutely delicious as leftovers, staying tender even days later. You can pop them in the toaster for a reheated morning treat, or eat them cold as a snack. You can make them into a sandwich with butter and fig jam, or cover them in whipped cream (my husband's favorite). Pumpkin pancakes are one of those things you'll never regret having too many of. And if you've got a big family or are having a crowd for brunch? They're perfect. And don't worry, I've got tips for hot to keep the pancakes piping hot while you cook. Whole Can Pumpkin Pancakes RecipeThis recipe is about triple the original Joy of Cooking recipe I've adapted endlessly over the years. So feel free to cut it in half. But then it won't use a whole can of pumpkin. You can also cut back on the butter too, if you like, or substitute some vegetable oil. 4 1/12 cups flour (you can sub up to 2/3rds whole grain flour) 1/2 cup sugar 4 teaspoons baking powder 3 teaspoons salt 1-2 teaspoons pumpkin spice and/or cinnamon 3 eggs 1 stick (1/2 cup) melted butter 1 can (16 oz.) pureed pumpkin 3 1/2 - 4+ cups milk Preheat your griddle over medium heat. If using cast iron, grease it lightly. I prefer to use an electric griddle which can handle 5-6 pancakes at a time. I set the control to 350 F and let it preheat. Whisk the flour, sugar, baking powder, salt, and spices together until well blended in a VERY large bowl. In a separate bowl, whisk the pumpkin, eggs, and butter to combine, then add to the dry ingredients. Add 3 cups milk and whisk, incorporating the flour slowly, add more milk as necessary to make a smooth, lump-free batter. Using the measuring cup you used to add the milk, pour the batter in about 1/3 cup amounts onto the griddle. When bubbles form near the center of the pancake, flip and let brown on the other side. 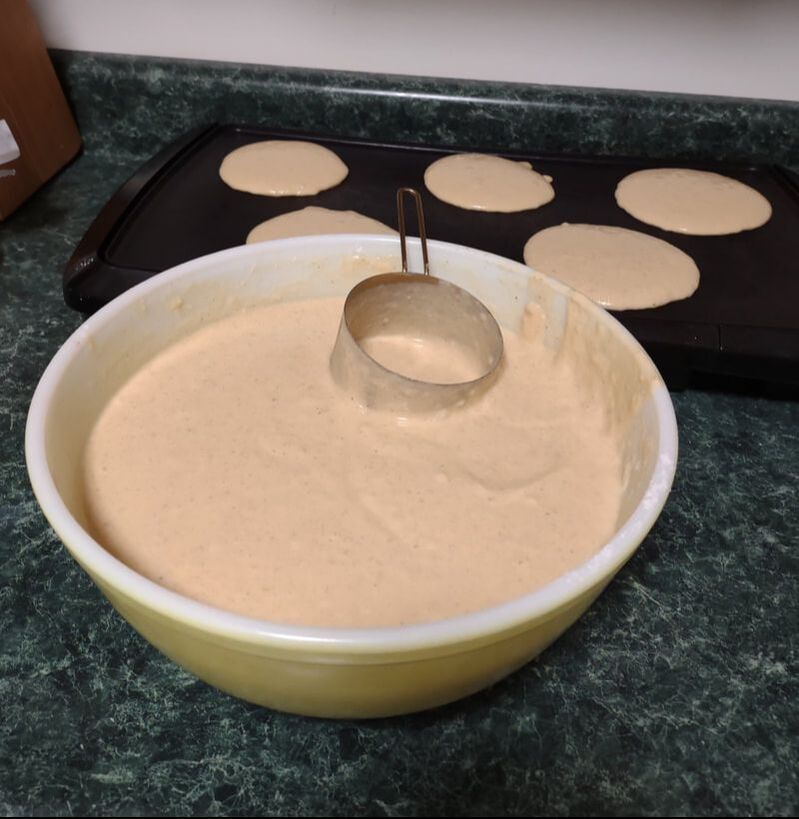 Gotta break out the big yellow Pyrex bowl for this recipe. Now for the savvy tip taught to me by my mother. Use a dish towel to keep your pancakes hot! Using a flat-weave dish towel, place one end on the plate you're using to pile the pancakes, and leave the long tail to cover them. Add the pancakes in an overlapping circle and keep covered by the towel in between. The towel combined with the pile of the pancakes themselves will keep everything piping hot until it's ready to go to the table.  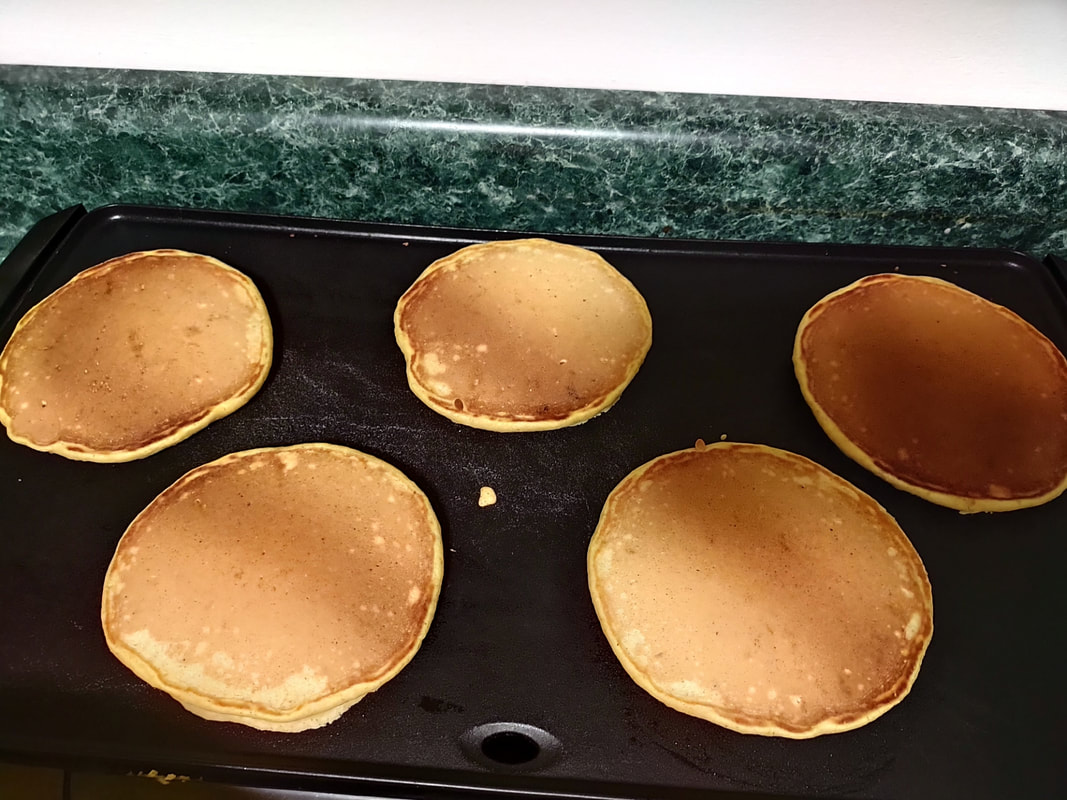 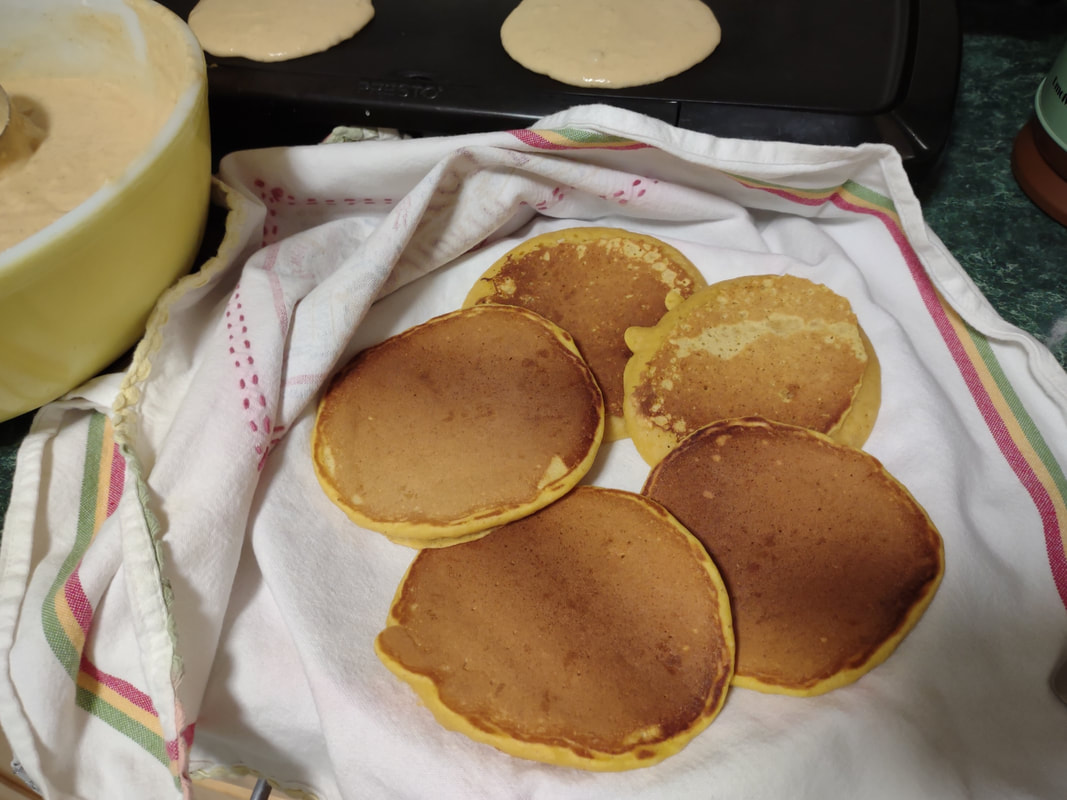  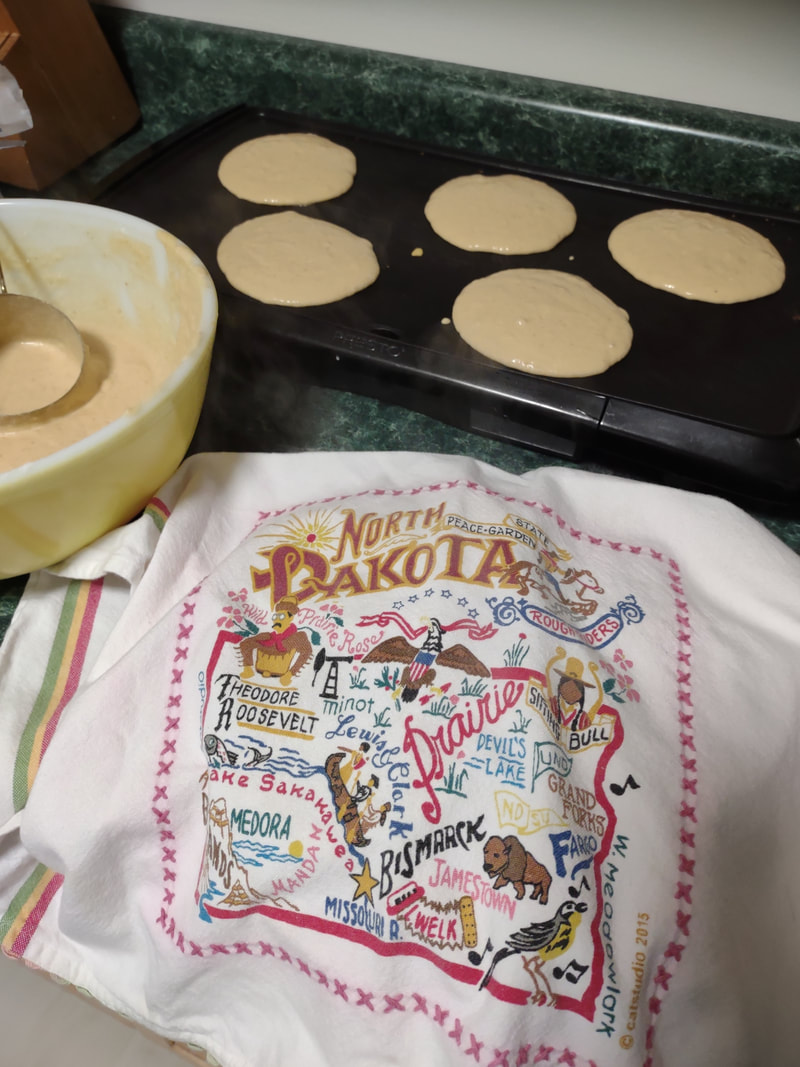 Gotta represent with this North Dakota dish towel Mom got me for Christmas one year. Serve with butter, real maple syrup, and whipped cream for a decadent brunch. Let the leftovers cool to room temp and store in a closed container to keep them from drying out. They will keep at room temp for a few days, so if you don't plan to eat them right away, refrigerate or freeze for future use. A third cup of batter will make a pancake small enough to fit inside a conventional toaster, should you want to reheat them. 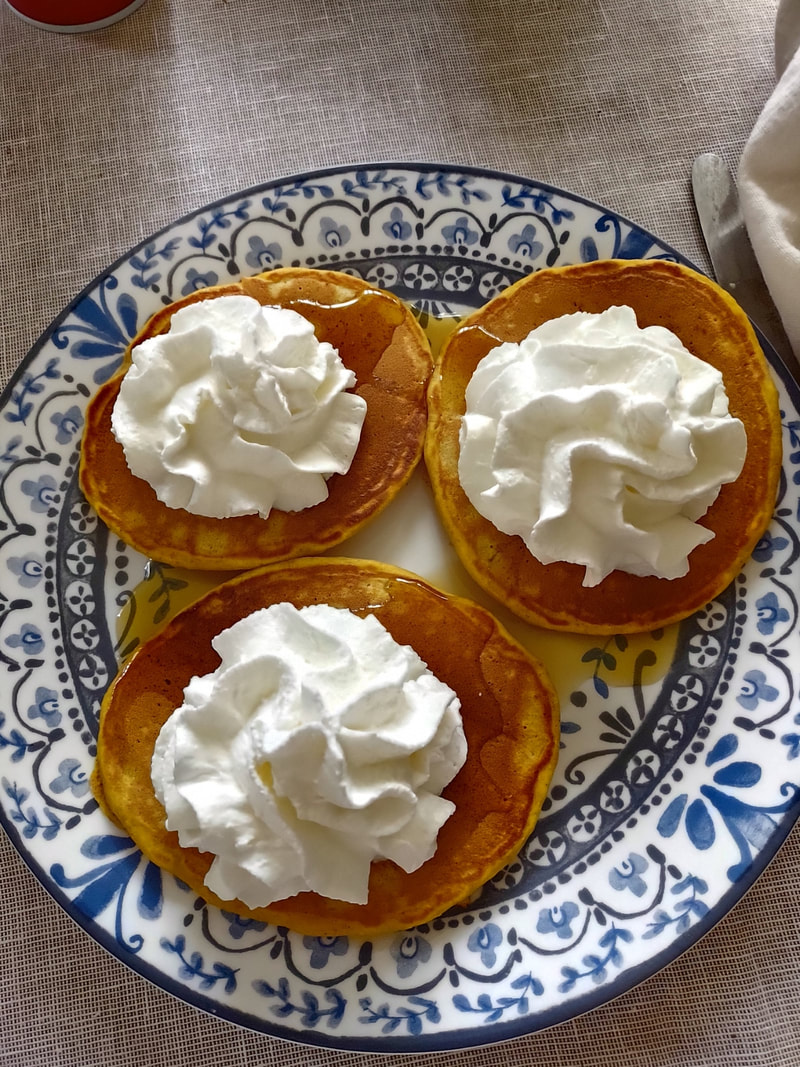
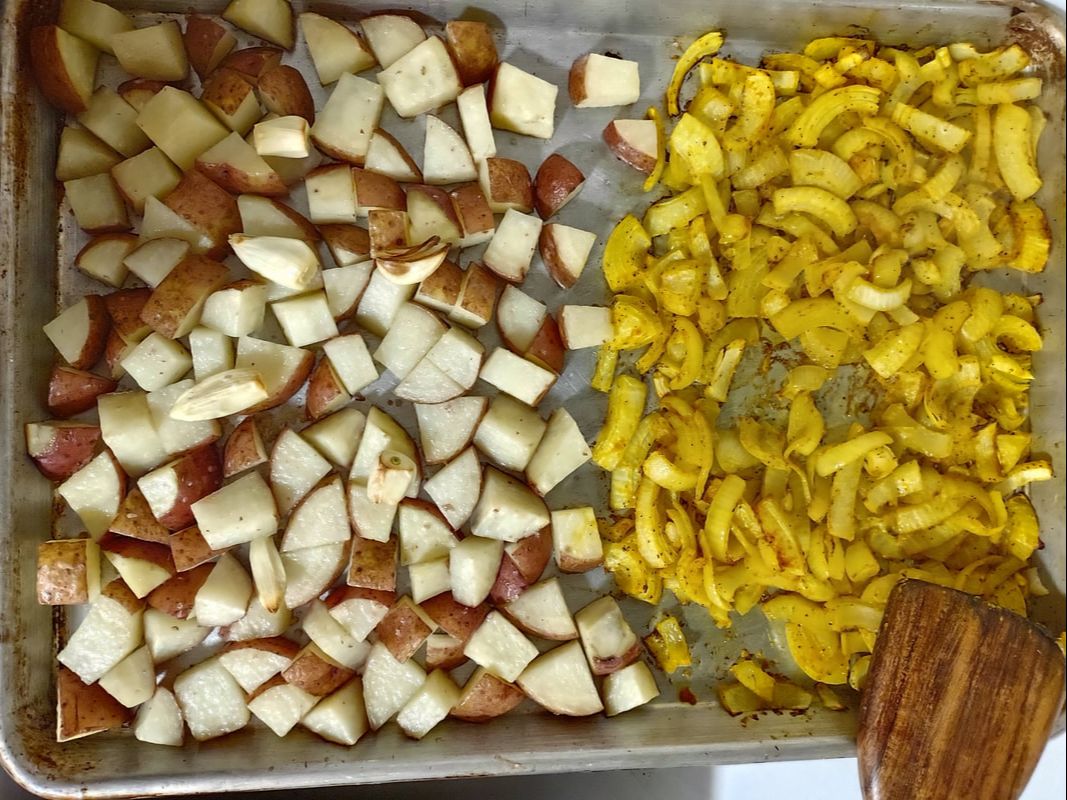
I hope you enjoy these pancakes as much as we do. I'm off to eat one as a snack before heading out to do some grocery shopping. Happy eating! The Food Historian blog is supported by patrons on Patreon! Patrons help keep blog posts like this one free and available to the public. Join us for awesome members-only content like free digitized cookbooks from my personal collection, e-newsletter, and even snail mail from time to time! Don't like Patreon? Join with an annual membership below, or just leave a tip! 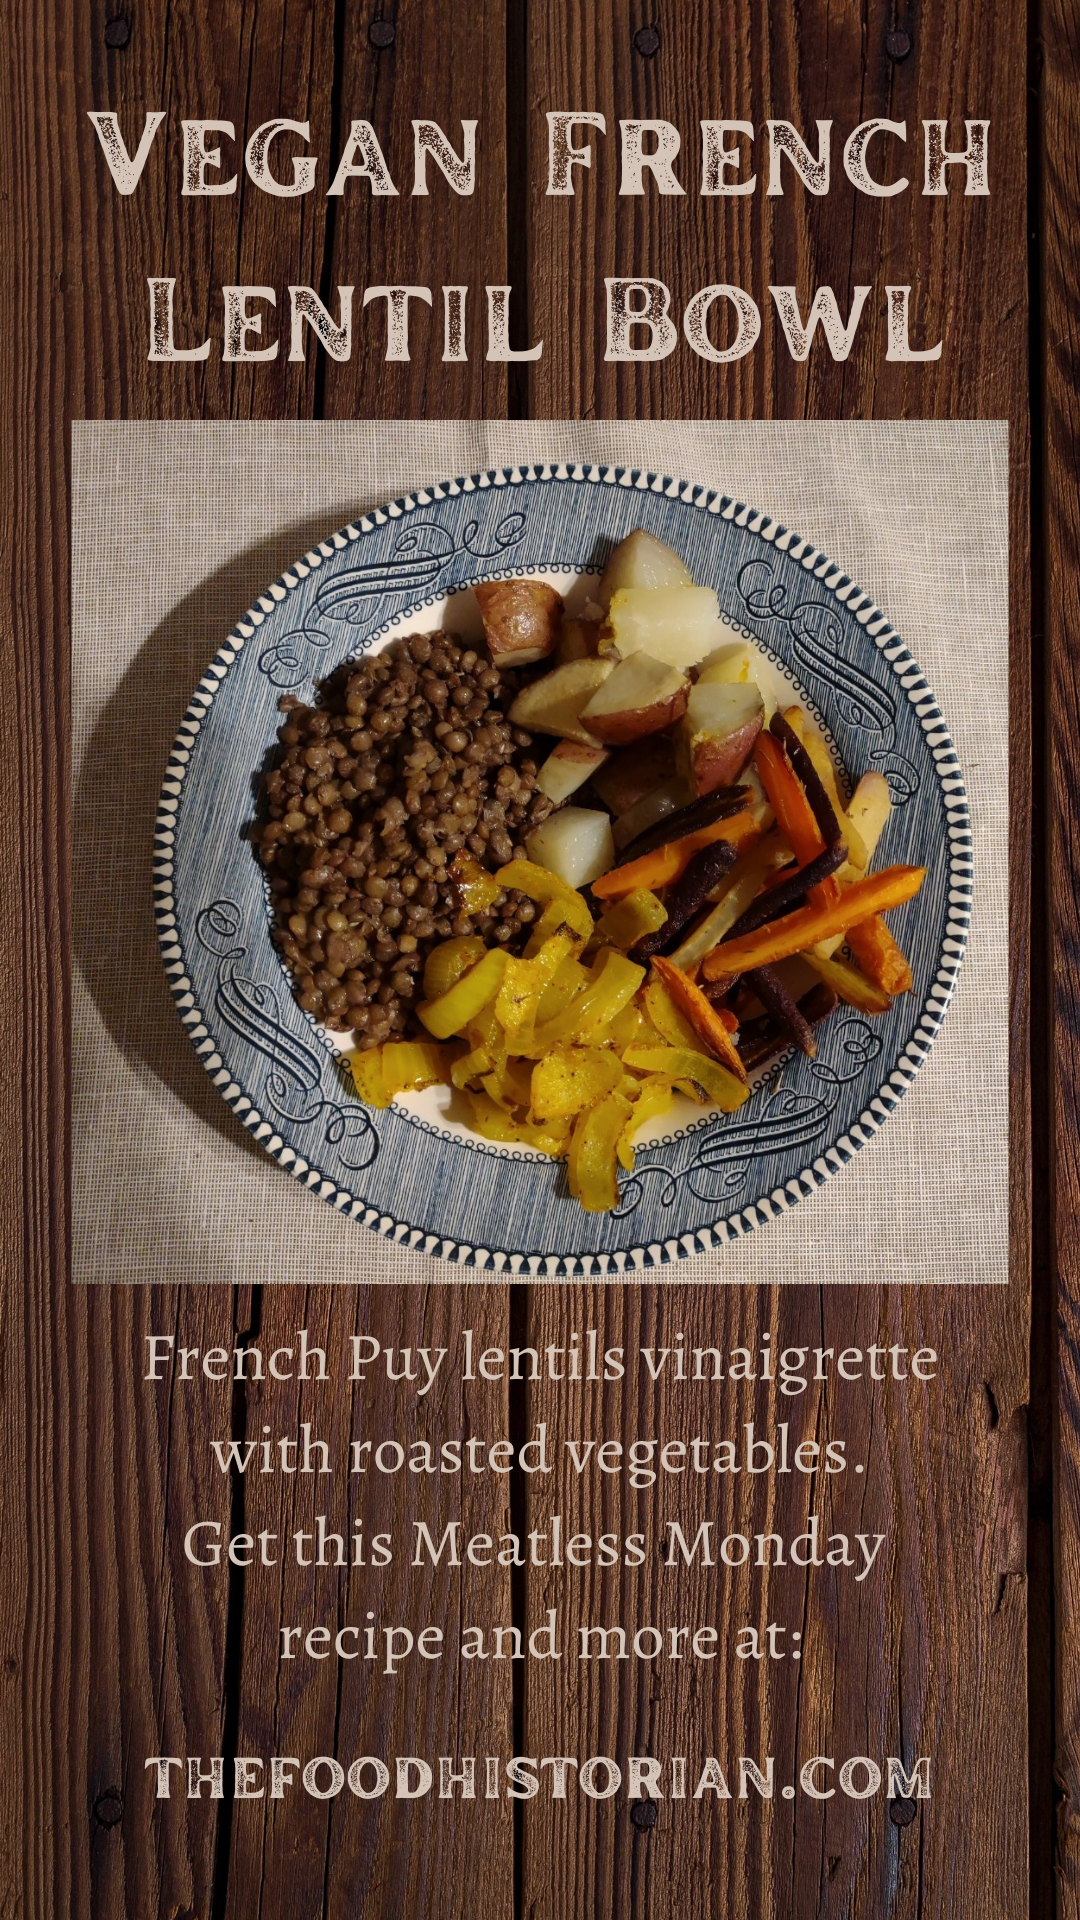 Last Monday I gave a talk on the history of vegetarian food, and the subject of my vegan dinner came up! So I thought I would take the opportunity to share the recipe with you, since so many have asked for it. This is one of my favorite recipes for an easy, delicious supper - perfect for cold weather - and is often in rotation during the fall and winter months. I call it French Lentil Bowl because I used French green Puy lentils, and Dijon mustard vinaigrette, but also because lentils vinaigrette is an old-school French dish. I use lentils vinaigrette in a variety of salads and other dishes (notably one delicious, but very rich, recipe for creamed Dijon lentils with ham I found in the French Vegetable Cookbook by Patricia Bourne), so it's safe to say I'm a lentil fan (don't believe me? Try the lentilwurst). They're quicker and easier to cook from dried than beans and the green Puy lentils (black Beluga lentils also work well) have a hearty texture and peppery flavor that I just love. If you've only ever had lentils in the murky brown soup, give this recipe a try. Vegan French Lentil Bowl RecipeThis recipe makes a lot, but also makes wonderful leftovers and reheats nicely. If the carrots and onions seem excessive, let me note that they are so delicious you will almost always regret not making more. 2 cups green/French lentils 3 cups water 2 bay leaves 1-2 cloves garlic (optional) 2 pounds carrots (baby carrots are fine) 3-4 red potatoes 3-4 yellow storage onions extra virgin olive oil sea salt dried thyme ground turmeric ground black pepper white wine vinegar Dijon mustard Preheat the oven to 450 F. Add the lentils, water, bay leaf, and garlic to a 2 quart pot, cover, and cook over medium-high heat. Once boiling, reduce to medium-low heat and continue cooking until the lentils are tender and all the water is absorbed (approximately 20 minutes). While the lentils are cooking, wash and cut the carrots. If using full-size carrots, wash, peel, and cut into thick julienne. Pieces should be no larger than your pinky finger. If using baby carrots (I like the rainbow heirloom ones for color), wash and cut fat ones in quarters, medium ones in half, and leave the skinny ones. Toss in olive oil and arrange in a thin layer on a half sheet pan. Sprinkle with thyme and sea salt. Then scrub and cut red potatoes into chunks about 1-2 inches square. I usually cut the potato in half lengthwise, then in half lengthwise again, then cross-cut into chunks. Toss with olive oil and arrange on a half sheet pan - it should take up about 2/3 of the space. Sprinkle with sea salt and add a few cloves of garlic to scent them, if you like. Then cut the root part off the onions, cut in half, remove the papery skin, and cut into finger-width slices. Toss with olive oil, a generous sprinkling of turmeric (1/2-1 tablespoon), sprinkling of black pepper, and arrange the onions on the remaining 1/3 of the baking sheet (you can do the tossing and stirring right on the baking sheet).
Pop both sheets into the oven for about 20 minutes. Meanwhile the lentils are probably done. In a largish bowl, add at least 3 tablespoons of olive oil, at least 3 tablespoons of white wine vinegar, and 1-2 tablespoons of Dijon mustard. Whisk with a fork until well-blended, then add your hot lentils (fish out the bay leaves and garlic and discard) and stir well to combine. Let rest until the vegetables are done - they'll keep their heat. When the potatoes are tender, the onions melting, and the carrots browned and tender, pile about a half cup of each of the vegetables into a shallow bowl and serve hot. If you like, you can add a dollop of cold cottage cheese or some crumbles of goat cheese or feta on top, or garnish with toasted walnuts, but it's really delicious as-is. 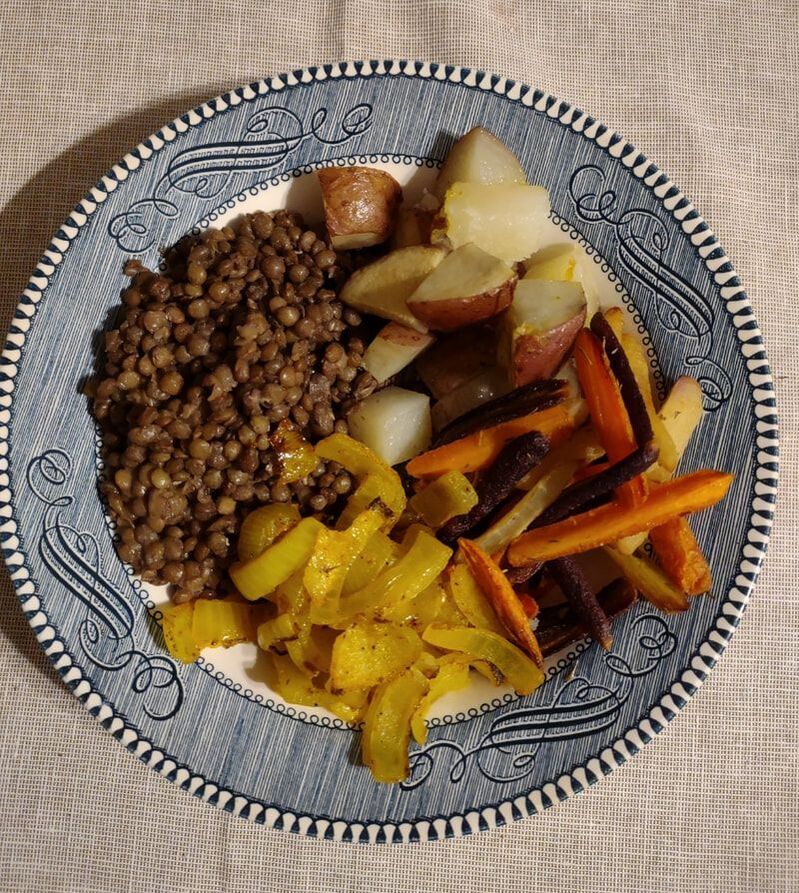 My bowl right before nomming. It's also a great and inexpensive way to feed a crowd. To turn it into dinner party fare, I recommend starting with a salad of baby greens with sliced Bosc pears and a sprinkling of walnut oil and pear vinegar, and serving the lentil bowls with either whole grain toast or garlic bread. Finish with a very French cheese course or simple baked apples, fruit crisp, or custard dessert (like clafoutis). This recipe is, of course, quite accidentally vegan. I did not develop it with the intent that it would be vegan, it just happens to be completely delicious without meat, eggs, or dairy. And since French food was all the rage during the First World War, I thought it a very apt addition to the Meatless Monday list. I hope you enjoy it as much as I do! If you make this recipe, share your thoughts in the comments, or tell me your favorite lentil dish! The Food Historian blog is supported by patrons on Patreon! Patrons help keep blog posts like this one free and available to the public. Join us for awesome members-only content like free digitized cookbooks from my personal collection, e-newsletter, and even snail mail from time to time! Don't like Patreon? Join with an annual membership below, or just leave a tip! 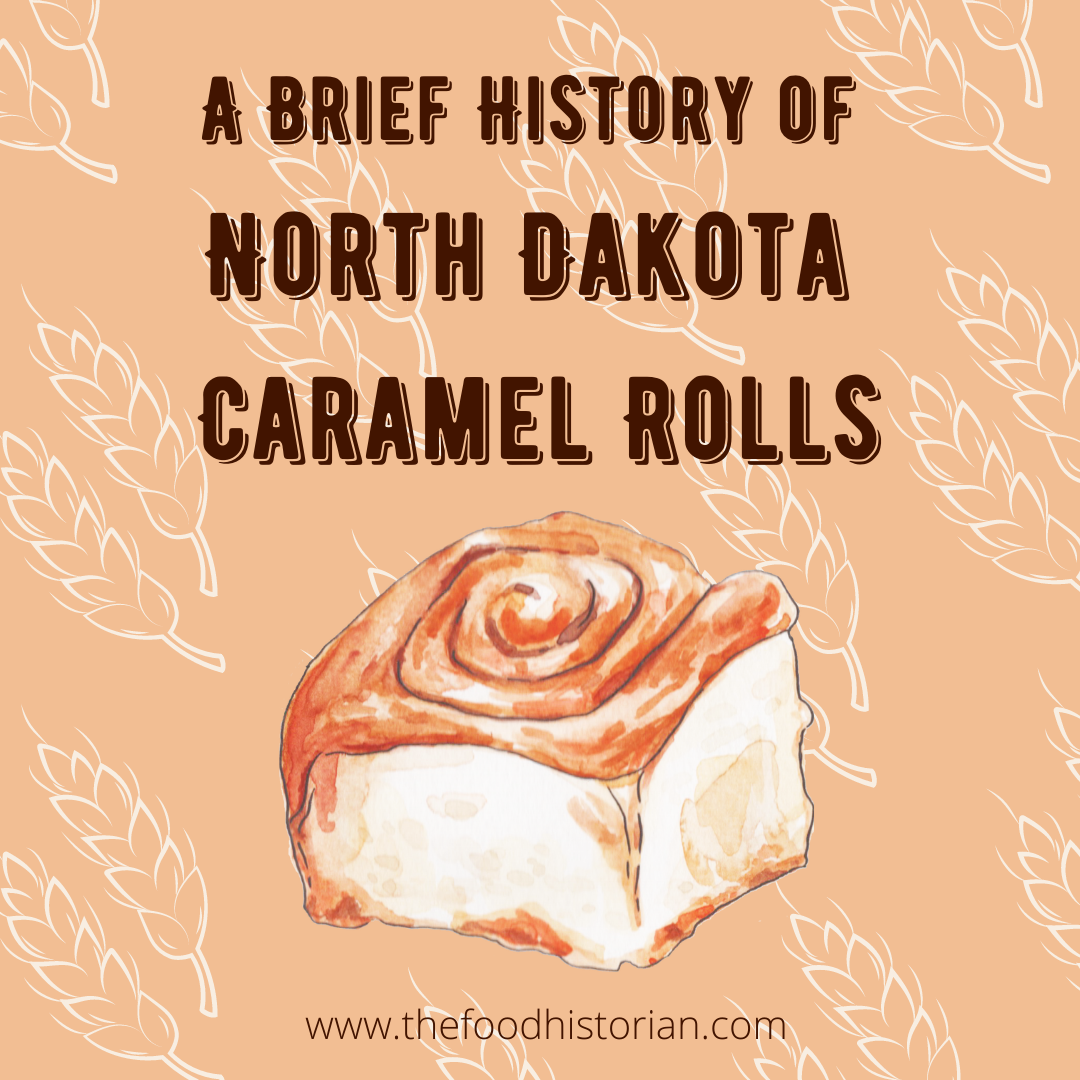 Last week I went home to Fargo, ND for my grandfather's funeral. He had passed away in June of this year, just a few weeks short of his 102nd birthday. Born in 1919, he lived to see a lot of change and ultimately, two global pandemics. It was the first time I had been home since 2019, when I returned for grandpa's 100th birthday and a cousin's wedding. Every time I go home to North Dakota, there's both joy and grief. Joy in seeing old friends and family, in visiting the old stomping grounds, in being able to see the whole sky without too many trees and mountains in the way, and being back in the land where Scandinavian culture still looms large (I went to the Sons of Norway, Kringen Lodge, four times in six days). But also grief, for what once was and will never be again. The common sort of grief when the stomping grounds change almost beyond recognition, but also another sort of grief, of cultural loss. When I was in high school, North Dakota had two Democratic Senators and a Democratic Representative and our biggest exports were wheat, sunflower seeds, honey, and sugar beets. Things have certainly changed since then. But some things haven't changed at all. Case in point: the North Dakota Caramel Roll (pronounced "car-mull," not "care-ah-mel"), formerly called "Dakota Rolls." Once the purview of rural cafes and church basements, the caramel roll is seeing something of a North Dakota renaissance. It's everywhere, and it's amazing. 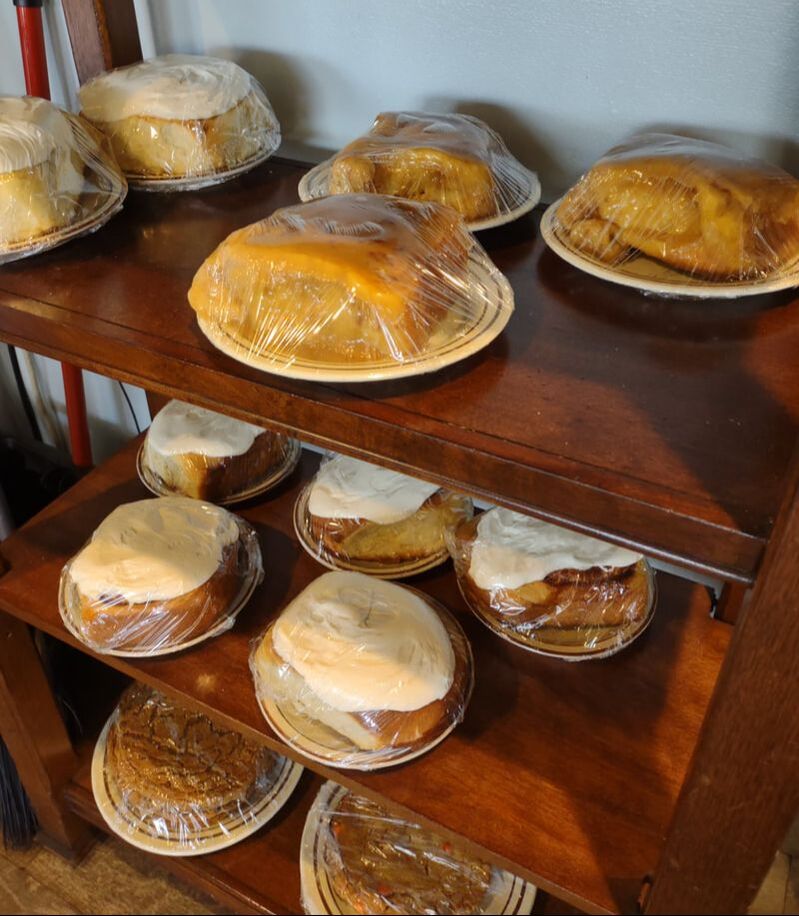 Caramel rolls, cinnamon rolls, and cookies the size of my head, on display at The Shack in North Fargo, ND. Not to be confused with cinnamon rolls or the sad, dried out, caramel roll cousin, the "sticky bun," caramel rolls are pillowy soft and drenched in smooth caramel. There's nothing worse than getting a caramel roll that's more roll than caramel. The Northeast can keep its dry and sticky buns with burnt pecans. I tried my best to track down the history of "Dakota rolls," but sadly no one else appears to have done the research yet, so this is my stab at it. I think perhaps their prominence in North Dakota has to do with the specific confluence of immigration that makes North Dakota - especially the Eastern half of the state - special when compared to others. Scandinavians, especially Norwegians, abound. Germans, too, but one particular group, Germans from Russia, have settled on the northern plains, including North Dakota, in higher concentrations than anywhere else in the world. The intersection of Scandinavian and German immigration has meant that North Dakota is home to some prodigious bakers. Cinnamon rolls are thought to have originated in Scandinavia, possibly Sweden. They were also historically popular in Germany, where the sticky bun or "schnecken" (snail) is from. Honey-sweetened buns date back to ancient Rome, but the idea to roll the dough flat, spread it with a filling, and roll it into a spiral before slicing was an inspiration whose inventor is lost to time. Caramel rolls specifically seem to date to the early 20th century in North Dakota. I did find a few 19th century references to "sticky buns," but no recipes. The search term "caramel roll" turns up almost exclusively candy advertisements and recipes until the 1920s. I did find one reference to caramel rolls from the Hughes Brothers Bakery in Bismarck, ND. Although the bakery itself predates 1911, they moved to a new location that year, and apparently began engaging in regular newspaper advertisements thereafter. 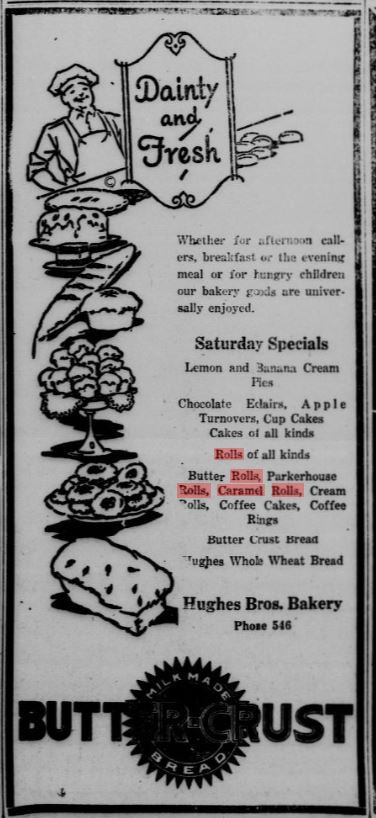 Hughes Bros. Bakery advertisement mentioning Caramel Rolls, "Bismarck Tribune," September 23, 1927. 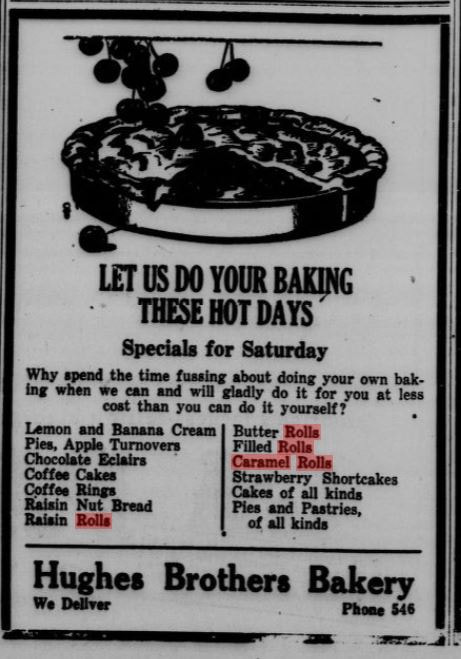 Hughes Bros. Bakery advertisement mentioning Caramel Rolls, "Bismarck Tribune," May 25, 1928. I love the 1928 advertisement - "Let us do your baking these hot days," and published close to Memorial Day, no less! "Why spend time fussing about doing your own baking when we can and will gladly do it for you at less cost than you can do it yourself?" Why, indeed, Hughes Brothers. Why, indeed? Likely coinciding with the rise of diners, roadside cafes, and school cafeterias, the caramel roll expanded across North Dakota (and into some neighboring states, notably South Dakota) with a vengeance. Although there is little mention of them in North Dakota community cookbooks from the 1940s, by the 1970s they're in full evidence. The few recipes that I was able to find are remarkably similar, and all call for making the dough from scratch. But some modern bakers cheat and use frozen bread dough, notably Rhodes brand. My copy of the Westminster Presbyterian Church cookbook from Casselton, ND, undated but likely circa 1970s, judging by the handwriting, has a recipe for "Dakota Rolls" submitted by Mrs. William L. Guy. Mr. William L. Guy was governor of North Dakota from 1961-1973, and the Mrs. was Elizabeth "Jean" (Mason) Guy, who is credited with helping revive the Democratic Nonpartisan League in North Dakota (thanks for the research tip, Mom!). I've reproduced Jean's recipe in full below. Dakota Rolls Recipe1 c. scalded milk (do not boil) 2 T. butter 2 T. sugar 1 t. salt 1 cake compressed or 1 pkg. granulated yeast 1/4 c. lukewarm water 1 egg, well beaten 3 1/2 c. flour (about) Soften yeast in lukewarm water. Stir and let stand about 5 minutes. Combine milk, sugar, salt and shortening (i.e. the butter) and cool to lukewarm. Stir yeast and add to cooled milk. Beat egg, add to milk and yeast mixture. Gradually stir in the flour to form a soft dough (there should be about 1/2 cup flour left for kneading). Beat until smooth. Turn out on floured canvas or board. Cover with greased wax paper and a damp towel. Let rest for 10 minutes. Knead until smooth and satiny, adding flour as needed. This roll dough should not be too firm. Place dough in a warm greased bowl, turning until all of surface is lightly greased. Cover with greased wax paper and damp towel, and let rise in a warm place (85-90 F) about 1 hour and 45 minutes or until double in bulk. Punch down and let rise again until double in bulk. Turn out on flour dusted canvas or board and roll about 1/4" thick in oblong shape, 8" x 16". Brush with melted butter and sprinkle with 1/4 cup brown sugar. Roll as for cinnamon rolls. Cut in 1" slices. Combine 1 C. of brown sugar, 2 T. light corn syrup, and 1 T. butter. Heat slowly in a greased shallow pan or muffin tin. Set aside to cool. Place rolls, cut side down, over the mixture. Cover, let rise until double in bulk. Bake in 375 F oven for 25 minutes. Remove from pan. Cool, bottom side up. Makes 2 dozen rolls. It seems to me that this recipe, while very instructive in terms of the dough, has not nearly enough caramel to cover two dozen rolls. Modern cooks usually combine brown sugar and heavy cream, or some even swear that melted vanilla ice cream is the secret to good and ample caramel. However, the 1975 Fargo-Moorhead Centennial Cookbook also has a recipe for Dakota Rolls, submitted by Judy Adams, which appears to be lifted almost verbatim from the Casselton cookbook. Here's a more caramel-y modern recipe. Sadly, I haven't had time to test this recipe and it's been too hot to bake lately, but fall weather is coming! So maybe a weekend of yeast baking is in order soon. Perhaps I'll combine my caramel roll baking with orange rolls - another Midwestern specialty that seemed to be more prominent in the 1930s and '40s than their caramelly cousins. I'll leave you with one of the few photos I took at home - sunset on Tamarack Lake in Minnesota. And if you're ever in Fargo, try the rhubarb caramel rolls (yes! they put rhubarb in the bottom with the caramel! It's amazing!) at Kroll's Diner. They're divine. 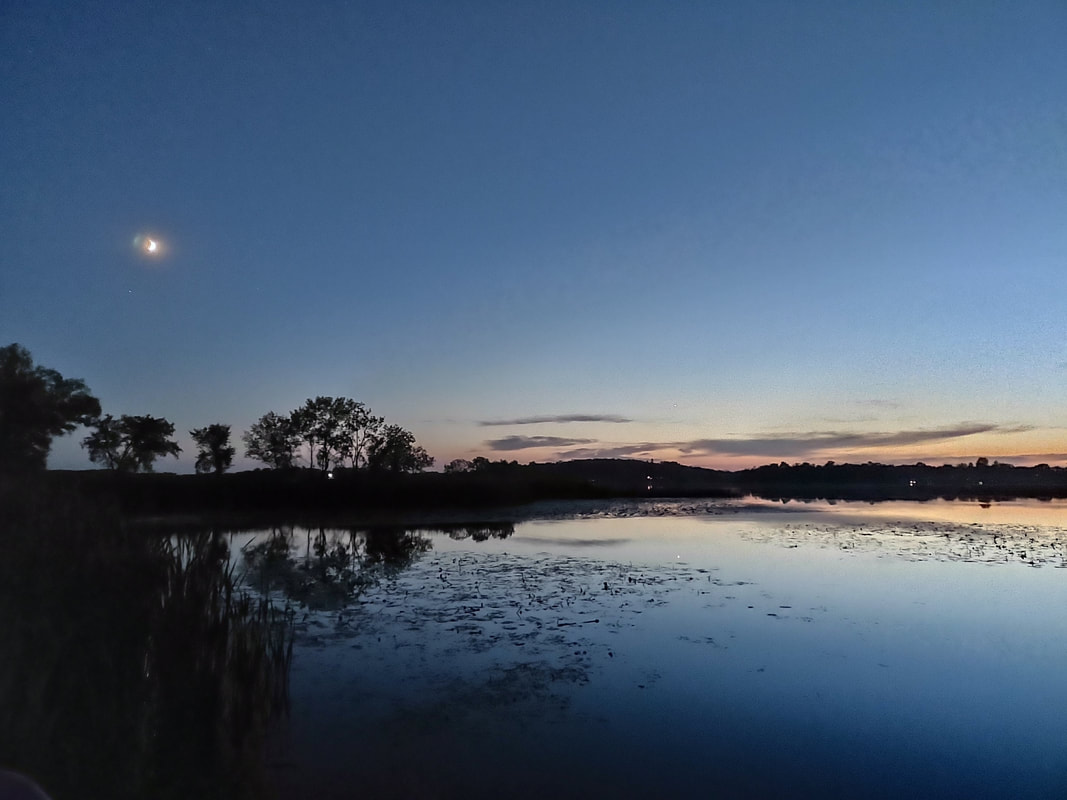 The Food Historian blog is supported by patrons on Patreon! Patrons help keep blog posts like this one free and available to the public. Join us for awesome members-only content like free digitized cookbooks from my personal collection, e-newsletter, and even snail mail from time to time! Don't like Patreon? Join with an annual membership below, or just leave a tip! 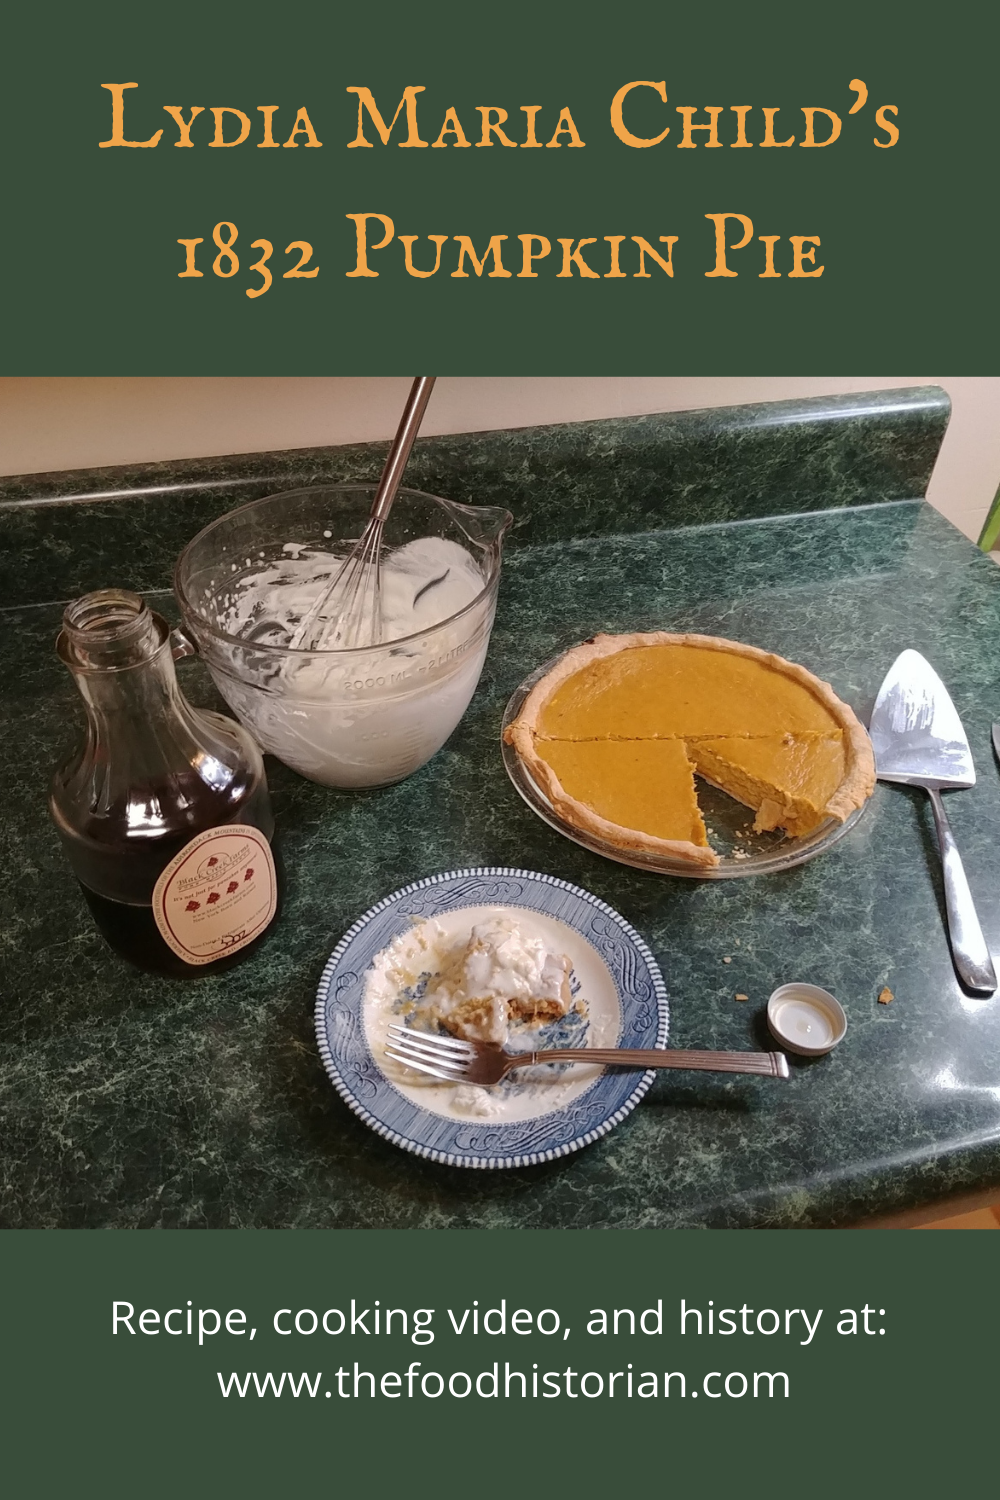 Last week I did the first of a series of several talks with cooking demonstrations for the Poughkeepsie Library. The first was all about pumpkin pie and I made Lydia Maria Child's original pumpkin pie recipe from her 1832 cookbook The American Frugal Housewife, and then followed it with a discussion of the history of pumpkin, pumpkin pie, and pumpkin pie spice. The library recorded the talk, so you can check it out below! Lydia Maria Child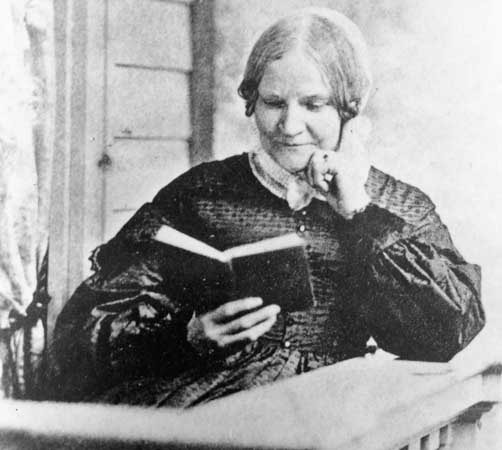 Photograph of Lydia Maria Child reading a book, c. 1865. Lydia Maria Child was born in Medford, Massachusetts in 1802. When she moved to Maine as a young woman to study to be a teacher, her older brother Convers, who had attended Harvard Seminary, assisted with her literary education. Upon reading and article about the rich resources New England history could provide novelists, she launched an unplanned writing career with her first novel, Hobomok, published in 1824. The book was set in 17th century New England and concerned the lives of a Native man, Hobomok, and the White woman he married and had a child with. Initially rejected by critics for its theme of miscegenation, it was later lauded by Boston literary circles. While teaching, Lydia Maria turned her attention to writing again, founding Juvenile Miscellany in 1826 - the first American monthly periodical designed specifically for children. Under Child's editorship, it became a popular and groundbreaking publication, emphasizing Protestant morality without the boring proselytizing common in children's literature at the time. In 1828 she married David Lee Child, a Boston lawyer and journalist (her maiden name was Francis) and stopped teaching, but not writing. In 1829 she published The Frugal Housewife: Dedicated to those who are not ashamed of economy, a cookbook directed at assisting the lower classes. It was published in several editions until 1832, when she changed the name to The American Frugal Housewife, to differentiate it from another cookbook of the same title published in Britain. Child published several other books on motherhood and household management, but her abolition work and radical politics largely derailed her literary career. She and her husband David Child began to identify as abolitionists in 1831. In 1833, she published An Appeal in Favor of that Class of Americans Called Africans, which called, among other things, for total abolition of slavery without compensation to enslavers. It was the first anti-slavery book (not pamphlet) published in the United States. Throughout the 1830s and '40s she became very active in the abolition and anti-slavery movements, publishing anti-slavery fiction, anti-slavery political tracts, and organizing fundraisers and events. Her anti-slavery stance and other radical politics enraged many readers in the American South, and subscriptions to Juvenile Miscellany declined so much that in 1834 she stepped down as editor. Sarah Josepha Hale edited the magazine until its closure in 1836. Child went on to publish tracts supporting Native American rights as well, including An Appeal for the Indians in 1868. Lydia Maria Child died in 1880 at the age of 78. Because of her political beliefs, she did not see the financial success of many of her author peers. But The American Frugal Housewife remains one of her most enduring legacies, along with her most famous poem, "A New England Boy's Song About Thanksgiving Day," which she published as part of her book Flowers for Children, Vol. 2 in 1844. You might know it better as "Over the River and Through the Woods." "A New England Boy's Song About Thanksgiving"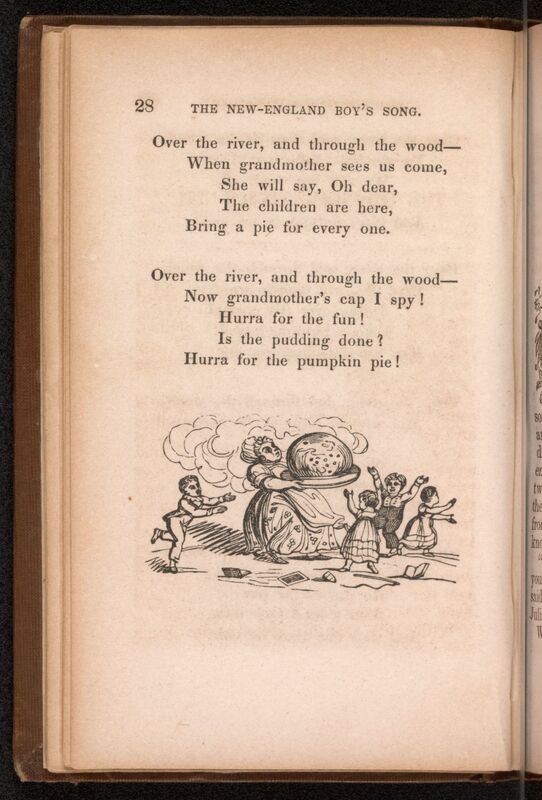 The final page from "The New England Boy's Song for Thanksgiving Day," featuring a delightful illustration of "grandmother" carrying not a pumpkin pie, but an enormous steamed pudding with hard sauce. "Flowers for Children, Volume II" (1844). Library of Congress. Over the river, and through the wood, To grandfather's house we go; The horse knows the way, To carry the sleigh, Through the white and drifted snow. Over the river, and through the wood, To grandfather's house away! We would not stop For doll or top, For 't is Thanksgiving day. Over the river, and through the wood, Oh, how the wind does blow! It stings the toes, And bites the nose, As over the ground we go. Over the river, and through the wood, With a clear blue winter sky, The dogs do bark, And children hark, As we go jingling by. Over the river, and through the wood, To have a first-rate play -- Hear the bells ring Ting a ling ding, Hurra for Thanksgiving day! Over the river, and through the wood -- No matter for winds that blow; Or if we get The sleigh upset, Into a bank of snow. Over the river, and through the wood, To see little John and Ann; We will kiss them all, And play snow-ball, And stay as long as we can. Over the river, and through the wood, Trot fast, my dapple grey! Spring over the ground, Like a hunting hound, For 't is Thanksgiving day! Over the river, and through the wood, And straight through the barn-yard gate; We seem to go Extremely slow, It is so hard to wait. Over the river, and through the wood, Old Jowler hears our bells; He shakes his pow, With a loud bow wow, And thus the news he tells. Over the river, and through the wood -- When grandmother sees us come, She will say, Oh dear, The children are here, Bring a pie for every one. Over the river, and through the wood -- Now grandmother's cap I spy! Hurra for the fun! Is the pudding done? Hurra for the pumpkin pie! "Pumpkin And Squash Pie" (the filling)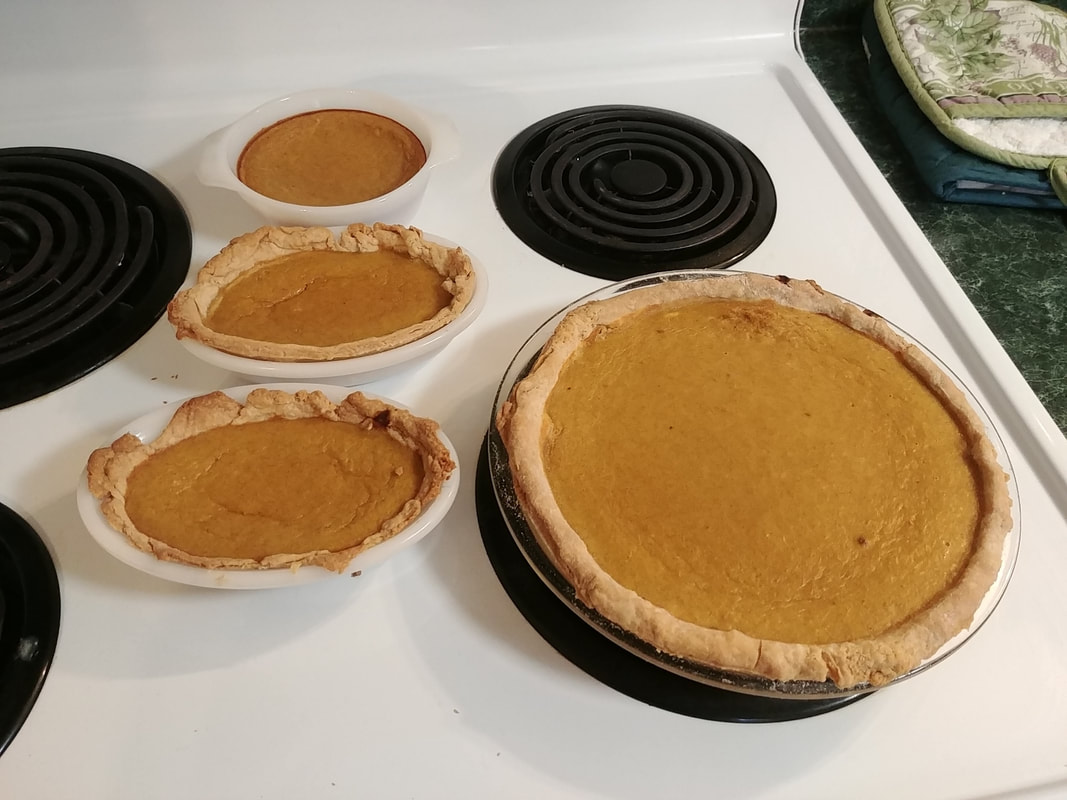 The finished pies I baked for the cooking demonstration! Here is Lydia Maria Child's original text: "For common family pumpkin pies, three eggs do very well to a quart of milk. Stew your pumpkin, and strain it through a sieve, or colander. Take out the seeds, and pare the pumpkin, or squash, before you stew it; but do not scrape the inside; the part nearest the seed is the sweetest part of the squash. Stir in the stewed pumpkin, till it is as thick as you can stir it round rapidly and easily. If you want to make your pie richer, make it thinner, and add another egg. One egg to a quart of milk makes very decent pies. Sweeten it to your taste, with molasses or sugar; some pumpkins require more sweetening than others. Two tea-spoonfuls of salt; two great spoonfuls of sifted cinnamon; one great spoonful of ginger. Ginger will answer very well alone for spice, if you use enough of it. The outside of a lemon grated is nice. The more eggs, the better the pie; some put an egg to a gill of milk. They should bake from forty to fifty minutes, and even ten minutes longer, if very deep." And here's my translation: 1 sugar pie pumpkin 2 cups whole milk 4 eggs 2 tablespoons cinnamon 1 tablespoon ground ginger 1/2 teaspoon salt 1/4-1/2 cup maple syrup Cut pumpkin in half, scoop out seeds, and roast, cut-side down, for 45 minutes at 350 F. When soft and easily pierced with a knife, remove from oven and scoop out flesh from rind. Mash thoroughly with a fork to remove stringiness. Let cool, then add spices and salt and mix thoroughly, then add all liquid ingredients. Pour into chilled pie shells (recipe below) and bake at 450 F for 15 minutes, then reduce heat to 350 F and bake for an additional 30 minutes. When the center is solid (a slight wobble is allowed), the pie is set and baked. Serve warm or cold with additional maple syrup (if desired) and whipped cream (recipe below). If you have extra filling, add to ungreased glass baking dishes or custard cups for equally good "crustless pumpkin pie." "Pie Crust" Half eaten pumpkin pie with extra maple syrup (I went very light on the maple syrup in the recipe) and hand-whipped cream. The original: "To make pie crust for common use, a quarter of a pound of butter is enough for half a pound of flour. Take out about a quarter part of the flour you intend to use, and lay it aside. Into the remainder of the flour rub butter thoroughly with your hands, until it is so short that a handful of it, clasped tight, will remain in a ball, without any tendency to fall to pieces. Then wet it with cold water, roll it out on a board, rob over the surface with flour, stick little lumps of butter all over it, sprinkle some flour over the butter, and roll the dough all up; flour the paste, and flour the rolling-pin; roll it lightly and quickly; flour it again; stick in bits of butter; do it up; flour the rolling-pin, and roll it quickly and lightly; and so on, till you have used up your butter. Always roll from you. Pie crust should be made as cold as possible, and set it in a cool place; but be careful that it does not freeze. Do not use more flour than you can help in sprinkling and rolling. The paste should not be rolled out more than three times; if rolled too much, it will not be flaky." Well that was a bit of a doozy of a recipe! Essentially, she's making an all-butter pie crust by combining shortbread and puff pastry techniques. And it turns out pretty well! If you're looking for a good all-butter pie crust recipe, this is a fairly reliable one, if you handle it gently. Here's my translation: 1 stick (1/4 pound) very cold unsalted butter 1 1/4 cup all-purpose flour 1/4-1/2 cup reserved flour for rolling ice water With cold hands, cut the stick of butter lengthwise in thirds, then rotate one quart of the way and cut in thirds again. Then cut crosswise until you have nice little cubes. Use at least half of the butter to rub into the 1 1/4 cup flour in a large bowl. Add more butter if you need to. From a bowl of ice water, using a tablespoon, add the water, 1-2 tablespoons at a time, and toss mixture with a fork. You'll need 6-8 tablespoons, depending on your flour and butter ratios. When you can make a ball with your hands and it sticks together nicely, but not too wet, you're good. Form the mass into a ball and roll out on a well floured surface, taking care to roll gently so as not to break the dough or roll unevenly. Once you have rolled out a round, spread whole cubes of butter across half the circle, fold in half, and roll that flat. Then repeat 2 more times (making sure to reserve enough butter for each rolling). When complete, roll out for crust. You'll have at least one single crust, with some left over for smaller pies. Place in pans, trim and crimp edges, and chill until ready to fill. Bake with pumpkin filling as directed above, or add your favorite fruit filling. My crust turned out delightfully crisp, but a little flat in flavor. A pinch of sugar and/or salt would probably be a nice addition. Hand Whipped Cream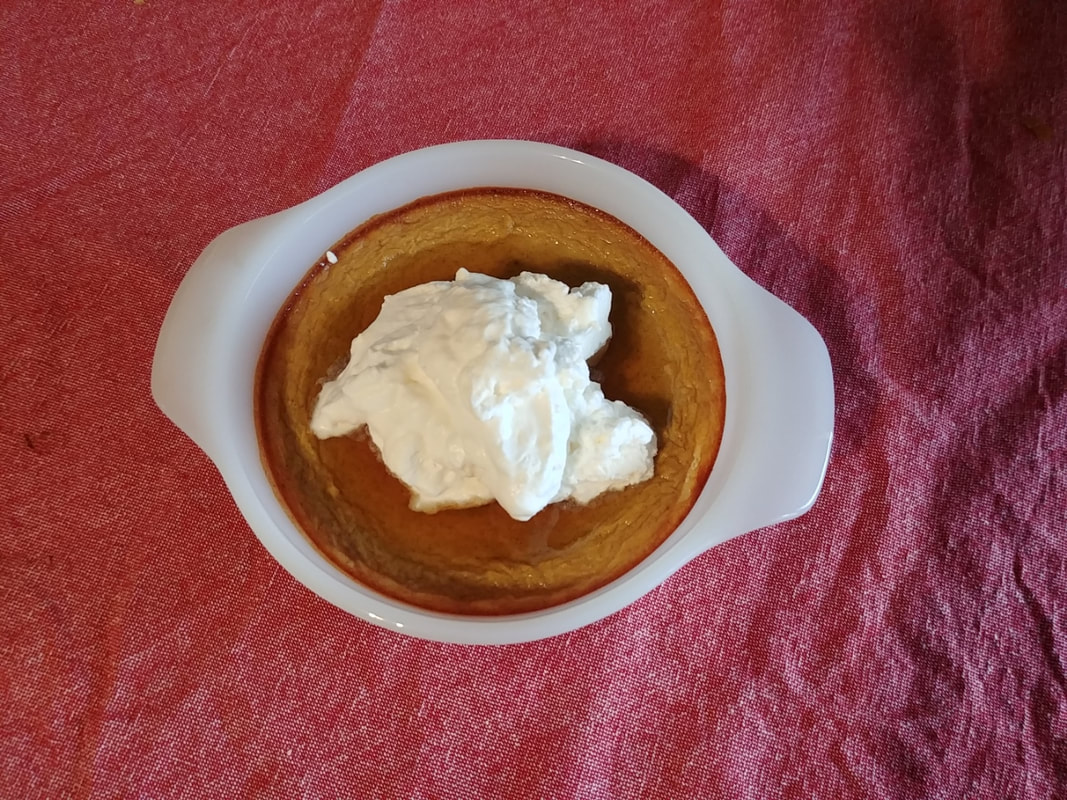 Morning breakfast of champions - crustless pumpkin pie with leftover whipped cream (refrigerated overnight and kept its volume!). This one isn't in The American Frugal Housewife, but it goes deliciously with pumpkin pie! The higher quality/fat content your cream, the easier it is to whip by hand. 1/2 cup heavy cream 1 tablespoon sugar or maple syrup 1 teaspoon homemade vanilla (recipe below) In a very deep bowl (preferably glass, which stays nice and cold), add the chilled cream, sugar, and vanilla. Tilt bowl and beat cream with a wire balloon whisk in a circular motion until you add enough air to the cream that it holds its shape. Do not overbeat, or you'll end up with sweet vanilla butter. Chill until ready to serve. Homemade VanillaHomemade vanilla lasts nearly forever, so it's a worthy investment, but vanilla beans are quite expensive these days, so make at your own expense. Still probably cheaper than buying the tiny bottles of the real stuff. You can make it with vodka, but I find the gold rum is much nicer and mellower. Also makes a great Christmas present. A dozen or so whole vanilla beans Gold rum (get the not-quite-the-cheapest brand) Cut the vanilla beans in half and add them to a quart jar. Fill jar with gold rum. Let sit in a dark place for a week or so before using. Keep adding rum as you deplete the vanilla. You want to keep the beans submerged at all times. Add beans every few years to keep the flavor up. Happy Thanksgiving! And that, my dears, is that. If you made it this far through the blog post, congratulations! I hope you enjoyed the video, some history about Lydia Maria Child, her famous poem, and the recipes. Keep your eyes peeled for more cooking-demonstration-and-talk programs coming up in December, January, and February. I hope you have a wonderful Thanksgiving! As always, The Food Historian blog is supported by patrons on Patreon! Join us for awesome members-only content like free digitized cookbooks from my personal collection, e-newsletter, and even snail mail from time to time!  Today was a chilly VERY blustery day - my styrofoam Halloween headstone actually blew away this morning! Luckily it only blew into the side yard and wasn't too damaged. Long story short, it seemed like the perfect weather for chicken and dumpling soup. Only problem? I'd yet to find a good dumpling recipe. Until I consulted the glorious Ida Bailey Allen and her 1942 Money-Saving Cook Book. Ida Bailey Allen is one of my favorite relatively unknown celebrity cookbook authors. She was PROLIFIC and published over 50 cookbooks in her lifetime, from 1917 to the 1973 Best Loved Recipes of the American People, published the same year she died. A food writer, magazine editor, and essentially the founder of homemaker radio (she was the president of the Radio Homemakers Association), she was also the first female food TV host with her show "Mrs. Allen and the Chef" (you can listen to clip here!). 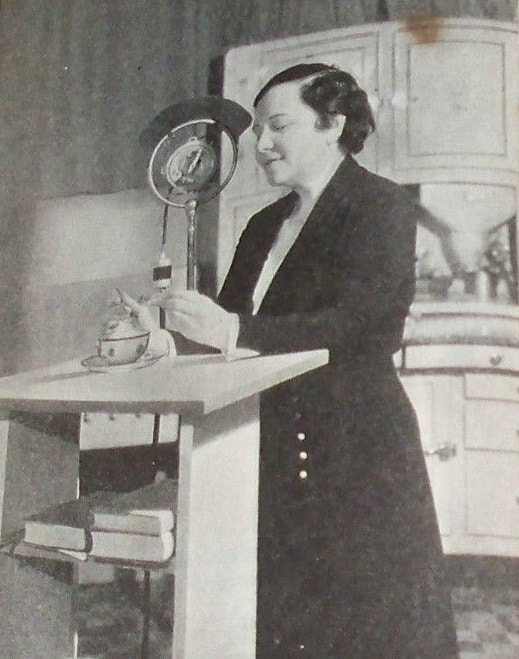 Ida Bailey Allen in her kitchen with a microphone for radio broadcasting, c. 1924. Note the awesome Hoosier cabinet in the background. One of the only moving images of Mrs. Allen that seems to survive on the internet is this little clip from the 1940s - a retrospective of the 1920s. Candy in tea! Who knew? 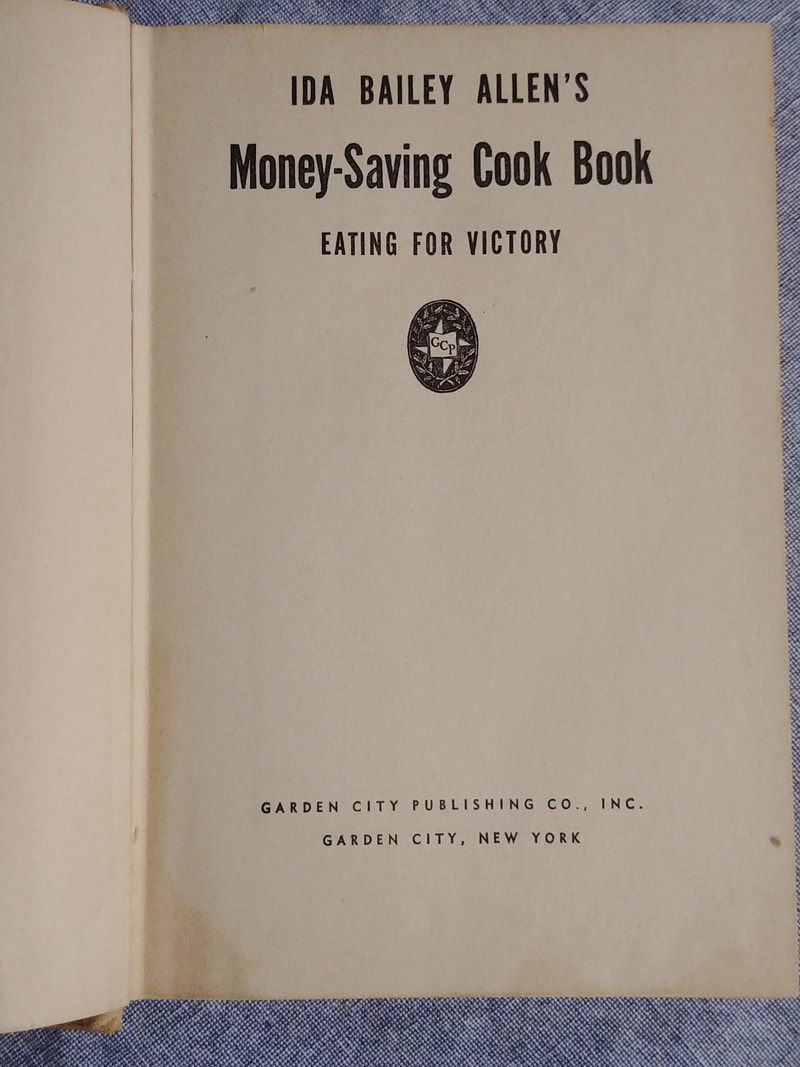 Her Money-Saving Cook Book, first published in 1940 was republished in 1942 as a Victory edition, which is the version I have. It's just a delightful cookbook - chock full of basic, easy, and inexpensive recipes, as well as a bunch of 1940s-style vegetable recipes that I can't wait to try out. So when I was on the hunt for a dumpling recipe to go with my chicken soup, this one of the first cookbooks I consulted, and it did not disappoint. First, let's start with the chicken soup. Scratch Chicken Soup1 pound chicken 5 quarts water (or 4 quarts water and 1 quart chicken stock) 1 onion 2-3 ribs celery 1 cup diced carrots 1 cup frozen peas 1 cup frozen corn (or 1 bag mixed frozen corn, peas, and carrots) salt & pepper to taste Soup is always way easier than people think. It's just a matter of adding ingredients at the right time depending on how long they have to cook. Start with the chicken. You can use boneless or bone-in, skin-on. If using boneless, substitute 1 quart of water with chicken stock for extra flavor. In a large stock pot (I used my favorite cast iron dutch oven), add the chicken, water (and/or stock), onion, celery, and carrots (if using fresh). If not using chicken broth (which is salted), add a teaspoon of salt. Bring to a boil and reduce heat to a simmer, cooking until the chicken is cooked-through and the carrots are tender. About 20 minutes. Remove the chicken from the broth, dice, and return to the pot. Add the frozen vegetables and return to a simmer. Once the vegetables are tender, voila - chicken soup. You can now proceed to the dumpling recipe. 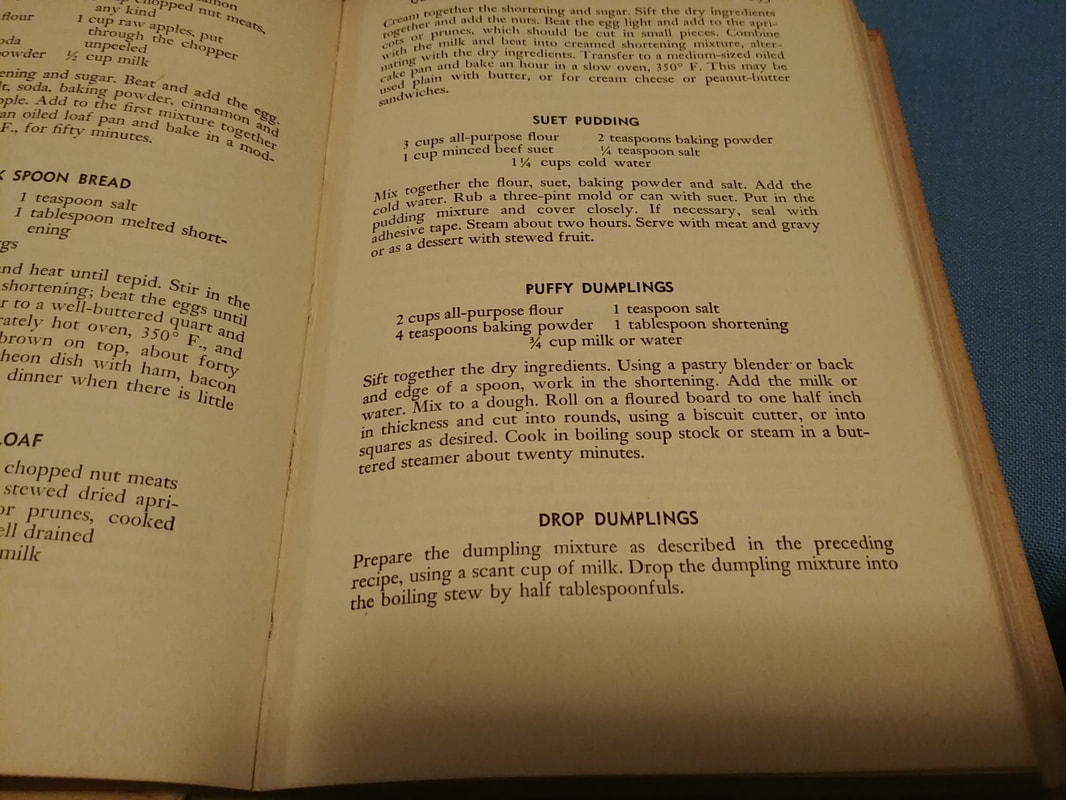 Ida Bailey Allen's Puffy Drop DumplingsI didn't want to roll out the dumplings, so I used the Drop Dumpling version of the recipe. Here's the original, which turned out pretty well! I did substitute butter for the shortening. If you use salted butter, reduce the salt in the recipe to 1/2 or 3/4 teaspoon. 2 cups all-purpose flour 1 teaspoon salt 1 teaspoons baking powder 1 tablespoon unsalted butter 1 cup whole milk Use a balloon whisk to blend the flour, salt, and baking powder together. Cut the butter into small pieces and squish in the flour with your fingers (or cut in with a pastry blender) - there should be small chunks or streaks of butter left in the floury mixture. Then add 1 cup milk. Mrs. Allen called for a scant cup, but that wasn't quite enough - my mix was dry instead of being soft. Using a regular table or soup spoon, drop bits of dough about the size of a walnut (or a little larger) into the simmering soup. There will be a lot - submerge any exposed parts under the broth to make sure they steam properly. They'll start puffing up/breaking up almost immediately. Cover the pot and simmer for about 5 minutes. The flour from the dumplings will thicken the broth nicely.  The simmering pot of dumplings. (Please ignore my messy stove!) 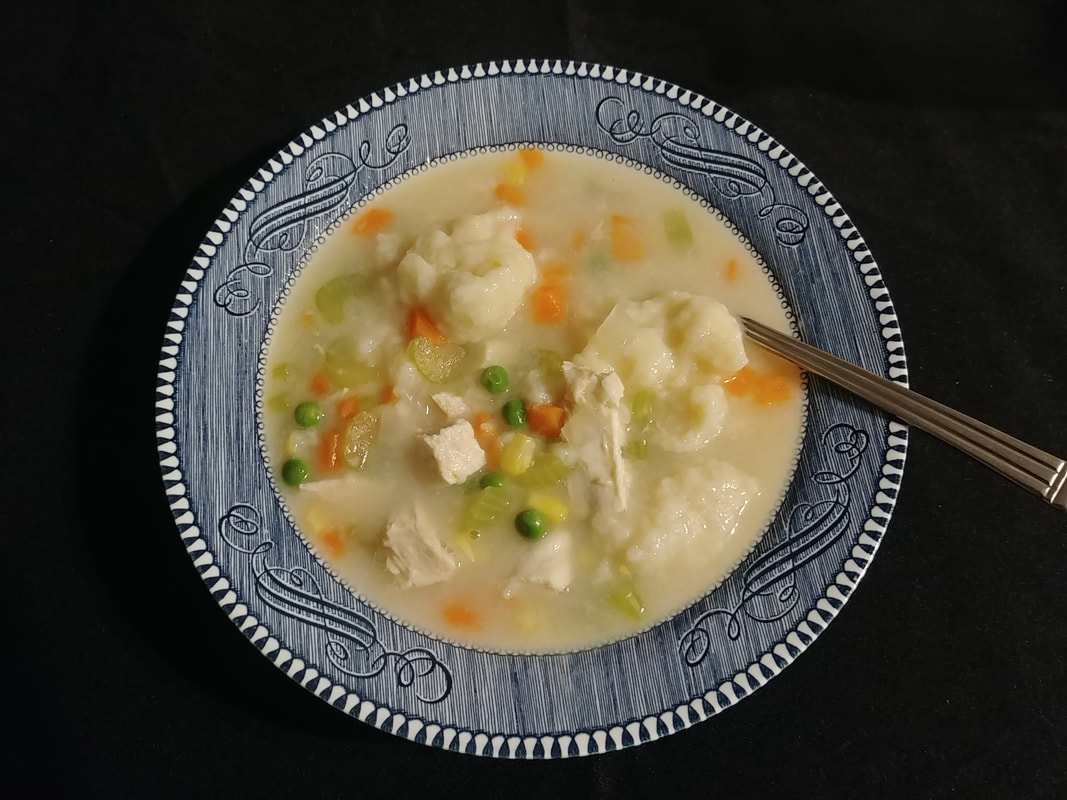 The delicious finished product. The dumplings exceeded my expectations - being a cross between that doughy chew you expect from a nice soup dumpling and light and spongy on the inside of the larger ones. All in all - a perfect one pot supper on a blustery, chilly day. The Food Historian blog is supported by patrons on Patreon! Join us for awesome members-only content like free digitized cookbooks from my personal collection, e-newsletter, and even snail mail from time to time!
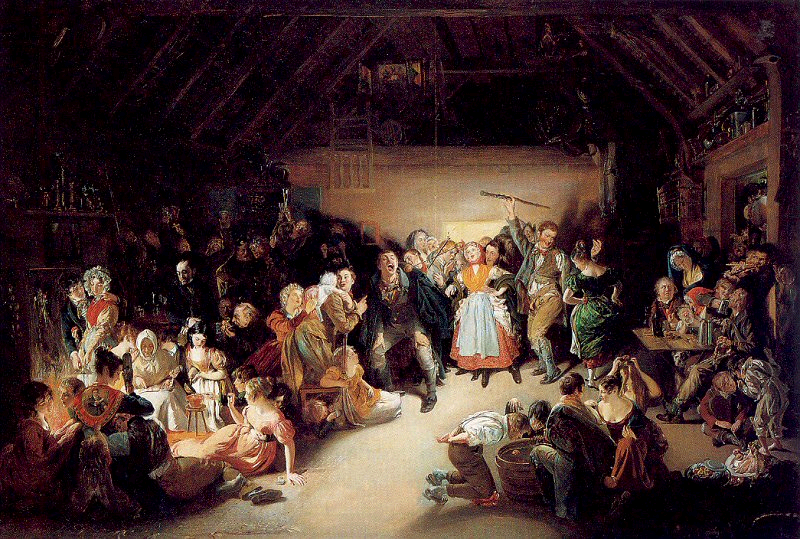
Snap-Apple Night, painted by Irish artist Daniel Maclise in 1833.
Thanks to everyone who joined us for Episode 22 of the Food History Happy Hour! This was a very special Halloween themed episode! We made the early 19th century Stone Fence cocktail, and talked about all sorts of historic Halloween traditions and foods, including the Celtic and Catholic origins of Halloween, Halloween games and divination, including Snap Apple (as illustrated above), donuts, party foods including gingerbread, grapes and grape juice, apples, pumpkins, color themed parties, decorations, including Dennison's Bogie Books, the history of trick-or-treating, and more!
Stone Fence Cocktail (19th Century - 1946)
There's all kinds of versions of this - I was first introduced to the Stone Fence in the Roving Bartender (1946), and of course it's in Jerry Thomas' "How to Make Mixed Drinks" (1862) also has a version, which is largely how it gets popularized in bars across the country. But mixing hard cider with brown liquor dates to much earlier, and the type of brown liquor depends on the region. Both of these recipes call for Whiskey/Bourbon, but I decided to go with spiced rum. Other versions also call for Angostura bitters or cinnamon, which is unnecessary if you use spiced rum, like I did.
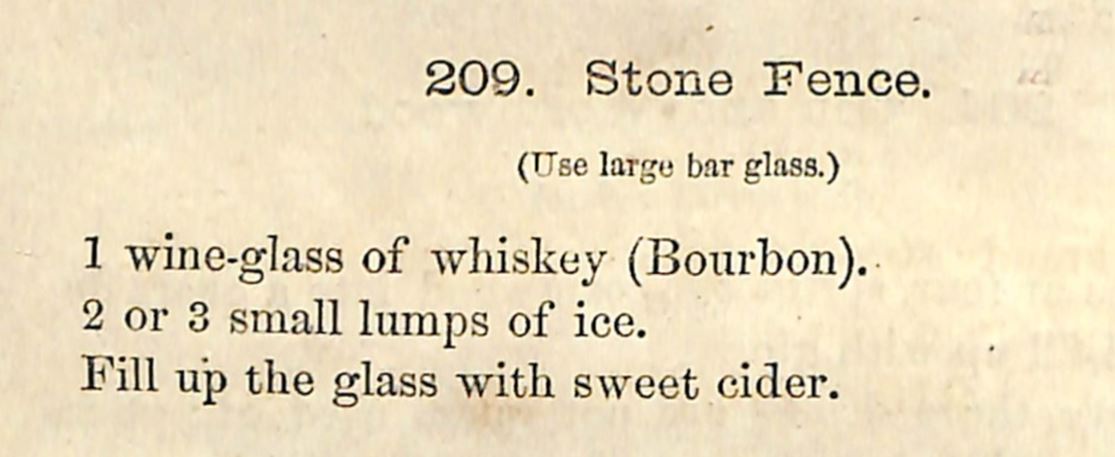
Recipe for the Stone Fence, from "How to Mix Drinks" by Jerry Thomas, 1862.
You'll note that the Jerry Thomas recipe actually calls for the use of sweet cider, which is unusual. Here's the original recipe:
(209) Stone Fence. (use a large bar glass) 1 wine glass of whickey (bourbon). 2 or 3 small lumps of ice. Fill up the glass with sweet cider. 
Stone Fence recipe from "The Roving Bartender" by Bill Kelly (1946).
I like the Bill Kelly recipe from the Roving Bartender a bit better. Here's the original:
Stone Fence. 1 oz. whiskey in a high ball glass Fill with hard cider. And of course, there's my own version! 1 oz. spiced rum Fill with hard cider (I used Strongbow Artisanal Blend) I did not use ice, because I was lazy, but if you don't make sure your hard cider is chilled for the best version. You could also turn this into a sort of flip by heating the hard cider (don't boil unless you want to lose the fizz and the alcohol content) and adding the spiced rum at the last minute. 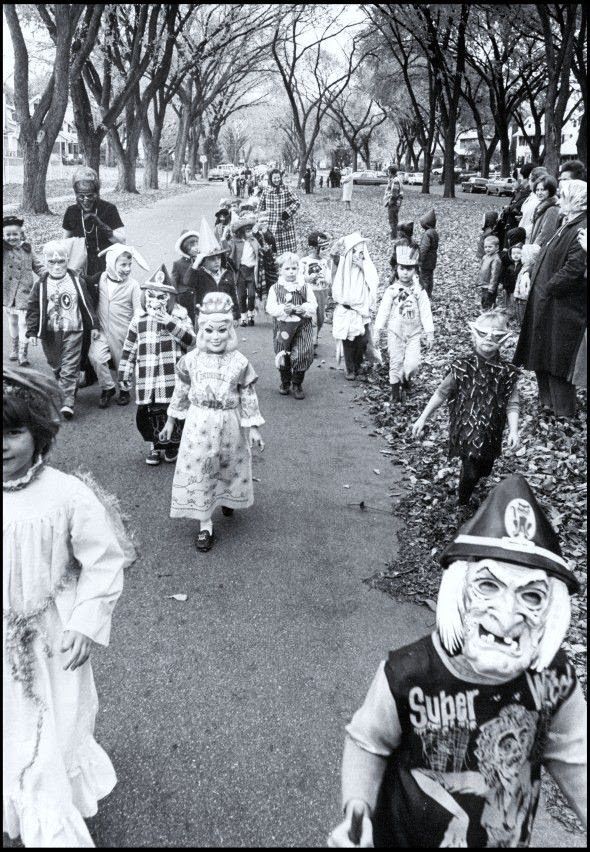
A great 1950s image of trick or treaters in a very suburban area. Note the mix of store-bought masks and homemade costumes.
Episode Links
I love Halloween and had a bunch of fun putting this together.
That's all for tonight! I hope everyone has a very Happy Halloween tomorrow and we'll see you in November for the next episode of Food History Happy Hour! 
Food History Happy Hour is supported by patrons on Patreon! Join us for awesome members-only content like free digitized cookbooks from my personal collection, e-newsletter, and even snail mail (like the Halloween packet) from time to time!

Thanks to everyone who joined us for Episode 21 of the Food History Happy Hour! We discussed pumpkins and their indigenous origins, as well as the history of pumpkin pie spice, including a discussion of the European spice trade, where various spices come from, and how they went from the purview of the fabulously wealthy to hopelessly old-fashioned, to ragingly popular again. Plus we talk about how pumpkin spice got its name and what's REALLY in those cans of pumpkin puree.
Port Wine Negus (1862)
This particular recipe comes from the famous Jerry Thomas, in his 1862 book, The Bar-Tender's Guide but the drink is actually much older, dating back to the 18th century, and features in the novels of Jane Austen and Charles Dickens. By the Victorian period, it was commonly used for children's parties (shocking I know), and it seems that Jerry Thomas may have lifted his recipe directly from Isabella Beeton.
I followed this recipe pretty closely, and it makes a LOT - I filled my teapot full - so be aware that either you need to save any leftovers for a soda negus (also in Jerry Thomas), share with friends, or cut the recipe down. Here's the original: 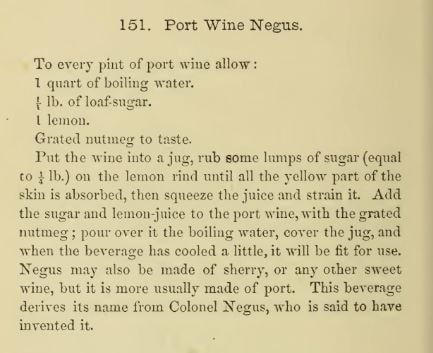
Recipe for Port Wine Negus from The Bar-tender's Guide by Jerry Thomas, 1862.
151. Port Wine Negus
Here's the version I made:
4 cups water, brought to a boil 2 cups Ruby port 1/2 cup sugar 4 tablespoons bottled lemon juice 4 cloves about 1/4 teaspoon fresh grated nutmeg This makes one and a half quarts of hot Negus, which is delicious but was too sweet for my taste. I'm guessing the original recipe called for Tawny port, which is not as sweet as Ruby port. I also cheated and used bottled lemon juice instead and added cloves because another recipe for soda negus I saw called for them. It really is imperative to use fresh nutmeg for this recipe, as the ground kind doesn't hold a candle in flavor. One or two nutmegs will last you a long time, so you don't have to buy a ton. It is fairly addictive, so just be forewarned. I may or may not have had four cups in the course of Food History Happy Hour and writing this blog... Episode Links:
I had fun researching this topic and even learned a few things! One of my primary sources for the European spice trade as the book Nathaniel's Nutmeg, by Giles Milton. It's a highly engaging read and designed for a more popular audience, so if anyone wants to read about bloodthirsty Europeans obsessed with spice and their various maritime misfortunes, check it out.

other fun links include:
The next Food History Happy Hour won't be until Friday, October 30, 2020, but we'll be discussing Halloween! And making the Stone Fence cocktail. I hope you'll join us then. AND! I have a special treat for Patreon members old and new - join or renew at the $5 level and above, and you'll get a special Halloween packet mailed to you! Chock full of all kinds of fun history, images, party ideas, recipes, and more.
If you enjoyed this episode of Food History Happy Hour and would like to support more livestreams, please consider joining us on Patreon. Patrons get special perks like access to members-only content.
|

AuthorSarah Wassberg Johnson has an MA in Public History from the University at Albany and studies early 20th century food history. Archives
July 2024
Categories
All
|

 RSS Feed