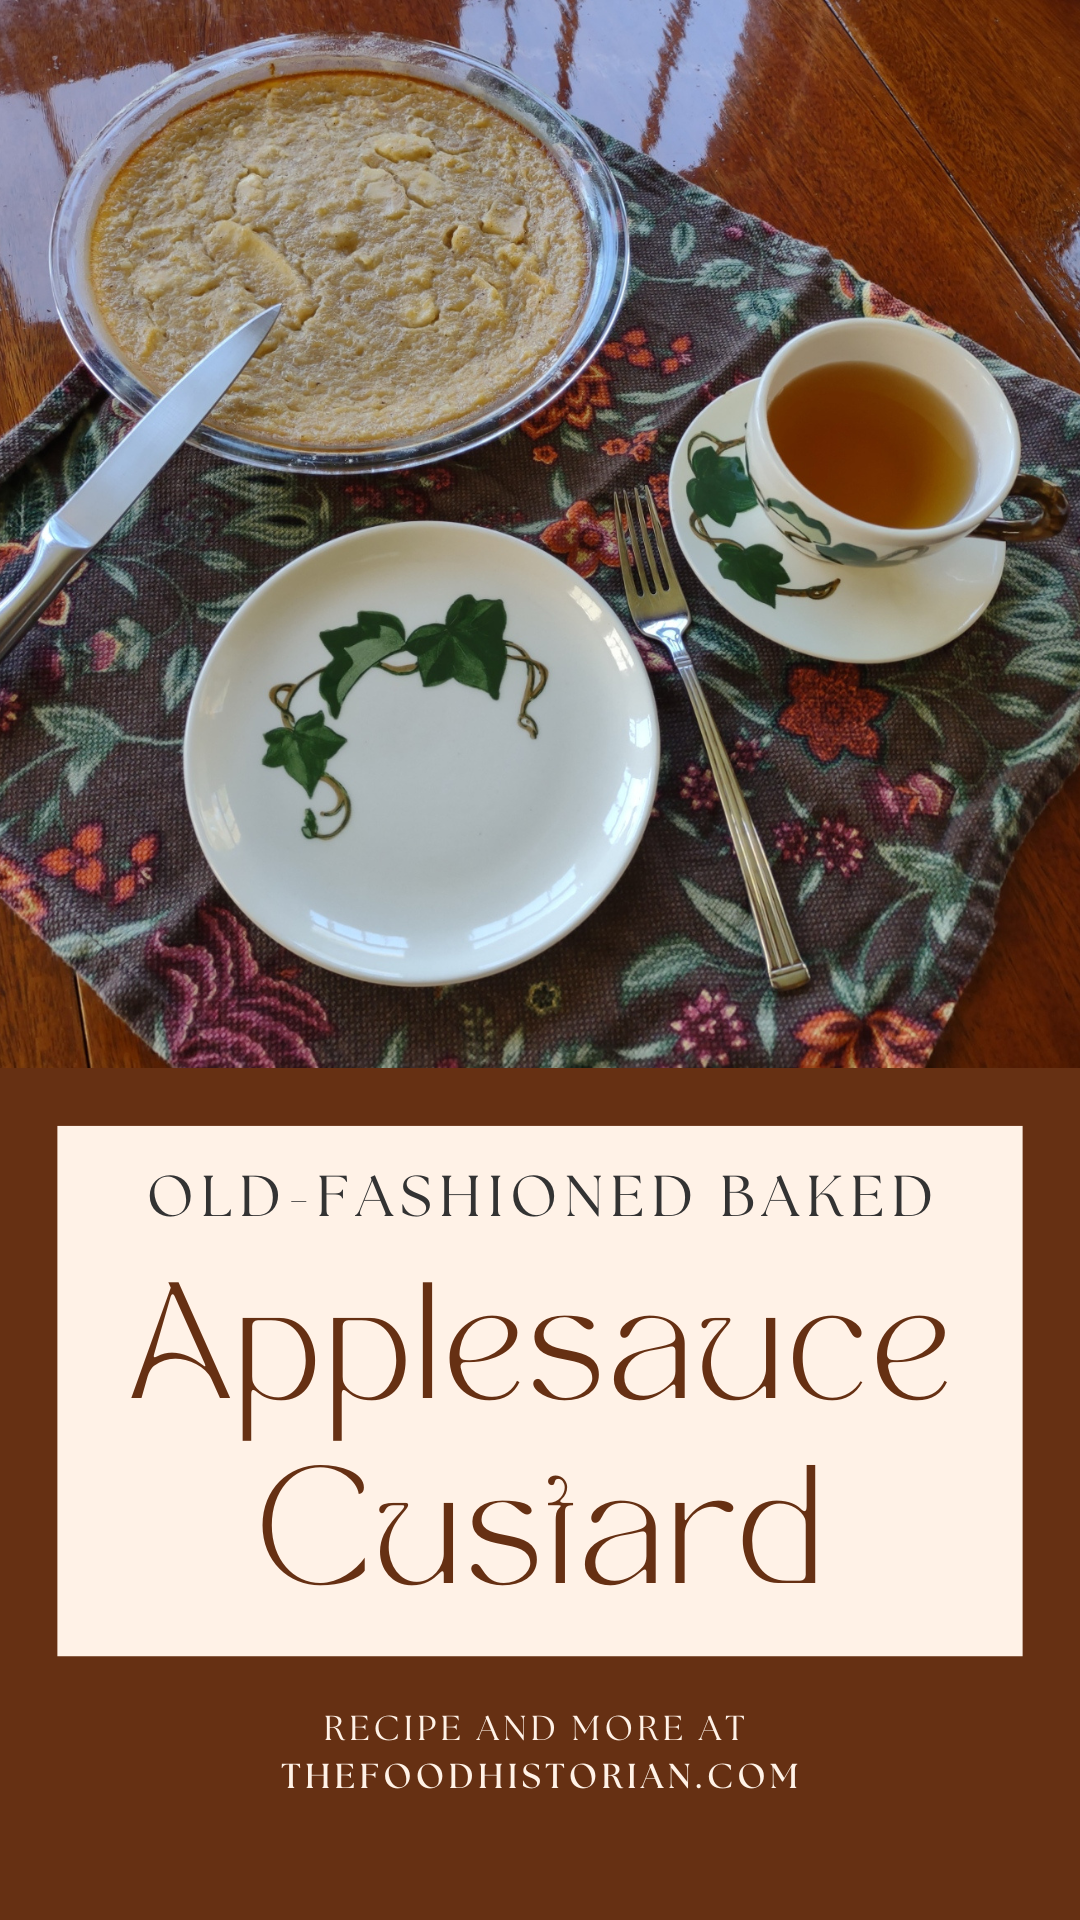
 I call this old-fashioned baked applesauce custard because while it's not from a historic recipe, it does hearken back to several styles of historic recipes. Its antecedents are:
Apples plus dairy seem to be a recurring theme, and while apple crisp with ice cream and apple pie with whipped cream are a delight, I wanted to try something a little different. Enter, baked apple custard. As you may have noticed, I've been on an apple kick lately, and this custard just doesn't disappoint. I had most of a quart jar of homemade applesauce in my fridge that needed using up as I hadn't canned it, and it had been made over a week ago. If you leave applesauce in the fridge long enough, it will start to ferment! And I didn't want that work to go to waste. I also felt like cooking something a bit more dessert-y than just eating plain applesauce with a little maple syrup or cream. This recipe is a mash-up of two, mainly - an applesauce custard pie recipe, and crustless custards. It was an experiment that turned out eminently delightful. Old-Fashioned Baked Applesauce Custard Recipe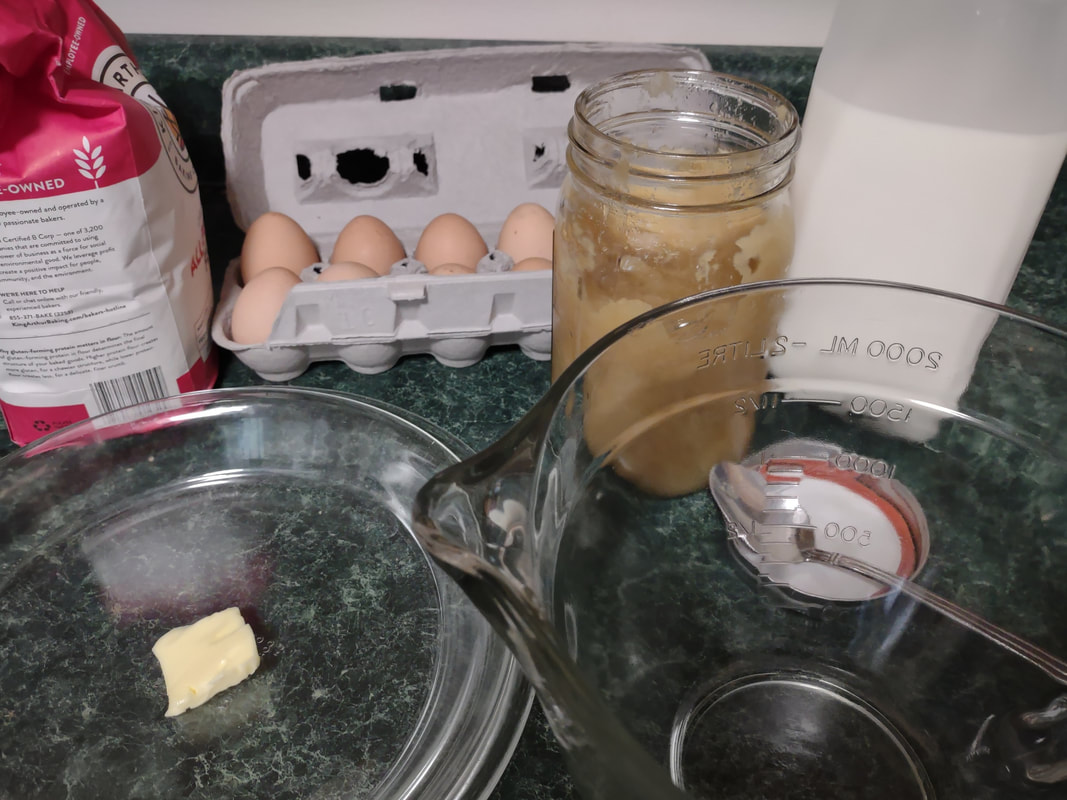 Most of the ingredients, flour, eggs, homemade applesauce, and milk. This recipe starts with a very simple applesauce recipe, although you can use unsweetened store-bought applesauce if you prefer. But I liked the chunky kind, like my mom used to make. Start with apples you like. Most modern dessert apples will not need sweetening. Peel them, quarter, and cut out the cores (I use a sharp paring knife to make a V-shape around the seeds, like my mom used to do). Slice them lengthwise into a pot and cook over medium-low heat, uncovered, stirring occasionally. If the apples seem dry, add two tablespoons of water to get them started. The bottom ones will cook into mush, and the ones closer to the top will stay firmer. If you prefer, you can mix cooking apples like McIntosh with a crisper apple like Honeycrisp or Gala to get the same result. I used a mixture of Gingergolds, Golden Supremes, and Winesaps - some of my favorite locally available apples. Once all the apples are fork-tender or sauce, et your applesauce cool fully, and you're ready to start the recipe. 2 eggs 1/3 cup sugar or maple syrup 1 tsp. cinnamon 1/4 teaspoon salt 2 tbsp. flour 1 cup milk 1 1/2 cups homemade, unsweetened applesauce Preheat the oven to 350 F. Grease a glass pie plate generously with butter, and flour it (sprinkle with flour and tap and rotate the pie plate to coat it with a thin layer of flour - discard any extra, or use it in the recipe). In a large bowl with a pouring spout, whisk the eggs, sugar, cinnamon, and salt together until well-combined. Add the flour and whisk well to prevent lumps. Then stir in milk and applesauce. Pour into the buttered and floured pie plate, and carefully place in the oven. Cook 30-40 minutes or until the center is set. The top will be sticky. Let it cool slightly and serve warm, or chill and serve cold. 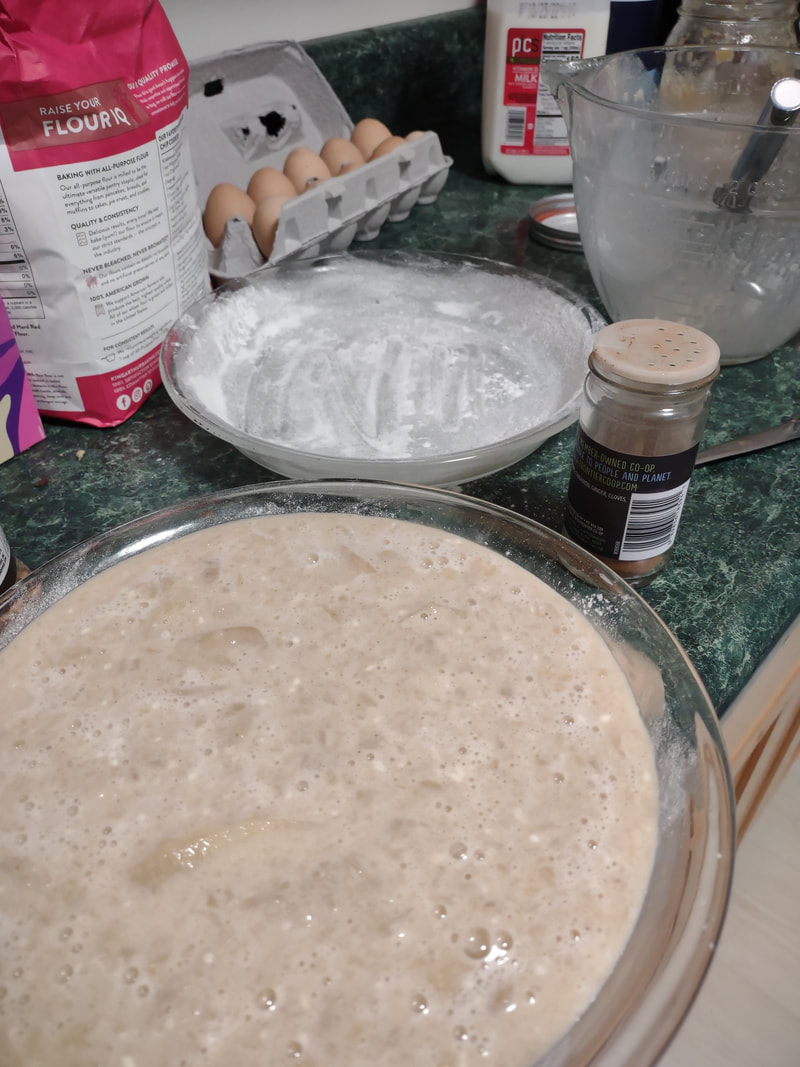 A slightly blurry pic of one pie plate filled with applesauce custard, another to go. Ignore the lumps of flour - I nearly forgot on the first one and added it last! Don't make my same mistake - the second version was better. This recipe is easy to double, like I did, but the high applesauce ratio means it's very soft and delicious, but it won't cut up into a nice, neat pie slices (as you'll see below). Better to make it in a pretty oval baking dish and serve with a large spoon instead of in slices. It doesn't need it, but add some whipped cream if you're so inclined. 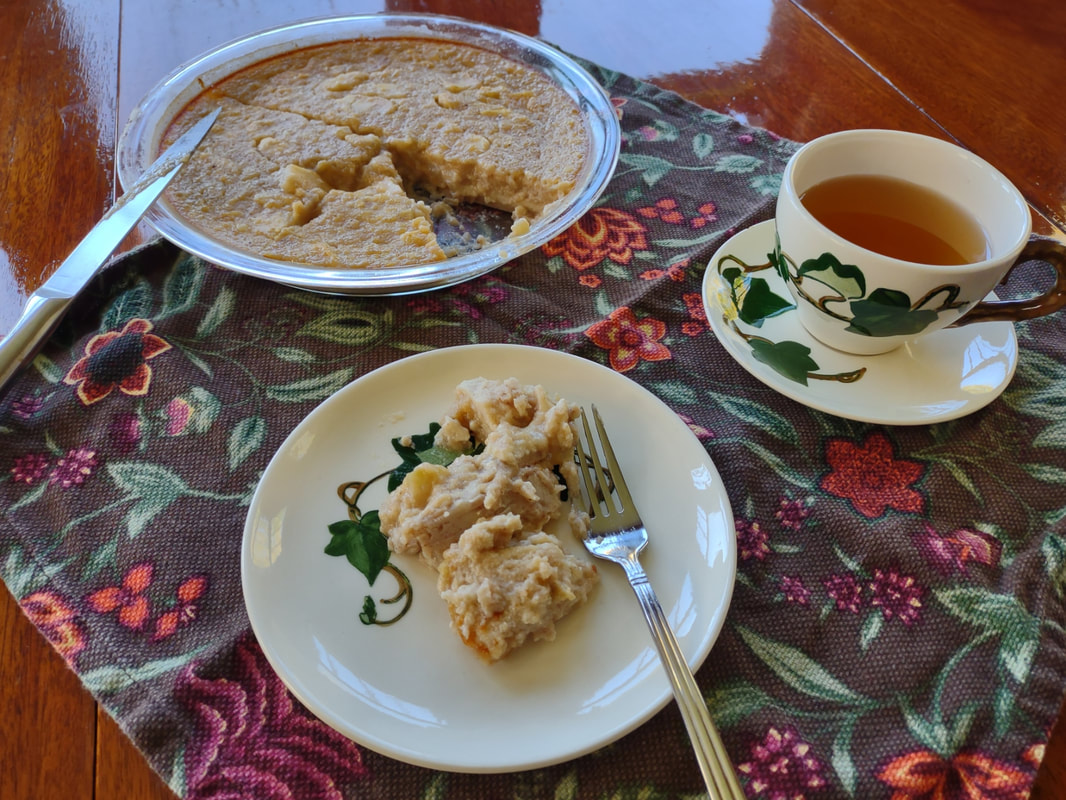 The first slice was kind of a mess, but delicious.  The second slice didn't come out any better. Oh well, it was so delicious it wasn't a hardship at all to eat another. Old-Fashioned Baked Applesauce Custard is simple and homey, creamy and delicious whether served warm or cold. It tastes of fall and childhood, and that particular poignant longing for a past or place you know never existed that seems so endemic to autumn. It's the perfect dish for that transition between fall and winter, when November gets misty and the blazing leaves turn brown, and the days get darker. Who needs the fuss of pie crust? It makes a perfect after-school snack, weekend breakfast, or comforting dessert after a long work day. It doesn't look like much, but you could gussie it up for Thanksgiving too, if you've a mind. And while it's almost certainly better with homemade sauce, it's probably pretty darned good with the store-bought kind, too. Happy eating, friends. The Food Historian blog is supported by patrons on Patreon! Patrons help keep blog posts like this one free and available to the public. Join us for awesome members-only content like free digitized cookbooks from my personal collection, e-newsletter, and even snail mail from time to time! Don't like Patreon? Leave a tip!
3 Comments
Welcome to The Food Historian's 31 Days of Halloween extravaganza. Between social media (Facebook, Instagram, Twitter) and this blog, I'll be sharing vintage Halloween content nearly every day this month! 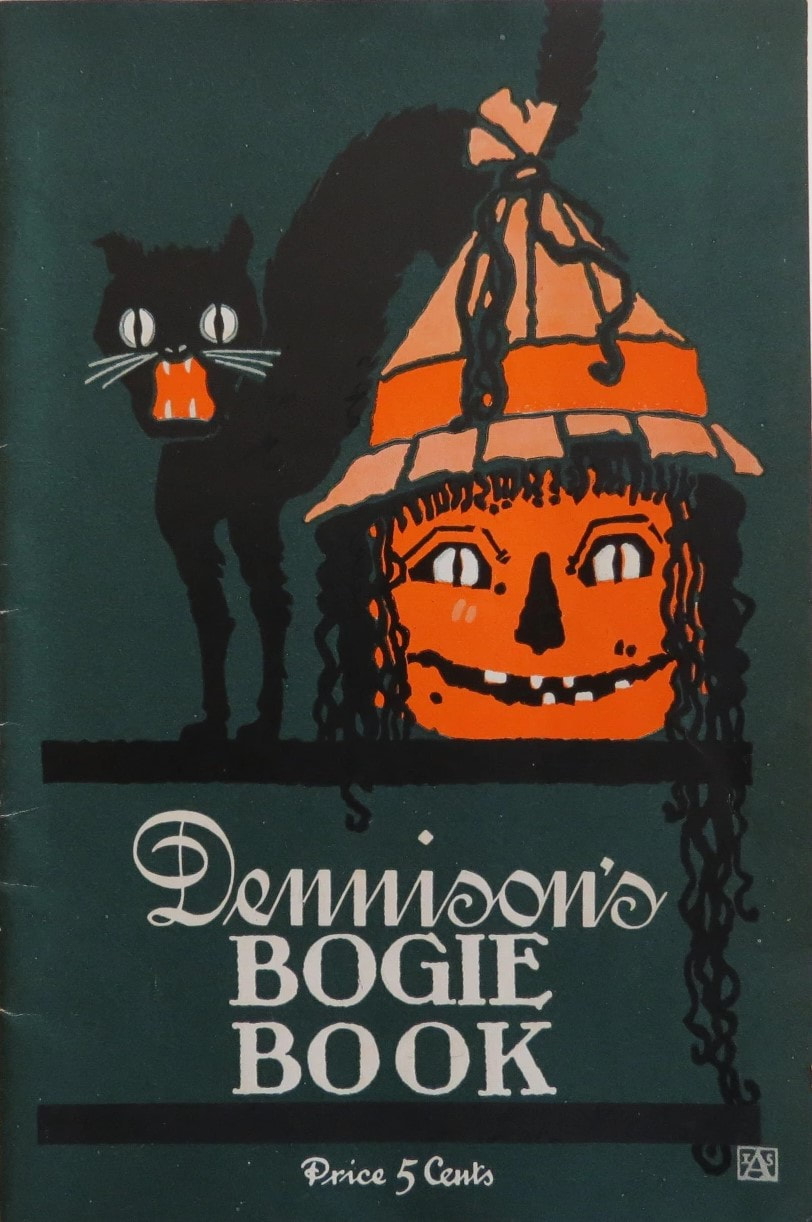 Cover of the 1919 issue of "Dennison's Bogie Book," in dark green featuring a glowing orange jack-o'-lantern with long hair and a witch hat and a yowling black cat. Image courtesy the Vintage Halloween Collector. If you're a fan of Halloween and all things vintage, you've probably heard of Dennison's Bogie Books. Launched in 1909 by the Dennison paper products company, which specialized in crepe paper, the Bogie Books became hugely popular for their ideas for parties, costumes, and yes, menus. The idea of direct-to-consumer advertising was starting to take off in the 1900s, and certainly food companies were capitalizing on corporate cookbooklets at this time. But Dennison's was one of the first companies to issue what they called "instruction books," but which were more like idea books. Chock full of ideas for table crafts, games, costumes, decorating, party organizing, and menus, they were a one-stop shop for all things Halloween. Nearly all the ideas incorporated Dennison's products, which branched out from just black and orange crepe paper to more elaborate decorations, like printed paper tablecloths and napkins, paper plates, printed crepe paper "borders," die cut figures, and more. The popularity of Halloween parties exploded in the 1920s. Long popular among young adults looking for romance, postwar they shifted to include children and adults, too. Dennison's had been printing Art and Decoration in Crepe and Tissue Paper since 1894 (here's the 1917 edition, complete with colorful samples of crepe and tissue paper). But the 1909 Bogie Book was one of its first forays into a single holiday booklet, although others for Christmas, galas, and other holidays would follow in the 1920s. The Bogie Book, however, was the only one to be printed annually, and illustrates just how popular Halloween had become in the United States. Halloween Decorations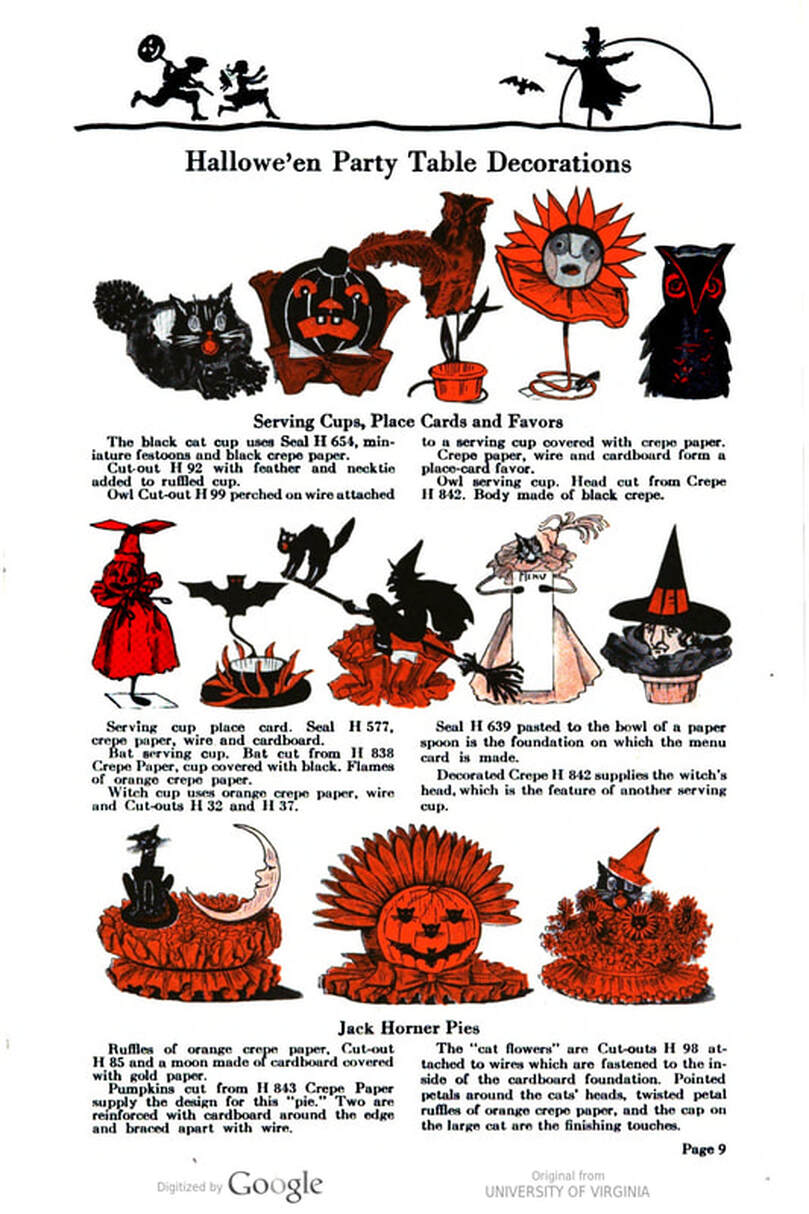 Some of the elaborate table decorations and paper centerpieces sold by Dennison's, here in orange, black, black and white, from the 1923 edition. Dennison's bread and butter was paper decorations and colored crepe paper. More than any other holiday except perhaps Christmas, decorations were an integral part of Halloween celebrations. Popularized in the late Victorian era, home Halloween parties were increasingly common in the 1910s and 1920s. Dressing up your living room (like below) and other more mundane parts of the house was crucial, and Dennison's promised loads of ideas for themes and instructions for making your own decorations, in addition to purchasing their ready-made stock. 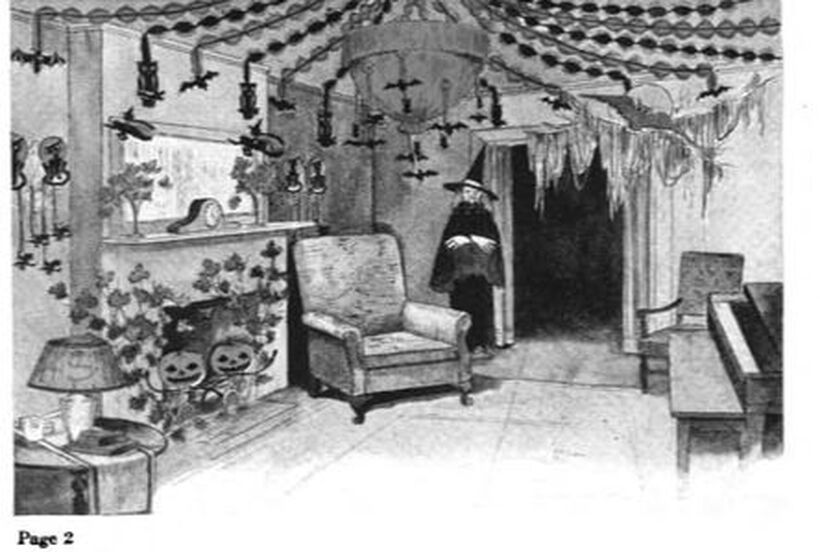 Drawing of a spookily decorated living room from "Dennison's Bogie Book," 1923 edition. Halloween Parties
In addition to parties at home, increasingly people were throwing more public parties. Halloween was traditionally a time for young love, and it was the perfect opportunity to get young people together. Public parties could be held in church basements, public halls, fraternal organizations, and schools. Bogie Books included hints not only in decorating these larger spaces, but also advice for spooky entrances, harmless tricks, and group games. Halloween Costumes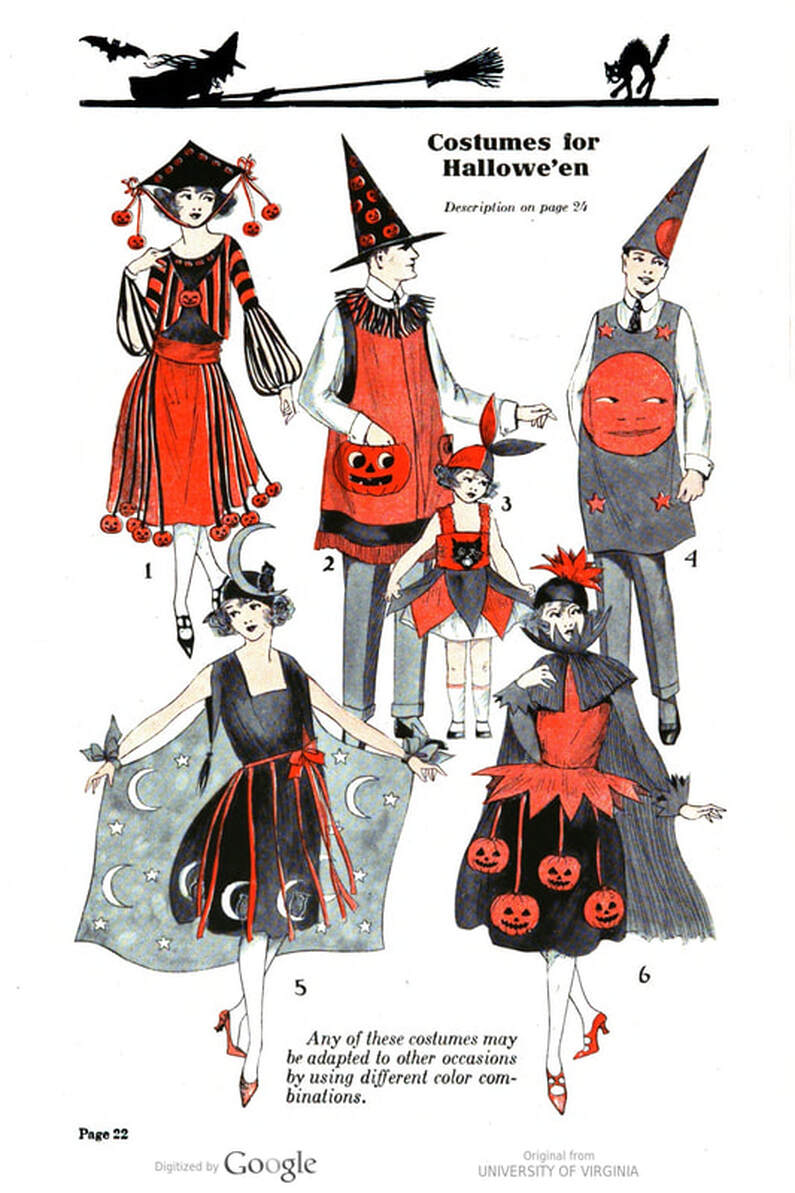 Suggestions for Halloween costumes in Dennison's Bogie Book, 1922 edition. Of course, what was a party without a costume? But Halloween costumes in the 1910s and 1920s were not much like today's. Although classic Halloween archetypes like witches, bats, pirates, pierrot and harlequin figures, and fortune tellers were popular for more obvious costumes, simply dressing in black and orange with spooky figures or motifs was enough for most people. The silhouettes of the day were largely maintained. Sometimes more abstract themes, like "Night" or "The Moon" or "A Star" might allow the fashionable young lady to put in a little more effort while still feeling pretty. In the above image, three young women feature variations on the same 1920s party dress silhouette - one is festooned with orange stripes and ribbons of crepe paper hang from her waist and festoon a hat, with jack-o'-lantern images bobbing at the ends of the streamers. Another is dressed as "The Moon" - with a large silver crescent moon on her head and a black dress and gray cape spangled with more crescent moons and stars - orange streamers hang from her waist. Another goes with a pumpkin theme - wearing an orange bodice with a dagged peplum, a black dress featuring orange jack-o'-lanterns, and long black sleeves with dagged cuffs and black ribbed cape with capelet and a huge stiff collar. Her ensemble is topped with a black cap featuring a festoon of orange leaves. A little girl is also pictured, wearing a black and orange dress featuring a black cat's face on the bodice and a black and orange cap with long ears or leaves protruding from the top. Alas, the men's costumes are less flattering - large, formless tunics and hats worn over their regular button-up shirts and ties. One is dressed as the moon - with the tunic featuring an enigmatic-looking full man-in-the-moon and a tall cone of a cap with another moon and stars. The other is dressed in a black-trimmed orange tunic featuring a large fringed black-and-orange collar and a smiling jack-o'-lantern as a pocket. He wears a witch's hat covered in small jack-'o-lanterns. Each Dennison's Bogie Book included instructions for making each of the pictured costumes from Dennison's crepe paper, printed paper figures, and more. Halloween Menus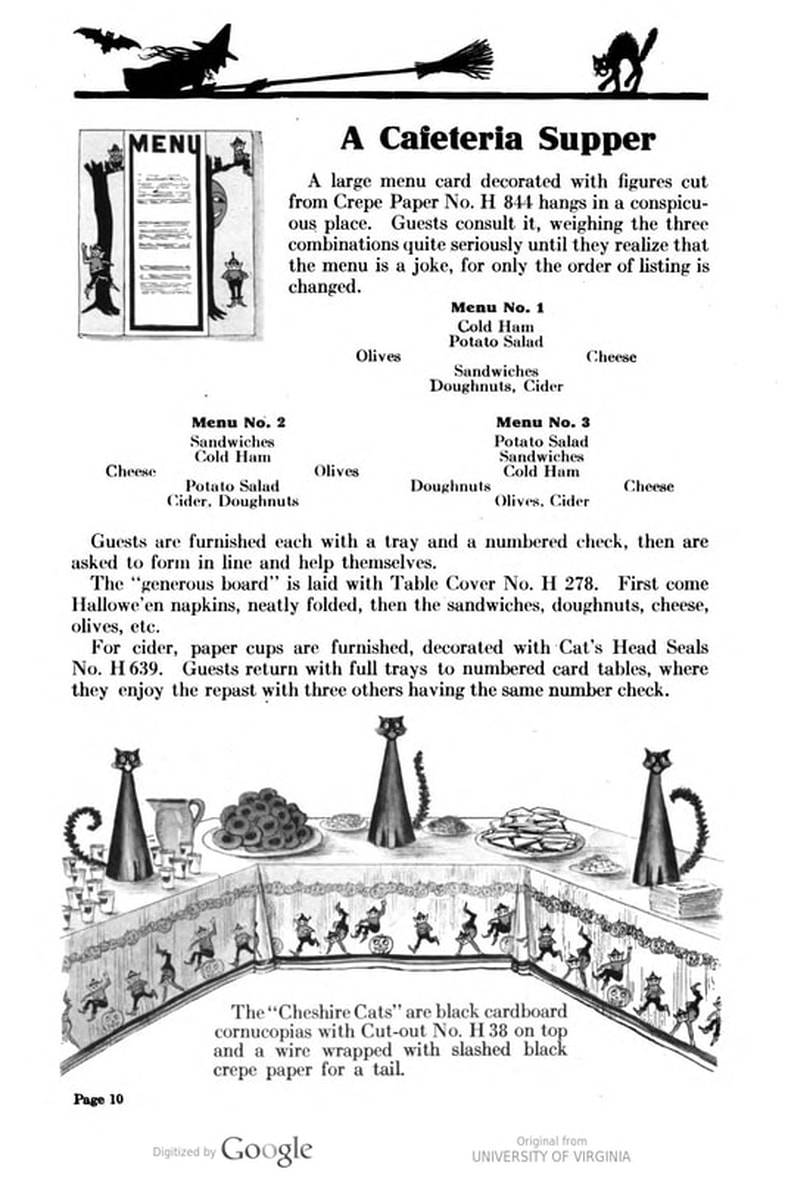 This particular menu is available pre-printed from Dennison's. It is designed as a joke, as all three menu options are just the same food - "Cold ham, potato salad, olives, cheese, sandwiches, donuts, cider" - rearranged in different orders. Of course, The Food Historian is going to be interested in the menus! Along with all their other suggestions, some issues of Dennison's included sample menus. Although not every Bogie Book contains menus, many do reference food and refreshments. Generally, the suggestions are simple and standard party fare - sandwiches, potato chips, potato salad, simple cakes, donuts, fruit, olives, cheese, nuts, etc. - and rarely are recipes included. The emphasis of the books is on decorating the food, tableware, and tables than the food itself. It took a while for the books to gain traction, and the 1909 one didn't get a sequel until 1912. But by then home parties for Halloween were becoming increasingly popular. And Dennison published Bogie Books annually from 1912-1935. Only war (1918) and the Great Depression (1932) stopped their publication. History of the Dennison Manufacturing Company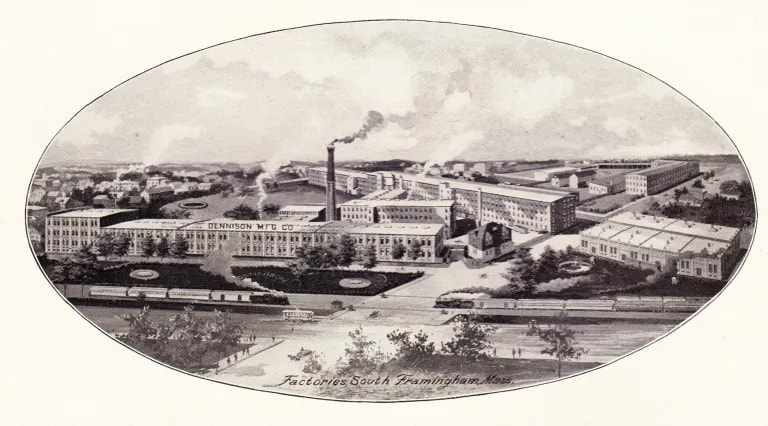 The Dennison Manufacturing Company factories located in South Framingham, Massachusetts. Courtesy the Framingham History Center. The Dennison Manufacturing Company has a long and interesting history, as it was largely controlled by one family for nearly 100 years. The Dennison company is still around today as Avery-Dennison. From the Hollis Archives, Harvard University, which holds the Dennison corporate collection: "The Dennison Manufacturing Company was a manufacturer of consumer paper products such as tags, labels, wrapping paper, crepe paper and greeting cards. The company was founded by Aaron L. Dennison and his father Andrew Dennison in Brunswick, Maine in 1844. Aaron Dennison, who was working in the Boston in the jewelry business, believed he could produce a better paper box than the imported boxes then on the market. The Dennison's first produced boxes made to house jewelry and watches. Aaron Dennison sold the boxes at his store in Boston, beginning in 1850 and in New York starting in 1854. After early business success, Aaron Dennison retired and yielded control of the company to his brother E.W. Dennison. "The mid to late 19th century saw numerous products introduced by E. W. Dennison, who improved the product so that it became the best and most sought after on the market and under the Dennison name. In order to grow the business, Dennison needed to mechanize the box making process. Dennison introduced the box machine to meet the growing demand of jewelers and watch makers, who began ordering large numbers of boxes. Until the introduction of the box machine, the boxes were still being made one at a time, by hand. The machine mechanized and sped up the box-making process. The company continued to expand, and a larger, centrally located factory was needed. Dennison chose Boston, Mass., as the site of the new factory in order to be close to the city's retail store. "In 1854, Dennison introduced card stock to hold jewelry and jewelry tags. Dennison's tags became wildly popular and the business began to expand rapidly, from the jewelry industry to textile manufacturers and retail merchants. E.W. Dennison noticed a deficiency in the quality of shipping tags and patented a paper washer that reinforced the hole in the tag. Sales of tags hit ten million in the first year. Stationery gummed labels were introduced just after the end of the Civil War. These labels had an adhesive on the back side and were manufactured to stick on boxes, crates or bags. The tag business alone required E.W. Dennison to move his factory in order to fulfill demand. The boxes, shipping tags, merchandise tags, labels and jeweler's cards were moved to the new factory in Roxbury in 1878. That same year the company was officially incorporated as the Dennison Manufacturing Company. "In just over thirty years, the company grew from a small jewelry box maker to a large manufacturer of paper products under the direction of E.W. Dennison and his partner and treasurer Albert Metcalf. Dennison died in 1886 and his son, Henry B. Dennison succeeded him as president of the company. Henry B. Dennison had worked for the company for many years, having opened the Chicago store in 1868 and served as superintendent of the factories since 1869. Henry B. Dennison served as president of the company for only six years and resigned due to poor health in 1892. Henry K. Dyer was then elected president, and under his direction the company consolidated its many factories and operations. In 1897, the Dennison Manufacturing Company purchased the Para Rubber Company plant located on the railroad line in Framingham, Mass. The box division was transferred from Brunswick, Maine; the wax and crepe paper operations from the Brooklyn, NY factory; and the labels and tags from the Roxbury plant. The move was complete in 1898 and the factory was up and running. The factory was divided into five manufacturing divisions: first, the jewelry line, which included boxes, cases, display trays; second, the consumers' line of shipping tags, gummed labels, baggage check and specialty paper items; third, the dealers' line which included all stock products sold to dealers and some consumers; fourth, the crepe paper line; and fifth, the holiday line. Also located at the Framingham plant were financial offices, advertising and marketing departments, sales division and director's offices. Although the company was divided into divisions, all aspects of the company worked together in unison to plan and execute the production, marketing, and sale of a product. The Dennison Mfg. Co. planned well in advance of any sale by conducting market research, reviewing past statistics and gauging future interest in products. "Henry Sturgis Dennison, grandson of the founder, began working for the family business after graduating from Harvard in 1899. He held various jobs at the company including foreman of the wax department and in the factory office. He was promoted to works-manager in 1906, director in 1909 and treasurer in 1912. In 1917, H.S. Dennison was elected president of the company. While serving as president of the company, H.S. Dennison oversaw the international expansion of the firm, consolidation and streamlining of certain processes and procedures, reduction in working hours, implementation of employee profit sharing plans, an unemployment fund and the creation of company wellness facilities. H.S. Dennison was heavily focused on getting the highest quality work out of each of his employees and eagerly sought their advice and suggestions for improving working conditions and manufacturing processes. He employed market analysis and research when venturing into a new sales territory or rolling out a new product. His focus on industrial management led him to be a prolific writer, speaker, and expert advisor on the topic. Outside of his management of the company, he served as an advisor to the administrations of Woodrow Wilson and Franklin Roosevelt and lectured at Harvard Business School. Henry Sturgis Dennison served as president of the Dennison Manufacturing Company until his death in 1952. "Dennison's long time director of research and vice president, John S. Keir, was elected to succeed him in 1952. Keir only served for a short time, and continued running the company the way Dennison would have. After World War II, an emphasis was placed on manufacturing products that appealed to women, especially housewives. New products included photo corners, picture hangers, stationery, scotch tape, diaper liners and school supply materials for children. During the 1960s and 1970s, the Dennison Manufacturing Company began actively researching new products and proposed acquiring small, competing office product companies with new technologies. This effort was undertaken by president Nelson S. Gifford in order to diversify Dennison's product line, maximize profits for shareholders, and keep the company fresh. In 1975, Dennison acquired the Carter's Ink Company, a Boston, Mass. based manufacturer of ink and writing utensils. This acquisition and others broadened Dennison's product line as the company moved away from paper manufacture to a manufacturer of all office products. "Dennison Manufacturing Company merged with Avery Products in 1990 to become, Avery-Dennison, a global manufacturer of pressure sensitive adhesive labels and packaging materials solutions." If you'd like to learn more about Dennison, check out the Harvard collection. For more about the history of the family and its products, check out this historical overview from the Framingham, Massachusetts History Center, which holds the Dennison family papers and other collections related to the company. Finding Dennison's Bogie Books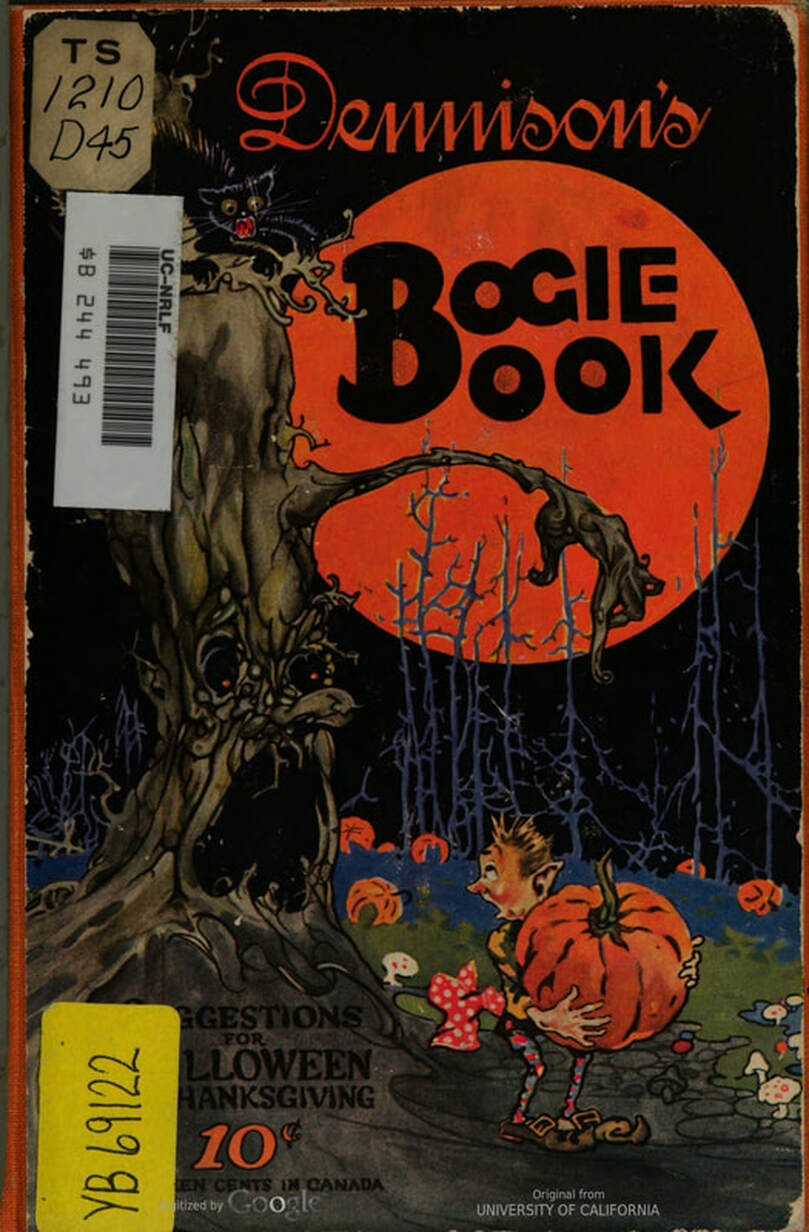 Cover of the 1924 edition of "Dennison's Bogie Book." Click on the image to get access to the full book. The Bogie Books can be hard to find these days. They are collector's items and sadly often disappear from library and archival collections. However, several issues from the 1920s have been digitized and are available for free on disparate locations around the internet. I've collected them here for your viewing and reading pleasure. If you'd like to see the covers for 1912-1925, check out the list at Vintage Halloween Collector. Dennison's Bogie Book - 1919 edition Dennison's Bogie Book - 1920 edition Dennison's Bogie Book - 1922 edition Dennison's Bogie Book - 1923 edition Dennison's Bogie Book - 1924 edition Dennison's Bogie Book - 1925 edition Dennison's Bogie Book - 1926 edition Dennison's has also reproduced many of its historic Bogie Books and they are available for sale as print copies. You can find them on Amazon by clicking the links below. If you purchase anything from the links, you'll help support The Food Historian!
What do you think? Are you inspired to try some vintage decorations for your Halloween party this year? In 2019 I threw my own version of A Very Vintage Halloween party - check it out! The Food Historian blog is supported by patrons on Patreon! Patrons help keep blog posts like this one free and available to the public. Join us for awesome members-only content like free digitized cookbooks from my personal collection, e-newsletter, and even snail mail from time to time! Don't like Patreon? Leave a tip!  For a lot of Norwegian-Americans, sandbakkels (the plural in Norwegian is actually sandbakkelse, but we can Americanize) remind them of Christmas. The crisp, buttery cookies are essentially dense tart shells, similar to shortbread, but more crumbly. Meaning "sand pastry," sandbakkels are baked in special fluted tins and contain either ground almonds or more commonly in the U.S., almond extract. Despite the fact that they are usually served plain here in the states, those little tart shells just begged to be filled. So when I was planning my Scandinavian Midsummer Porch Party, I thought they would make the perfect little dessert. The problem was, what recipe to use? One of my best-loved talks is on the history of Christmas cookies, and I've got a whole section on Scandinavian ones. So I turned to my former research and remembered the PAGES of sandbakkel recipes from Recipes from Many Lands, a little cookbook of recipes submitted by North Dakota housewives and home economists around the state and published in July, 1927 as Circular 77 of the Agricultural Extension Division of North Dakota State University. I've clipped all the Sandbakkelse recipes (also Americanized to "Sand Tarts") and posted them below. 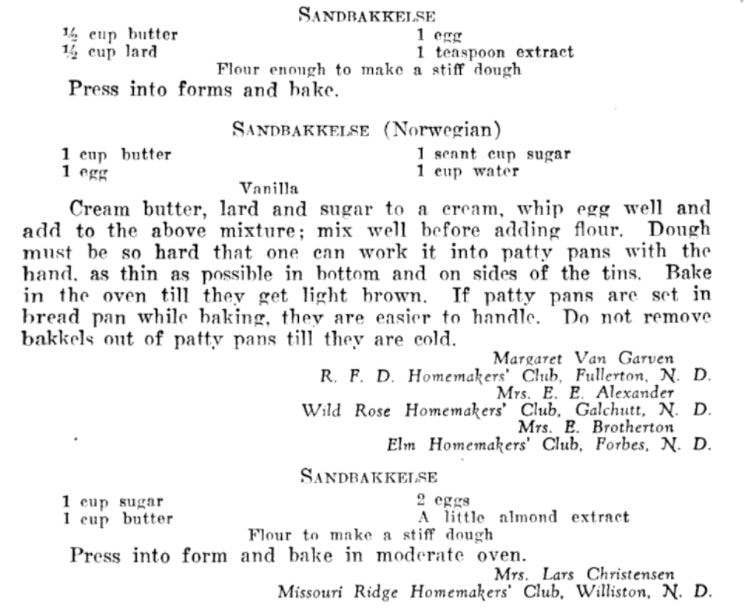 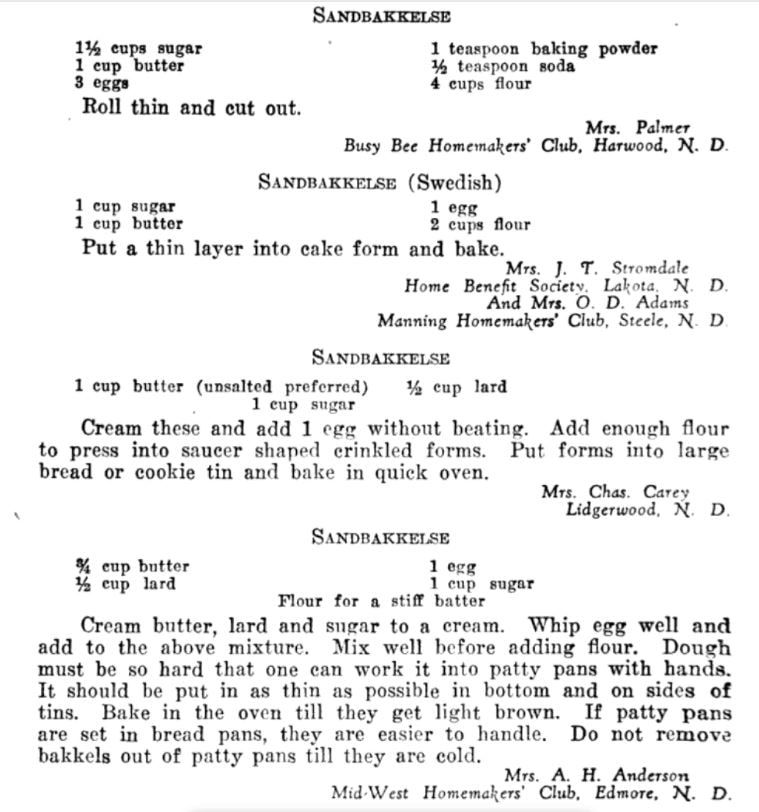 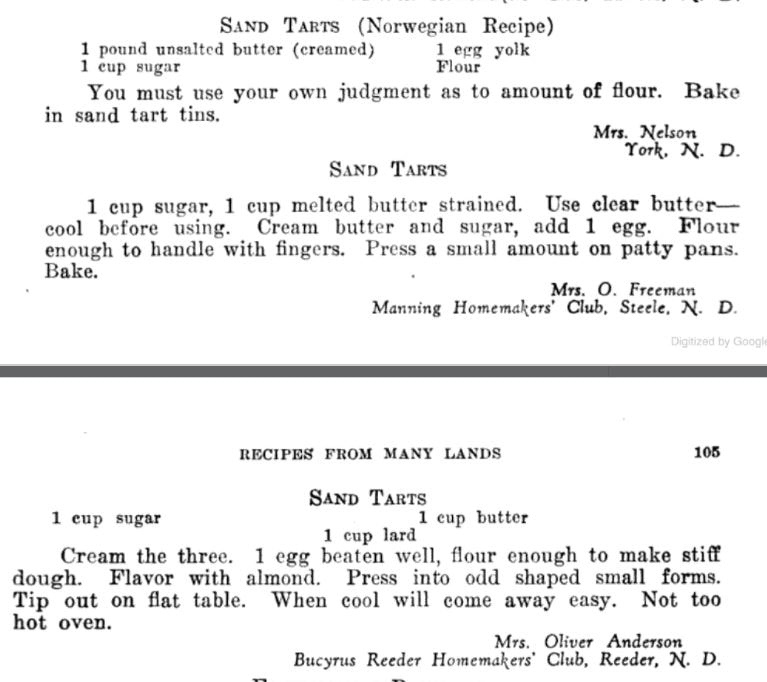 The vast majority of these recipes are very similar - almost all call for a mixture of butter and lard, sugar, an egg or two, almond extract, and flour. The instructions are usually quite vague. Some don't even include amounts of flour. Some just say to press into tins and bake. So I decided to take the best advice from all the recipes and the Swedish Sandbakkelse recipe (which actually had measurements for everything) and go from there. But first, I had to find my sandbakkel tins! At some point I either stole them from my mother (she always had too many and never used them), but I had a little original box of vintage sandbakkel tins in mint condition hiding in the bottom of a kitchen drawer. Alas, I only had a dozen of them, so I had to make due with the recipe in other ways, which you'll see below. But how cute is this box? With the original hardware store price tag!  The little white box with a drawing of the fluted tin reading "Sandbakkel Set Tart Tins" and a pink "Our Own Hardware" pricetag in the corner for $1.09. 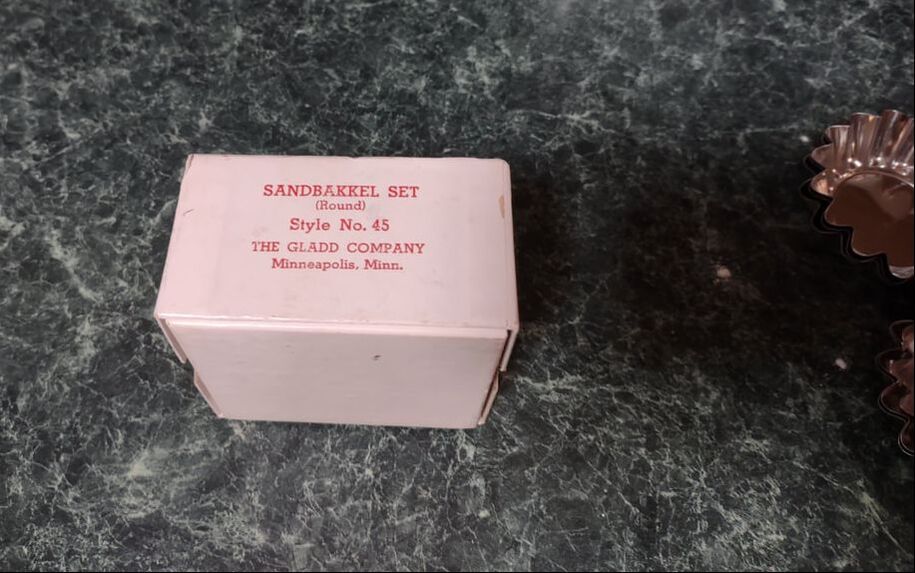 The box reads "Sandbakkel Set (Round) Style No. 45 The Gladd Company, Minneapolis, Minn." because there are several styles of fluted sandbakkel tins, including heart-shaped and diamond-shaped, in addition to the more common round ones. Scandinavian Sandbakkelse Recipe (1927)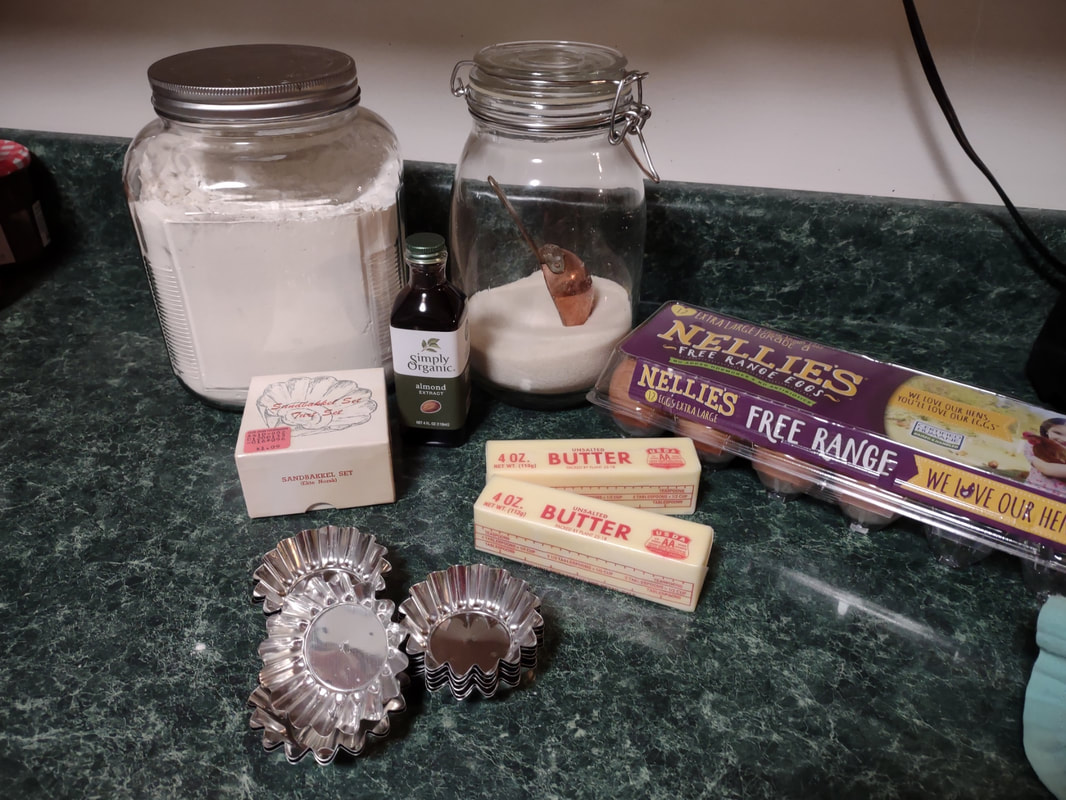 Sandbakkelse ingredients - flour, sugar, butter, eggs, almond extract, and the tins. The recipe is pretty straightforward, and if you don't have sandbakkel tins, never fear! There's a hack suggested in the historic recipes that I'll outline below. 1 cup softened butter (2 sticks) 1 cup granulated sugar 1 egg 1 teaspoon almond extract 2 cups flour (plus more to knead) Preheat the oven to 350 F. In a large bowl, cream the butter and the sugar together, then add the egg and extract and mix until smooth. Add the flour, a little at a time, until the dough starts to come together, then knead with the hands until smooth. Take half dollar sized pieces of dough and press into the tart tin, pressing the dough all the way out to the edge of the tin, but not over the edges. Make sure to press well to ensure good fluting. The dough is buttery enough that you won't need to grease the tins. Place tins on a sheet pan and bake 12-15 minutes or until golden brown. Let cool in the tins. Uhoh - you've still got a ton of dough left, and your sandbakkel tin set only came with 12 tins! What do you do? Well dear reader, you follow the advice of those sage 1920s North Dakota farm wives, who maybe didn't have sandbakkel tins either, and you press the dough into a pie plate, and bake it that way. And instead of filling the adorable individual tarts with jam and whipped cream, you fill a whole pie worth and cut it into slices to serve. Easy peasy! You could probably also use muffin tins, in a pinch. But the fluting is the pretty part, so if you can find sandbakkel tins, use them! I actually took a fair number of photos this time, so enjoy the process via the power of film: 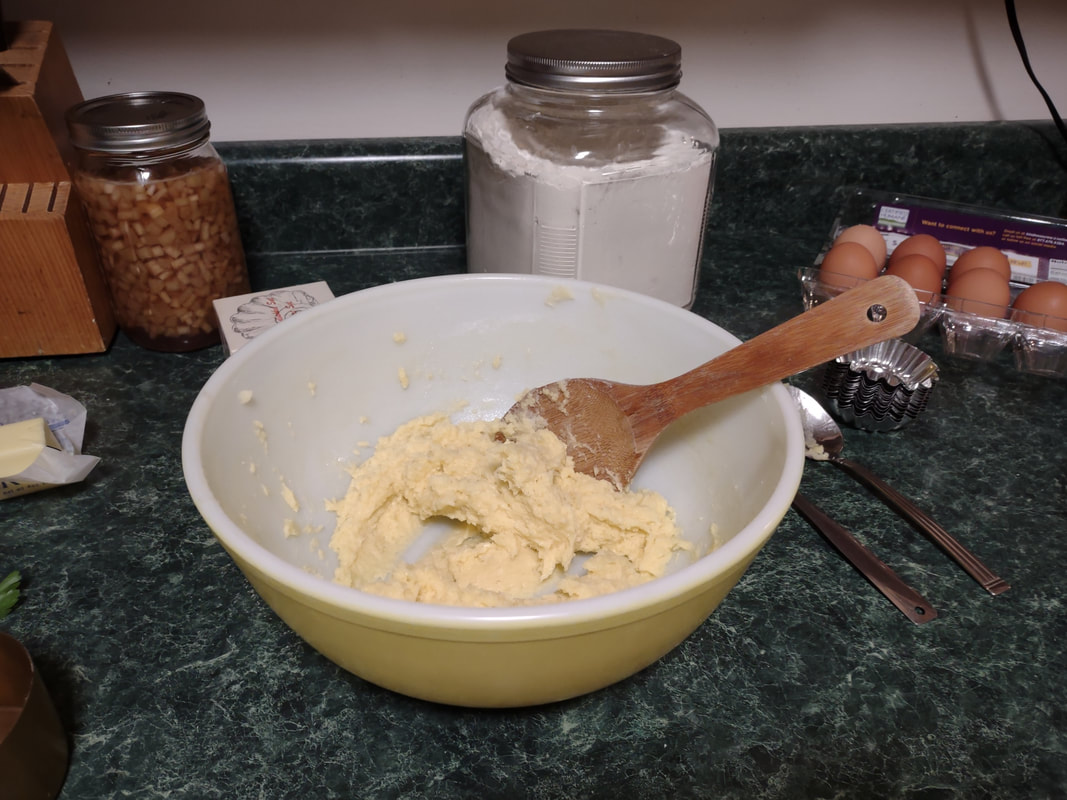 Creaming the butter and sugar by hand, because I don't like to wash my electric mixer beaters. 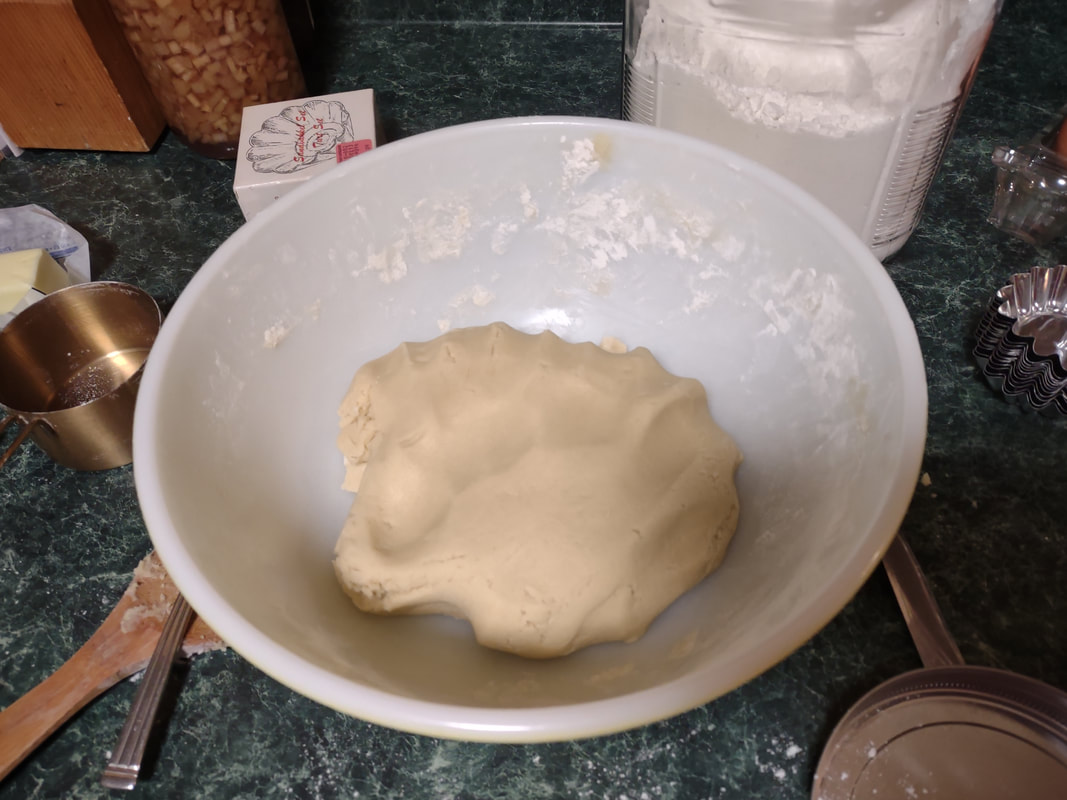 The soft dough that wouldn't hold anymore flour without getting tough. 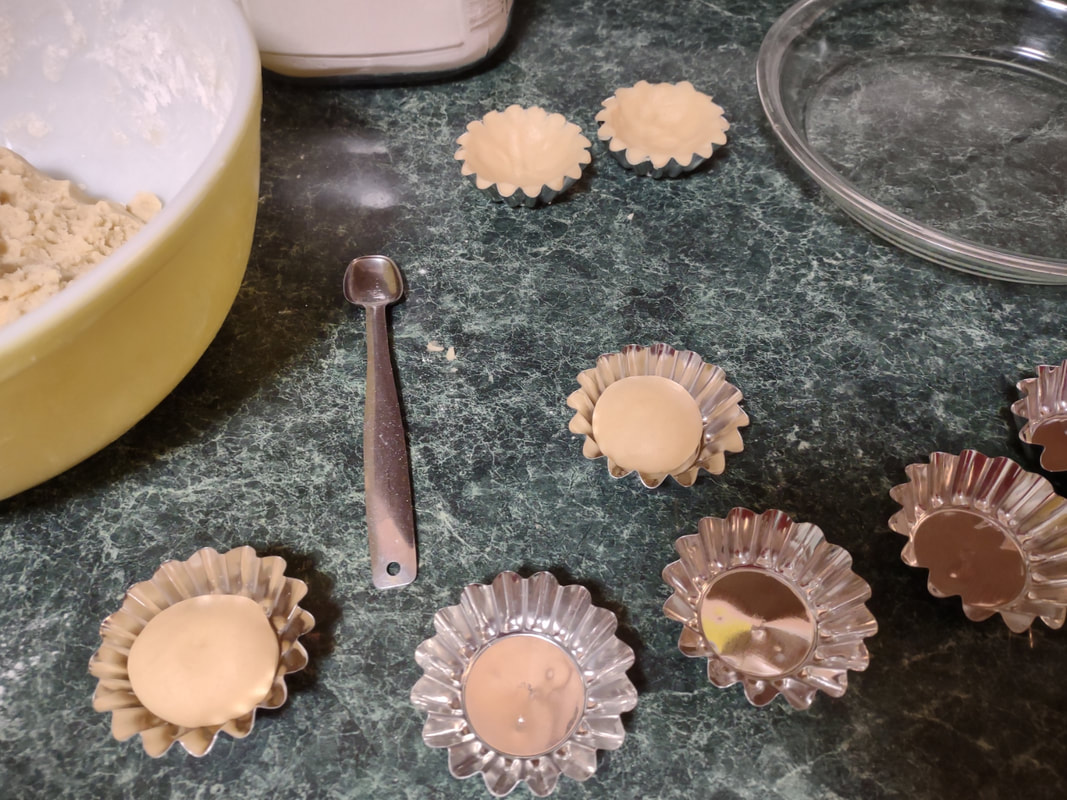 Pressing the dough into the tins (they're so shiny!) with some rounds of dough for amount gauging. 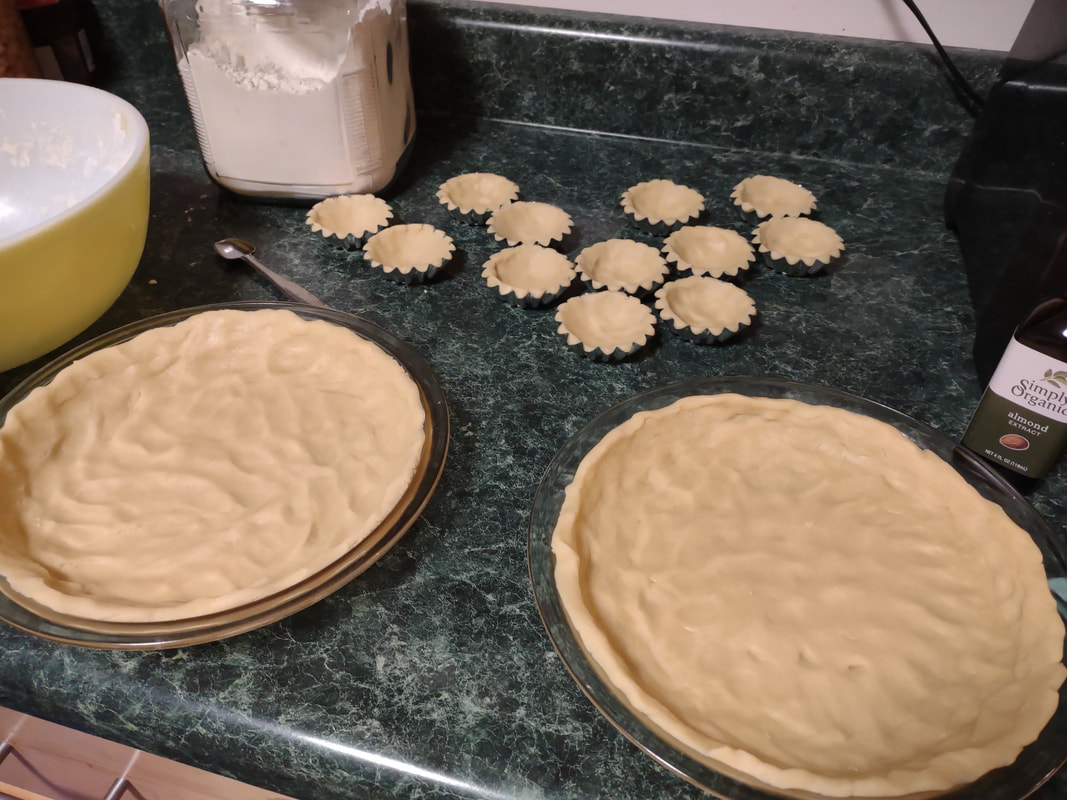 The recipe made enough dough for 12 sandbakkel tins and two pie plates! If I had enough tins, I'd estimate 3 dozen tarts total. 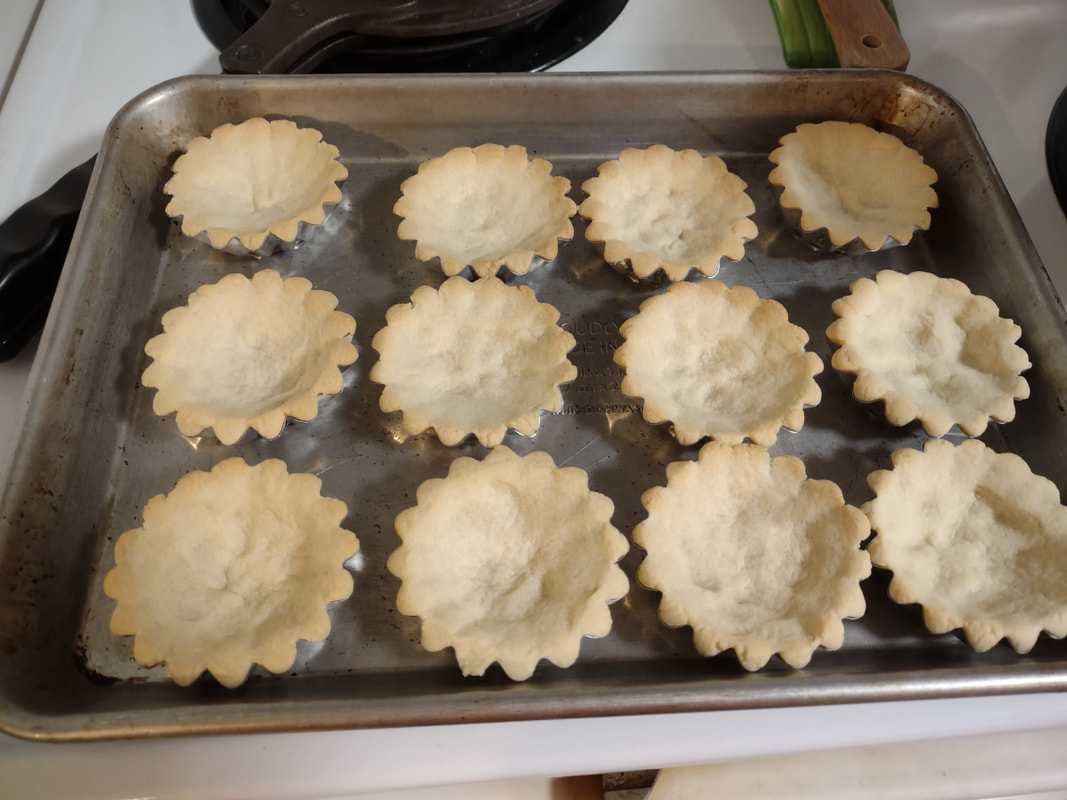 The finished tarts, coming out of the oven on their sheet pan, golden brown. 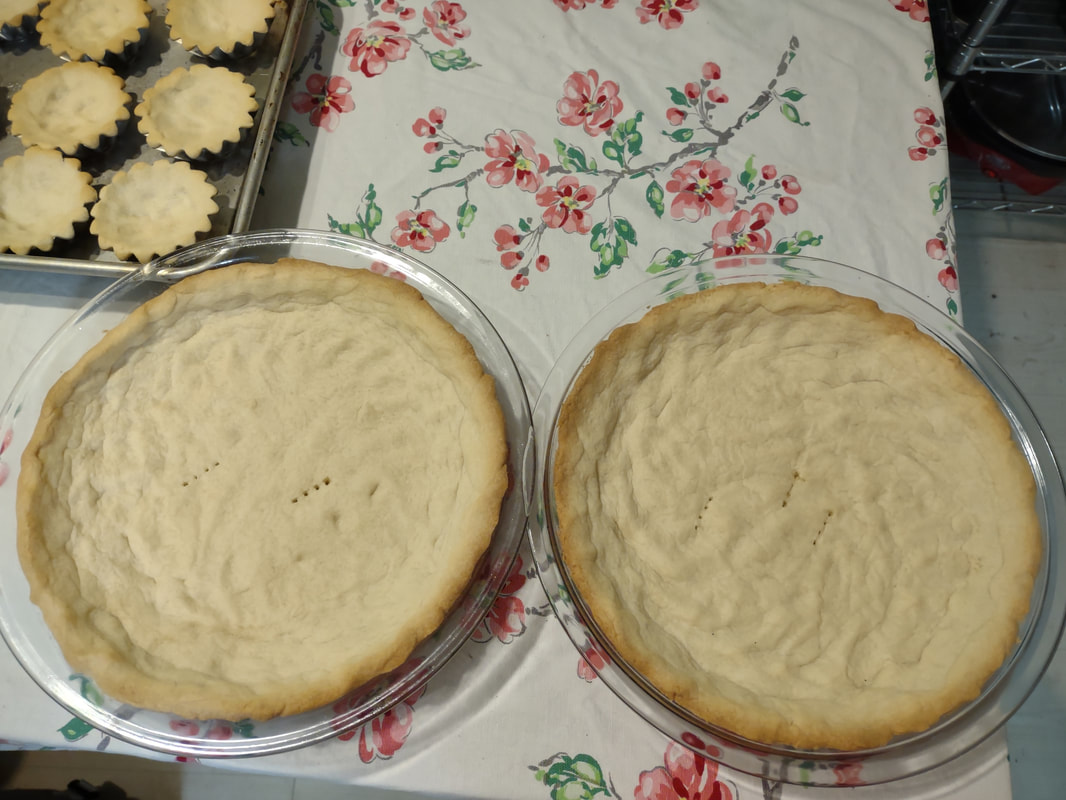 The sandbakkels and pie plate sized ones cooling. The pie versions have fork marks because they were puffing up in the middle during baking. 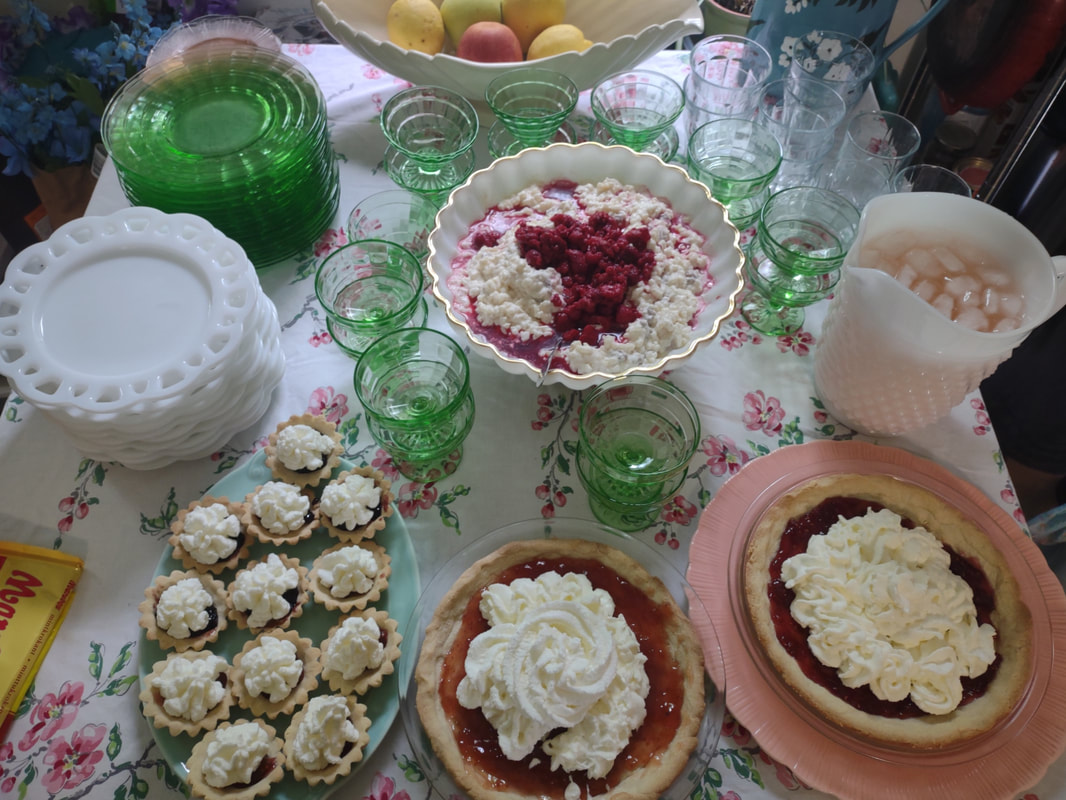 The finished dessert table! Sandbakkelse in the foreground. Tarts were filled with strawberry, blackberry, or a special homemade raspberry-rose wine jam that was to die for, and then topped with homemade whipped cream. In all, the sandbakkelse were among the easiest of the Scandinavian cookies to make. Which is probably why in Norway they are traditionally the first Christmas cookie that kids help make. But they're not just for Christmas! They were delightful as a summer treat. You could also fill them with pastry cream, fresh fruit, chocolate, or whatever you like! But berry jam and whipped cream felt the most appropriate for Midsummer. If you'd like to buy your own sandbakkelse tins, Bethany Housewares makes the round kind, and you can get the fancy shapes from Norpro. And if you are a whipped cream fiend like my husband (and to a lesser extent me), and you admired the pretty piping, I can't recommend enough getting a professional, reusable whipped cream dispenser. We love this one. When you factor in buying the heavy cream and the nitrous oxide cartridges, they're not much cheaper than buying the disposable cans, but the whipped cream is some of the best you'll ever taste and you waste a lot less packaging. Plus the cream, once charged, keeps in the fridge for as long as the heavy cream was good. A little shake and it restores to fluffy deliciousness. Happy baking, happy eating! If you purchase anything from the links, The Food Historian gets a small commission! 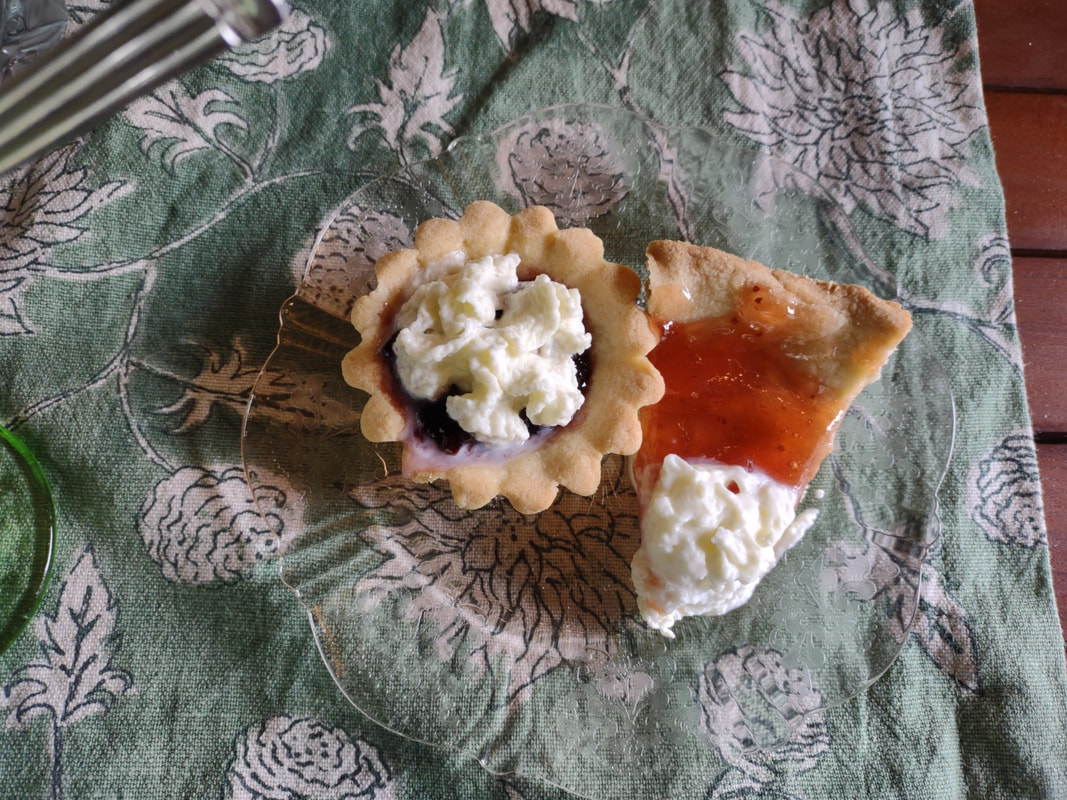 A blackberry sandbakkel and a slice of giant strawberry sandbakkel, on a vintage pink Depression glass plate. You know these were not the first ones I ate. The Food Historian blog is supported by patrons on Patreon! Patrons help keep blog posts like this one free and available to the public. Join us for awesome members-only content like free digitized cookbooks from my personal collection, e-newsletter, and even snail mail from time to time! Don't like Patreon? Leave a tip! 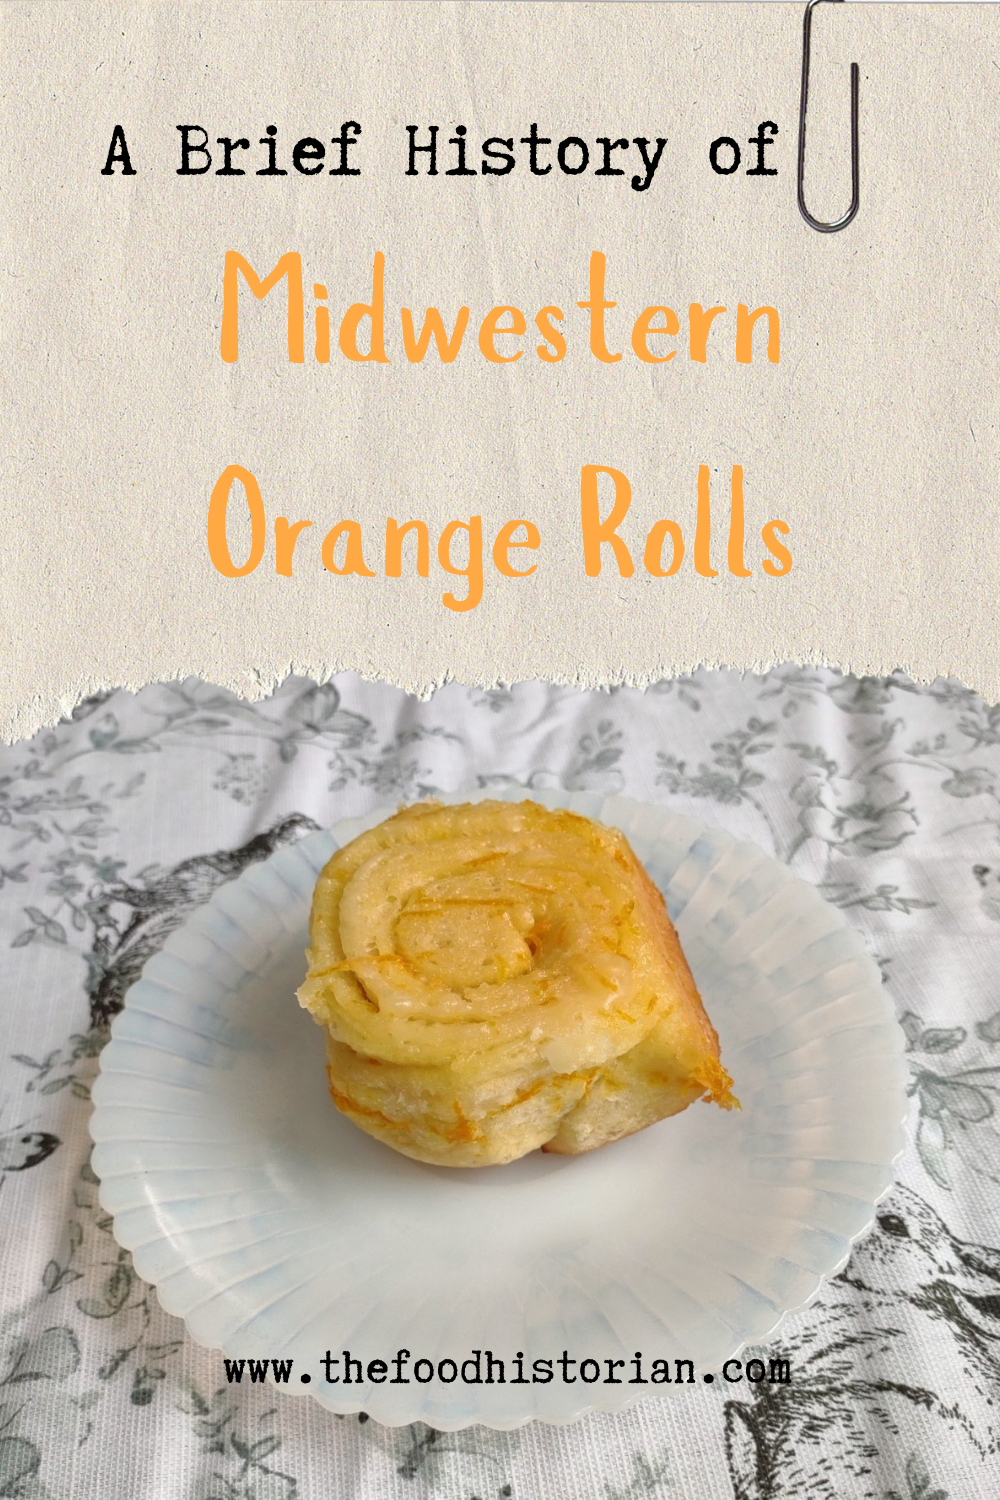 Last year I wrote about North Dakota Caramel Rolls, which have dominated the state in recent years. But funnily enough, although they are less popular now, orange rolls were equally if not more popular when I was growing up. And I found many more references to them in my historic cookbooks. Orange rolls in the upper Midwest (mainly Eastern North Dakota, where I grew up, and Minnesota) were popular Sunday brunch staples, although they competed about even with caramel rolls in my neck of the woods. Of course, the kind I grew up with were not made from scratch, but rather the frozen kind made by the Rhodes frozen bread company. They came with a delightful orange cream cheese frosting. But despite being a brunch staple of my Midwestern childhood, I didn't know much about these, and I wanted to try a historic recipe for a brunch of my own. The origins of orange rolls and their popularity in the Midwest is, like many things, a bit cloudy. If you search for "history orange rolls" today, you'll likely get a LOT of hits about ALABAMA orange rolls (scroll to the bottom for the links), but nary a one about the Midwestern kind. Truth be told they don't look like they differ much. A sweet roll dough with orange zest and sugar rolled up like a cinnamon roll and topped with an orange glaze. So why did both Alabama and the Upper Midwest develop a love of orange rolls? Oranges aren't grown in either region. Enter the 1910s and '20s orange craze. In the 1870s California orange agriculture exploded, and oranges - once an imported wintertime treat - became increasingly available year-round. "Orange fever" struck Florida around the same time, until a big freeze in 1894 and again in 1895 set the industry back on its heels. In the 1920s the industry got a boost from the Florida real estate boom. Cooperatives like the California Orange Growers Exchange began to market nationally using clever advertising techniques. "Sunkist" - a playful spelling of "sun-kissed" - became synonymous with the California Orange Growers co-op, and later became their official name. 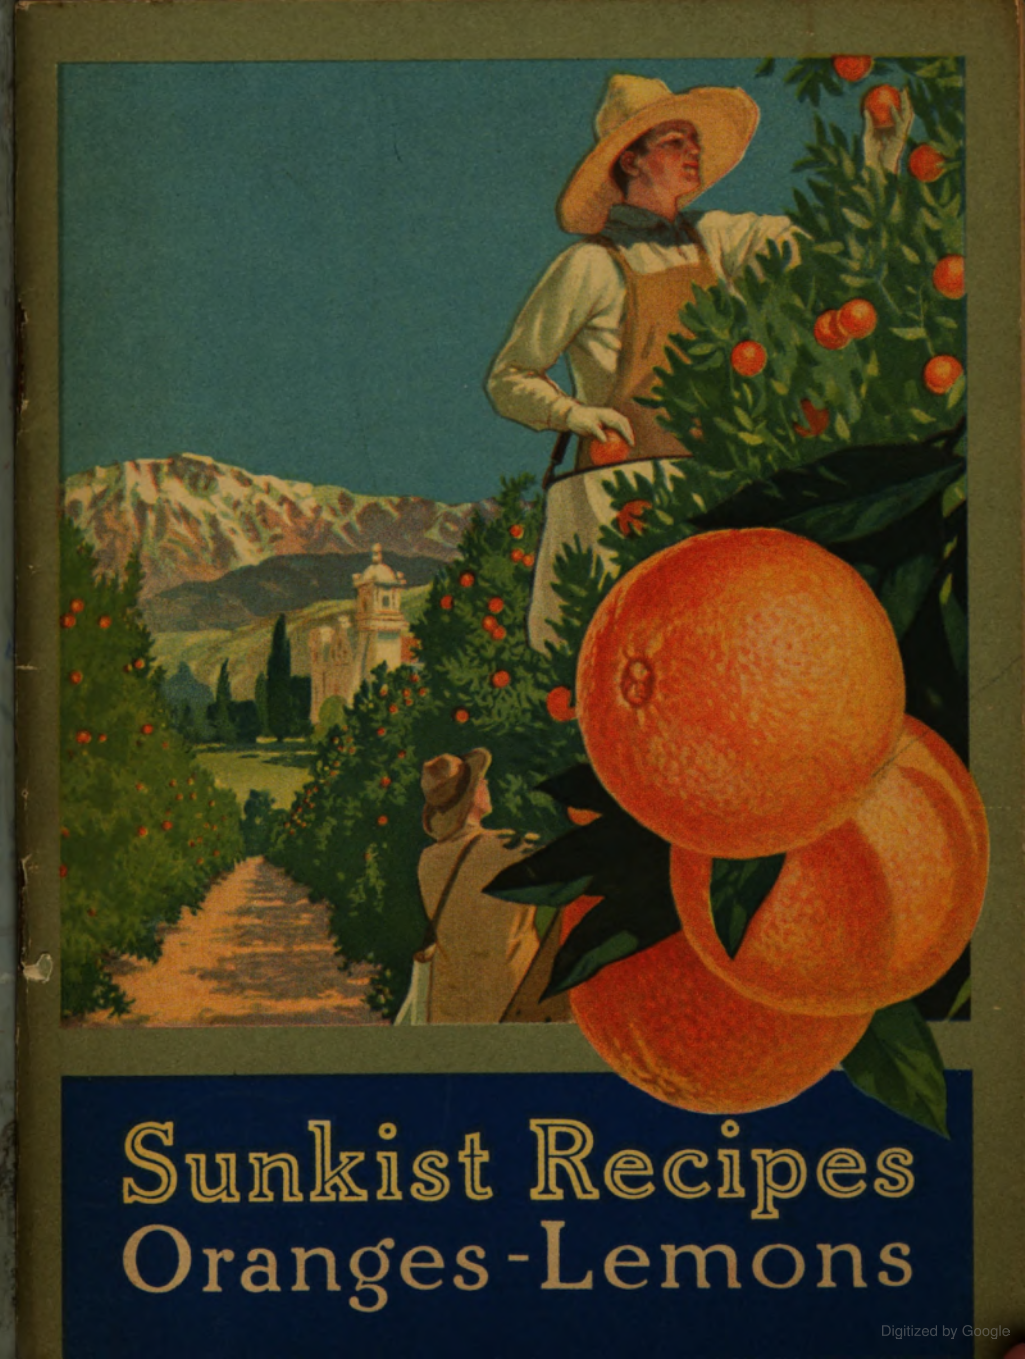 "Sunkist Recipes: Oranges and Lemons," by the California Fruit Growers Exchange, 1916. The earliest recipe for what resembled orange rolls comes from Sunkist Recipes, Oranges - Lemons, published by the California Citrus Growers Exchange in 1916. 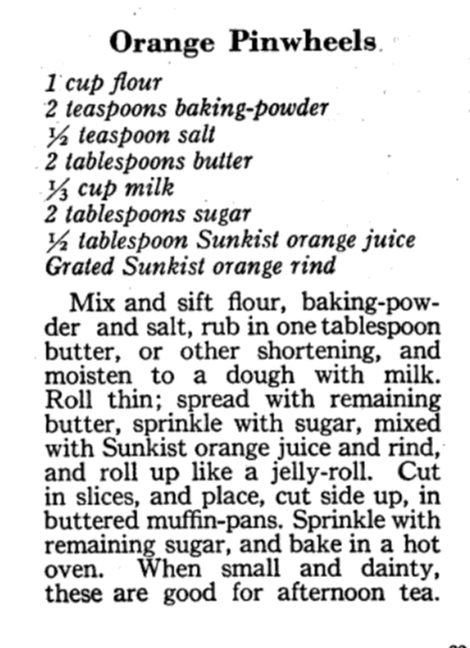 "Orange Pinwheels" are essentially baking powder biscuits, rolled thin, spread with butter and sugar mixed with orange juice and zest, then rolled up and sliced, with more sugar sprinkled on top. The Sunkist biscuit-style recipe survives, with or without attribution, in other cookbooks throughout the 1920s and '30s. Often, the biscuit "rolls" are called "orange rolls," not "pinwheels," which makes the research a bit confusing! The earliest recipe I could find for yeasted orange rolls comes from Mrs. Allen's Cook Book by one of my favorite cookbook authors, Ida Bailey Allen, published in 1917. But even these aren't quite the same as what I was looking for. 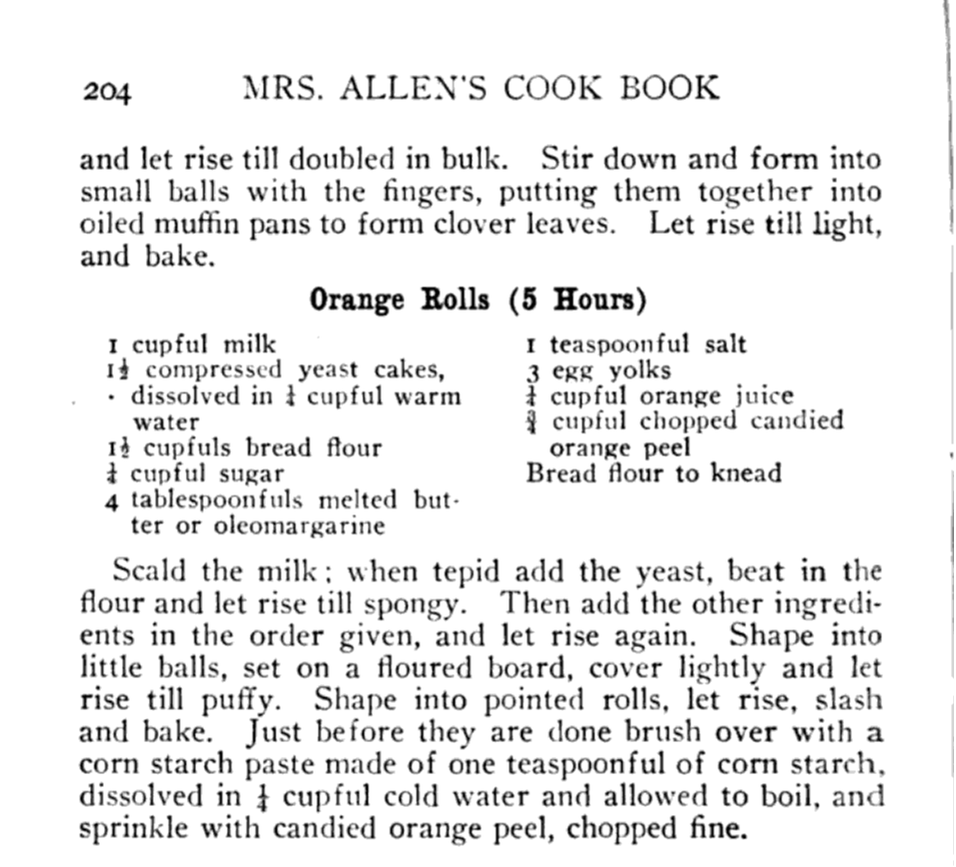 Recipe for "Orange Rolls (5 Hours)" from "Mrs. Allen's Cook Book," by Ida Bailey Allen, 1917. Mrs. Allen's "Orange Rolls (5 Hours)" are not actually rolled up rolls - they're more like buns flavored with orange juice and candied orange peel, and then glazed with more orange peel. Thankfully, Frances Lowe Smith has our back with her More Recipes for Fifty, published in 1918 and containing several wartime-friendly recipes, including this one for "Orange Rolls," which are to be prepared using a yeasted dough and spread with butter and sugar mixed with orange juice and grated rind and then "rolled like cinnamon rolls." The first North Dakota reference I could find is for the biscuit-y kind of orange rolls, in a 1930s North Dakota Agricultural Extension circular. But looking through my cookbook library for vintage midwestern cookbooks, I also found tons of references to orange rolls! Largely from the 1930s and '40s (which is when most of my North Dakota and Minnesota cookbooks date to). I decided to go with this recipe, because it looked fairly easy and definitely quick. No getting up five hours before brunch for these beauties (sorry, Mrs. Allen). Taken from Receiptfully Yours, a community cookbook published by the Ladies' Guild of the Zion Lutheran Church of Duluth, MN, the recipe turned out very nicely! 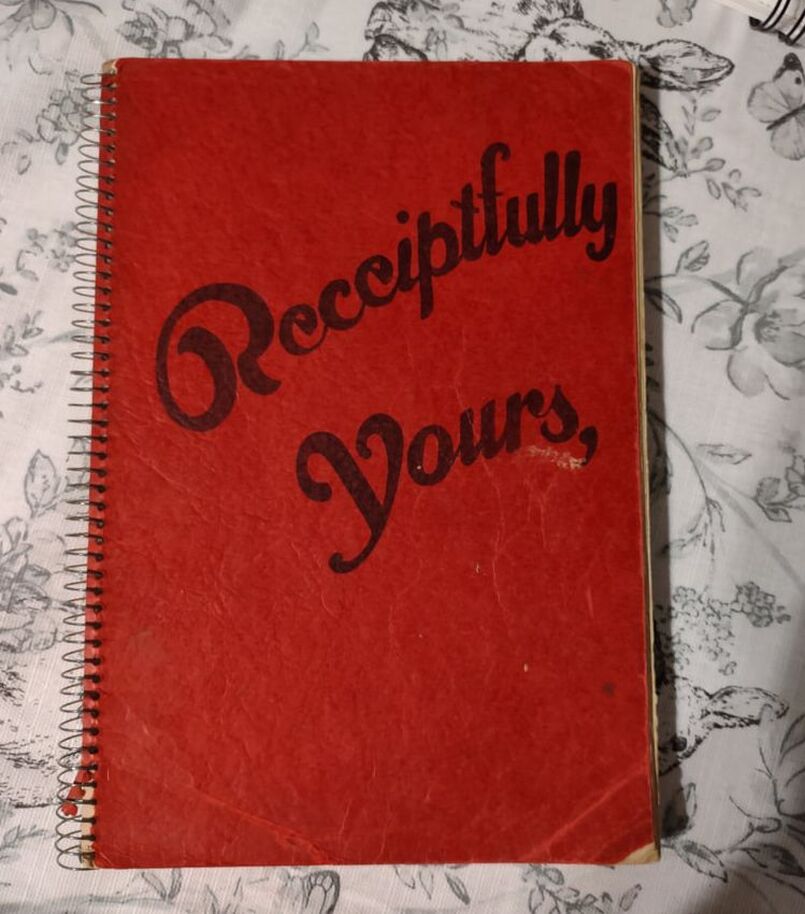 Although Receiptfully Yours, is undated, I'm guessing it dates from the 1940s, judging by the type and the style of binding. Both the Cinnamon Roll recipe and Orange Roll variation were submitted by Ethel Mathison. I love that they used full names, instead of "Mrs. Husband's Name!" 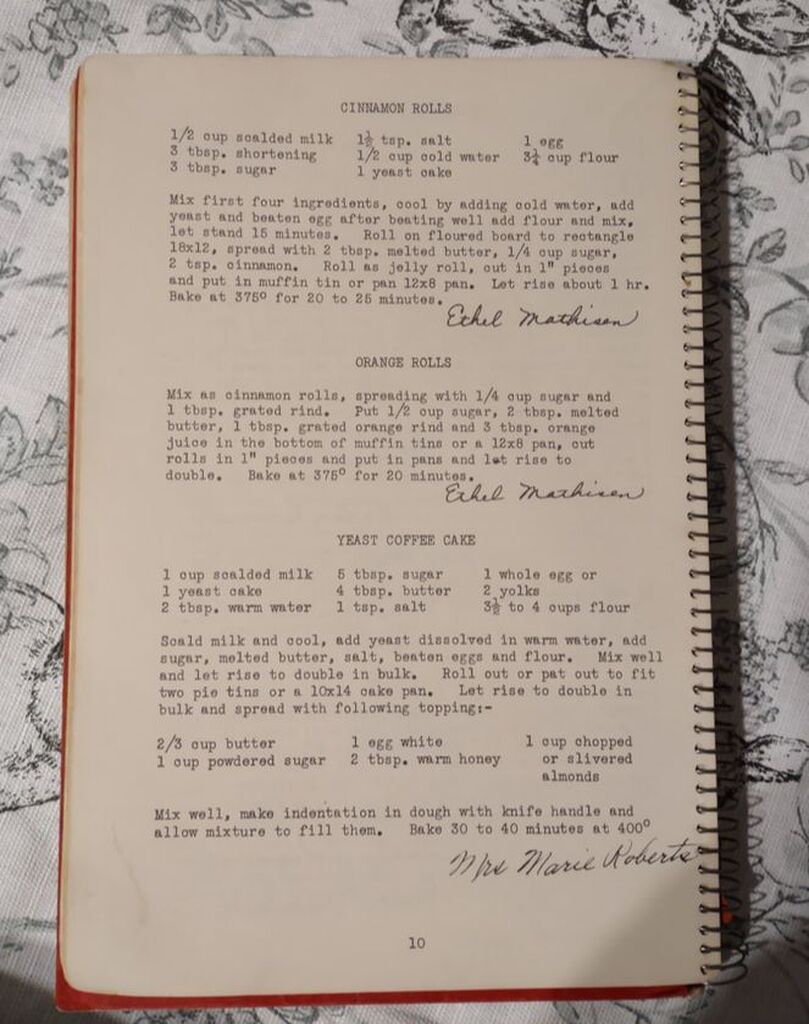 Midwestern Orange Rolls RecipeLike many orange rolls recipes, this one starts as a recipe for cinnamon rolls, with orange rolls listed as a variation. Interestingly, instead of having an orange glaze or cream cheese frosting, this recipe is listed much like caramel rolls! With a butter-sugar-orange-juice mixture cooked in the bottom of the pan. Here is my slight modernization of the recipe: - - For the dough - - 1/2 cup scalded milk 3 tablespoons butter 3 tablespoons sugar 1 1/2 teaspoons salt 1/2 cup cold water 1 envelope quick-rising yeast 1 egg 3 1/4 cups flour - - For the filling and glaze - - 3/4 cup sugar 2 tablespoons grated orange zest 2 tablespoons melted butter 3 tablespoons orange juice Preheat the oven to 375 F. Mix milk, butter, sugar, and salt in a saucepan and heat over medium heat until the butter is just melted. Cool by adding cold water, then add the yeast and egg and beat well. Then add flour and mix until smooth, kneading several times. The dough will be soft. Let the dough rest 15 minutes. Roll the dough out on a floured board (or clean countertop) into a 12" by 18" rectangle. Mix 1/4 cup sugar and 1 tablespoon zest and spread on the dough, then roll as for cinnamon rolls and cut crosswise into 1 inch slices. In a 9"x13" pan, mix 1/2 cup sugar, 2 tablespoons melted butter, 1 tablespoon orange rind, and 3 tablespoons orange juice, then top with the cut dough pieces. Let rise until doubled, then bake for 20 minutes or until golden brown. Flip to serve. 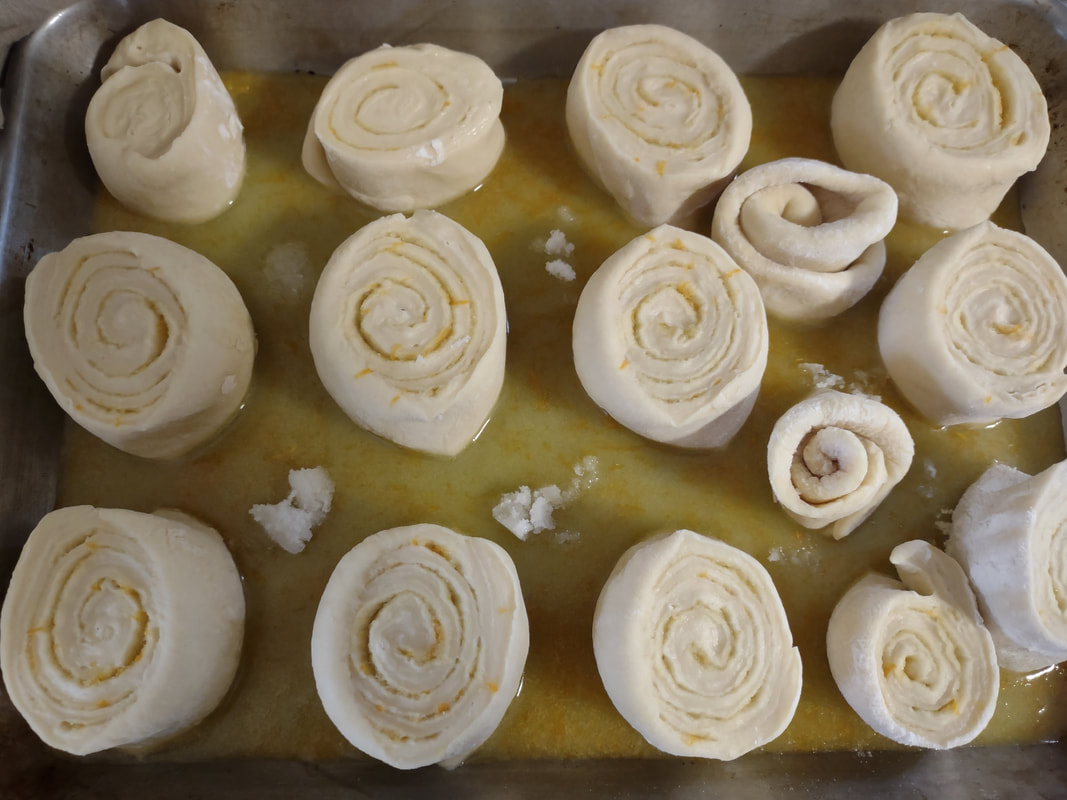 Leaving space between the raw rolls is key! They need enough space to rise. 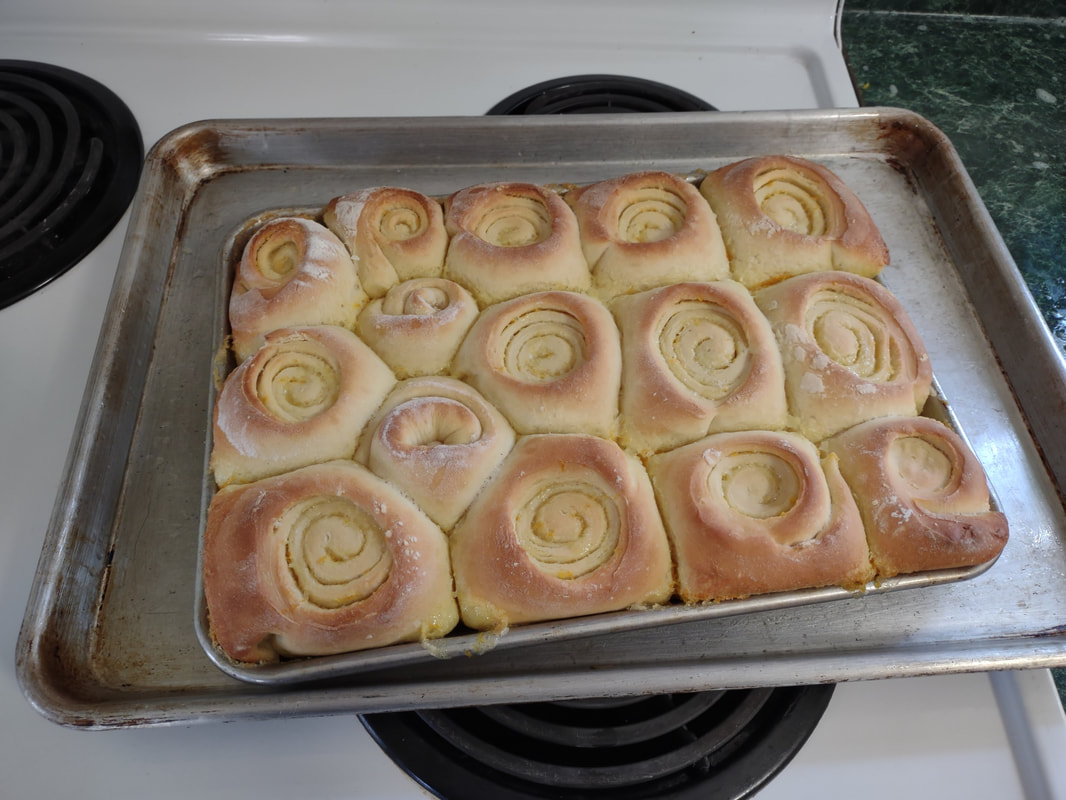 I was worried about the sauce spilling over (and you can see a few spots where we got close!) so I baked these on a baking sheet to catch any spills. But they turned out beautifully. 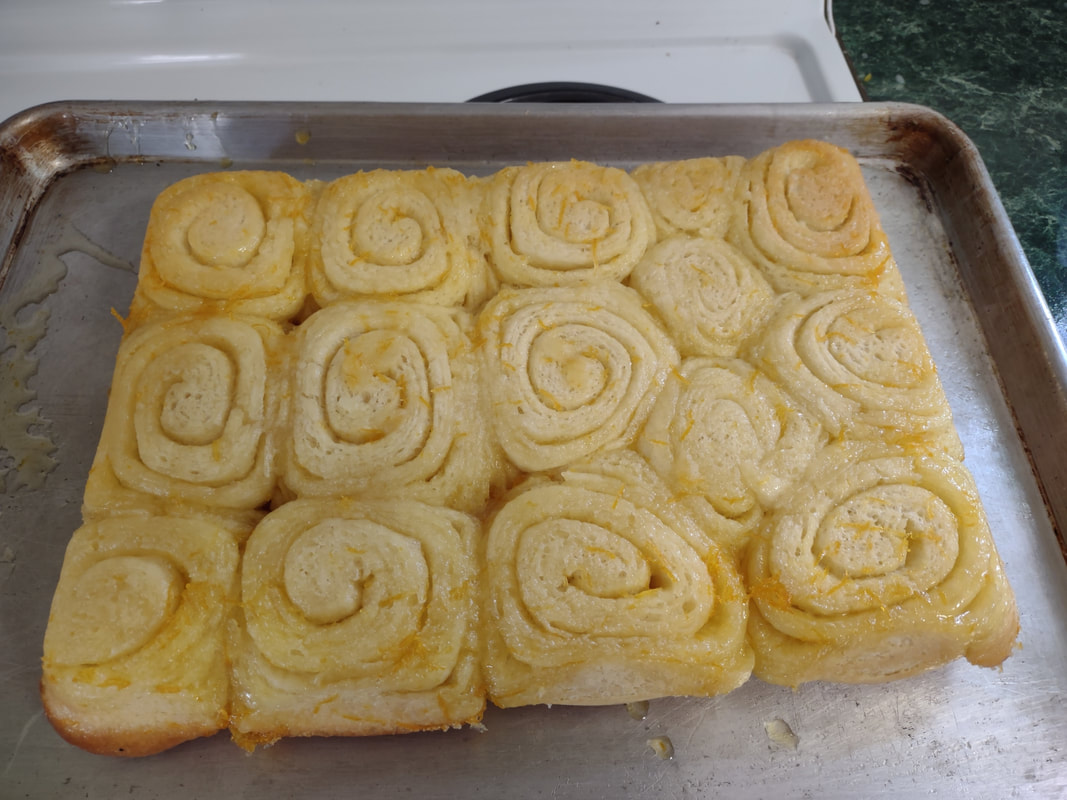 The baking sheet was also useful in flipping them over! Here you can see the syrupy bottoms. These turned out beautifully, although very sweet! I used some very sweet heirloom navel oranges in the recipe, and something with a little more acidity might have been better. When I make them again, I might take a page from some of the other recipes and moisten the sugar for rolling with a little orange juice, and pick some more sour oranges. I may also bake them a smidge longer. Of course, I may also decide to try my hand at some of the other recipes, too! These rolls are perfect for a weekend brunch, bridal or baby shower, or afternoon treat. Have you ever had orange rolls? How do you take yours? 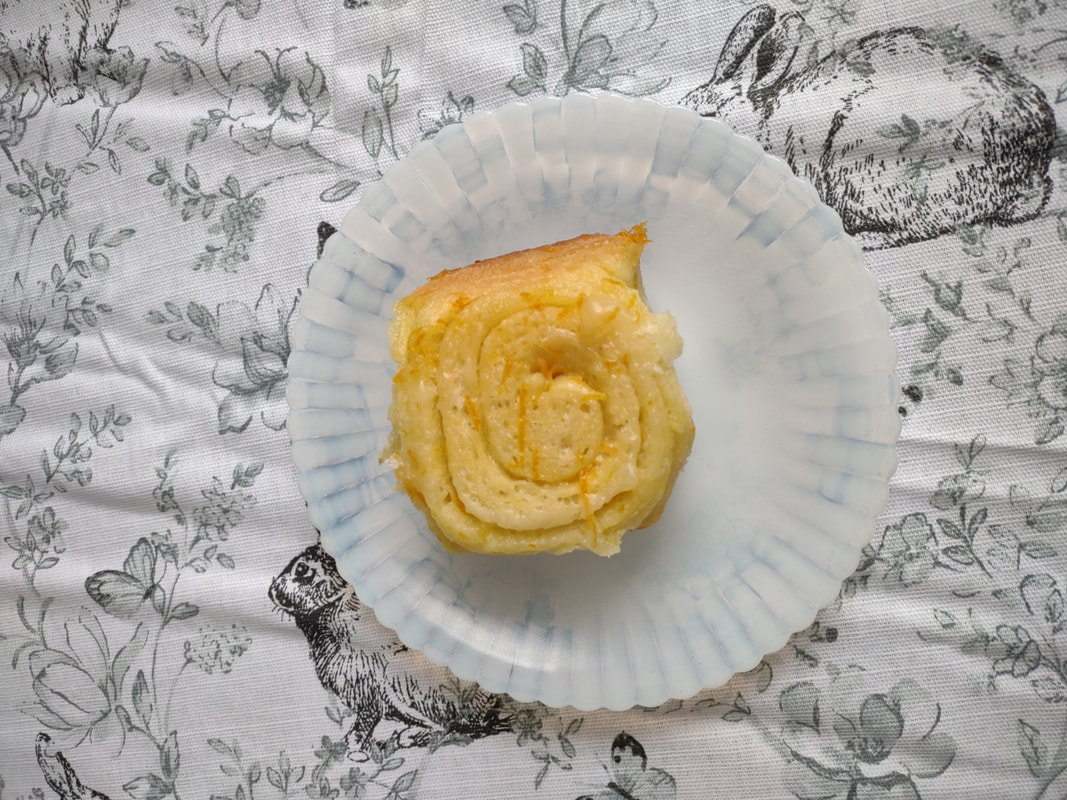 Alabama Orange Rolls History LinksAnd now, as promised, a taste of the rabbit hole I went down in researching this post. The Alabama orange rolls may be more internet famous than the Midwestern ones, but it looks like they laid their claim to fame a bit later - in the 1960s and '70s, to be precise. Read on for more of the back story. The delectable history behind Birmingham’s famous Orange Rolls Why the Alabama Orange Roll is a Southern Classic - Southern Living The sweet story of Millie Ray and her famous orange rolls The Food Historian blog is supported by patrons on Patreon! Patrons help keep blog posts like this one free and available to the public. Join us for awesome members-only content like free digitized cookbooks from my personal collection, e-newsletter, and even snail mail from time to time! Don't like Patreon? Leave a tip! 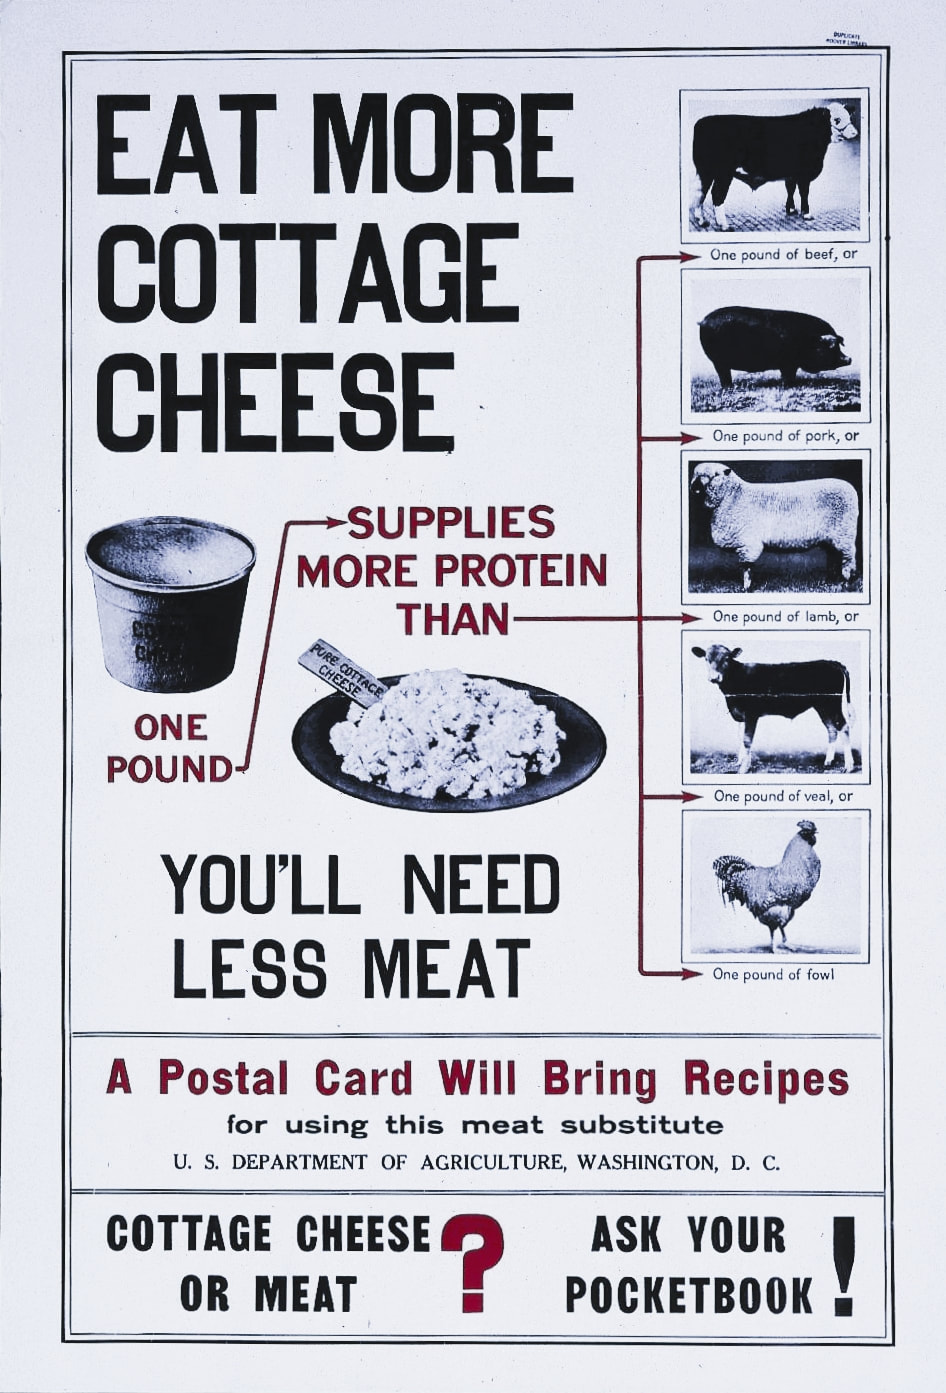
"Eat More Cottage Cheese" poster by the U.S. Department of Agriculture, c. 1918. Hoover Institute Library and Archives.
I am an unabashed fan of cottage cheese. I don't know when I first realized how delicious it is. Growing up, it always seemed some rubbery gross thing old ladies on a diet ate. Probably because the cottage cheese I tasted was likely skimmed milk cottage cheese and probably not very good quality. I certainly didn't think serving it with fruit or jam was a good idea, as was often touted by advertisements.
These days, cottage cheese has largely been superseded by yogurt, as NPR discussed in 2015, but I'm not sure that's a good thing. Cottage cheese is a very old style of fresh cheeses - a family that also encompasses ricotta, mascarpone, cream cheese, feta, mozzarella, goat and other un-aged cheeses that spoil rather quickly compared to their older cousins. But while all those other cheeses get their praises sung, cottage cheese gets short shrift (although not as short as farmer cheese, pot cheese, and dry cottage cheese, which are even harder to find). This propaganda poster from World War I exhorts Americans to "Eat More Cottage Cheese" and "You'll Need Less Meat" - comparing the protein in a pound of cottage cheese favorably to a pound of beef, lamb, pork, veal, and chicken. The First World War saw a dairy surplus, especially in 1918 as dairy farmers across the country fought for better fluid milk prices as cheese and evaporated/condensed milk stores overflowed and feed and labor prices went up. Food preservationists encouraged people to eat more dairy products, especially in the spring of 1918 when a huge milk surplus going into spring dairy season boded ill for the farmers and fair prices. Cottage cheese was touted as a meat substitute to kill two birds with one stone - it ate up some of the dairy surplus while also allowing people to eat less meat. As the poster suggests, cottage cheese was also far cheaper than meat, and still is today, although the gap has closed somewhat. The current national average price for a pound of ground beef is $5.41, and in April, 2022 the average price of a pound of boneless chicken breast was over $4, the highest in 15 years. A pound of cottage cheese has held pretty much steady between $2 and $4/pound, depending on the brand. My local grocery store brand, which is quite good, has 24 oz. (1.5 pound) containers available for just over $3, and often $2.50 or less on sale. Cottage cheese was also touted as a substitute during World War II, and post-war skimmed milk cottage cheese was promoted as a high-protein diet food, which is perhaps why so many of the latter generations disdained it. 
Cookbook cover for "100 Money-Saving Cottage Cheese Recipes, Including 33 Prize-Winners" by Gridley Dairy Company, Millwaukee, WI, 1918. Archive.org.
A number of cookbooks and recipe pamphlets promoting cottage cheese use were published during World War I, including the above 100 Money-Saving Cottage Cheese Recipes published in 1918 by the Gridley Dairy Company and containing recipes like "Liberty Loaf," "Cottage Cheese Relish," "Cheese Pancakes," and over a dozen recipes for "Cottage Cheese Pie," plus cheesecakes!
Much of the advertisement of cottage cheese tended toward the sweet, like this hilariously 1950s advertisement from Borden, which features cottage cheese with jam, with maple syrup, and with fruit in a salad:
But most of my favorite recipes for cottage cheese treat it like the savory cheese it is. It's great in dips for raw veggies, as a topping for roasted vegetables, in savory salads, and yes, as a substitute for meat in fried foods. I even use farmer cheese (drained cottage cheese) in my favorite pastry crust recipe, which I use to make everything from cookies and apple butter bars to Cornish pasties and lentils Wellington.
Frankly, most Progressive Era reformers would have been better off asking Eastern European immigrants for the best ways to use cottage cheese, as it features prominently in Russian, Polish, Ukrainian, and Georgian cuisines. The USDA did a little better with their accompanying pamphlet on cottage cheese cookery: 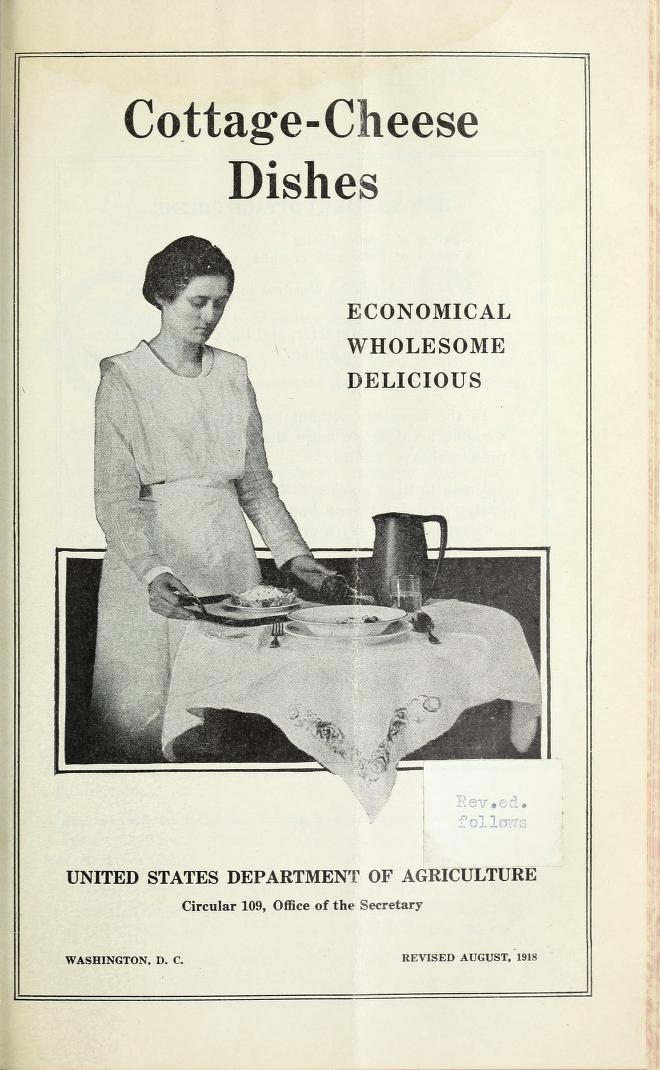
"Cottage-Cheese Dishes: Wholesome, Economical, Delicious" published by the United States Department of Agriculture, 1918.
Cottage Cheese Dishes: Wholesome, Economical, Delicious was published in 1918 by the USDA and contains slightly more sensible, savory uses for cottage cheese, including in salad dressings, scrambled eggs with cottage cheese, potato croquettes, and a lovely-sounding cold weather dish they call "Cottage Cheese Roll," which is cottage cheese mixed with cooked rice or breadcrumbs, seasoned well, and mixed with chopped vegetables, olives or pickles, leftover cold meats, canned salmon, etc. and formed into a roll which is then sliced and served on a bed of shredded lettuce. A suggested "Hot Weather Supper" is "cottage cheese roll made with rice and leftover salmon, served on a bed of lettuce leaves, with mayonnaise dressing; sliced tomatoes, oatmeal bread with nuts, whey lemonade, crisp fifty-fifty raisin cookies." The menu hits all the World War I food spots with a meat substitute (no, salmon wasn't considered "meat"), using up leftovers, using cottage cheese, using wheatless bread with protein-giving nuts, waste-less whey lemonade, and inexpensive and likely low- or no-sugar raisin cookies for dessert. How's that for conforming to rationing directives!
It also includes directions for making cottage cheese (which is incredibly easy to do at home - you just need a lot of milk, heat, and patience) and more importantly in my mind, some recipes for using up the leftover whey, including the aforementioned whey lemonade! How do you like to eat your cottage cheese?
The Food Historian blog is supported by patrons on Patreon! Patrons help keep blog posts like this one free and available to the public. Join us for awesome members-only content like free digitized cookbooks from my personal collection, e-newsletter, and even snail mail from time to time! Don't like Patreon? Leave a tip!
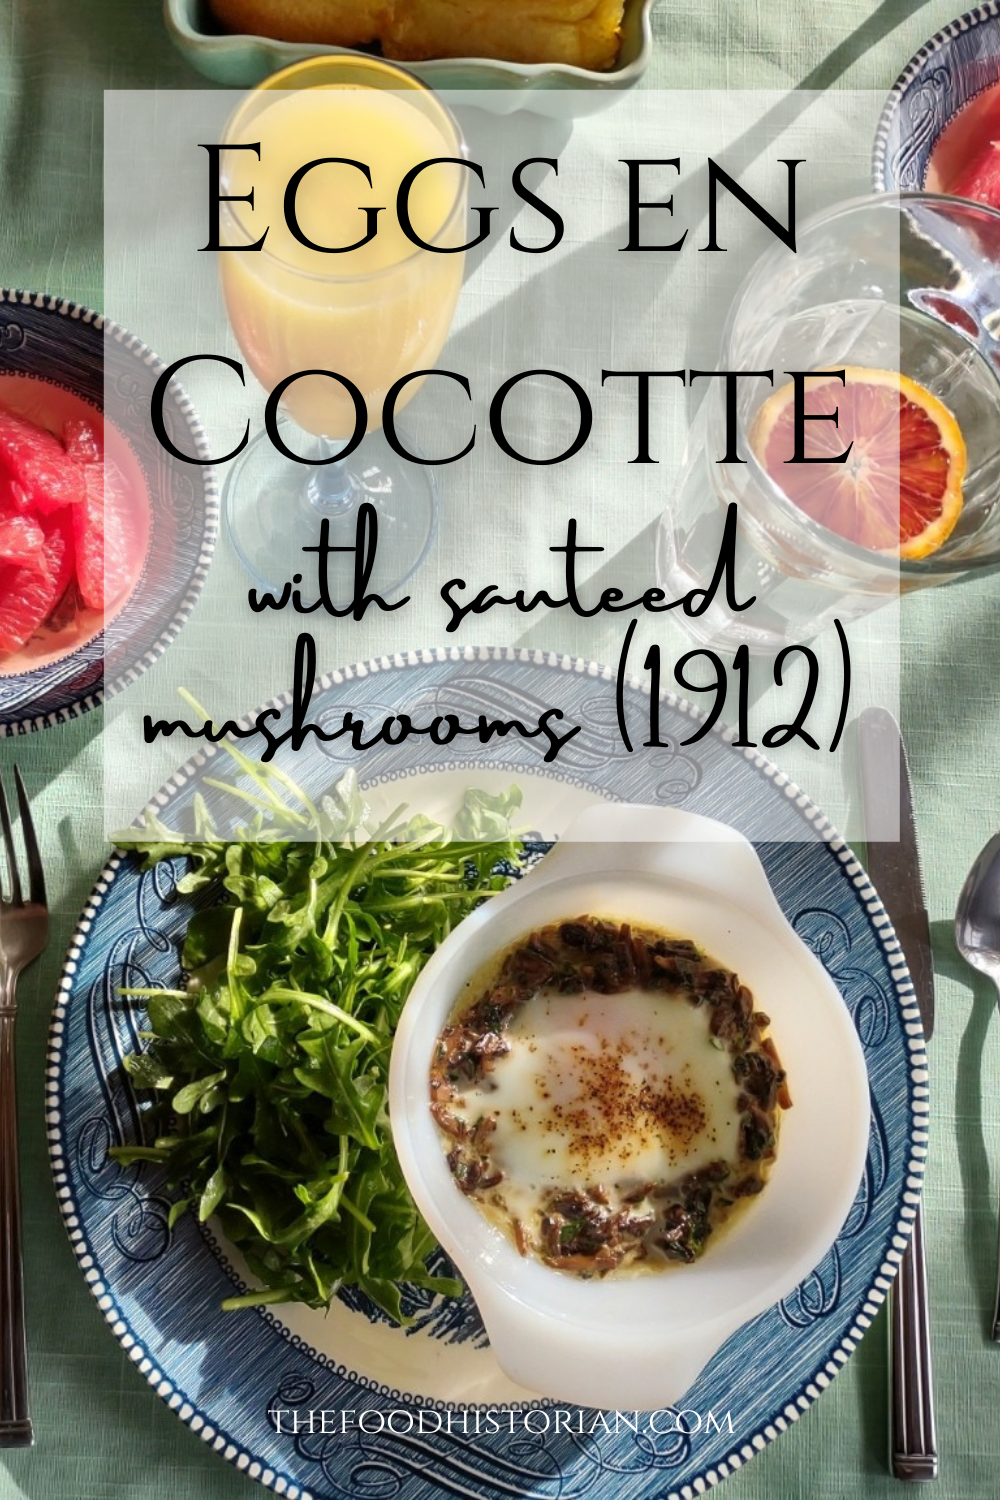 I love brunch. Not the kind you wait in line for, crowded and busy and loud. I love brunch made at home. It's as quiet or loud as you want it to be, the service is usually pretty good, and while there's the effort of making food, if you play your cards right, it's always hot when it gets to the table, and hopefully someone else will do the washing up. Eggs have long been a breakfast staple. If you've a hot skillet, they cook up in a flash. And if you keep chickens, you have a fresh supply every day, at least during the warmer months. But getting a bunch of eggs hot and cooked to order to the table can be a precarious thing when you're hosting. So I took to my historic cookbooks and found a viable solution - eggs en cocotte. Technically, it's oeufs en cocotte, which is French for eggs baked in a type of dish called a cocotte, which may or may not have been round, or with a round bottom and/or with legs. Sometimes also called shirred eggs, which are usually just baked with cream until just set, these days en cocotte generally means the dish spends some time in a bain marie - a water bath. The cookbook recipe I used was from Practical Cooking & Serving by prolific cookbook author Janet McKenzie Hill. Originally published in 1902, my edition is from 1912. You can find the 1919 edition online for free here.  The cover of "Practical Cooking and Serving" by Janet McKenzie Hill, 1912 edition, author's library. A weighty tome of a book, Practical Cooking and Serving is nothing if not practical, and McKenzie Hill is uncommonly good at explaining things. Her section on eggs explains: "Eggs poached in a dish are said to be shirred; when the eggs are basted with melted butter during the cooking, to give them a glossy, shiny appearance, the dish is called au mirroir. Often the eggs are served in the dish in which they are cooked; at other times, especially where several are cooked in the same dish, they are cut with a round paste-cutter and served on croutons, or on a garnish. Eggs are shirred in flat dishes, in cases of china, or paper, or in cocottes. A cocotte is a small earthen saucepan with a handle, standing on three feet." Since my baking dishes were neither the flat oval shirring dishes, nor the handled kind, I guess perhaps they are neither shirred nor en cocotte, according to Hill, but we can afford to be less picky about our dishware. Hill offered two recipes: one more classic version with breadcrumbs (optional addition of chopped chicken or ham) mixed with cream "to make a batter." The buttered cocotte was lined with the creamy breadcrumbs, the egg cracked on top, with the option to cover with more breadcrumb batter. The whole thing was then baked in a hot water bath "until the egg is set." My brunch guest adores mushrooms, and I wanted something a little fancier and more substantial, so I went with Hill's version No. II. Eggs en Cocotte with Sauteed Mushrooms (1912)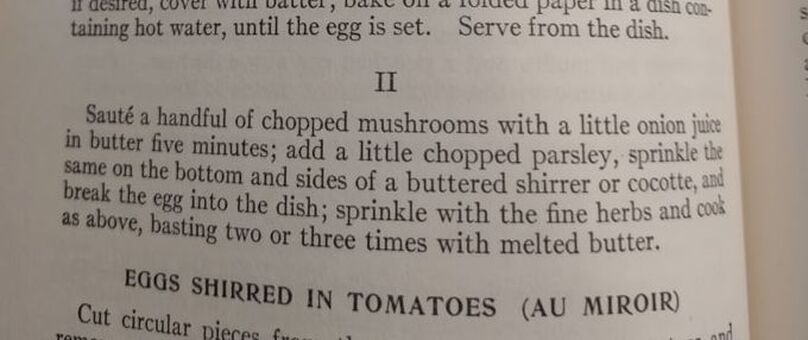 Egg in Cocottes, No. II, from "Practical Cooking and Serving," by Janet McKenzie Hill, 1912. Author's library. Hill's original recipe reads: Sauté a handful of chopped mushrooms with a little onion juice in butter five minutes; add a little chopped parsley, sprinkle the same on the bottom and sides of a buttered shirrer or cocotte, and break the egg into the dish. Sprinkle with the fine herbs and cook as above, basting two or three times with melted butter. I will admit I didn't follow the directions as closely as I should have - I didn't use hot water in my bain marie (oops), and I didn't baste with butter. So the eggs were cooked a little more solid than I would have like, but still turned out deliciously. Here's my adapted recipe: 1 pint white button mushrooms, minced 2 tablespoons butter 1 clove minced garlic salt and pepper 2 tablespoons heavy cream 2 tablespoons fresh flat leaf parsley, chopped 4 eggs Preheat the oven to 350 F. Butter three or four small glass baking dishes. Sauté the mushrooms and garlic in butter, adding salt and pepper to taste. When most of the mushroom liquid has cooked off, add the heavy cream and parsley and stir well. Divide evenly among the baking dishes, make a little well, and then crack eggs into dishes. One or two per dish. Salt and pepper the egg, then place in a 9x13" baking pan with two inches of water (use hot or boiling water). Bake 5-10 minutes, or until the egg white is set and the yolk still runny. For firmer eggs, bake 10-15 mins. I did not use boiling water, so the whole thing took more like 20-30 mins for the water to heat up properly, and the yolks got firmer than I would have liked. Tasted delicious, though! This is a very rich dish, so best served with something green and piquant - I chose baby arugula with a sharp homemade vinaigrette (2 tablespoons olive oil, 2 tablespoons lemon juice, 1 tablespoon dijon mustard was enough for 3 or 4 servings of salad), which was just about perfect. 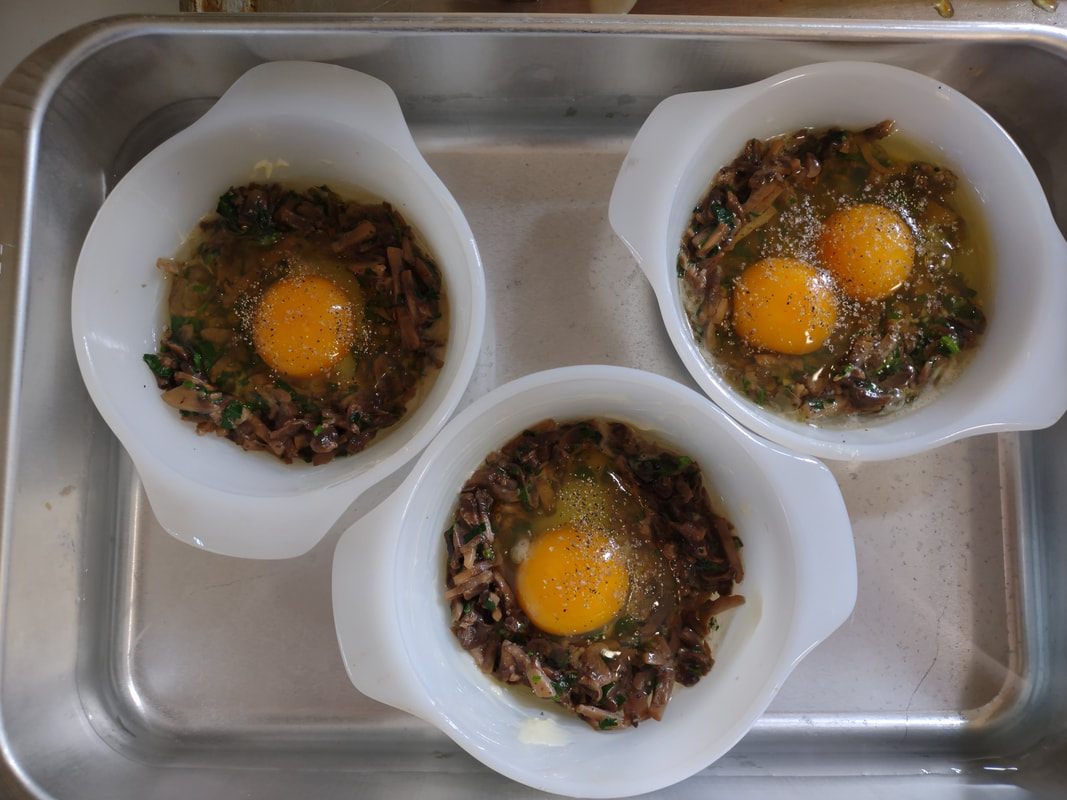 The raw eggs in their cocottes, sitting in their water bath and waiting to go into the oven. You don't have to be a fan of mushrooms to like this dish - white button mushrooms aren't particularly strong-flavored - they just tasted rich and meaty. And despite the fact that eggs en cocotte look and taste incredibly fancy, they were very easy and relatively fast to make. If you were cooking brunch for a crowd, you could certainly prep the mushroom mixture in advance, have the bain marie water on the boil, and make the eggs your last task for a beautiful brunch. With the simple arugula vinaigrette on the side, something sweet and bready (that recipe is coming soon, too) and some fresh fruit and mimosas, you've got yourself a winner. Do you have a favorite egg recipe? 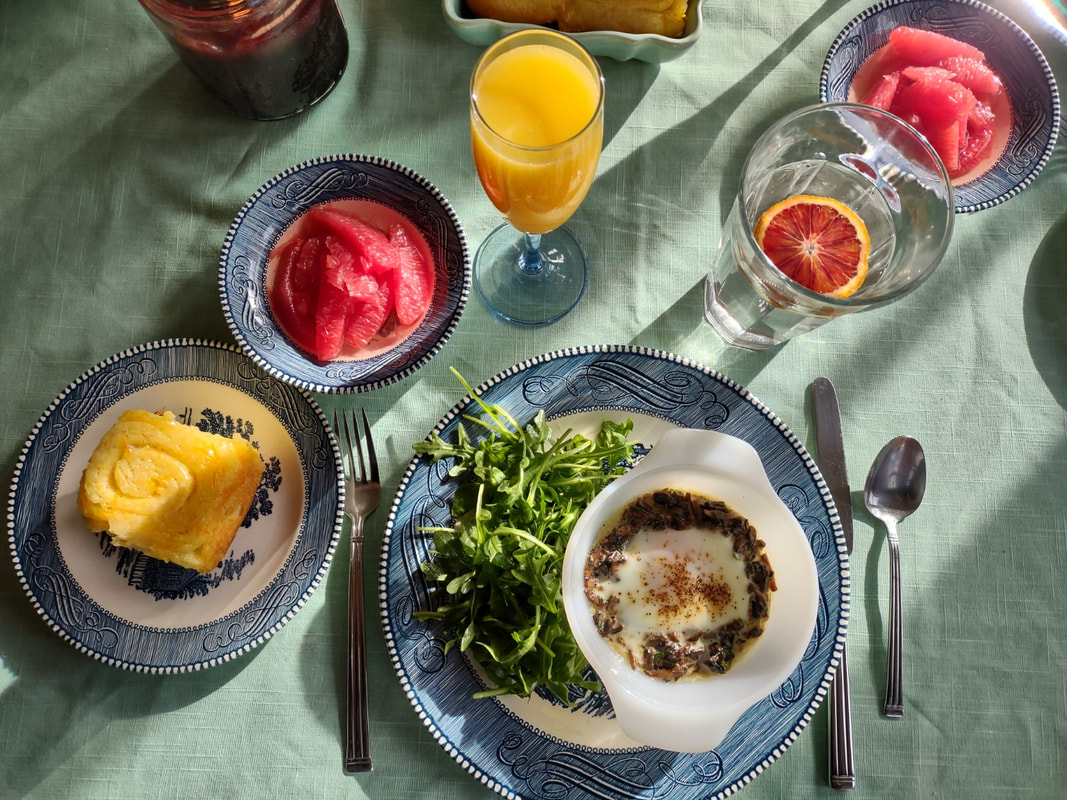 The whole beautiful brunch spread. The Food Historian blog is supported by patrons on Patreon! Patrons help keep blog posts like this one free and available to the public. Join us for awesome members-only content like free digitized cookbooks from my personal collection, e-newsletter, and even snail mail from time to time! Don't like Patreon? You can leave a tip!  Washington Pie HistoryWashington pie is everywhere in 19th century cookbooks. Confusingly, it is not a pie. Gastro Obscura traced the history of Washington pie, but spoiler alert - it was called a pie because it was baked in tin pie pans, which back then had straight sides similar to modern cake pans. WHY it was named after George Washington isn't clear - and the earliest references we can find date to 1850. Gastro Obscura and Patricia Reber trace it back to Mrs. Putnam's Receipt Book and Young Housekeeper, by Elizabeth H. Putnam and published in 1850. But I found another reference from 1850, the Practical Cook Book by Mrs. Bliss (of Boston), also published in 1850, for "No. 1 Washington Cake," which included the note "This cake is sometimes called WASHINGTON PIE, LAFAYETTE PIE, JELLY CAKE, &c." Mrs. Bliss' recipe is preceded by the lovely-sounding "Virginia Cake," which calls for sieved sweet potato and molasses, and "Victoria's Cake," which is a lemon-flavored sponge cake with no mention of the jam and cream commonly found in Victoria Sponge. I did find several earlier references to "Washington Cake," many of which were more a type of white fruit cake with currants (Mrs. Bliss' "No. 2 Washington Cake" is of this type), not a layer cake with jelly, with one exception. "Washington Cake" in Mrs. T. J. Crowen's 1845 Every Lady's Cook Book calls for a similar style cake flavored with lemon and brandy. However it does not say to bake it in layers, nor fill it with jam or jelly. But let's take a harder look at that "Layfayette Pie" reference from Mrs. Bliss. Lafayette Pie, Martha Washington Pie or Cake History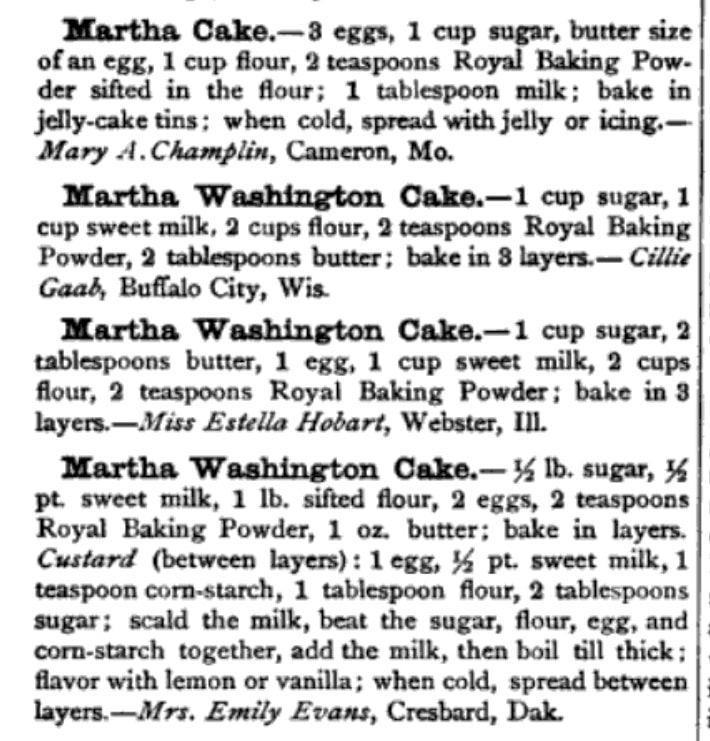 Several references to "Martha Cake" and "Martha Washington Cake" from "My Favorite Receipt," published by the Royal Baking Powder Company in 1886. Although Washington Pie is traditionally made with only jam or jelly, there was another variation that shows up later: the Lafayette or Martha Washington Pie/Cake. Similar to Washington Pie, both "pies" are a simple cake baked in thin layers, but instead of filled with jelly or jam, are filled with custard (or more rarely, whipped cream). Confusingly, though the majority of references to Lafayette Pie and Martha Washington Pie call for custard, I have seen occasional references to jelly options, too. The above recipes, from My Favorite Receipt, published by the Royal Baking Powder Company in 1886 is one of the earliest references I can find to Martha Washington Cake/Pie. The first one, called just "Martha Cake" calls for it to be baked in "jelly-cake tins" and spread with "jelly or icing." The next two recipes are identical, and call for the cake to be baked in three layers, but no reference to fillings. The final version (from a North Dakotan!), is the one which also lists the cooked custard filling, to be flavored with vanilla or lemon. The earliest reference I could find for "Lafayette Pie" is Mrs. E. Putnam's 1867 version of her Mrs. Putnam's Receipt Book, which follows the Washington Cake recipe with "Lafayette Pie," a rather less precise recipe than Washington's, which is "enough for two pies" and is followed with "Filling for the Above Pies," seeming to mean both Washington and Lafayette. It reads "Two ounces of butter, quarter of a pound of sugar, two eggs, and one lemon; beat all together without boiling." At first, I read this to mean uncooked, but instead it must mean heated but not boiled - essentially a rich, lemon-flavored custard. The Methodist Cook Book, published in 1899, contains a recipe for "Lafayette Pie," which calls for being baked in a "Deep pie plate," and then cut in half lengthwise (confusingly, it says to "cut out the center to make room for the filling") and filled with a cornstarch-egg custard. Just like Martha's. Boston Cream Pie History As far as I can tell, Lafayette Pie and Martha Washington Pie/Cake are essentially the same: a simple layer cake baked in pie tins and filled with cooked custard. Sound familiar? Recipes called "Boston Cream Pie" were for decades exactly the same - a thin plain layer cake filled with a cooked custard. Contrary to what Gastro Obscura claims, when Americans made Boston Cream Pie at home in the 19th century, it was WITHOUT a chocolate topping. None of the 19th century recipes I could find titled "Boston Cream Pie" (and there were many) contain chocolate at all - only one Maria Parloa recipe calls for chocolate, and that is named "Chocolate Cream Pie." Chocolate-free Boston Cream Pie recipes continue to be published into the 1940s. As far as cookbooks go, Boston Cream Pie doesn't morph into the chocolate-topped version until the 20th century. The Home Dissertations cookbook, published in 1886, includes a recipe for "Boston Cream Pie" among its pastry recipes, even though it is clearly a cake. It calls for the cake to be baked in "round tins so that the cake will be one inch and a half thick" and filled with a cooked custard made with eggs and cornstarch, flavored with vanilla or lemon. No chocolate in sight. How or why all of these "pies" which are really cakes got their names remains lost to history. Likely, the cake was baked in honor of Washington's birthday, or other patriotic occasions. Washington's Birthday became a federal holiday in 1879, which may explain the popularity of the cake at the end of the 19th century. Lafayette and Martha likely followed as other patriotic homages. Other political figures also got their due, like this "Mrs. Madison's Cake" from 1855, which lists just above a white fruitcake-style "Washington's Cake," "Madison Cake" from 1856, and "Mrs. Madison's Whim," a similar-style cake "good for three months" stays in print as late as 1860. Even Jefferson got his own cake, although only in one 1865 edition of Godey's Magazine, and it reads more like a sweet biscuit than a true cake. Political cakes may have been a thing in the 19th century, because the 1874 The Home Cook Book of Chicago has an Adams Cake, a Clay Cake, two Harrison Cakes, and a Lincoln Cake, and the Adams and Clay cakes (named for President John Adams and Senator Henry Clay, one presumes) read very much like Washington Pie. There are also TWO recipes for "Washington Pie," one of which has a filling that includes apples. I could only find one other "Lincoln Cake" in the 19th century, published in 1863. And Boston? It could be that the patriotic cakes were simply popular in Beantown, which leant its name as the "pies" spread elsewhere (a la Boston Brown Bread, Boston Baked Beans, etc.). Certainly the Parker House Hotel in Boston claims to have invented Boston Cream Pie, although I've yet to see any hard evidence (like a recipe or period description) that indicates it had a chocolate topping in the 1860s. Victoria Sponge Cake History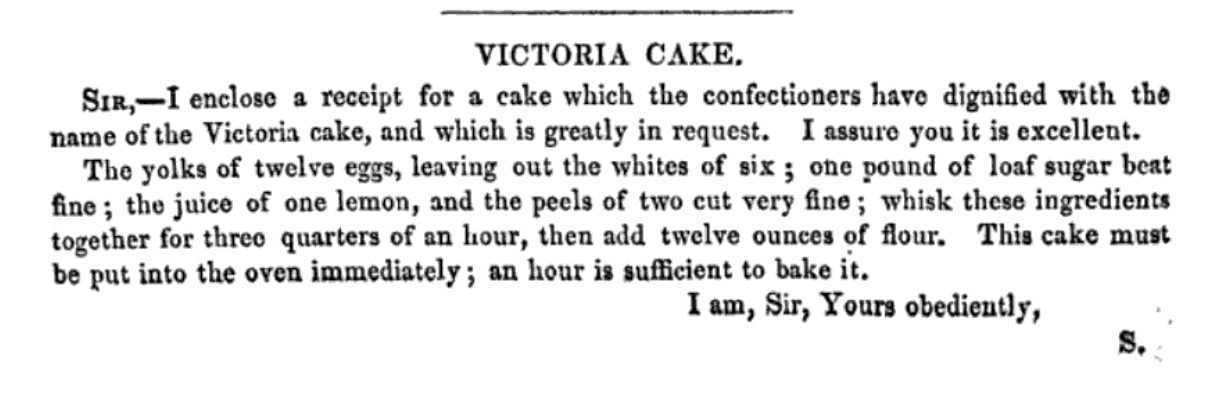 A reader-submitted recipe for "a cake which the confectioners have dignified with the name of the Victoria cake, and which is greatly in request," from "The Magazine of Domestic Economy," 1839. Washington Pie really is quite similar to Victoria Sponge, which if you're a fan of the Great British Bakeoff, you know is one of Britain's (and Queen Victoria's) favorite desserts. And, ironically, not actually a sponge cake, as it calls for butter (true sponge cakes have no fat). Likely developed in the late 1840s, coinciding with the development of baking powder in 1843, and adopted by the Queen in mourning in the 1860s. Like Washington Cake, some of the first references to "Victoria Cake" are much closer to a white fruitcake or pound cake than a sponge, like this recipe from 1842, or this recipe from 1846 by Francatelli. The first recipe to a sponge-style Victoria Cake comes in 1838, the year after she became queen (recipe pictured above) from The Magazine of Domestic Economy. Although it does not call for filling of either jam nor whipped cream. The oft-cited recipe published in The Practical Cook (1845), is identical to the 1838 recipe, down to the letter. Of course, Mrs. Bliss' "Victoria's Cake," published in 1850, while not identical to the letter, is certainly just a slightly re-worded copy. Despite the popularity of the sponge, "Victoria's Cake" continues to be the yeasted fruitcake that Francatelli and later Soyer keep pushing well into the 1860s. "Victoria Sandwiches" come into play in the 1850s, whereby pieces of sponge cake are sandwiched with jam and topped with pink icing, a la The Practical Housewife, published in 1855 by Robert Kemp Philp. Ridiculously, Francatelli's version of "Victoria Sandwiches" are a literal sandwich, made with hard boiled egg and anchovies. Not quite as flattering to the queen. Mrs. Beeton wisely hops on the sponge cake "Victoria Sandwiches" bandwagon in the 1860s. Although curiously none of these early recipes call for whipped cream to accompany the jam. Perhaps because Mrs. Beeton's recipe for Victoria Sandwiches is immediately followed by one for Whipped Cream, maybe someone put two and two together. Which cake was inspired by whose we'll perhaps never know. Unless some manuscript cookbook has in it somewhere "Washington Pie, from Victoria's Cake" or "Victoria Sandwiches, in the style of Washington Pie." Regardless, it was the exact right kind of cake to associate with heads of state, apparently, once everyone got over heavy white fruit cakes laden with lemon and currants and alcohol. In making a birthday brunch for a friend, I wanted to focus on vintage recipes and had Washington Pie already in mind. But unwilling to use the internet (cheating!), I instead consulted my historic cookbooks. I had been on the lookout for another recipe, when I found a recipe for "Washington Cake" in one of my North Dakota community cookbooks, this one dating to the 1940s: The North Dakota Baptist Women's Cook Book. 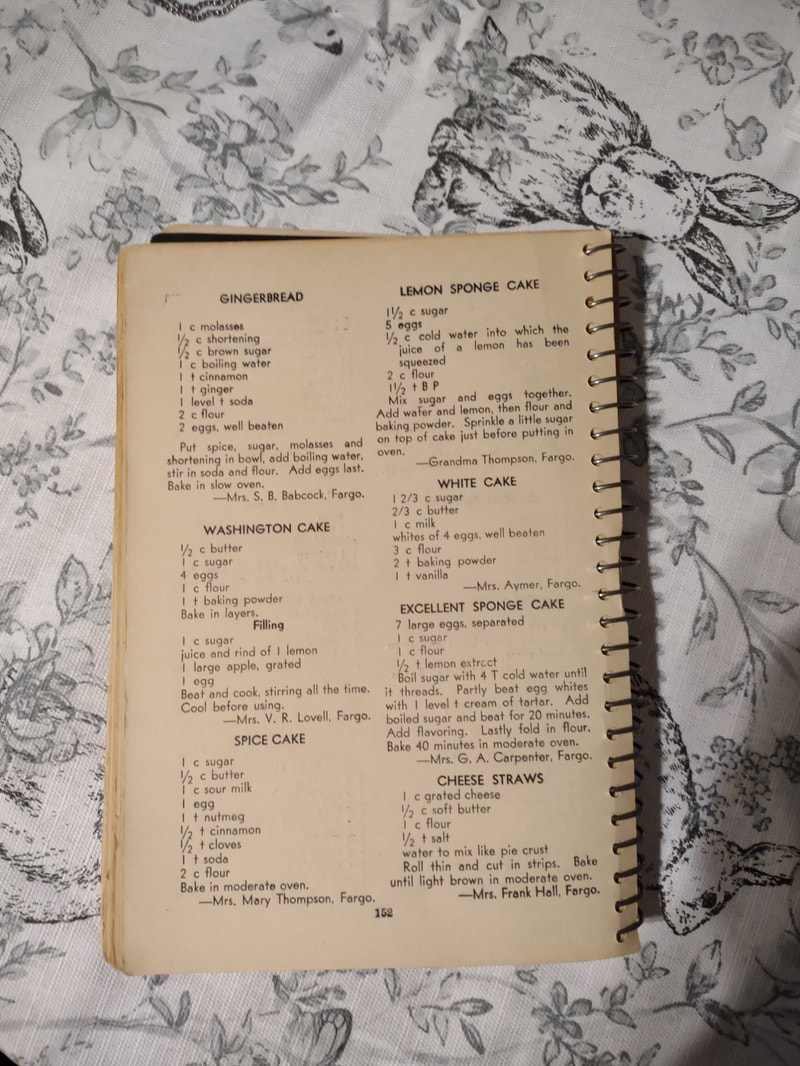 The cookbook does not have a publication date, but there is a reference to 1947 in the frontspiece, and from that and judging by the style of font and print, we can safely date it to the late 1940s, possibly 1950, but not much later. Interestingly, the recipe for Washington Cake was in a section in the back called "1905 Recipes" and dedicated to the women of the First Baptist Church of Fargo, ND, which was built in 1905. The recipes that follow were all written by women of the church for that first construction - likely from an older cookbook. The dedication reads, "In loving memory of those who have made a very definite contribution to the Christian cause through their labors in the First Baptist Church of Fargo, N. D., and who have left behind them fruits that are being utilized in this book, this page is gratefully dedicated." It then lists two biblical references to death and a list of women's names. The recipes read as much older than 1905, with emphasis on things like brown bread, suet pudding, doughnuts, gingerbread, and mincemeat. Likely they were submitted as "colonial" or similar "old-fashioned" recipes that were part of the popular colonial revival that began at the turn of the 20th century. The recipe for "Washington Cake" was contributed by Mrs. V. R. Lovell of Fargo, ND. It reads: 1/2 c butter 1 c sugar 4 eggs 1 c flour 1 t baking powder Bake in layers. Filling 1 c sugar juice and rind of 1 lemon 1 large apple, grated 1 egg Beat and cook, stirring all the time. Cool before using. Not exactly the most descriptive recipe I've ever read, but better than many! I decided not to use the interesting-sounding filling, although I may revisit it at a future date. Instead, I wanted to go the jam-and-cream route. 1905 Washington Cake (or Pie), Adapted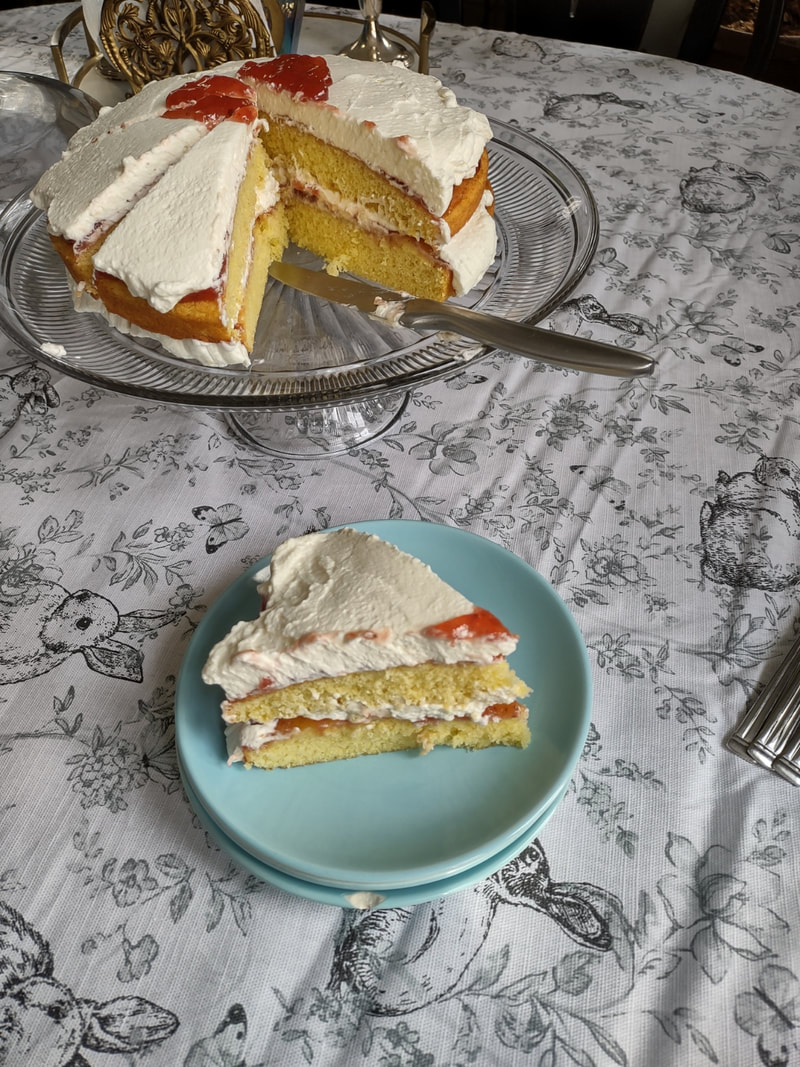 Unlike a traditional sponge cake, which can be quite finicky with separating egg whites, I found this recipe to be just as delicious, but much simpler. As an added bonus, you don't have to split a taller cake evenly lengthwise - the layers are already thin enough to stack as-is. You can use any kind of jam, but I chose my favorite brand of strawberry. 1/2 cup butter 1 cup sugar 4 eggs 1 cup flour 1 teaspoon baking powder 1 teaspoon vanilla (or lemon or extract) Strawberry jam Whipped cream Preheat the oven to 350 F. Butter well two round cake pans. Cream but the butter and sugar together, then add the eggs one at a time, beating after each addition. Add the vanilla (or lemon), then the flour and baking powder, then mix well until everything is well combined. Pour equal amounts into the two cake pans, then bake on the center rack for approximately 30 minutes (check after 20 - when the cake is golden at the edges and the center springs back to the touch, it is done). Tip the cakes out of their pans onto a cooling rack and let cool completely. Then spread strawberry jam on one layer, and top with whipped cream (I stabilized mine with cornstarch - which you could taste, so I would not recommend doing that again), then add the second layer, more strawberry jam, and more whipped cream. If you want this cake to keep better, I would recommend going the traditional Washington Pie route and just filling thickly with strawberry jam, and serving it with whipped cream on top to taste. This cake is very easy, bakes relatively quickly, and tasted delicious. It was VERY sweet, so I might cut back on the sugar slightly if I make it again. But while I'm sure Great British Bakeoff experts would criticize the fact that I didn't weigh my ingredients or make sure my eggs were room temperature, I thought the cake turned out very lovely indeed. And the combination of cake, whipped cream, and sweetened fruit can never be wrong. As for all the other political cakes? I may have to do some more investigative baking for Presidents' Day 2023. The Food Historian blog is supported by patrons on Patreon! Patrons help keep blog posts like this one free and available to the public. Join us for awesome members-only content like free digitized cookbooks from my personal collection, e-newsletter, and even snail mail from time to time! Don't like Patreon? You can leave a tip! 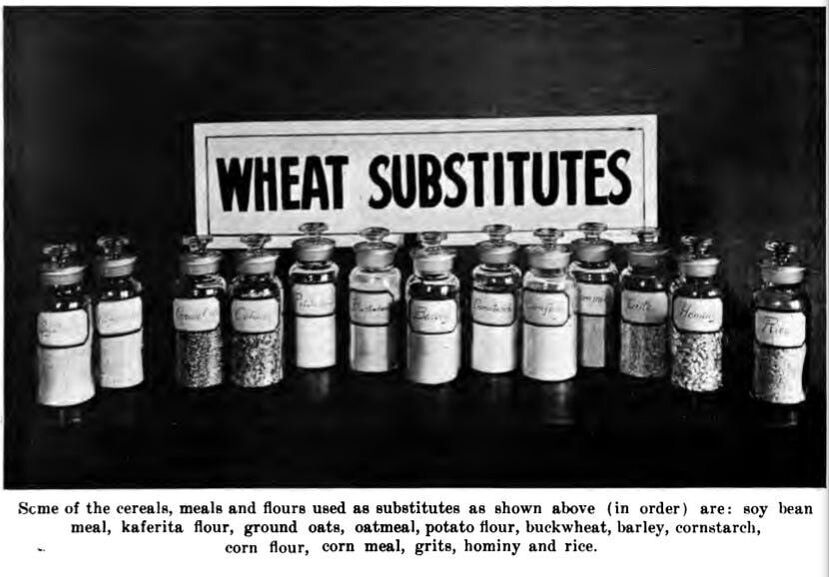 "Wheat Substitutes" as illustrated in "Liberty Recipes" (1918). Caption: "Some of the cereals, meals and flours used as substitutes as shown above (in order) are: soy bean meal, kaferita flour, ground oats, oatmeal, potato flour, buckwheat, barley, cornstarch, corn flour, corn meal, grits, hominy, and rice." Last time for World War Wednesday, we discussed how important it was during the First World War to save wheat and reduce bread consumption. During the war a number of cookbooks were published to help Americans reduce their consumption of wheat, meat, butter, and sugar and how to go without or reduce the use of scarce or expensive ingredients like eggs. When it came to bread, there were very few recipes that used no wheat flour at all, but instead most recipes used alternative grains like barley, rye, corn, and oatmeal or other ingredients like mashed potatoes or cooked rice to reduce the overall ratio of wheat flour used. Liberty Recipes was written by Amelia Doddridge, who the title page lists as "Formerly, Instructor of Cooking, Manual Training High School, Indianapolis, Indiana; and Emergency City Home Demonstration Agent, Wilmington, Delaware. Now, Head of Home Economics Department, Wooster College, Wooster, Ohio." The book was published by Stewart & Kidd Company in Cincinnati, Ohio in 1918. I wasn't able to find much more on Amelia herself. I found a dissertation that notes that several classes in food and household management at Wooster College were taught by Amelia, who was then Acting Dean of Women. But those classes were apparently only offered temporarily during the war, "These particular classes were offered only between 1918-1919 during the "confused period of war, fuel shortages, S.A.T.C., Spanish flu, and demobilization." Which seems to indicate that Amelia herself may not have survived as an instructor after the war. A reference from 1922 places an Amelia Dodderidge in Montevallo, Alabama as head of the home economics department "at Montevallo," which possibly meant the college located there. I found a reference to an Amelia Doddridge teaching high school home economics in Ohio in 1924. And another to an Amelia Dodderidge working at a Farm Bureau in Pennsylvania and/or as a county home economics representative, and/or as the Home Economics Extension representative from the state college, all in Pennsylvania, all in 1926. In 1929 there's a Miss Amelia Dodderidge in Modesto, California, acting as an "assistant home department agent." By the 1950s she appears to be living, retired, in Franklin, Indiana and throughout the late 1950s and 1960s there are numerous articles in the Franklin Star authored by Amelia Dodderidge. A 1962 article indicates she was working for the Methodist Home (likely a home for the elderly) in Franklin, IN and, indeed, most of the articles she published in the Franklin Star were called "The Home Window," apparently reporting on the activities and events of the Methodist Home. The trail runs cold at the very end of 1963. The last reference to Amelia is published on December, 31. It's unclear whether the newspaper simply did not run her column again or if the newspaper itself ceased publication or if it simply wasn't digitized past 1963. Although it's tough to prover all these Amelia Dodderidges were the same person, it is very likely. Amelia apparently continued her home economics work throughout her life, even after "retirement." But back to Liberty Recipes. The cookbook is a fascinating one, and I particularly love some of the slogans listed in the frontspiece; my two favorites are "Place meat and buns behind the guns" and "Husband your stuff; don't stuff your husband." Also interesting are the references in the foreword to the cookbook itself being much more convenient for reference by housewives rather than taking "too much trouble to hunt in a pile of leaflets for the recipes she wishes at the particular time she needs it" - a reference to the numerous bulletins and cookbooklets being published by the USDA and other government agencies. In addition, the foreword claims that although the recipes listed are designed for the "present emergency," "they should be usable and still practical even after the war clouds pass and Freedom is ours." There are numerous bread recipes in the cookbook - both yeast and quick breads. In addition, the cookbook focuses on meatless and meat-saving recipes, a few salads, and numerous sugarless, low-sugar, and wheat- and fat-saving dessert recipes. This recipe for Sweet Potato Bread seemed quite modern, and a fun recipe to share in the lead-up to Thanksgiving. Although I have not had time in a while to bake yeast bread, I thought I would share it anyway. Maybe I can take a stab over the holiday. World War I Sweet Potato Bread (1918)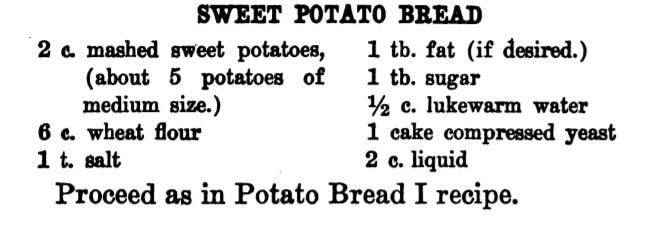 "Sweet Potato Bread" recipe from "Liberty Recipes" (1918). The original recipe makes references to other recipes, so I've combined the instructions for your convenience. A cake of yeast is about the same as dried yeast packets that are sold today. Although you can try it with RediRise or similar fast-acting yeast, I recommend plain ol' active dry yeast. 2 cups mashed sweet potatoes (about 5 potatoes of medium size.) 6 cups wheat flour 1 teaspoon salt 1 tablespoon fat (if desired.) 1 tablespoon sugar 1/2 cup lukewarm water 1 cake compressed yeast (or 1 envelope active dry yeast) 2 cups liquid Use the potato water for the liquid. Pour it gradually over the hot mashed potatoes. When lukewarm add the softened yeast, salt, sugar, and fat. Stir in the rest of the flour gradually. When the dough becomes too stiff to stir, work in the remainder of the flour by kneading with the hands. It may take a little more flour or a little less depending upon the kind of flour used. The dough should be of such a consistency that it will not stick to the hands or to the bowl. Knead 10 or 15 minutes until the dough is smooth and elastic. Place in a bowl, cover, and keep it in q warm temperature (75 to 85 F). When risen twice its bulk, cut down and knead again. Then shape into loaves, place in greased pans, and set in a warm place. When light and doubled in bulk it is ready to bake. To prevent a crust from forming over the top of the loaf while rising, rub the surface with a little melted fat. Watch the rising and put into the oven at the proper time. If risen too long, it will make a loaf full of holes; if not risen enough, it will make a heavy bread. Bake 45 minutes to 1 hour in a moderately hot oven (375 to 400 F). If oven is too hot, the crust will brown before the heat has reached the center of the loaf and will prevent further rising. The loaf should raise well during the first 15 minutes of baking; then it should begin to brown, and continue browning for the next 15 or 20 minutes. The last 15 to 30 minutes, it should finish baking and the heat may be reduced. When done, the bread will not cling to the sides of the pan. If a tender crust is desired, brush the bread over with a little melted fat as soon as it is taken from the oven. If you end up making this recipe, let us know in the comments how it turned out! There are lots of other interesting recipes to be had in Liberty Recipes, including a potato biscuit pie crust recipe, buckwheat spice cake, and cornmeal gingerbread, to name a few! Are there any recipes in there that you want to try? The Food Historian blog is supported by patrons on Patreon! Patrons help keep blog posts like this one free and available to the public. Join us for awesome members-only content like free digitized cookbooks from my personal collection, e-newsletter, and even snail mail from time to time! Don't like Patreon? Join with an annual membership below, or just leave a tip! 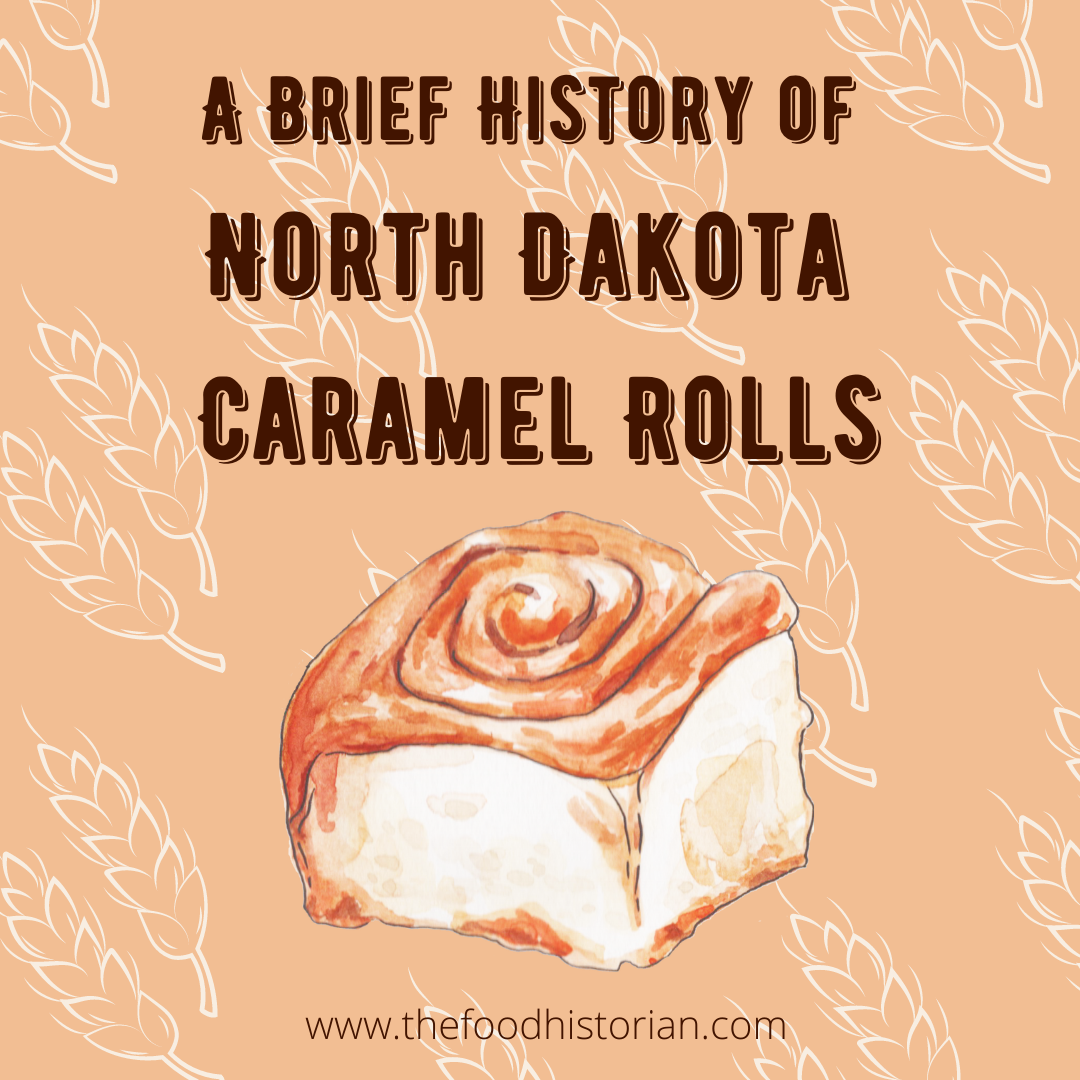 Last week I went home to Fargo, ND for my grandfather's funeral. He had passed away in June of this year, just a few weeks short of his 102nd birthday. Born in 1919, he lived to see a lot of change and ultimately, two global pandemics. It was the first time I had been home since 2019, when I returned for grandpa's 100th birthday and a cousin's wedding. Every time I go home to North Dakota, there's both joy and grief. Joy in seeing old friends and family, in visiting the old stomping grounds, in being able to see the whole sky without too many trees and mountains in the way, and being back in the land where Scandinavian culture still looms large (I went to the Sons of Norway, Kringen Lodge, four times in six days). But also grief, for what once was and will never be again. The common sort of grief when the stomping grounds change almost beyond recognition, but also another sort of grief, of cultural loss. When I was in high school, North Dakota had two Democratic Senators and a Democratic Representative and our biggest exports were wheat, sunflower seeds, honey, and sugar beets. Things have certainly changed since then. But some things haven't changed at all. Case in point: the North Dakota Caramel Roll (pronounced "car-mull," not "care-ah-mel"), formerly called "Dakota Rolls." Once the purview of rural cafes and church basements, the caramel roll is seeing something of a North Dakota renaissance. It's everywhere, and it's amazing. 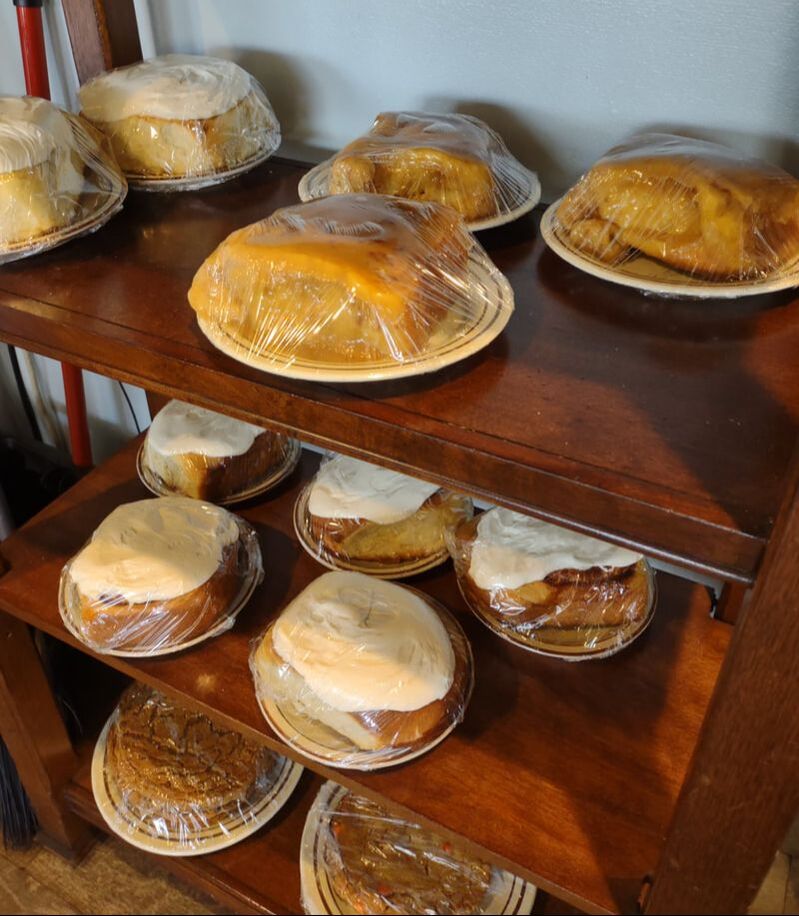 Caramel rolls, cinnamon rolls, and cookies the size of my head, on display at The Shack in North Fargo, ND. Not to be confused with cinnamon rolls or the sad, dried out, caramel roll cousin, the "sticky bun," caramel rolls are pillowy soft and drenched in smooth caramel. There's nothing worse than getting a caramel roll that's more roll than caramel. The Northeast can keep its dry and sticky buns with burnt pecans. I tried my best to track down the history of "Dakota rolls," but sadly no one else appears to have done the research yet, so this is my stab at it. I think perhaps their prominence in North Dakota has to do with the specific confluence of immigration that makes North Dakota - especially the Eastern half of the state - special when compared to others. Scandinavians, especially Norwegians, abound. Germans, too, but one particular group, Germans from Russia, have settled on the northern plains, including North Dakota, in higher concentrations than anywhere else in the world. The intersection of Scandinavian and German immigration has meant that North Dakota is home to some prodigious bakers. Cinnamon rolls are thought to have originated in Scandinavia, possibly Sweden. They were also historically popular in Germany, where the sticky bun or "schnecken" (snail) is from. Honey-sweetened buns date back to ancient Rome, but the idea to roll the dough flat, spread it with a filling, and roll it into a spiral before slicing was an inspiration whose inventor is lost to time. Caramel rolls specifically seem to date to the early 20th century in North Dakota. I did find a few 19th century references to "sticky buns," but no recipes. The search term "caramel roll" turns up almost exclusively candy advertisements and recipes until the 1920s. I did find one reference to caramel rolls from the Hughes Brothers Bakery in Bismarck, ND. Although the bakery itself predates 1911, they moved to a new location that year, and apparently began engaging in regular newspaper advertisements thereafter. 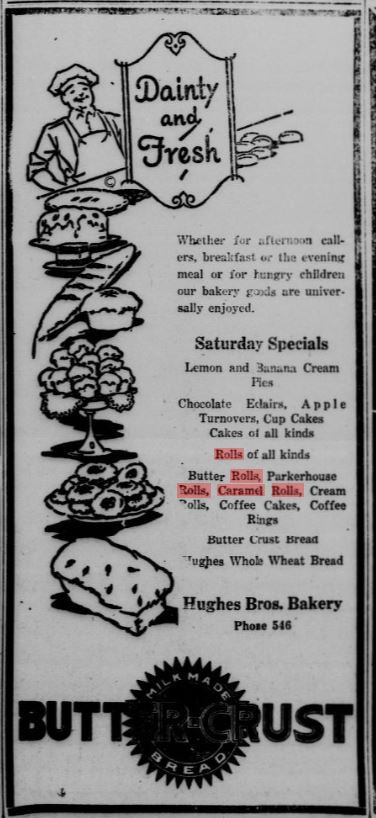 Hughes Bros. Bakery advertisement mentioning Caramel Rolls, "Bismarck Tribune," September 23, 1927. 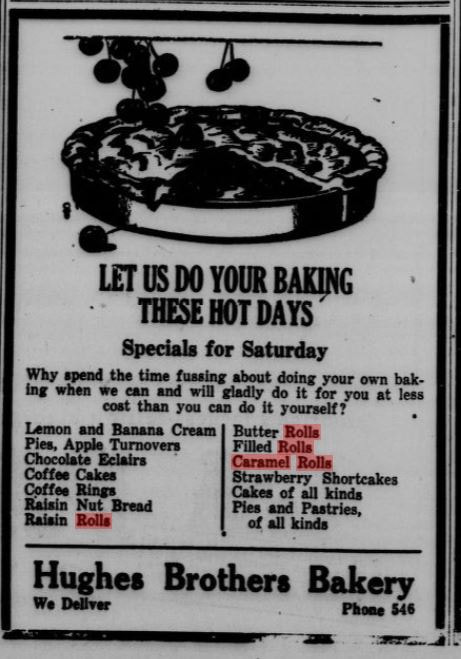 Hughes Bros. Bakery advertisement mentioning Caramel Rolls, "Bismarck Tribune," May 25, 1928. I love the 1928 advertisement - "Let us do your baking these hot days," and published close to Memorial Day, no less! "Why spend time fussing about doing your own baking when we can and will gladly do it for you at less cost than you can do it yourself?" Why, indeed, Hughes Brothers. Why, indeed? Likely coinciding with the rise of diners, roadside cafes, and school cafeterias, the caramel roll expanded across North Dakota (and into some neighboring states, notably South Dakota) with a vengeance. Although there is little mention of them in North Dakota community cookbooks from the 1940s, by the 1970s they're in full evidence. The few recipes that I was able to find are remarkably similar, and all call for making the dough from scratch. But some modern bakers cheat and use frozen bread dough, notably Rhodes brand. My copy of the Westminster Presbyterian Church cookbook from Casselton, ND, undated but likely circa 1970s, judging by the handwriting, has a recipe for "Dakota Rolls" submitted by Mrs. William L. Guy. Mr. William L. Guy was governor of North Dakota from 1961-1973, and the Mrs. was Elizabeth "Jean" (Mason) Guy, who is credited with helping revive the Democratic Nonpartisan League in North Dakota (thanks for the research tip, Mom!). I've reproduced Jean's recipe in full below. Dakota Rolls Recipe1 c. scalded milk (do not boil) 2 T. butter 2 T. sugar 1 t. salt 1 cake compressed or 1 pkg. granulated yeast 1/4 c. lukewarm water 1 egg, well beaten 3 1/2 c. flour (about) Soften yeast in lukewarm water. Stir and let stand about 5 minutes. Combine milk, sugar, salt and shortening (i.e. the butter) and cool to lukewarm. Stir yeast and add to cooled milk. Beat egg, add to milk and yeast mixture. Gradually stir in the flour to form a soft dough (there should be about 1/2 cup flour left for kneading). Beat until smooth. Turn out on floured canvas or board. Cover with greased wax paper and a damp towel. Let rest for 10 minutes. Knead until smooth and satiny, adding flour as needed. This roll dough should not be too firm. Place dough in a warm greased bowl, turning until all of surface is lightly greased. Cover with greased wax paper and damp towel, and let rise in a warm place (85-90 F) about 1 hour and 45 minutes or until double in bulk. Punch down and let rise again until double in bulk. Turn out on flour dusted canvas or board and roll about 1/4" thick in oblong shape, 8" x 16". Brush with melted butter and sprinkle with 1/4 cup brown sugar. Roll as for cinnamon rolls. Cut in 1" slices. Combine 1 C. of brown sugar, 2 T. light corn syrup, and 1 T. butter. Heat slowly in a greased shallow pan or muffin tin. Set aside to cool. Place rolls, cut side down, over the mixture. Cover, let rise until double in bulk. Bake in 375 F oven for 25 minutes. Remove from pan. Cool, bottom side up. Makes 2 dozen rolls. It seems to me that this recipe, while very instructive in terms of the dough, has not nearly enough caramel to cover two dozen rolls. Modern cooks usually combine brown sugar and heavy cream, or some even swear that melted vanilla ice cream is the secret to good and ample caramel. However, the 1975 Fargo-Moorhead Centennial Cookbook also has a recipe for Dakota Rolls, submitted by Judy Adams, which appears to be lifted almost verbatim from the Casselton cookbook. Here's a more caramel-y modern recipe. Sadly, I haven't had time to test this recipe and it's been too hot to bake lately, but fall weather is coming! So maybe a weekend of yeast baking is in order soon. Perhaps I'll combine my caramel roll baking with orange rolls - another Midwestern specialty that seemed to be more prominent in the 1930s and '40s than their caramelly cousins. I'll leave you with one of the few photos I took at home - sunset on Tamarack Lake in Minnesota. And if you're ever in Fargo, try the rhubarb caramel rolls (yes! they put rhubarb in the bottom with the caramel! It's amazing!) at Kroll's Diner. They're divine.  The Food Historian blog is supported by patrons on Patreon! Patrons help keep blog posts like this one free and available to the public. Join us for awesome members-only content like free digitized cookbooks from my personal collection, e-newsletter, and even snail mail from time to time! Don't like Patreon? Join with an annual membership below, or just leave a tip! 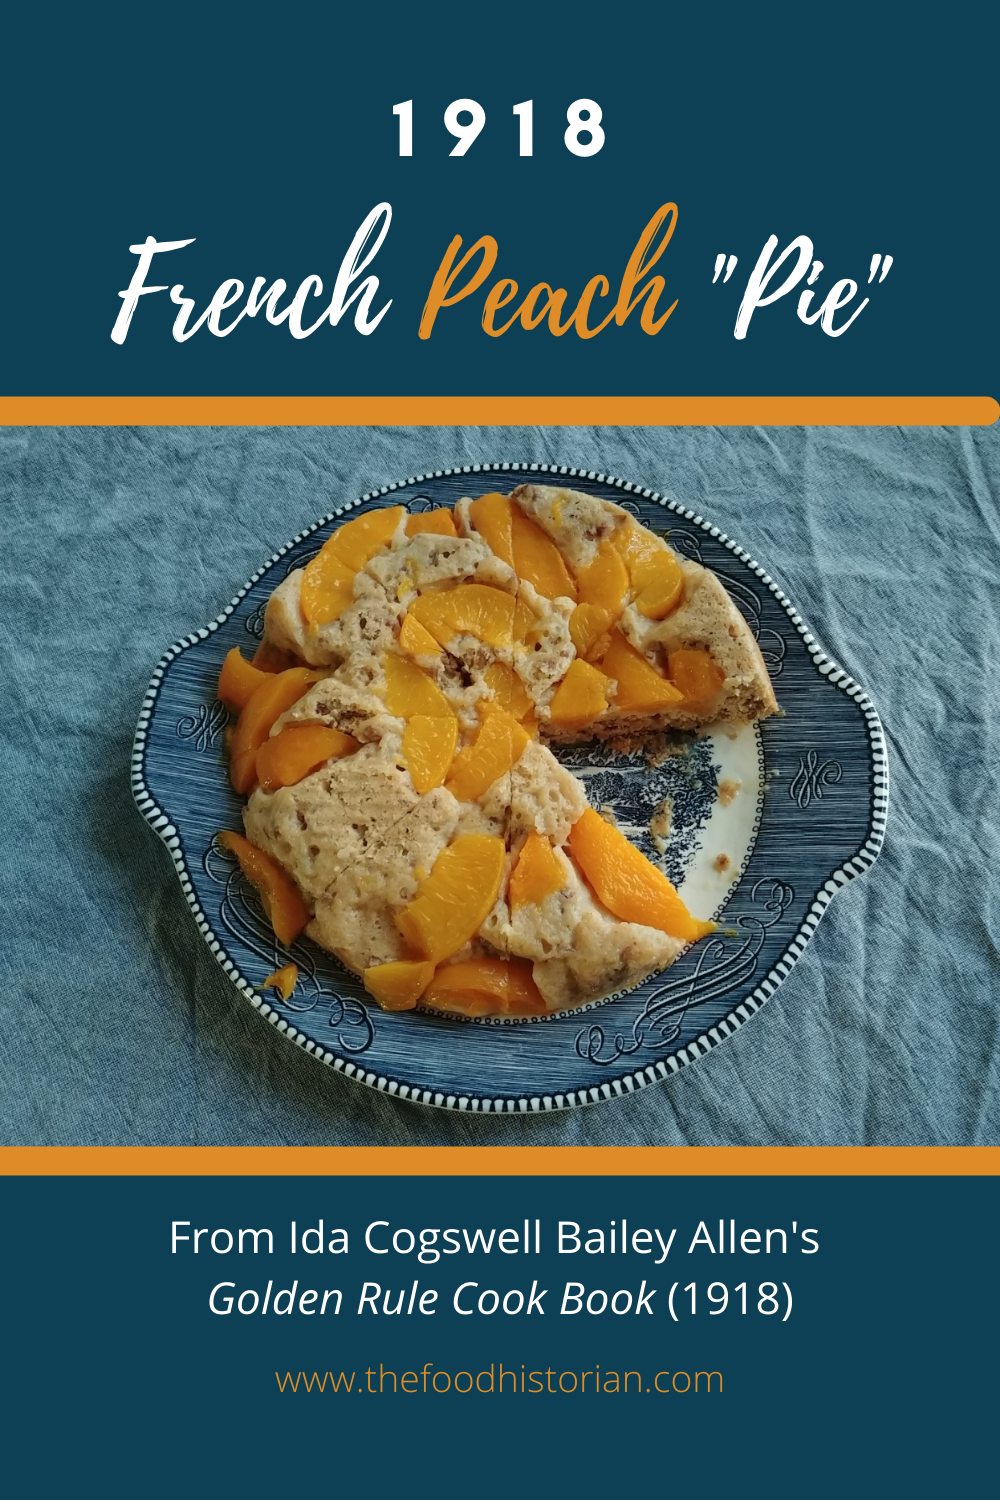 As you may know, I am a huge fan of Ida Cogswell Bailey Allen. A PROLIFIC cookbook author with over fifty titles to her name, I'm not sure anyone has ever done a comprehensive bibliography of her work. So when I saw this little cookbook on Etsy, I squealed. 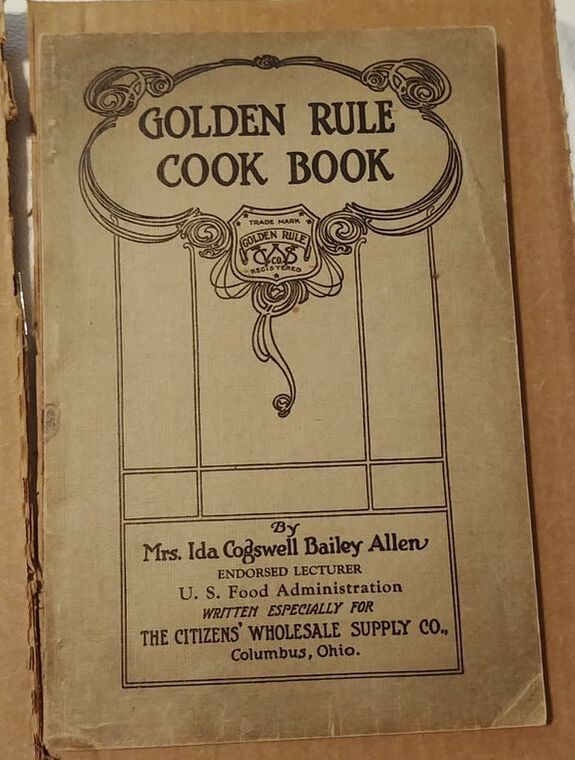 Cover of "The Golden Rule Cook Book," by Mrs. Ida Cogswell Bailey Allen, endorsed lecturer, U. S. Food Administration. Written especially for The Citizens' Wholesale Supply Co., Columbus, Ohio. Published in 1918. I squealed in part because, as far as I can tell, this is one of her first cookbooks! And I also got excited because she is listed as an "endorsed lecturer" for the United States Food Administration! The cookbook does have a few ration-friendly recipes in the very back - basically for wheatless baking recipes. But the majority are regular ol' recipes designed for The Citizens' Wholesale Supply Company from Columbus, Ohio. There's not a lot out there on this company, but from what I can tell it started out as a co-op, and then morphed into a company focused on food products - the Golden Rule brand. The Golden Rule Cook Book, (not to be confused with THIS Golden Rule Cook Book of meatless and vegetarian recipes), doesn't appear to be digitized anywhere, nor are there many versions for sale online. Which makes it all the more interesting! It was likely designed as an advertising cookbooklet, which were a common advertising device for food products and companies from the 1890s until quite recently. As you can see, the recipes all call for at least one Golden Rule brand ingredient, often a flavoring extract. This "French Peach Pie," however, caught my eye. It appeared to be an upside down cake, albeit baked in muffin tins. Ida Bailey Allen probably called it "French" because it loosely resembles tarte tatin. I wasn't sure exactly how many muffin tins, as I knew some historic tins were only 6 muffins big, and I had only a 1 dozen pan. So I decided to make a few changes. First, I made it in a round cake pan, instead of individual cakes in a muffin tin. I also added chopped pecans, because I had some and that sounded good with peaches. I added a pinch of salt, because Ida never does and baked goods taste flat without it. More commentary with the recipe. 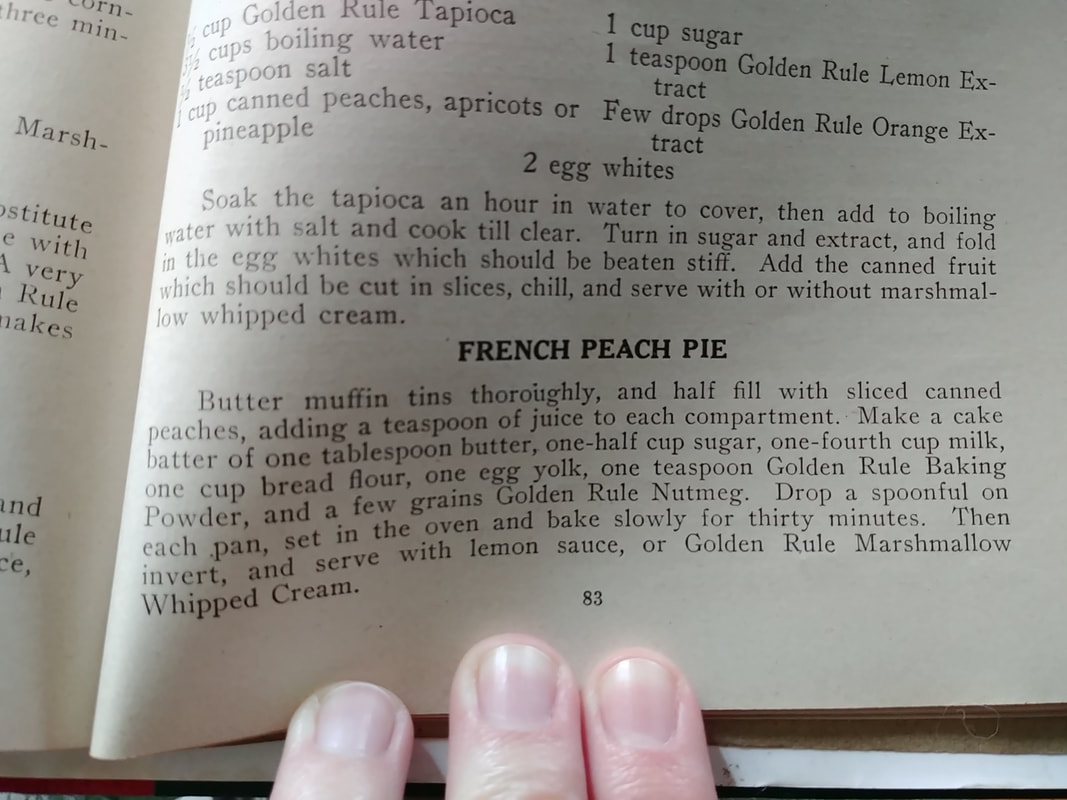 The recipe for "French Peach Pie" as published in the "Golden Rule Cook Book" by Ida Bailey Allen, 1918. French Peach "Pie"I put the "pie" in quotes because this is really an upside down cake. If I make this again, and I think I will, I am going to make a few more changes, mainly using regular all-purpose flour and using the full egg, instead of just the yolk, as the batter was a bit dry and needed an infusion of extra milk. I even added a little of the leftover peach juice! Here's the verbatim recipe: Butter muffin tins thoroughly, and half fill with sliced canned peaches, adding a teaspoon of juice to each compartment. Make a cake batter of one tablespoon butter, one-half cup sugar, one-fourth cup milk, one cup bread flour, one egg yolk, one teaspoon Golden Rule Baking Powder, and a few grains Golden Rule Nutmeg. Drop a spoonful on each pan, set in the oven, and bake slowly for thirty minutes. Then invert, and serve with lemon sauce, or Golden Rule Marshmallow Whipped Cream. Here's my translation: 1 quart canned peaches 1 tablespoon butter, softened 1/2 cup sugar 1 egg yolk 1/4 to 1/2 cup milk Leftover peach juice 1 cup bread flour 1 teaspoon baking powder pinch of salt (1/4 teaspoon at least) 1/2 teaspoon cinnamon 1/4 cup chopped pecans (optional) Well-butter a 9 inch round cake pan. Add the peach slices to the bottom of the pan (I was missing a few from my quart from an earlier snack), and a few tablespoons of the juice. In a large bowl, cream the butter and sugar (it WILL work, just takes a minute), then mix in the egg yolk. At this point I dithered between adding the milk or adding the flour, or alternating. I ended up adding the milk and blending well before adding the flour, baking powder, cinnamon, and chopped pecans. This was VERY thick and did not even absorb all the flour, so I added another a little more milk and the remaining peach juice (about 1/4 cup) to make something more closely resembling a thick batter. I dolloped spoonfuls into the pan and tried to spread it out as best I could. I then baked it at 350 F (a "slow" oven is usually between 300 and 350 F), and 30 minutes wasn't quite long enough, as it was a larger pan, so I baked it for probably 40ish minutes, or until the cake was starting to turn golden brown at the edges. 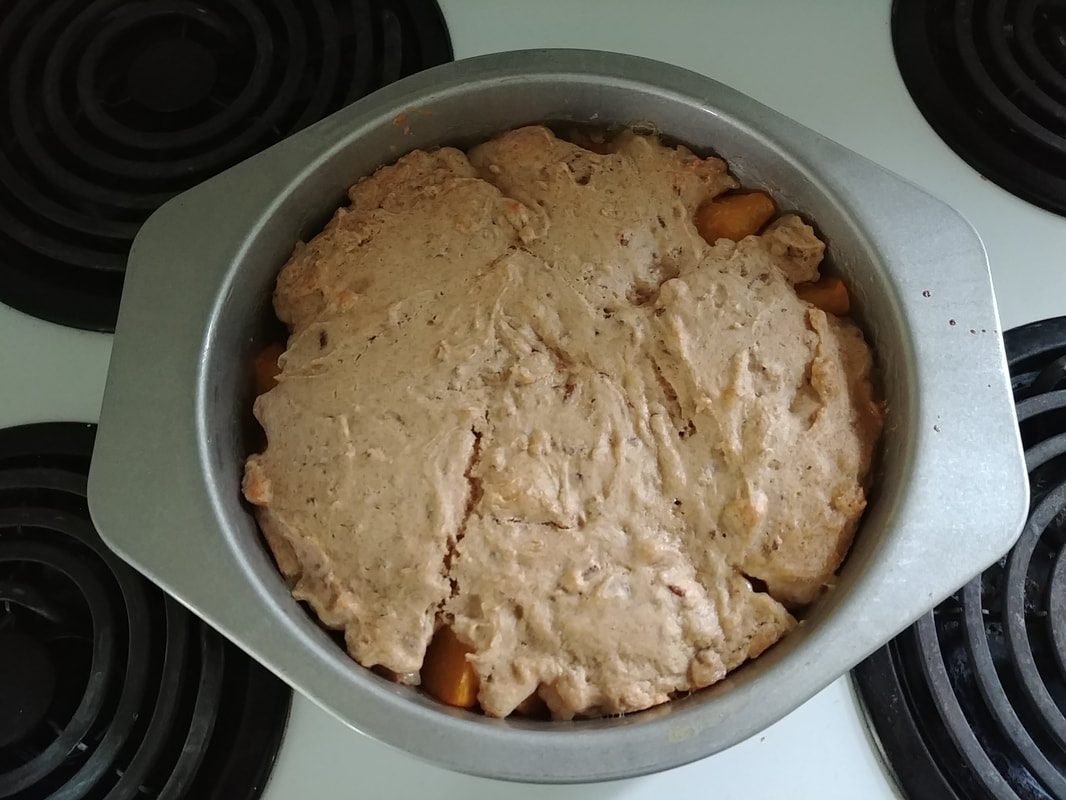 The oddly pale cake before flipping. I then used a knife to loosen the edges of the cake, placed a cake plate on top of the pan, and flipped to release. Only a little of the cake stuck to the bottom - likely because I added a smidge too much milk. The cake was oddly firm-textured, I think because of the use of bread flour, and a bit dense. Next time I make it I am definitely using all-purpose flour and a whole egg and we'll see how that turns out. And I'll add a little more salt next time. And more peaches! There were insufficient peaches. Lol. And I think this recipe would be much better with fresh peaches, but canned were perfectly fine. 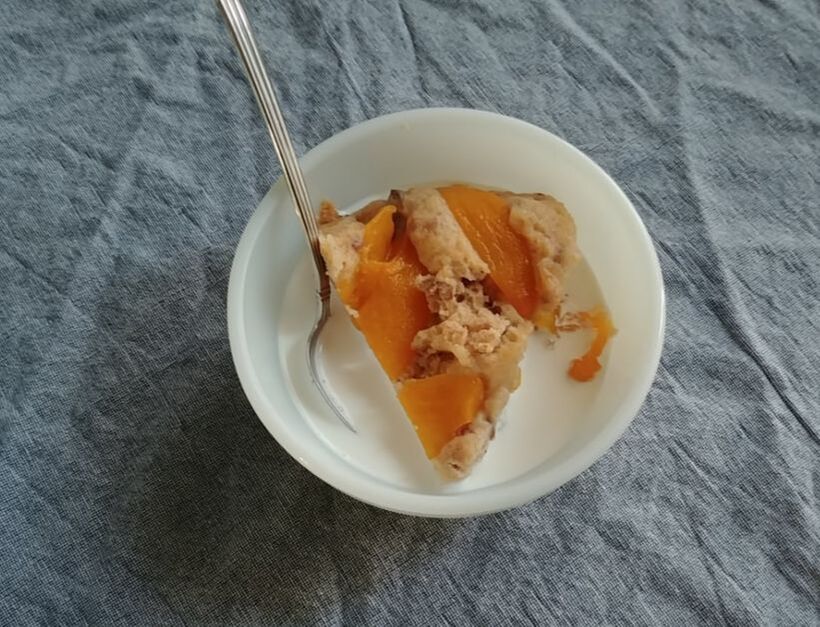 Of course you have to serve it with a little half and half! The Golden Rule Marshmallow Whipped Cream I did not try, but it is simply whipped cream stabilized with a tablespoon or so of marshmallow creme. Liquid cream is much better, in my opinion! Especially since this cake was quite sweet. Interestingly, although this dessert is not in the World War I section of wheat-saving recipes, it calls for just one tablespoon of butter and one egg yolk, at a time when butter was rationed and eggs were often scarce. It would also be easy to shift this recipe to all barley flour or all or part rye flour to substitute for the wheat. The sugar could also probably be substituted in part or all for honey or maple syrup, which would give added moisture to the batter as well. What do you think? Would you try French Peach "Pie?" Maybe next time I'll be brave enough to try it in the muffin tin! The Food Historian blog is supported by patrons on Patreon! Patrons help keep blog posts like this one free and available to the public. Join us for awesome members-only content like free digitized cookbooks from my personal collection, e-newsletter, and even snail mail from time to time! |

AuthorSarah Wassberg Johnson has an MA in Public History from the University at Albany and studies early 20th century food history. Archives
July 2024
Categories
All
|
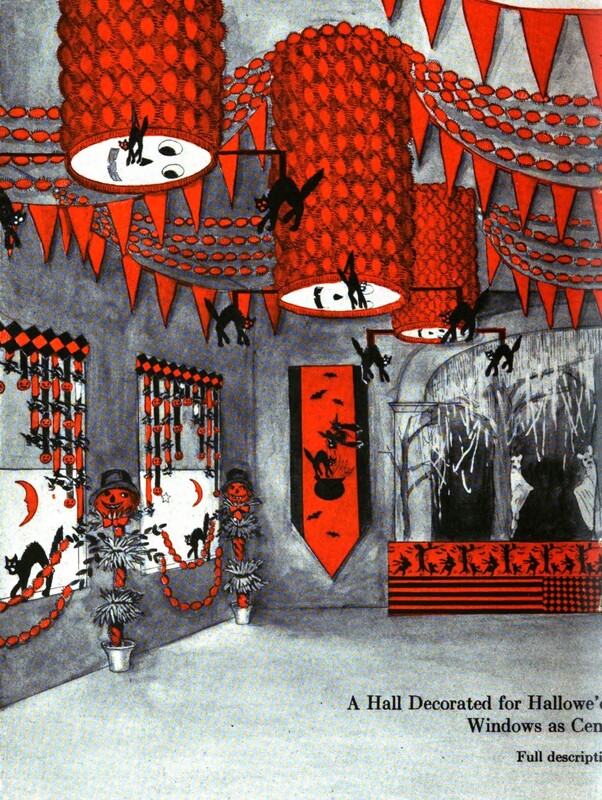
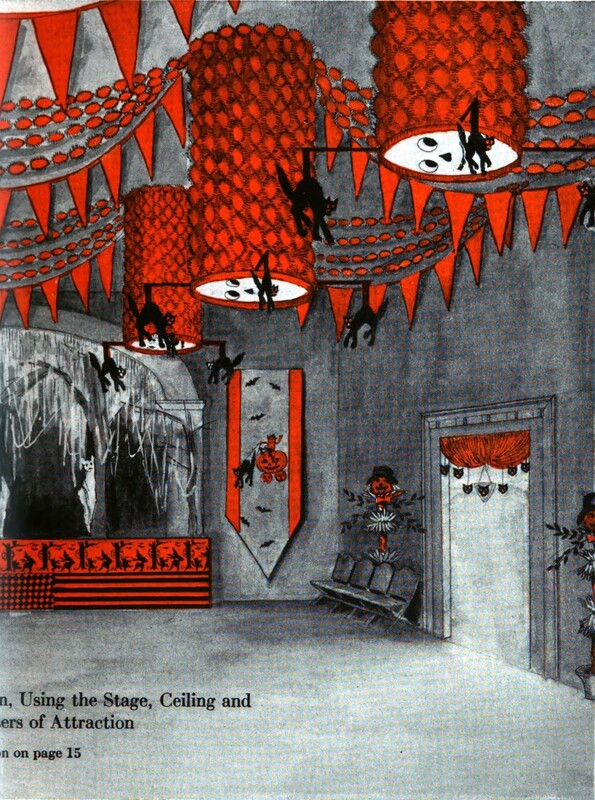

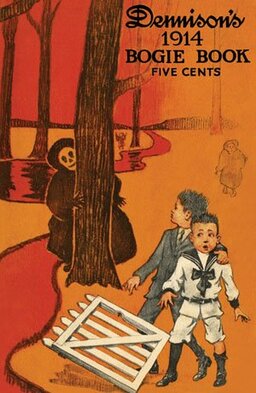
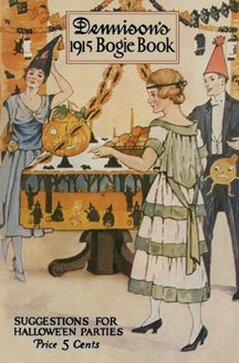

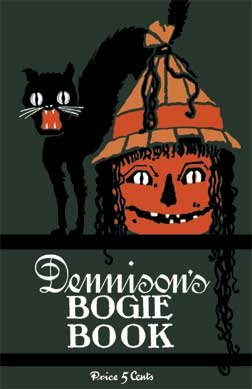
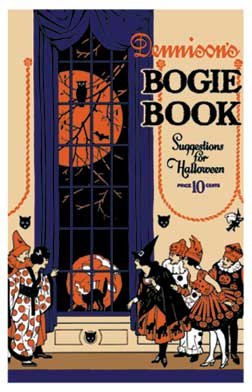
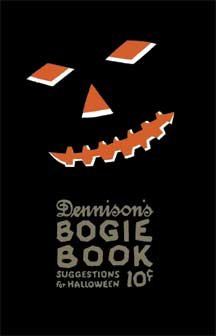
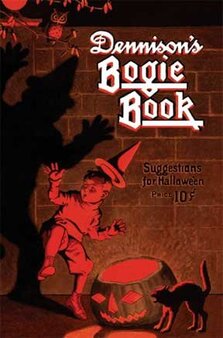
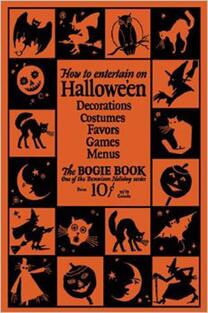
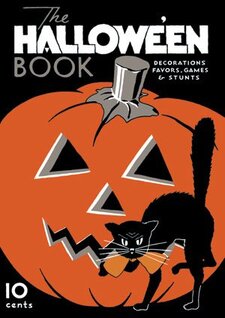
 RSS Feed