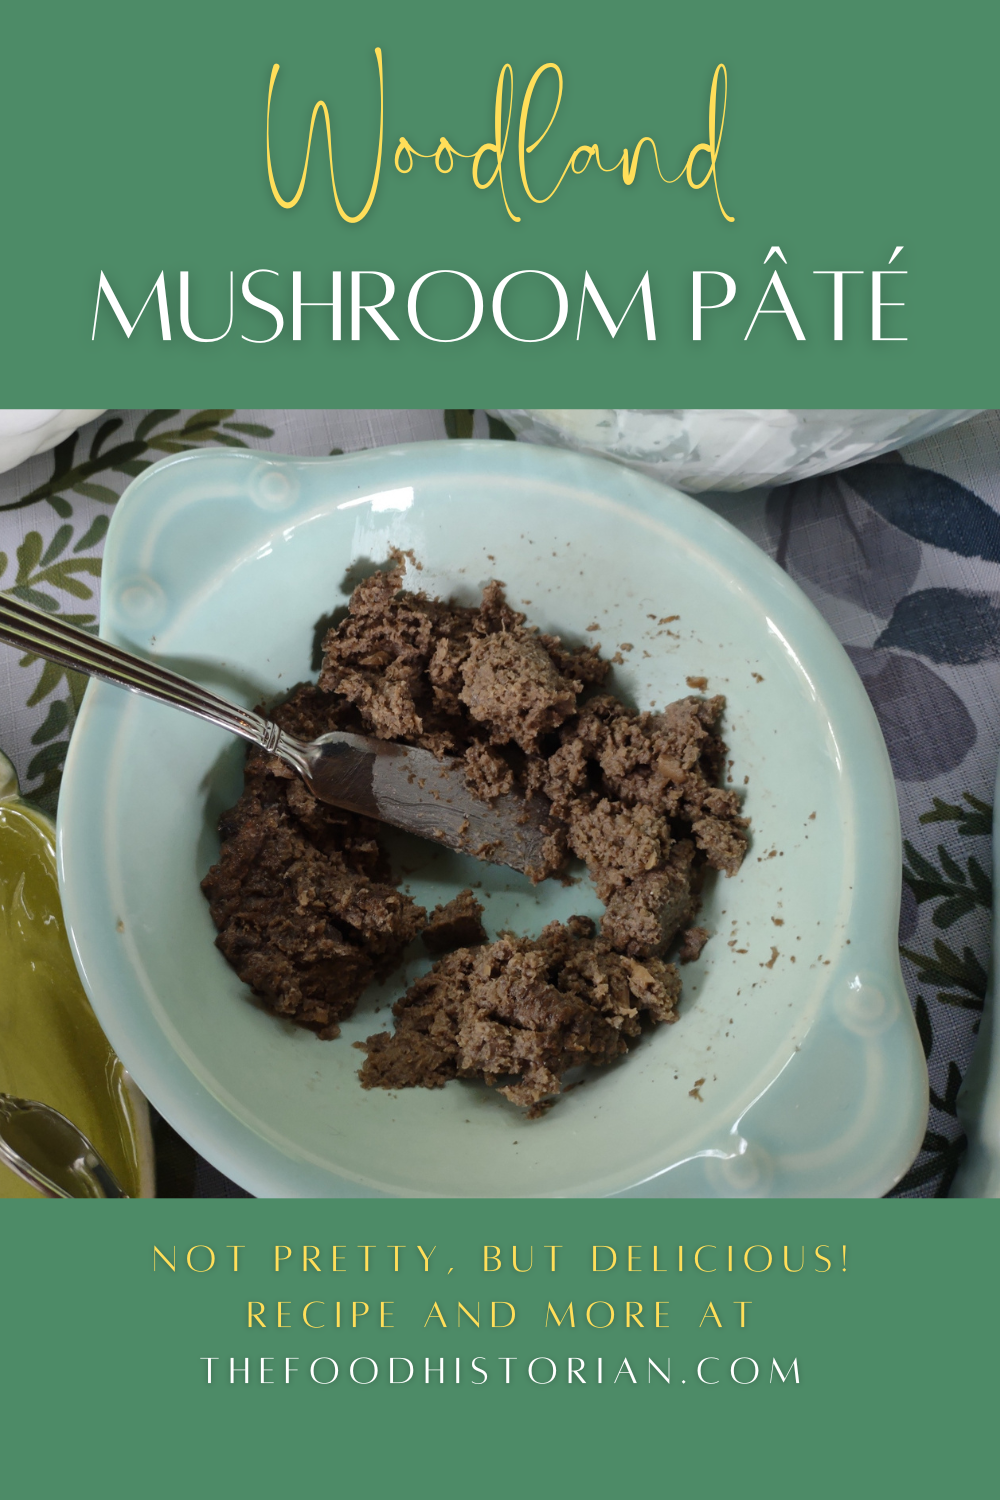
 In our continuing Scandinavian Midsummer Porch Party menu exploration, this mushroom pâté is relatively simple to make and a favorite of vegetarian guests. Although they're not often the first thing people consider when thinking of Scandinavian food, wild mushrooms are extremely popular in all the Nordic countries. Foraging is something of a national pastime, and while berries are easier to identify, mushrooms rank high on the list as well. Although in Scandinavia they are normally served in gratins, soups, and as an accompaniment to game meats, mushrooms in summer called for something a little different. Traditionally pâté is made of finely ground meat and fat - goose liver (a.k.a. fois gras) is the most famous of the pâtés, which of course originate in France (hence the French word), but are common throughout northern Europe. Substituting mushrooms for meat is a common swap, but the same smooth texture is replicated, albeit in a lighter format. There are lots of mushroom pâté recipes out there, but this is one of the simpler ones. It's based on a skillet dish I invented for a vegetarian friend. The lemon flavor doesn't fade as it often does in dishes, but adds an indefineable tang to the creamy richness. I recommend a food processor or chopper for this to work well, but with some time and knife skills, you can make due without one. Mushroom Pâté RecipeFor a more complex flavor, feel free to substitute your favorite wild mushrooms, or a combination of mushrooms. This recipe would also scale up easily if you're feeding a crowd. 1 pint white button mushrooms 1 tablespoon butter 1-2 tablespoons lemon juice 1/4 teaspoon wild garlic salt (or regular sea salt) 1/4 cup heavy cream Clean and coarsely chop the mushrooms, then add to a food processor or chopper. Pulse until the raw mushrooms start to form a paste. Be sure to ensure any large chunks are also finely chopped. If using a knife, just keep chopping until you can get them as fine as possible. In a saucepan over medium heat, melt the butter and add the mushroom paste all at once. Stir well to combine and let cook until the liquid of the mushrooms cooks out and evaporates. Add the lemon juice and salt and cook until the juice is absorbed by the mushroom paste. Add the heavy cream and cook until absorbed. Serve warm, room temperature, or cold with rye crisps, crackers, or toast. 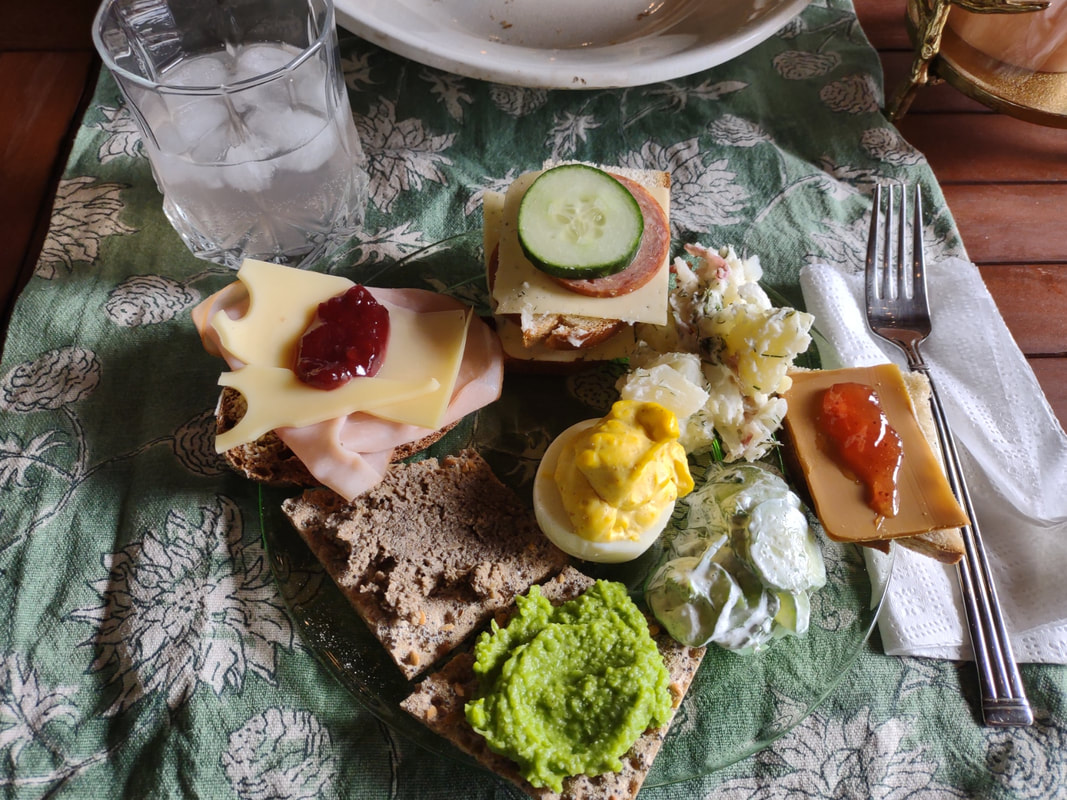 Mushroom pate on a rye crisp on the front left of my loaded midsummer party plate. :D Not pretty, but delicious! The Food Historian blog is supported by patrons on Patreon! Patrons help keep blog posts like this one free and available to the public. Join us for awesome members-only content like free digitized cookbooks from my personal collection, e-newsletter, and even snail mail from time to time! Don't like Patreon? Leave a tip!
1 Comment
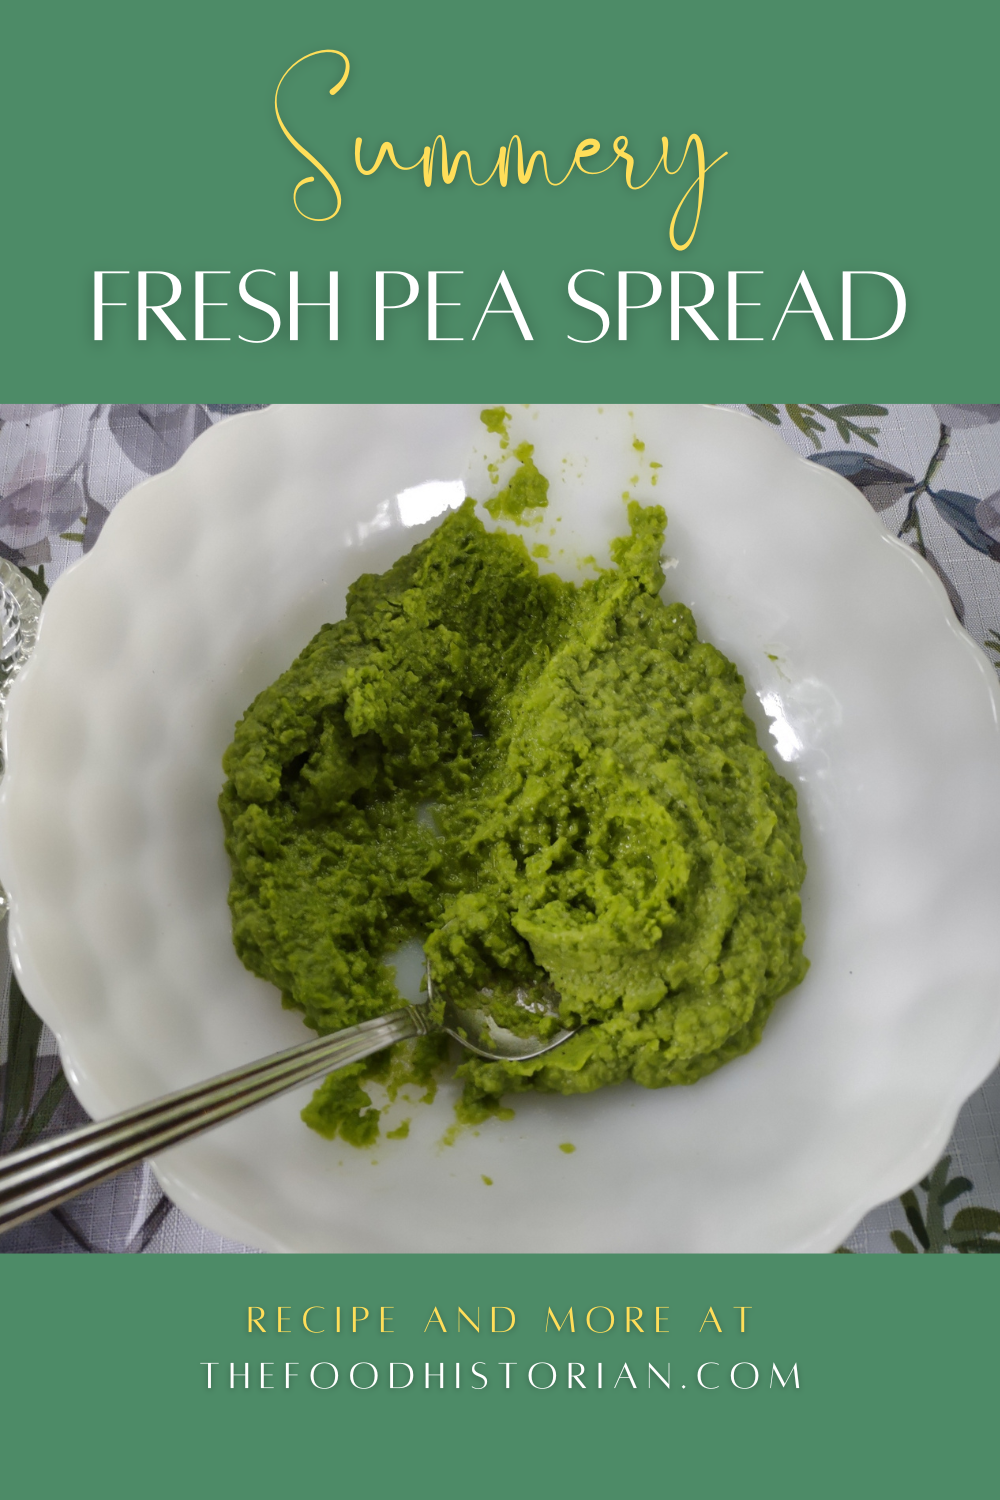 When it comes to freshness, there's nothing like a freshly picked garden pea. But most of us aren't growing them ourselves, and "fresh" peas in grocery stores are generally old enough that the sugars that make peas so delicious are converted to tasteless starch. Canned peas are generally overcooked and mushy. Fine for eating alongside mashed potatoes and meatloaf, but not so fresh-tasting. What's the solution? Frozen peas. Ironic, I know, but frozen peas are often so much better than "fresh" unless you've picked them yourself or get them the same day. To me, peas signal not only spring but also early summer - when mornings and evenings are still cool, even when midday is hot. In the Northeastern U.S., peas were historically on the menu as late as July 4th! They're popular in Scandinavia, too. I wanted some nice, bright color for my Scandinavian Midsummer Porch Party, and this fresh pea spread hit the spot. I've made Spring Pea Hummus before - and that's equally delicious. But I wanted something vegan this time. Fresh Pea Spread RecipeThis recipe definitely needs a food chopper or processor! You could use a food mill in a pinch, but you'll need to finely mince the onion, first. 1 bag frozen organic peas 1/4 sweet onion (I used Vidalia) 1 tablespoon lemon juice 1 tablespoon olive oil salt pepper Cook the peas in a little water on the stove or in the microwave until no longer frozen and just barely cooked. They'll be soft after thawing anyway. Add the peas and onions to the food chopper and pulse until well-mixed. Add a tablespoon of lemon juice and a tablespoon or two of olive oil and pulse again until as smooth as possible. If you're using a food mill, mince the onion as fine as you can before sending through the food mill with the peas, then mix in the lemon juice and olive oil by hand. Sample and add salt and pepper to taste. Serve on rye crisps or other crackers, or use as a sandwich spread. Fresh pea spread on a rye crisp on the bottom center of my Midsummer plate! The Food Historian blog is supported by patrons on Patreon! Patrons help keep blog posts like this one free and available to the public. Join us for awesome members-only content like free digitized cookbooks from my personal collection, e-newsletter, and even snail mail from time to time! Don't like Patreon? Leave a tip!  I'm not sure why deviled eggs are so popular. At least, mine are! They're always the first thing to go at every party, and no matter how many I make, even leftovers get devoured quickly. Historically, deviled eggs were "deviled" by mixing the yolks with soft butter and mustard. Later, the deviling became associated with cayenne pepper or paprika. The popularity of prepared mayonnaise meant that condiment soon supplanted butter as the primary ingredient. Deviled eggs are perfect for just about any party, but they seem especially lovely tea party, picnic, and summertime fare, so I just had to make them for my Scandinavian Midsummer Porch Party. As you can see in the photo, they were half-gone almost instantly, and totally gone by the end of the night. Despite their relative simplicity, they always seem so festive! They're not difficult or expensive to make, but a few tips will make things a bit easier than you might expect. Deviled Eggs RecipeI like to use free range local eggs for my deviled eggs, which makes for super delicious and bright yellow yolks. Slightly older eggs are better for peeling as the albumen of the egg starts to pull away from the shell. So if you've got a dozen eggs that need eating, there's no better way to use them up than deviled eggs. Deviled eggs are best when you boil the eggs the same day you devil them. 1 dozen eggs mayonnaise Dijon or spicy brown mustard sour cream (optional) In a stock pot large enough to accommodate all the eggs in a single layer without touching, cover the eggs with cold water. Cover the pot and place over high heat, bringing it to a full rolling boil. Turn off the heat and leave the eggs, covered, for 15 minutes. Then fish them out (a slotted spoon works nicely) and deposit them in a large bowl of ice water to stop the cooking process and cool them down. Let them rest at least 10 minutes. Now for the hard part - peeling them. I find the water method easiest. One at a time, place each egg in a glass, fill a third of the way with water, cover the top with your hand, and shake vigorously. Alternatively, crack the egg all over, peel up a small part, and then place under running water. In both instances, the water gets between the shell and the cooked egg, making peeling easier. Although a perfectly peeled egg is a joy, no one ever complains about a slightly battered one - they all taste the same! Slice the peeled eggs in half lengthwise and pop the yolks out into a small bowl. Mash the yolks thoroughly with a fork, until no large chunks remain. Then add about a half cup of mayonnaise and 1-2 tablespoons of prepared mustard. Add some sour cream if you like. The yolk mixture should be extra-creamy, but bright yellow from the yolks. Taste and add more mustard or salt as you like. Remember, the whites are bland. Using a spoon, plop the yolk mixture evenly into the egg halves (use a plastic bag with the tip cut off if you want cleaner piping - also good for transporting the eggs and filling on site for picnics and such), making sure to cover most of the white, not just the hollow left by the yolk. A good deviled egg should be just a bit messy to eat. Deviled eggs contain egg and mayonnaise, so they should not be left at room temperature for too long. Luckily they're not likely to last long, anyway! 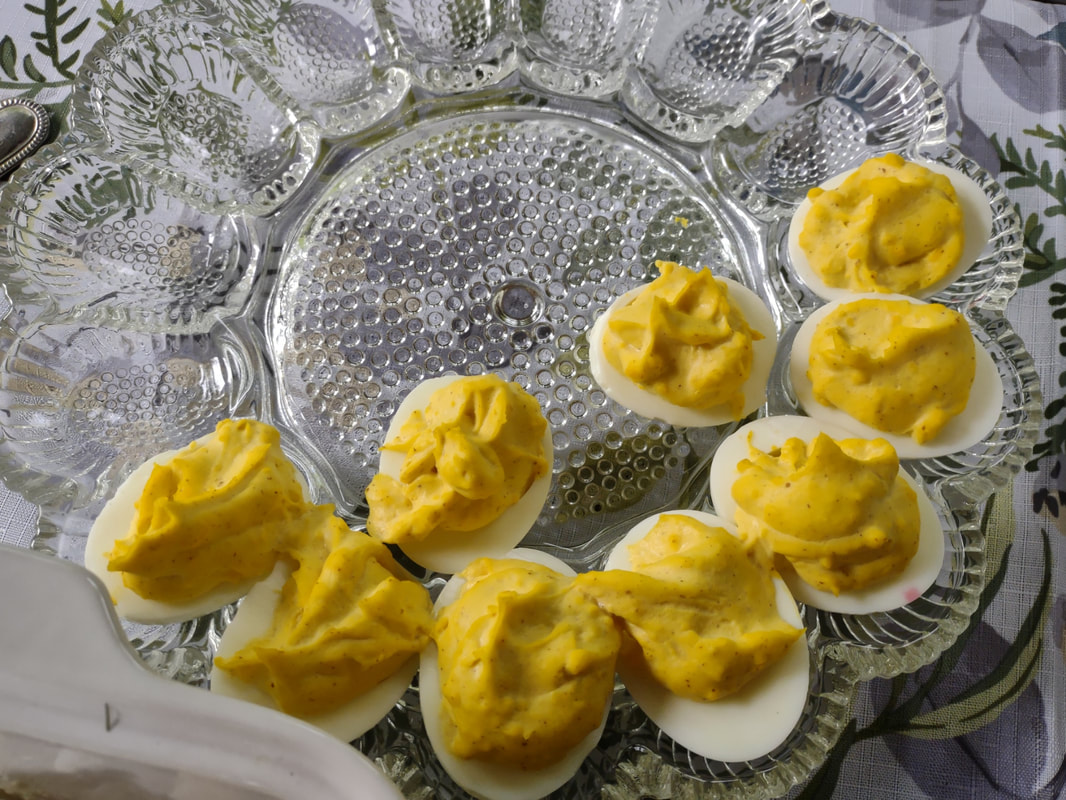 Half the deviled eggs were gone before I could take a photo! Lol. The Food Historian blog is supported by patrons on Patreon! Patrons help keep blog posts like this one free and available to the public. Join us for awesome members-only content like free digitized cookbooks from my personal collection, e-newsletter, and even snail mail from time to time! Don't like Patreon? Leave a tip! 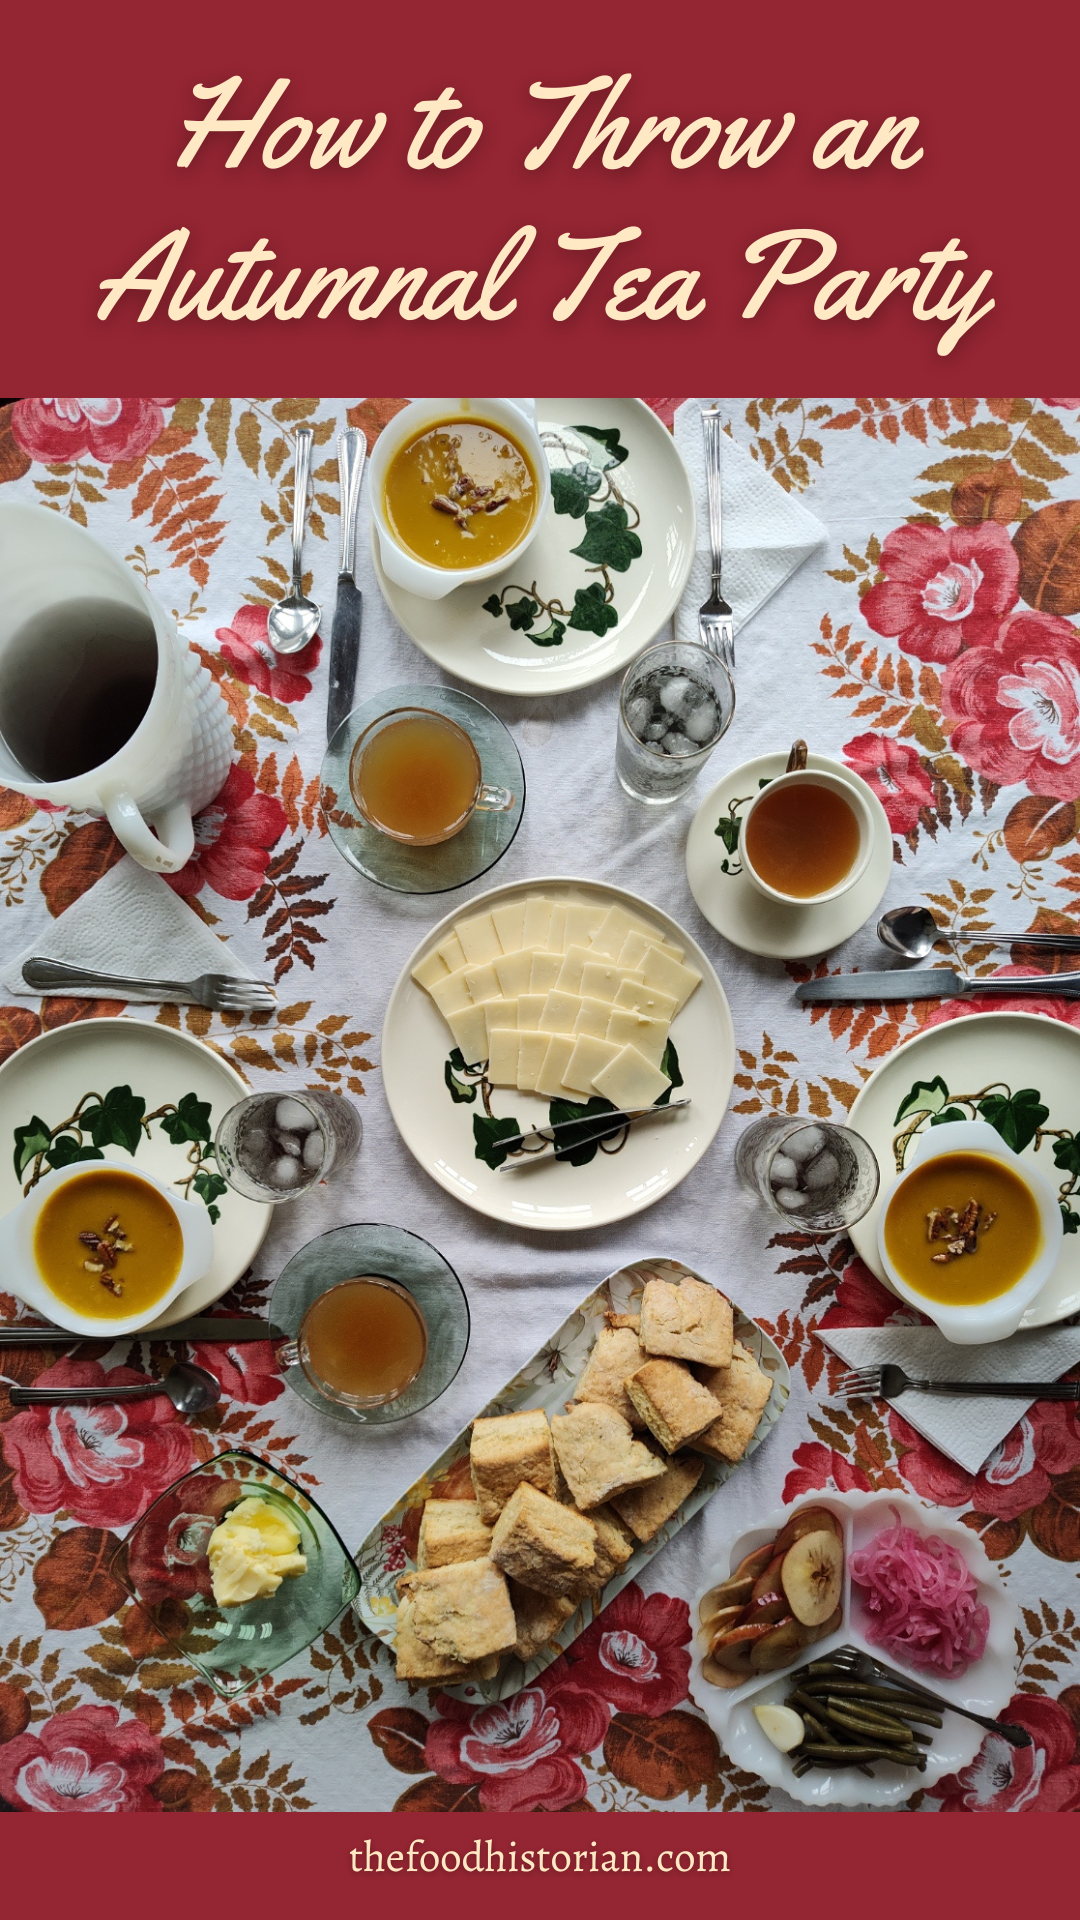 Today is Midsummer! The summer solstice is a big deal in Scandinavian countries, and I grew up celebrating it with my local Swedish Society. We'd have a big potluck, replete with Scandinavian goodies, in a local park, raise a giant maypole, and then sing and dance Swedish songs around it. My florist parents and I would do all the decorations for the maypole - a local guy would bring a huge harvest of poplar and cottonwood branches to serve as the greenery, and my dad would wire it all onto feet and feet of garland. The morning of, we'd wire leftover fresh flowers onto the garland and then deck the maypole, which had to have been at least 20 feet tall. Then it would get raised up at the park and everything felt festive! The picnic would be held in a big covered park pavilion, and we'd often have live music or visiting Scandinavian bands, but the food was the main attraction. Midsummer has long roots in Scandinavia. Celebrated since pagan Viking times, the festival emphasized the importance of the sun and fire. Sankthansaften - or St. John's Eve - is the night before midsummer, and in Norway is often celebrated with huge bonfires, including the one in Ålesund, Norway, which features the largest bonfire in the world! In Sweden, where midsommar is the biggest deal in all of the Nordic countries, the maypole is generally the center of midsummer celebrations. Salmon, shrimp, herring, sour cream, dill, cucumbers, strawberries, almond-flavored desserts, and whipped cream feature prominently in most Midsummer menus, along with copious amounts of aquavit (which, sadly, I could not find in my local liquor stores). Spring fish runs, woodland strawberries, and early vegetables like new potatoes all reflect the arrival of the summer season in Scandinavia, which is later than in most of Europe. Midsummer also heralds the season of midnight sun. As the longest day of the year for the Northern hemisphere, the summer solstice near the Arctic circle means just a few hours of twilight, and no actual nighttime, for weeks. Here in the northern United States, it just means the sun sets a little later than normal. Ever since my mom died, I've been feeling the need to reconnect with my Scandinavian roots. There are far fewer of us out East than back home, so I decided to introduce my friends to a real Scandinavian party. The midsummer porch picnic was born and now I want to do one every year! Scandinavian Midsummer Menu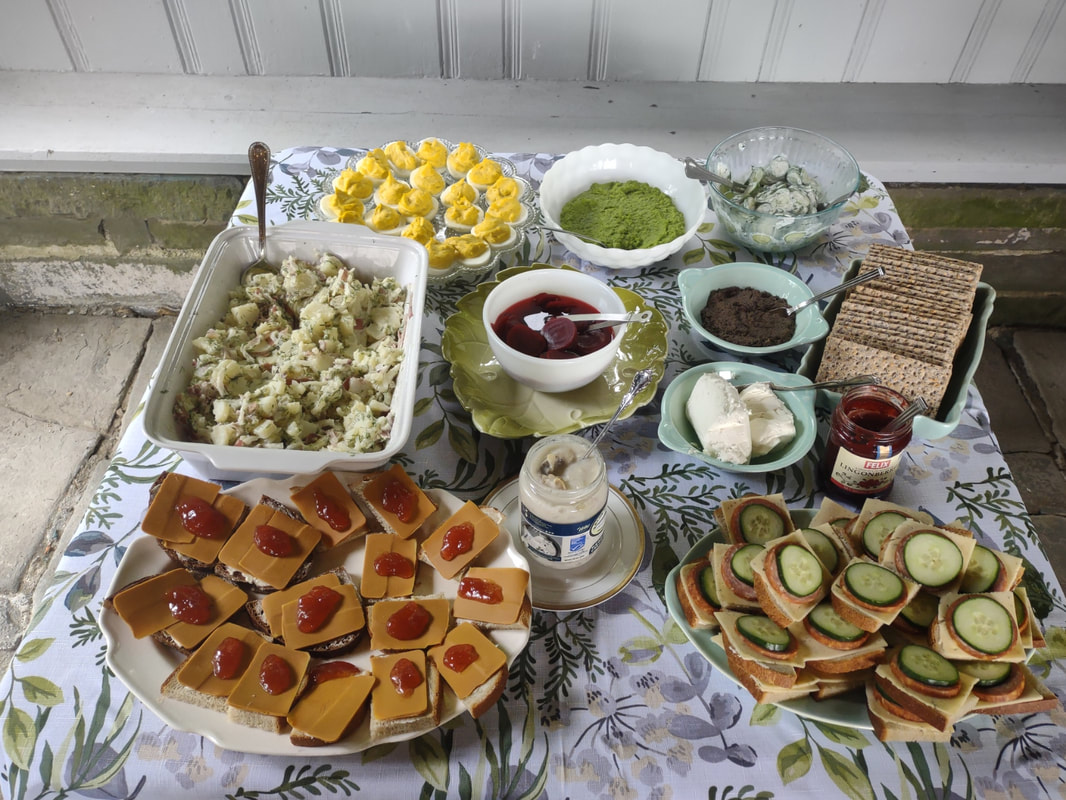 L-R from the top: Deviled eggs, spring pea spread, Scandinavian cucumber salad, dilled potato salad, pickled beets, mushroom pate, rye crisp crackers, goat cheese, lingonberry jam, brunost sandwiches with strawberry jam, pickled herring, dilled havarti, summer sausage, and cucumber sandwiches. I wanted the menu to be relatively straightforward and easy to prepare. I had a few extras on my list, but didn't quite get there due to time constraints (as per usual). I did the desserts ahead of time, but everything else was prepared the morning of. I was running behind, so the sandwiches were assembled with help from the guests! Here's the full menu: Appetizers: Deviled eggs Fresh Pea Spread Mushroom Pâté Goat cheese* Creamed Pickled Herring* Wasa Rye Crackers* Sides: Dilled Potato Salad Scandinavian Cucumber Salad Pickled Beets* Open Faced Sandwiches: Salmon Cucumber Salad on White Dill Havarti and Summer Sausage with Cucumber on Rye Ham and Jarlsberg on Pumpernickel with Lingonberry Jam Ski Queen Brunost on Rye with Strawberry Jam Dessert: Sandbakkels Small and Large with Jam and Whipped Cream Midsummer Rice Pudding with Raspberry Sauce Rommegrot Ice Cream Drinks: Rhubarb Gin & Tonics Elderflower Punch *you can buy these things - no need to make yourself! I'll be posting one recipe a day for the next several days, so keep your eyes peeled. No need to bookmark your favorites, I'll link them all back to this menu. 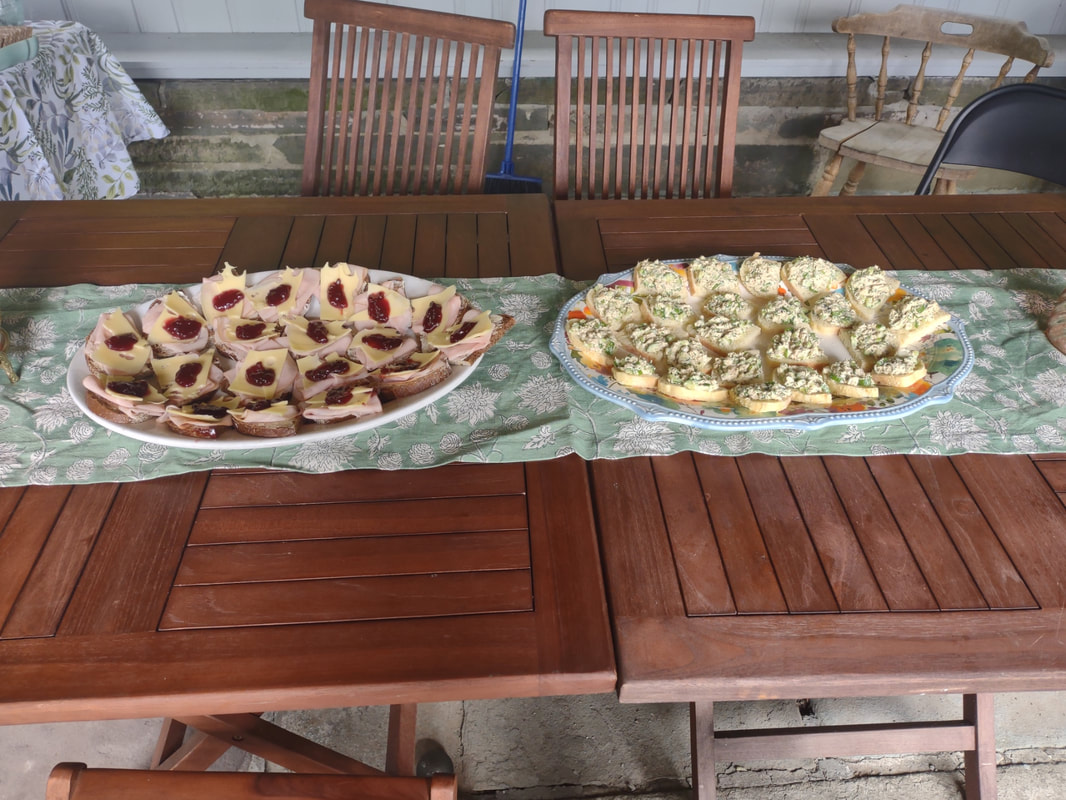 Two of the four open-faced sandwiches - ham and Jarlsberg with lingonberry jam at left, salmon cucumber salad at right. We are lucky enough that our little house has a very large screen porch, and one larger than our living room! This is always the perfect place for summer parties, although the fireplace is no longer useable. The uneven stone floor makes for some interesting seating and table arrangements sometimes, but it's worth it for the space to spread out all at tables together. I got to use some of my vintage dishes, including newly acquired Block Optic green Depression glass, some little pink depression glass dessert plates, and my favorite lace-edged milk glass plates for those who were too nervous to eat off of the green uranium glass. 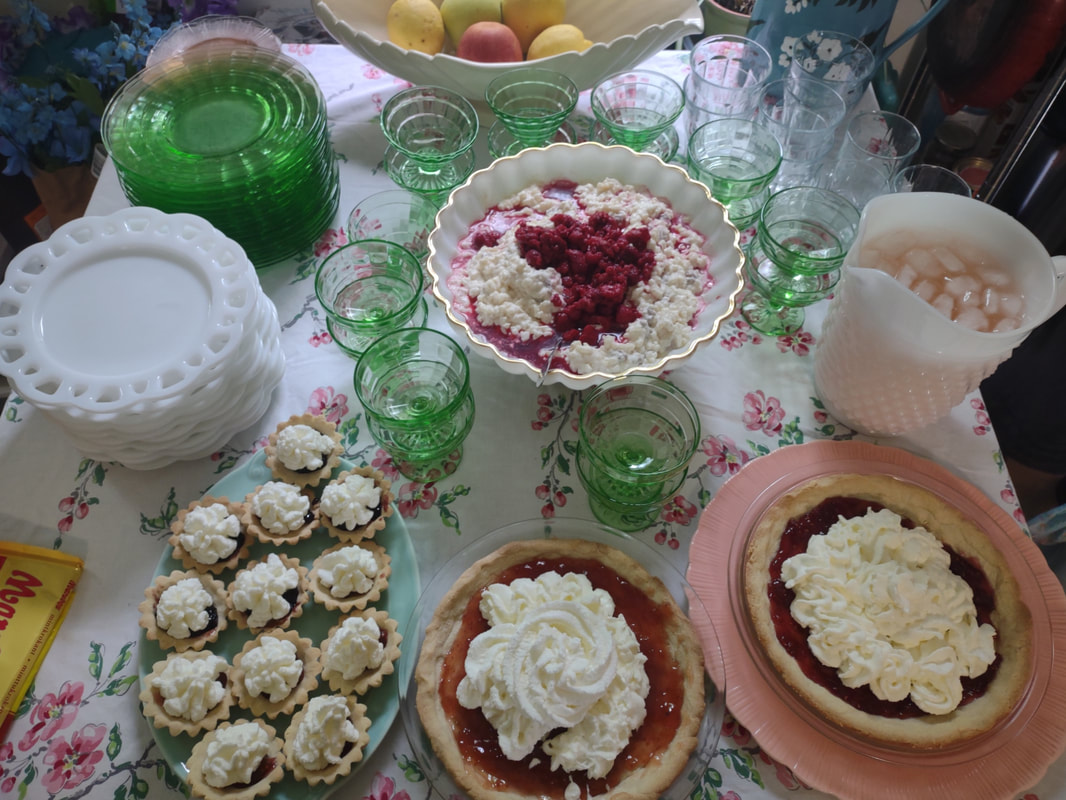 Rice pudding with raspberry sauce, a pitcher of rhubarb gin and tonic, and sandbakkels large and small with strawberry, blackberry, and homemade (not by me) raspberry-rose wine jam and topped with homemade whipped cream. The blue pitcher just out of sight in the upper right hand corner contained the elderflower punch. Although the party was a smash success (the first guest arrived at 2 pm - the last left at 10:30 pm), and we did get our bonfire outdoors, we were having too much fun to make the flower crowns I had planned! And the unseasonably chilly weather (a high of just 63 F after the previous day's high of 90 F was a bit of a shock) did put the kibosh on some of our plans. But we still had a great time. I tried pickled herring for the first time. It was my Swedish grandpa's favorite, but although it was nowhere near as bad as I feared as a child, the creamy sweet-and-sour flavor was not my favorite. I sent the jar home with a friend who fell in love. The pickled beets went home with another friend who loves them, and the last bits of the extremely good creamy cucumber salad went home with another friend's kids, who couldn't stop eating it. The rhubarb gin turned out divine, and everyone was curiously addicted to the elderflower punch. The extra creamy rice pudding with raspberries was my take on the Swedish rice pudding the society made by the gallons for the big Scandinavian festival I grew up attending every year. The raspberry sauce topping is a must. But the runaway surprise hit of the afternoon was the brunost with strawberry jam. To a person the 15+ people who attended loved it. That was the only platter of sandwiches to be totally gone by the end of the evening. In all, a delightful party, despite the weather, and one I'm definitely going to repeat. Next year I'll make sure to have the flower crown activity ready to go, I'll decorate more with some Scandinavian flags and a mini maypole or two (I don't think I could swing a giant one), and aquavit is definitely going on the menu for next year. And I will try to take more photos! If you'd like to try your hand at your own midsummer party, feel free to steal liberally from the menu above. Just don't forget to make things festive with flowers, candles, pretty table linens and dishes, and, if you can swing it, a real fire! Glad midsommar, alle! Learn more about Scandinavian midsummer traditions. The Food Historian blog is supported by patrons on Patreon! Patrons help keep blog posts like this one free and available to the public. Join us for awesome members-only content like free digitized cookbooks from my personal collection, e-newsletter, and even snail mail from time to time! Don't like Patreon? Leave a tip! 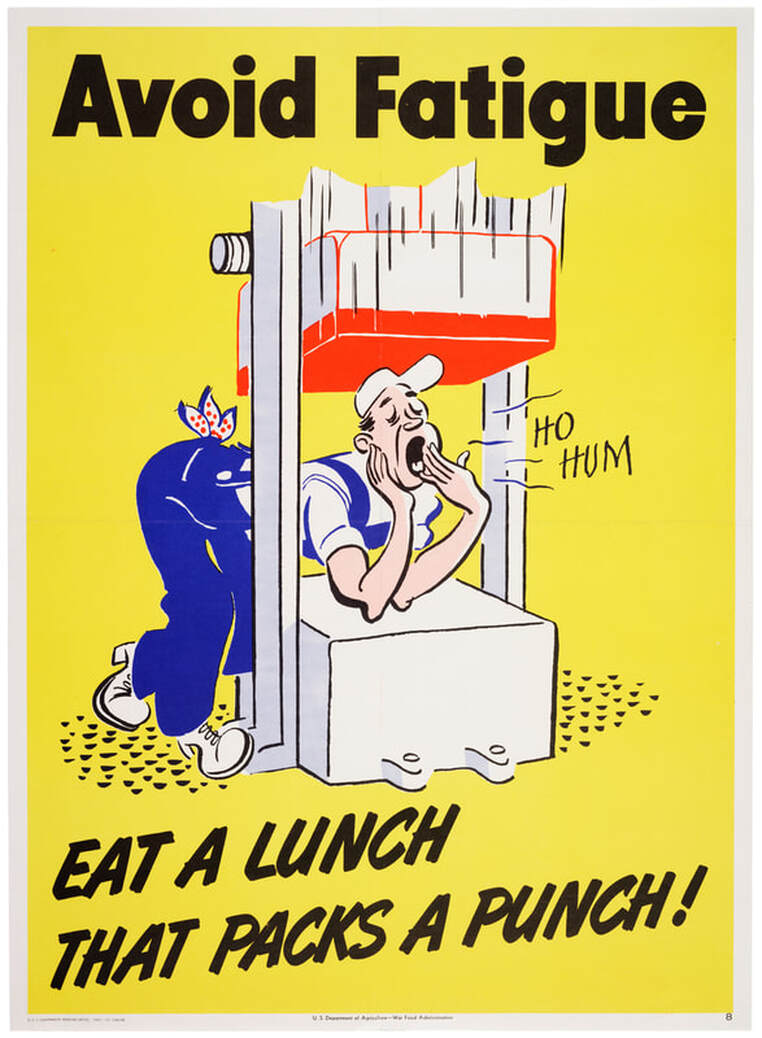 "Avoid Fatigue! Eat a lunch that packs a punch!" c. 1943, Office of War Information, National Archives. We've all had those days. Days where we forgot to bring lunch to work and can't get away to buy it, or when we bring a sad, cobbled-together lunch, or when we pick up fast food or something with empty calories. For many of us, a slow-moving afternoon or the distraction of a rumbling stomach isn't the end of the world. But during the Second World War, people didn't have the luxury of distraction of fatigue. This bold propaganda poster from c. 1943 features a yawning male worker leaning on the surface of what appears to be a stamping or hammering machine. He says, "Ho hum," feet crossed, leaning on his elbows, as a heavy block of metal descends toward his head. The poster reads, "Avoid fatigue! Eat a lunch that packs a punch!" During WWII, the United States engaged in total war. That meant that nearly every aspect of American society shifted toward the war effort. Nowhere was this more clear than in the everyday work of people in manufacturing. Men who weren't drafted for the war or working on farms often worked in factory settings. Factories that previously made machinery for consumer use - automobiles, refrigerators, washing machines, etc. - now found themselves manufacturing warplanes and Army jeeps and munitions. Factories worked on round-the-clock schedules, with three shifts a day. Some people worked much longer than 8 hours at a time. Although great strides had been made in ergonomics in factory work during the 1940s, the pressure of keeping up with military contracts and quotas was great. People often got too little sleep, and rationing made food supplies tight. During the war the U.S. federal government issued the Basic 7 - the first national nutrition guidelines ever issued. Based around the idea of balancing vitamin intake with protein, carbohydrates, and fats, the Basic 7 helped ordinary Americans better understand nutrition. Which is exactly what this poster is alluding to. "Eat a lunch that packs a punch" was a slogan also showed up in other posters, and alluded to calcium to keep bones strong, protein to build muscles, and Vitamin A to improve eyesight, among others. But this poster focuses on fatigue, which was a very real threat to the war machine. Tired workers made mistakes, hurt themselves, and could hurt or kill others. Operating flat out didn't leave room for mistakes, and a labor shortage thanks to the draft made skilled workers difficult to replace. Unbalanced meals, or not enough to eat, did not give war workers the energy they needed to perform at the highest levels at all times. The pressure of wartime work must have seemed unbearable at times. And with women increasingly joining the workforce and/or managing victory gardens and food preservation at home, not to mention coping with rationing, the idea of packing a large and nutritionally balanced lunch must have seemed like a lot of extra work for people. But while cafeterias were sometimes available, most people in factory work still packed their lunches. And while working at high speeds with dangerous equipment, it was worth it to make sure you weren't going to be too tired to do your job. There was no room for slacking off at work during the war, and getting proper nutrition to keep in peak physical health was so important the federal government spent a great deal of money advertising basic nutrition concepts (along with lots of posters about workplace safety) to ordinary Americans. Total war meant total commitment, total effort, and total focus. Staying healthy and well-fed was all part of total war. The Food Historian blog is supported by patrons on Patreon! Patrons help keep blog posts like this one free and available to the public. Join us for awesome members-only content like free digitized cookbooks from my personal collection, e-newsletter, and even snail mail from time to time! Don't like Patreon? Leave a tip!
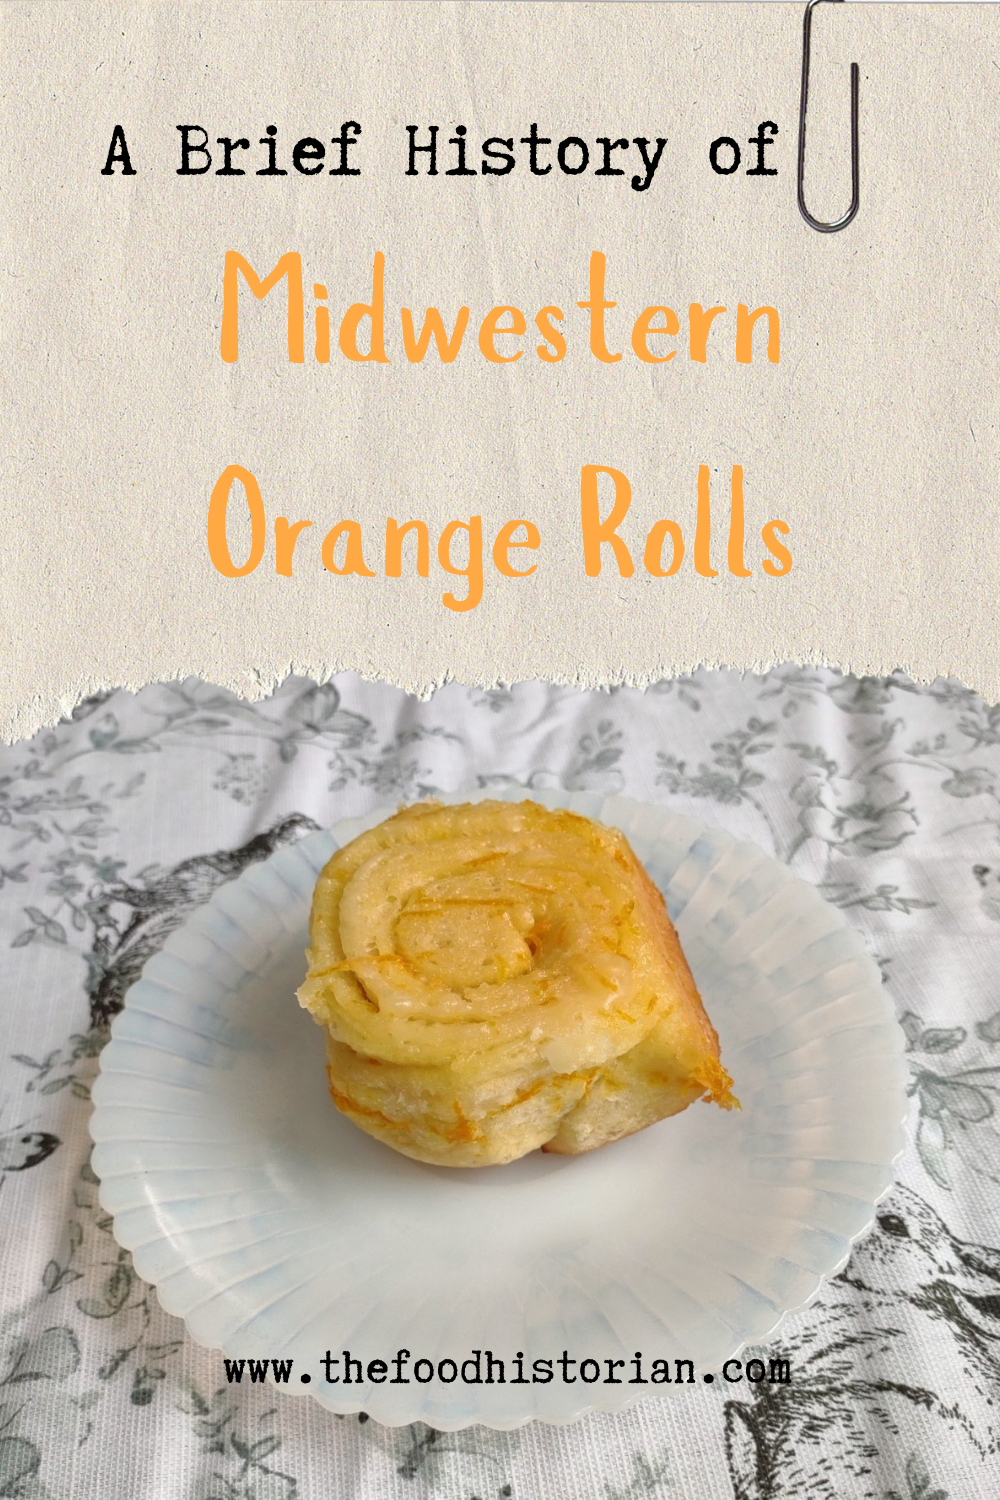 Last year I wrote about North Dakota Caramel Rolls, which have dominated the state in recent years. But funnily enough, although they are less popular now, orange rolls were equally if not more popular when I was growing up. And I found many more references to them in my historic cookbooks. Orange rolls in the upper Midwest (mainly Eastern North Dakota, where I grew up, and Minnesota) were popular Sunday brunch staples, although they competed about even with caramel rolls in my neck of the woods. Of course, the kind I grew up with were not made from scratch, but rather the frozen kind made by the Rhodes frozen bread company. They came with a delightful orange cream cheese frosting. But despite being a brunch staple of my Midwestern childhood, I didn't know much about these, and I wanted to try a historic recipe for a brunch of my own. The origins of orange rolls and their popularity in the Midwest is, like many things, a bit cloudy. If you search for "history orange rolls" today, you'll likely get a LOT of hits about ALABAMA orange rolls (scroll to the bottom for the links), but nary a one about the Midwestern kind. Truth be told they don't look like they differ much. A sweet roll dough with orange zest and sugar rolled up like a cinnamon roll and topped with an orange glaze. So why did both Alabama and the Upper Midwest develop a love of orange rolls? Oranges aren't grown in either region. Enter the 1910s and '20s orange craze. In the 1870s California orange agriculture exploded, and oranges - once an imported wintertime treat - became increasingly available year-round. "Orange fever" struck Florida around the same time, until a big freeze in 1894 and again in 1895 set the industry back on its heels. In the 1920s the industry got a boost from the Florida real estate boom. Cooperatives like the California Orange Growers Exchange began to market nationally using clever advertising techniques. "Sunkist" - a playful spelling of "sun-kissed" - became synonymous with the California Orange Growers co-op, and later became their official name. 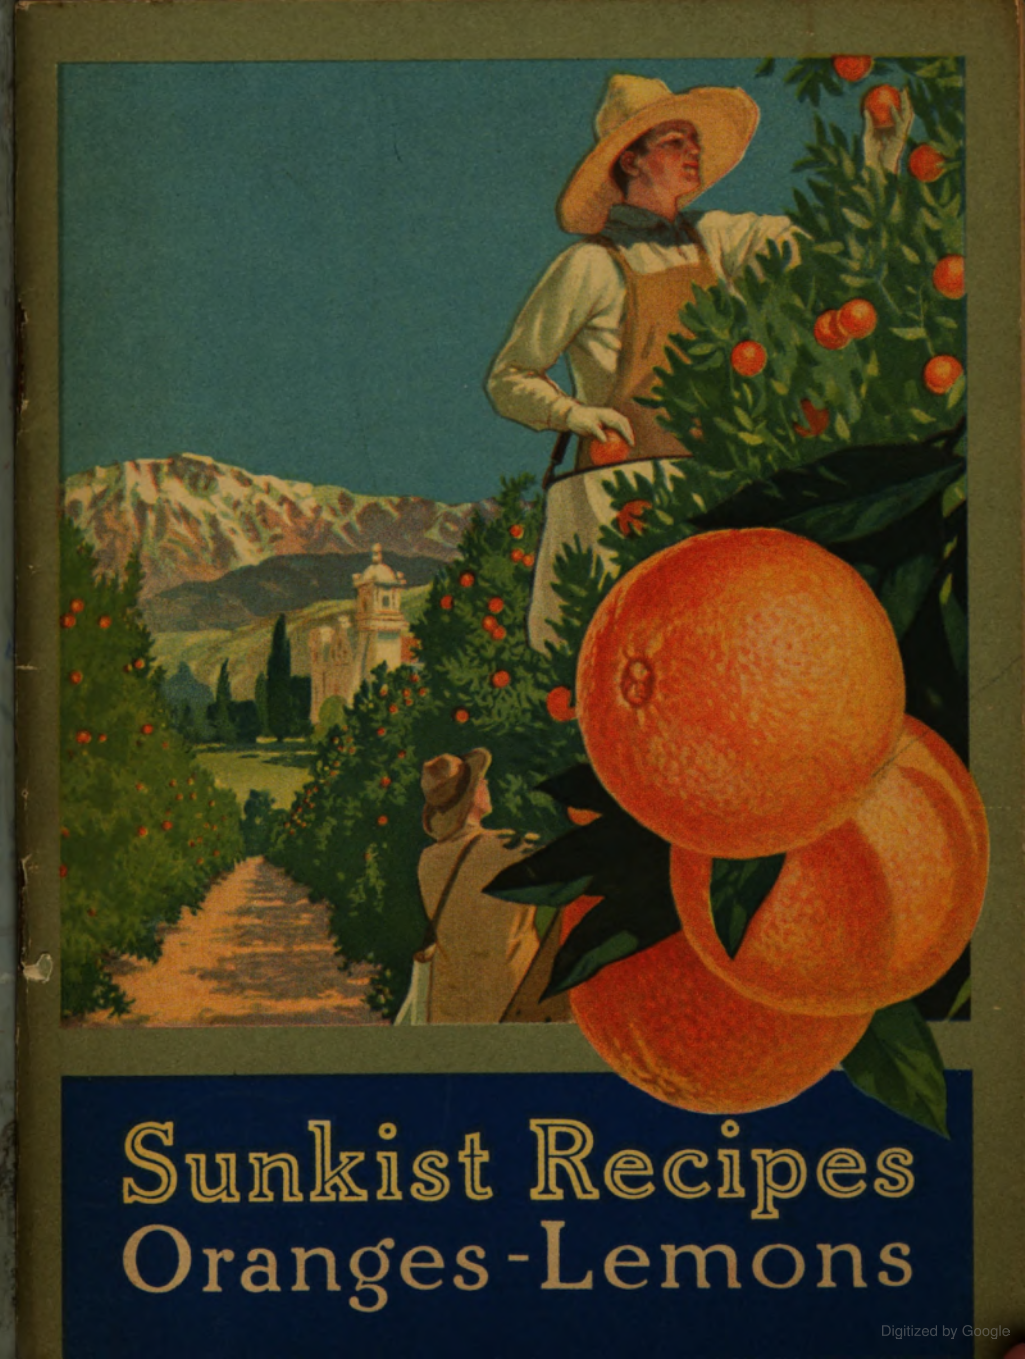 "Sunkist Recipes: Oranges and Lemons," by the California Fruit Growers Exchange, 1916. The earliest recipe for what resembled orange rolls comes from Sunkist Recipes, Oranges - Lemons, published by the California Citrus Growers Exchange in 1916. 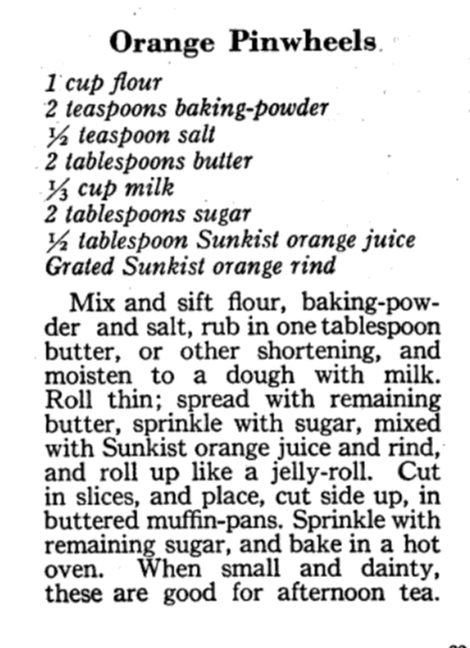 "Orange Pinwheels" are essentially baking powder biscuits, rolled thin, spread with butter and sugar mixed with orange juice and zest, then rolled up and sliced, with more sugar sprinkled on top. The Sunkist biscuit-style recipe survives, with or without attribution, in other cookbooks throughout the 1920s and '30s. Often, the biscuit "rolls" are called "orange rolls," not "pinwheels," which makes the research a bit confusing! The earliest recipe I could find for yeasted orange rolls comes from Mrs. Allen's Cook Book by one of my favorite cookbook authors, Ida Bailey Allen, published in 1917. But even these aren't quite the same as what I was looking for. 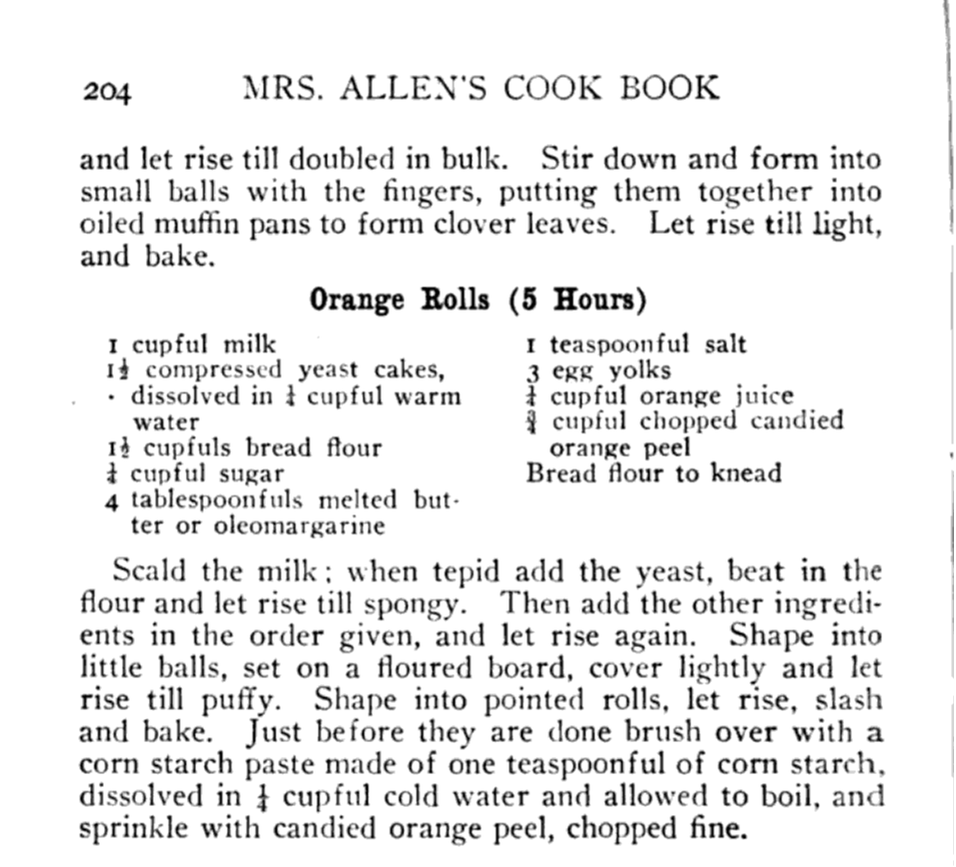 Recipe for "Orange Rolls (5 Hours)" from "Mrs. Allen's Cook Book," by Ida Bailey Allen, 1917. Mrs. Allen's "Orange Rolls (5 Hours)" are not actually rolled up rolls - they're more like buns flavored with orange juice and candied orange peel, and then glazed with more orange peel. Thankfully, Frances Lowe Smith has our back with her More Recipes for Fifty, published in 1918 and containing several wartime-friendly recipes, including this one for "Orange Rolls," which are to be prepared using a yeasted dough and spread with butter and sugar mixed with orange juice and grated rind and then "rolled like cinnamon rolls." The first North Dakota reference I could find is for the biscuit-y kind of orange rolls, in a 1930s North Dakota Agricultural Extension circular. But looking through my cookbook library for vintage midwestern cookbooks, I also found tons of references to orange rolls! Largely from the 1930s and '40s (which is when most of my North Dakota and Minnesota cookbooks date to). I decided to go with this recipe, because it looked fairly easy and definitely quick. No getting up five hours before brunch for these beauties (sorry, Mrs. Allen). Taken from Receiptfully Yours, a community cookbook published by the Ladies' Guild of the Zion Lutheran Church of Duluth, MN, the recipe turned out very nicely! 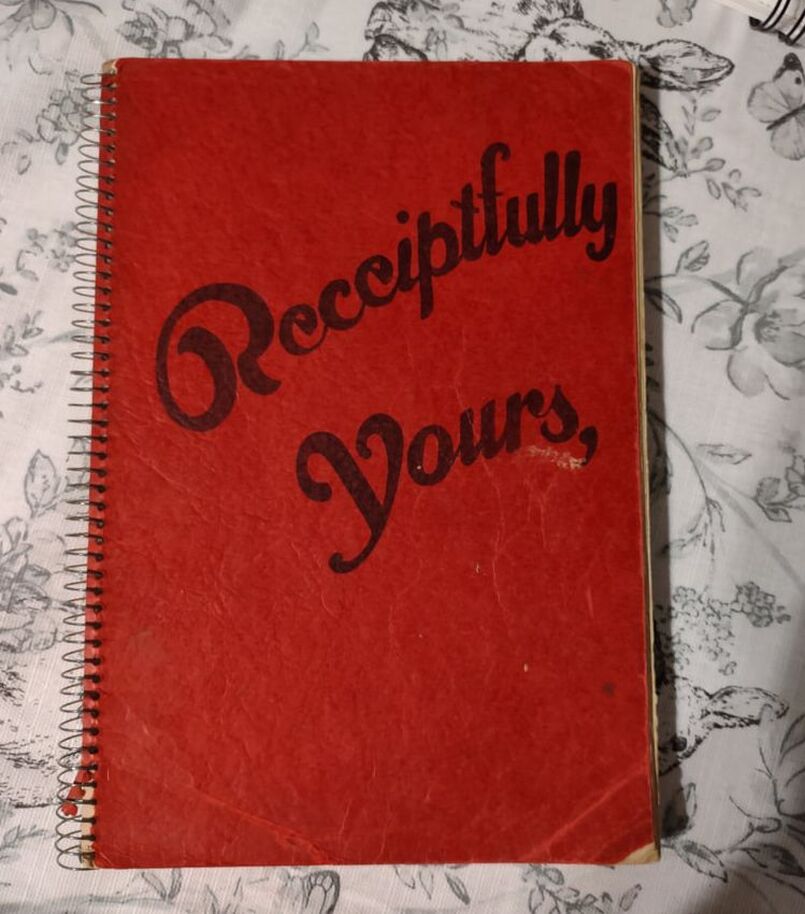 Although Receiptfully Yours, is undated, I'm guessing it dates from the 1940s, judging by the type and the style of binding. Both the Cinnamon Roll recipe and Orange Roll variation were submitted by Ethel Mathison. I love that they used full names, instead of "Mrs. Husband's Name!" 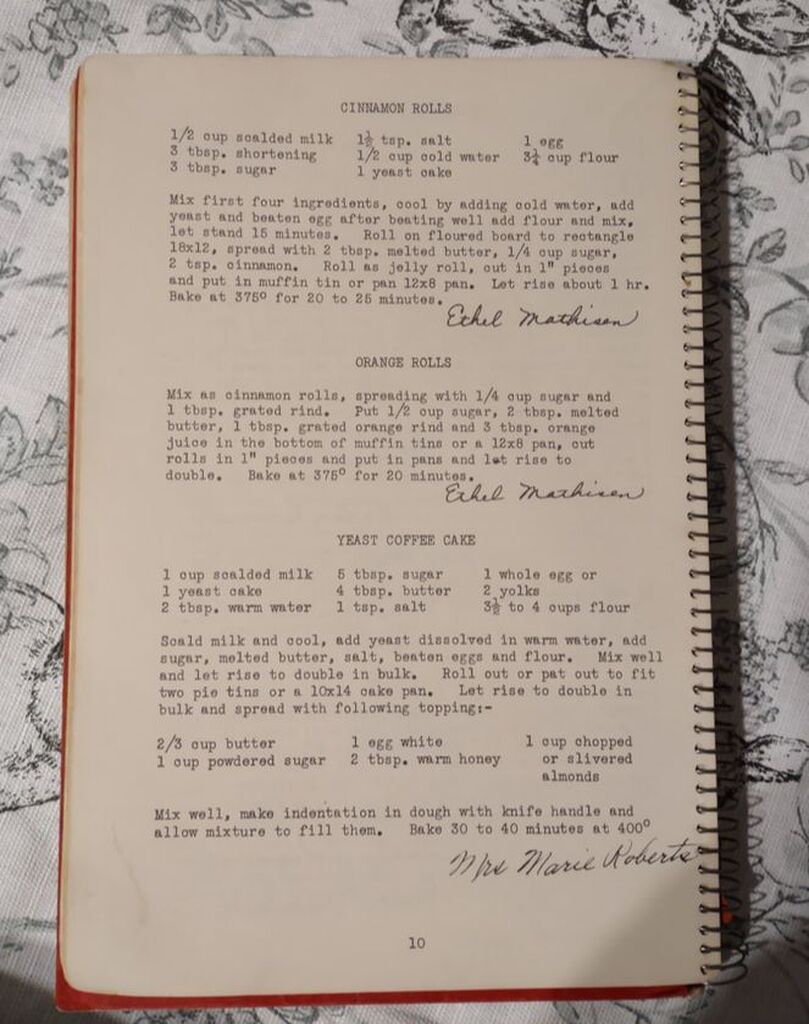 Midwestern Orange Rolls RecipeLike many orange rolls recipes, this one starts as a recipe for cinnamon rolls, with orange rolls listed as a variation. Interestingly, instead of having an orange glaze or cream cheese frosting, this recipe is listed much like caramel rolls! With a butter-sugar-orange-juice mixture cooked in the bottom of the pan. Here is my slight modernization of the recipe: - - For the dough - - 1/2 cup scalded milk 3 tablespoons butter 3 tablespoons sugar 1 1/2 teaspoons salt 1/2 cup cold water 1 envelope quick-rising yeast 1 egg 3 1/4 cups flour - - For the filling and glaze - - 3/4 cup sugar 2 tablespoons grated orange zest 2 tablespoons melted butter 3 tablespoons orange juice Preheat the oven to 375 F. Mix milk, butter, sugar, and salt in a saucepan and heat over medium heat until the butter is just melted. Cool by adding cold water, then add the yeast and egg and beat well. Then add flour and mix until smooth, kneading several times. The dough will be soft. Let the dough rest 15 minutes. Roll the dough out on a floured board (or clean countertop) into a 12" by 18" rectangle. Mix 1/4 cup sugar and 1 tablespoon zest and spread on the dough, then roll as for cinnamon rolls and cut crosswise into 1 inch slices. In a 9"x13" pan, mix 1/2 cup sugar, 2 tablespoons melted butter, 1 tablespoon orange rind, and 3 tablespoons orange juice, then top with the cut dough pieces. Let rise until doubled, then bake for 20 minutes or until golden brown. Flip to serve. 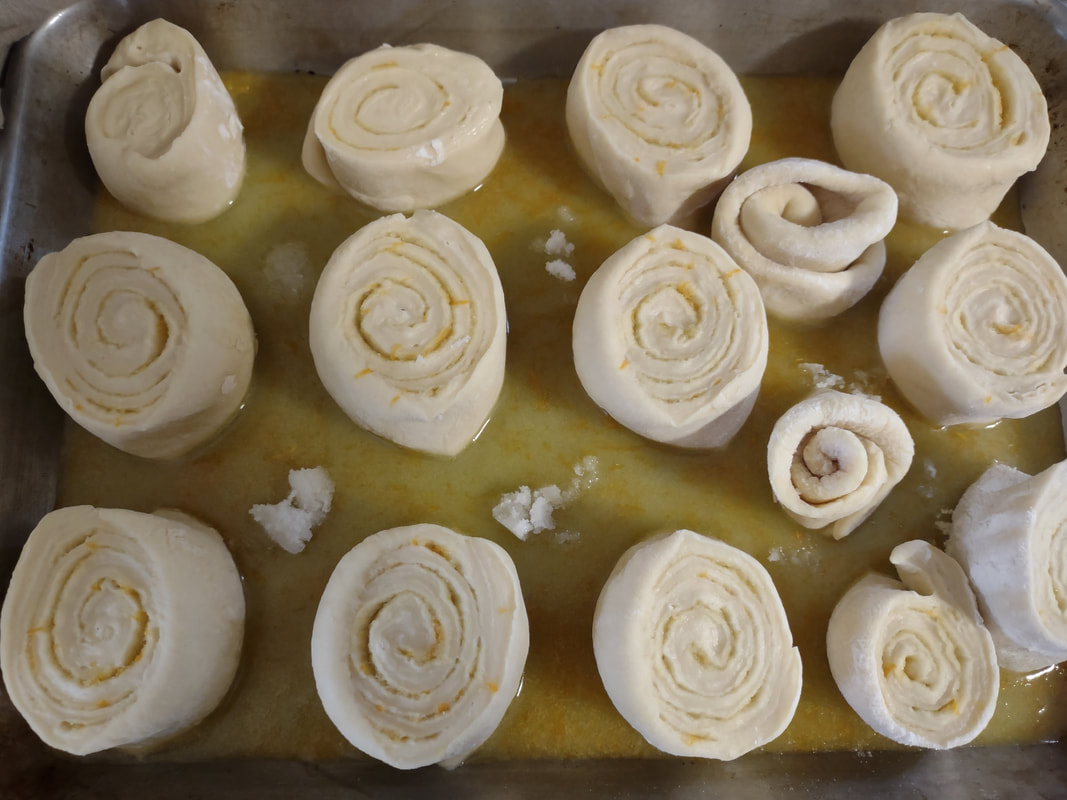 Leaving space between the raw rolls is key! They need enough space to rise. 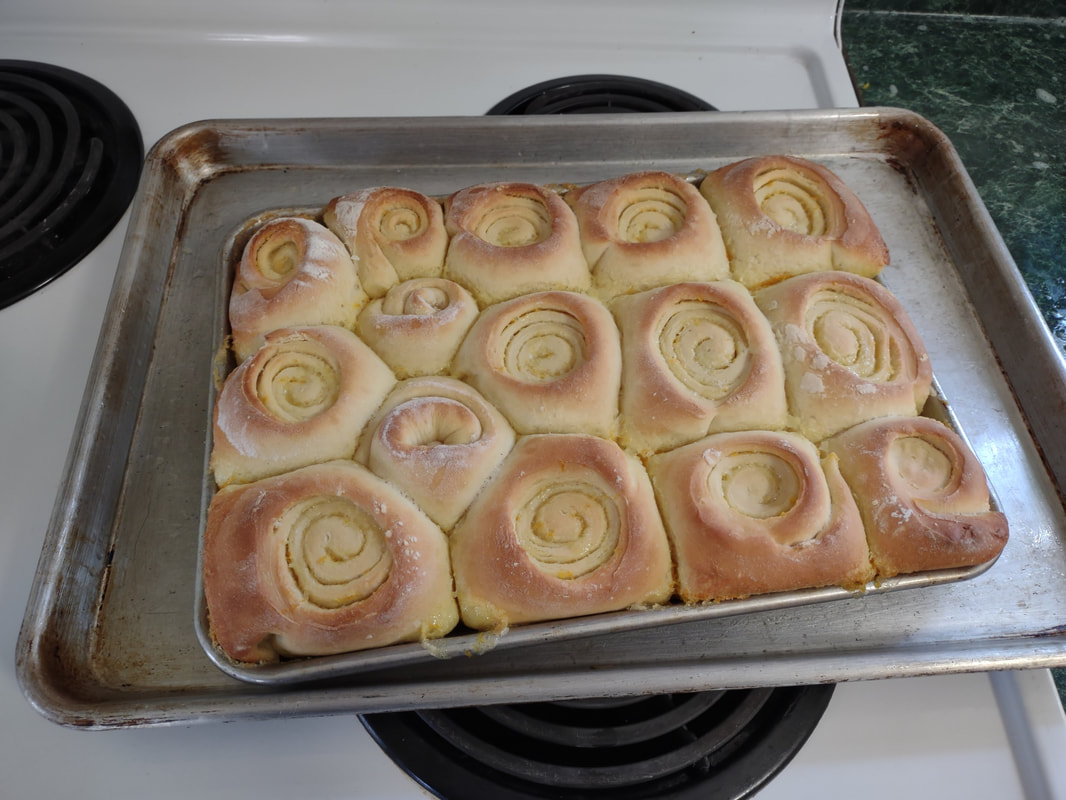 I was worried about the sauce spilling over (and you can see a few spots where we got close!) so I baked these on a baking sheet to catch any spills. But they turned out beautifully. 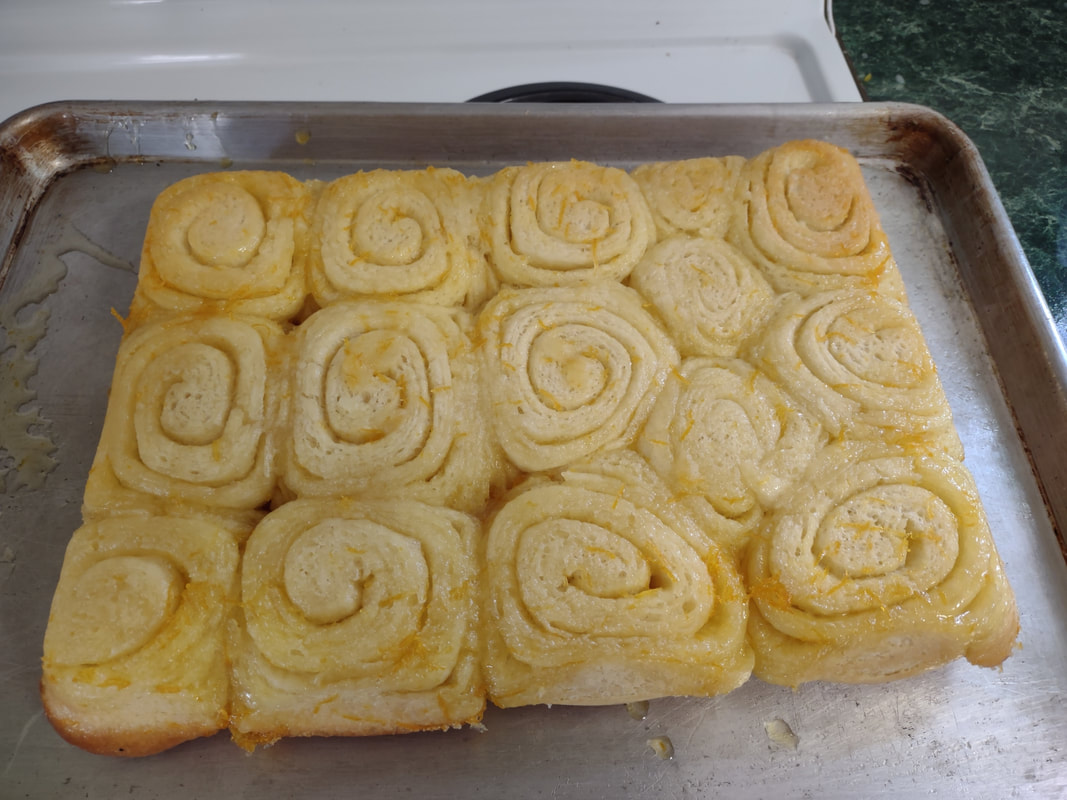 The baking sheet was also useful in flipping them over! Here you can see the syrupy bottoms. These turned out beautifully, although very sweet! I used some very sweet heirloom navel oranges in the recipe, and something with a little more acidity might have been better. When I make them again, I might take a page from some of the other recipes and moisten the sugar for rolling with a little orange juice, and pick some more sour oranges. I may also bake them a smidge longer. Of course, I may also decide to try my hand at some of the other recipes, too! These rolls are perfect for a weekend brunch, bridal or baby shower, or afternoon treat. Have you ever had orange rolls? How do you take yours? 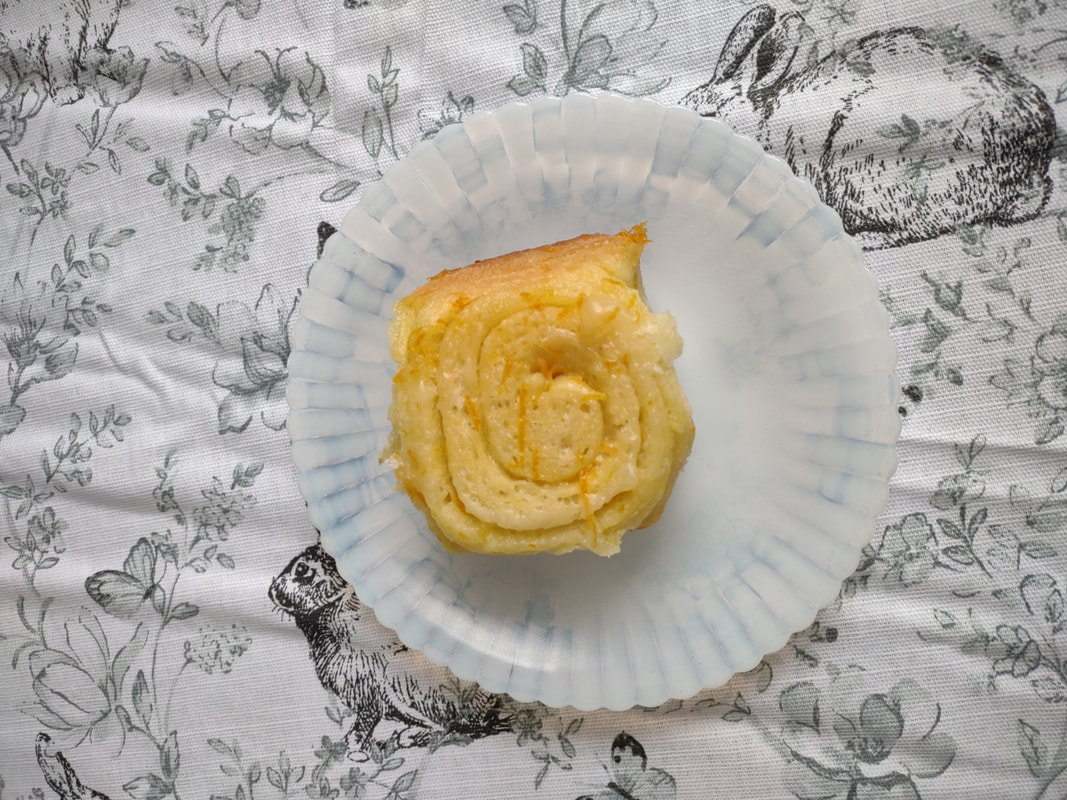 Alabama Orange Rolls History LinksAnd now, as promised, a taste of the rabbit hole I went down in researching this post. The Alabama orange rolls may be more internet famous than the Midwestern ones, but it looks like they laid their claim to fame a bit later - in the 1960s and '70s, to be precise. Read on for more of the back story. The delectable history behind Birmingham’s famous Orange Rolls Why the Alabama Orange Roll is a Southern Classic - Southern Living The sweet story of Millie Ray and her famous orange rolls The Food Historian blog is supported by patrons on Patreon! Patrons help keep blog posts like this one free and available to the public. Join us for awesome members-only content like free digitized cookbooks from my personal collection, e-newsletter, and even snail mail from time to time! Don't like Patreon? Leave a tip! 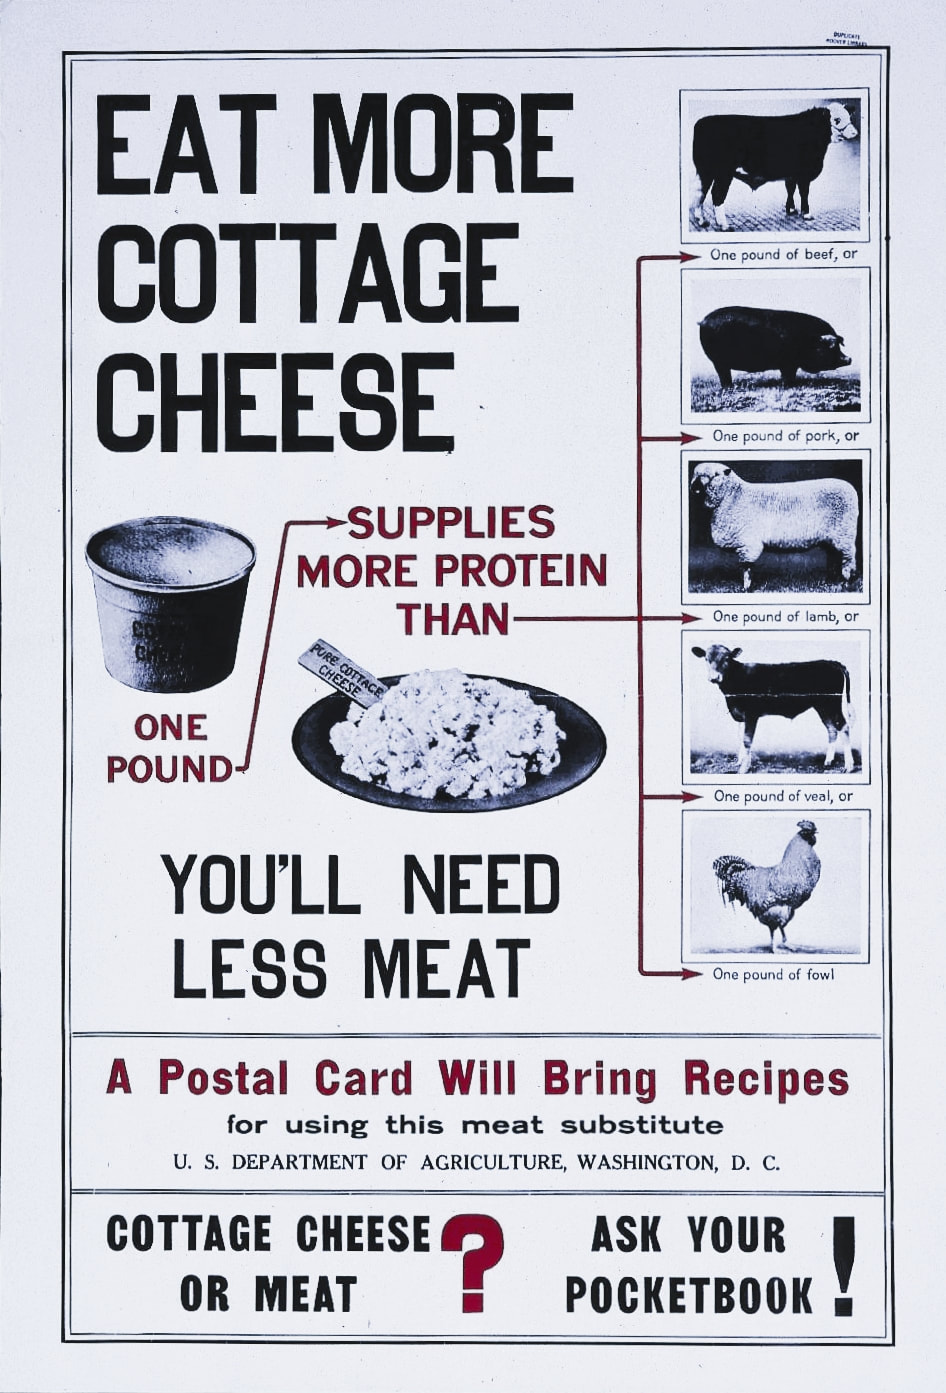
"Eat More Cottage Cheese" poster by the U.S. Department of Agriculture, c. 1918. Hoover Institute Library and Archives.
I am an unabashed fan of cottage cheese. I don't know when I first realized how delicious it is. Growing up, it always seemed some rubbery gross thing old ladies on a diet ate. Probably because the cottage cheese I tasted was likely skimmed milk cottage cheese and probably not very good quality. I certainly didn't think serving it with fruit or jam was a good idea, as was often touted by advertisements.
These days, cottage cheese has largely been superseded by yogurt, as NPR discussed in 2015, but I'm not sure that's a good thing. Cottage cheese is a very old style of fresh cheeses - a family that also encompasses ricotta, mascarpone, cream cheese, feta, mozzarella, goat and other un-aged cheeses that spoil rather quickly compared to their older cousins. But while all those other cheeses get their praises sung, cottage cheese gets short shrift (although not as short as farmer cheese, pot cheese, and dry cottage cheese, which are even harder to find). This propaganda poster from World War I exhorts Americans to "Eat More Cottage Cheese" and "You'll Need Less Meat" - comparing the protein in a pound of cottage cheese favorably to a pound of beef, lamb, pork, veal, and chicken. The First World War saw a dairy surplus, especially in 1918 as dairy farmers across the country fought for better fluid milk prices as cheese and evaporated/condensed milk stores overflowed and feed and labor prices went up. Food preservationists encouraged people to eat more dairy products, especially in the spring of 1918 when a huge milk surplus going into spring dairy season boded ill for the farmers and fair prices. Cottage cheese was touted as a meat substitute to kill two birds with one stone - it ate up some of the dairy surplus while also allowing people to eat less meat. As the poster suggests, cottage cheese was also far cheaper than meat, and still is today, although the gap has closed somewhat. The current national average price for a pound of ground beef is $5.41, and in April, 2022 the average price of a pound of boneless chicken breast was over $4, the highest in 15 years. A pound of cottage cheese has held pretty much steady between $2 and $4/pound, depending on the brand. My local grocery store brand, which is quite good, has 24 oz. (1.5 pound) containers available for just over $3, and often $2.50 or less on sale. Cottage cheese was also touted as a substitute during World War II, and post-war skimmed milk cottage cheese was promoted as a high-protein diet food, which is perhaps why so many of the latter generations disdained it. 
Cookbook cover for "100 Money-Saving Cottage Cheese Recipes, Including 33 Prize-Winners" by Gridley Dairy Company, Millwaukee, WI, 1918. Archive.org.
A number of cookbooks and recipe pamphlets promoting cottage cheese use were published during World War I, including the above 100 Money-Saving Cottage Cheese Recipes published in 1918 by the Gridley Dairy Company and containing recipes like "Liberty Loaf," "Cottage Cheese Relish," "Cheese Pancakes," and over a dozen recipes for "Cottage Cheese Pie," plus cheesecakes!
Much of the advertisement of cottage cheese tended toward the sweet, like this hilariously 1950s advertisement from Borden, which features cottage cheese with jam, with maple syrup, and with fruit in a salad:
But most of my favorite recipes for cottage cheese treat it like the savory cheese it is. It's great in dips for raw veggies, as a topping for roasted vegetables, in savory salads, and yes, as a substitute for meat in fried foods. I even use farmer cheese (drained cottage cheese) in my favorite pastry crust recipe, which I use to make everything from cookies and apple butter bars to Cornish pasties and lentils Wellington.
Frankly, most Progressive Era reformers would have been better off asking Eastern European immigrants for the best ways to use cottage cheese, as it features prominently in Russian, Polish, Ukrainian, and Georgian cuisines. The USDA did a little better with their accompanying pamphlet on cottage cheese cookery: 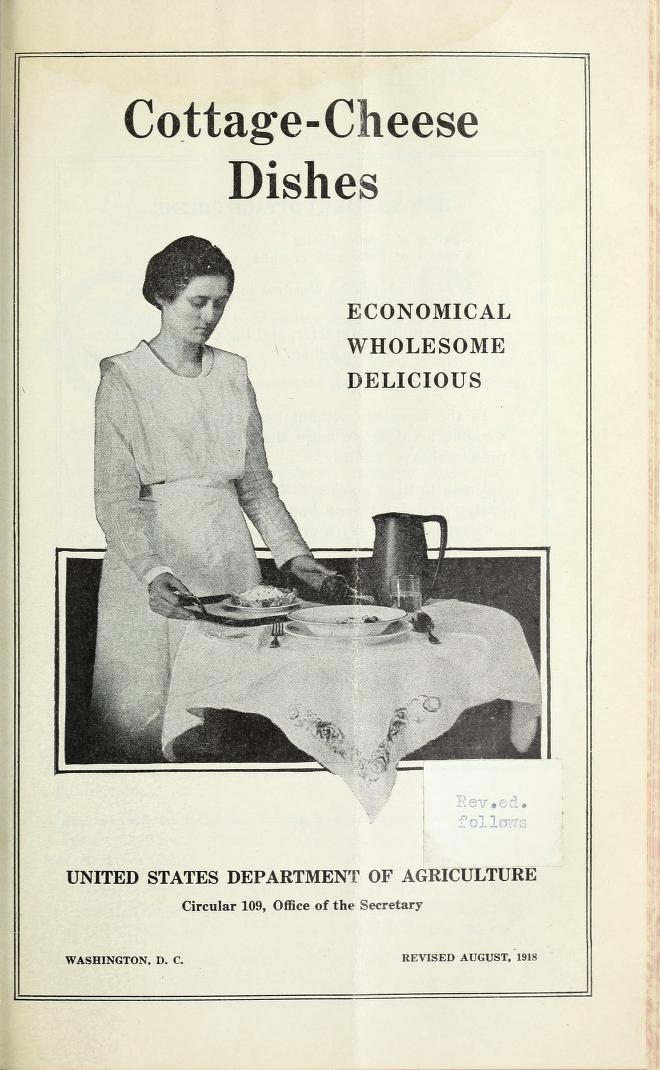
"Cottage-Cheese Dishes: Wholesome, Economical, Delicious" published by the United States Department of Agriculture, 1918.
Cottage Cheese Dishes: Wholesome, Economical, Delicious was published in 1918 by the USDA and contains slightly more sensible, savory uses for cottage cheese, including in salad dressings, scrambled eggs with cottage cheese, potato croquettes, and a lovely-sounding cold weather dish they call "Cottage Cheese Roll," which is cottage cheese mixed with cooked rice or breadcrumbs, seasoned well, and mixed with chopped vegetables, olives or pickles, leftover cold meats, canned salmon, etc. and formed into a roll which is then sliced and served on a bed of shredded lettuce. A suggested "Hot Weather Supper" is "cottage cheese roll made with rice and leftover salmon, served on a bed of lettuce leaves, with mayonnaise dressing; sliced tomatoes, oatmeal bread with nuts, whey lemonade, crisp fifty-fifty raisin cookies." The menu hits all the World War I food spots with a meat substitute (no, salmon wasn't considered "meat"), using up leftovers, using cottage cheese, using wheatless bread with protein-giving nuts, waste-less whey lemonade, and inexpensive and likely low- or no-sugar raisin cookies for dessert. How's that for conforming to rationing directives!
It also includes directions for making cottage cheese (which is incredibly easy to do at home - you just need a lot of milk, heat, and patience) and more importantly in my mind, some recipes for using up the leftover whey, including the aforementioned whey lemonade! How do you like to eat your cottage cheese?
The Food Historian blog is supported by patrons on Patreon! Patrons help keep blog posts like this one free and available to the public. Join us for awesome members-only content like free digitized cookbooks from my personal collection, e-newsletter, and even snail mail from time to time! Don't like Patreon? Leave a tip!
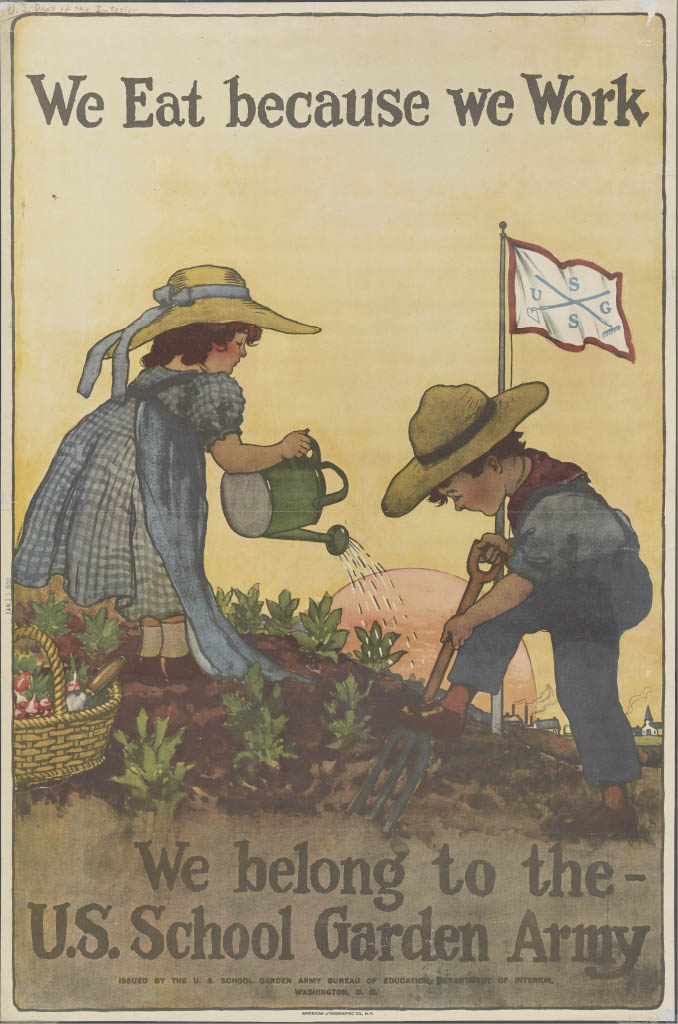 "We eat because we work. We belong to - U.S. School Garden Army," c. 1917. U.S. School Garden Army, Bureau of Education, Department of the Interior. From the USDA National Agricultural Library Collections. As I delve deeper into research on the farm labor shortage for my book, I'm starting to realize that the main theme of the home front in the First World War is that there were a whole bunch of people doing largely the same thing at the same time, and it wasn't until really the end of 1917 into 1918 that government agencies figured things out enough to actually get everyone properly organized. This poster is just one example of that. "We Eat Because We Work," a poster featuring cherubic White children digging and watering what are presumably radishes (judging by the contents of the basket) on a sunny hillside overlooking a flag flying not the American flag, but one of the United States School Garden Army, reads a little more ominously in the context of say, Nazi Germany, or Orwell's 1984. But when the U.S. School Garden Army was founded, and likely when this poster was produced, terms like "dictator" and "propaganda" had far more innocent meanings. Still, this poster does seem to imply, consciously or not, that children who do NOT work, will NOT get to eat. I doubt it was meant that way. Instead, like many propaganda posters of the First World War, it was meant to inspire people to participate. This poster sent me down the rabbit hole a bit, in part because the online history of The United States School Garden Army was so vague, and I'm a stickler for exact dates. Rose Hayden-Smith has written about the United States School Garden Army, but even she isn't super clear on when exactly the "army" was founded. The Farm Cadet program, which literally "enlisted" high school-aged boys into farm work on military-style camps, was founded in New York State in April of 1917, just days after the United States entered the war. A May 5, 1917 article in the New York Times mentions the "National School Children's Garden League," but only to mention a fundraiser for the league. It's the only reference I've been able to find of that organization. By June, 1917, Port Jervis, NY is discussing school gardens in conjunction with the Farm Cadet program, but school gardens as pedagogy had been popular throughout the Progressive Era. It seems that despite claims online that the United States School Garden Army was founded in 1917, it wasn't until March of 1918 that the USSGA was official. The Newburgh, NY Daily News published "Millions of Children to Enlist in Nation's School Garden Army" on March 20, 1918. The article suggests that this is a brand new endeavor, mentioning several times that this "new army" and "plans" "will begin soon." The "draft" age for the United States School Garden Army was 9-16 years old, both boys and girls. The cut-off age of 16 was so that boys aged 16 and older could participate in the Farm Cadet program. This poster features children who look younger than nine years old, but perhaps young cherubs were more attractive models than gangly pre-teens. As Hayden-Smith argues, the United States School Garden Army was designed to turn children from consumers into producers, at least temporarily. Critiques of the use of child labor were assuaged by assurances that the work would be for no more than a few hours a day, and always supervised by teachers or other staff. The work of the USSGA continued for several years after the war, still going strong in 1919 and 1920, likely because the High Cost of Living was keeping food prices up, and school gardens raised produce to be consumed by students on site, thus lowering school cafeteria costs. In fact, most of the articles from late 1919 and early 1920 talk about the financial benefits of the school gardens, in addition to the social and emotional benefits. In today's context, the discussion of the financial benefits of child labor seems mercenary, at best, but the school garden movement did have social and emotional benefits as well - being out-of-doors, the "stick-with-it-ness" of tending living things, and the rewards of getting to eat the results of your hard work. School garden programs that help provide for school cafeterias have been revived in recent years as a way to engage students with "real" food and create affordable access to fresh, local fruits and vegetables, especially in areas of food deserts. But growing school gardens isn't cheap, nor is it easy. In much of the nation, the best garden growing months are when school is not in session. In World War I, teachers and students gave up part or all of their summers for the war effort. In today's world, the garden manager usually does the bulk of the work over the summer. Regardless, the work of school gardens during the First World War does seem to have been a relative success. As I research more, I'll delve deeper into school gardens, so stay tuned! The Food Historian blog is supported by patrons on Patreon! Patrons help keep blog posts like this one free and available to the public. Join us for awesome members-only content like free digitized cookbooks from my personal collection, e-newsletter, and even snail mail from time to time! Don't like Patreon? Leave a tip!  Last week I went home to North Dakota for Mom's funeral. The service ended up being lovely, with a huge turnout, and so nice to see extended family and old friends. Reminders of her were everywhere, of course, but while her garden was starting to come up, including the special fern peonies she rescued from her grandmother's garden, nothing was really blooming yet. But the rhubarb on the south side of the house was already going gangbusters. About a month ago, right after Mom died, my sister and I were going through some of the books she had out, including cookbooks. Sister found a copy of the Ritzy Rhubarb Secrets Cookbook: Rhubarb Recipes by the Good Cooks of Litchville, North Dakota and the Surrounding Area, which is much in-demand on the North Dakotan corners of the internet. Edited by Jane Winge and originally published in 1991 and reprinted in 1992, 1993, 2000, and 2002, it's probably the most popular rhubarb cookbook in the Upper Midwest. We both wanted it, but given my already extensive cookbook collection, I said she could have it. Except then we found another copy! Thanks to Mom's thrifting skills, we both got to have one. Which was just a perfect present from her. All of the guests for the funeral were gone by Sunday, leaving just me and Dad. I decided I wanted to make a rhubarb cake for the two of us. We had the most delicious rhubarb bars at the after-service dinner, but they ran out before I could get one! Thankfully a friend had gotten dessert WITH her dinner, and shared. We found out later the young (and very talented) baker thought that people might not like rhubarb, so she didn't make as much of those as the other bars (rommegrot bars - a take on a favorite Norwegian cream porridge). I was like, "Not this crowd!" Rhubarb is very popular around here and those who moved away remember it from childhood. Everyone raved that they were the best rhubarb bars they'd ever had. And while I sadly do not have that recipe (yet, lol), I was feeling cake-ish (as I often do), so searched the Ritzy Rhubarb Secrets Cookbook for a likely candidate. This one immediately struck my fancy. Not only was it the first one listed in the cake section, it also looked easy as pie. 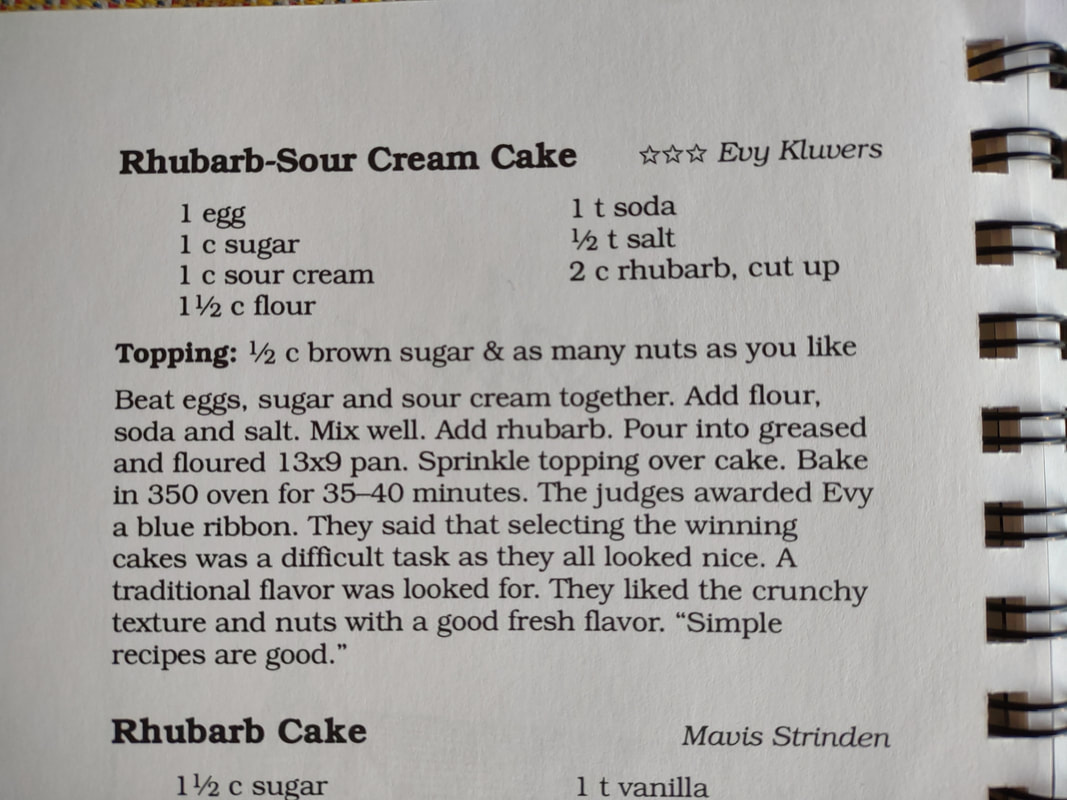 Evy Kulver's award-winning Rhubarb Sour Cream Cake, from the "Ritzy Rhubarb Secrets Cookbook." "The judges awarded Evy a blue ribbon. They said that selecting the winning cakes was a difficult task as they all looked nice. A traditional flavor was looked for. They liked the crunchy texture and nuts with a good fresh flavor. 'Simple recipes are good.'" How's that for the most North Dakotan review ever? But they're not wrong. This is a simple recipe with good, fresh flavor. No butter to soften and mixes up in a flash. The sour cream provides the fat and moisture in the recipe, and the baking soda reacts with the acidity in the sour cream to create lift, with help from the egg. Rhubarb-Sour Cream Cake RecipeHere's how Evy's original recipe reads: 1 egg 1 cup sugar 1 cup sour cream 1 1/2 cups flour 1 teaspoon baking soda 1/2 teaspoon salt 2 cups rhubarb, cut up Topping: 1/2 brown sugar and as many nuts as you like Beat eggs, sugar, and sour cream together. Add flour, soda, and salt. Mix well. Add rhubarb. Pour into greased and floured 13x9 pan. Sprinkle topping over cake. Bake at 350 for 35-40 minutes. Here's my adaptation, because since Dad doesn't bake, some of the ingredients were a bit lacking. The main one being I substituted nonfat plain Greek yogurt for the full fat dairy sour cream. Still turned out wonderfully, though! 1 egg 1 cup sugar (Mom only had raw sugar) 1 cup nonfat Greek yogurt 1 teaspoon vanilla extract 1 tablespoon vegetable oil (skip if using full fat yogurt or sour cream) 1 1/2 cups flour 1 teaspoon baking soda 1/2 teaspoon salt at least 2 cups chopped rhubarb 1 tablespoon raw sugar 1/4 cup sliced almonds Grease and flour a 9"x13" glass baking dish and preheat the oven to 350 F. Chop fresh rhubarb in advance. If using frozen, thaw and drain. Whisk the egg, sugar, yogurt, vegetable oil, and vanilla together. Add the flour, baking soda, and salt and stir quickly with wooden spoon. Add rhubarb and stir to combine, then pour into greased and floured baking dish and spread evenly. Work quickly as the baking soda will instantly start to react with the acid in the yogurt (probably a big slower with dairy sour cream). Sprinkle with sliced almonds, and then sprinkle sugar on top. Bake at 350 F for 30-40 minutes, or until top is golden brown. This makes a springy, delicious cake that would be good with any type of berry as well. Serve plain or with whipped cream, warm or cold. The rhubarb is not sweetened, so the sugar on top is necessary, along with the full cup of sugar in the batter. If you like your desserts very sweet, toss the rhubarb in sugar to coat before baking. But for me this was just perfect. 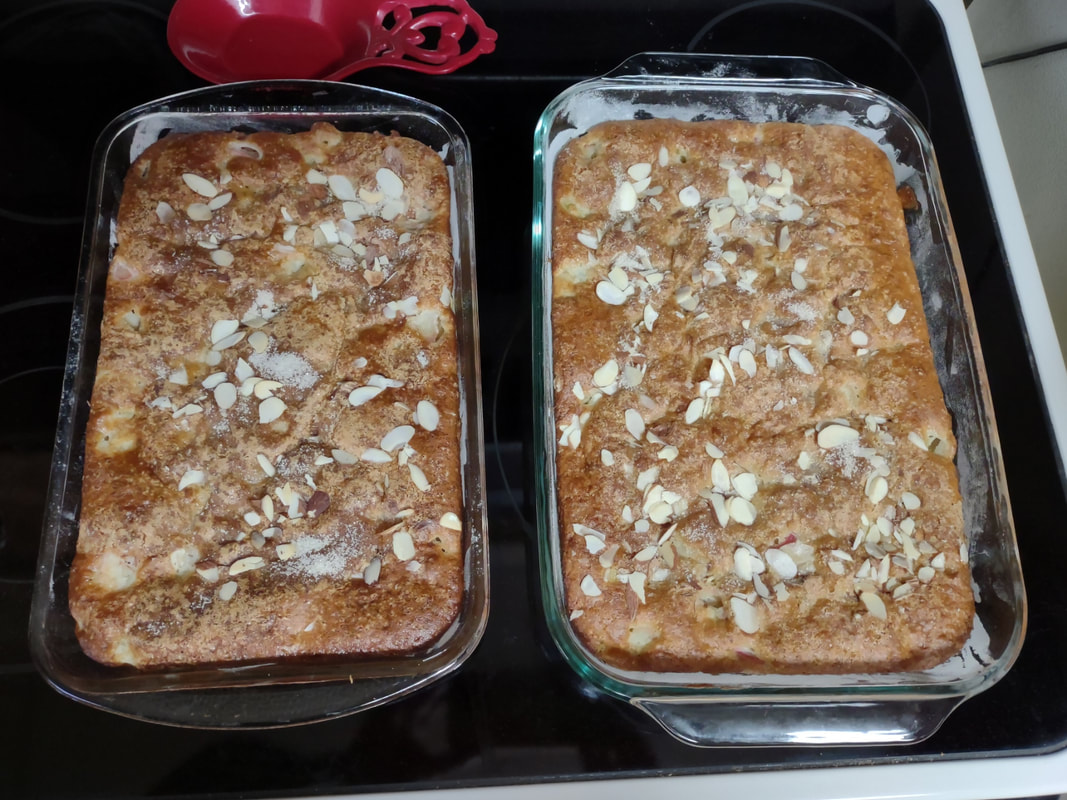 The rhubarb cake baked up nicely, even in two slightly different sized pans. The smaller one on the left got about 5 minutes longer as I made that one first, but that one on the right cooked quicker because it was less thick. 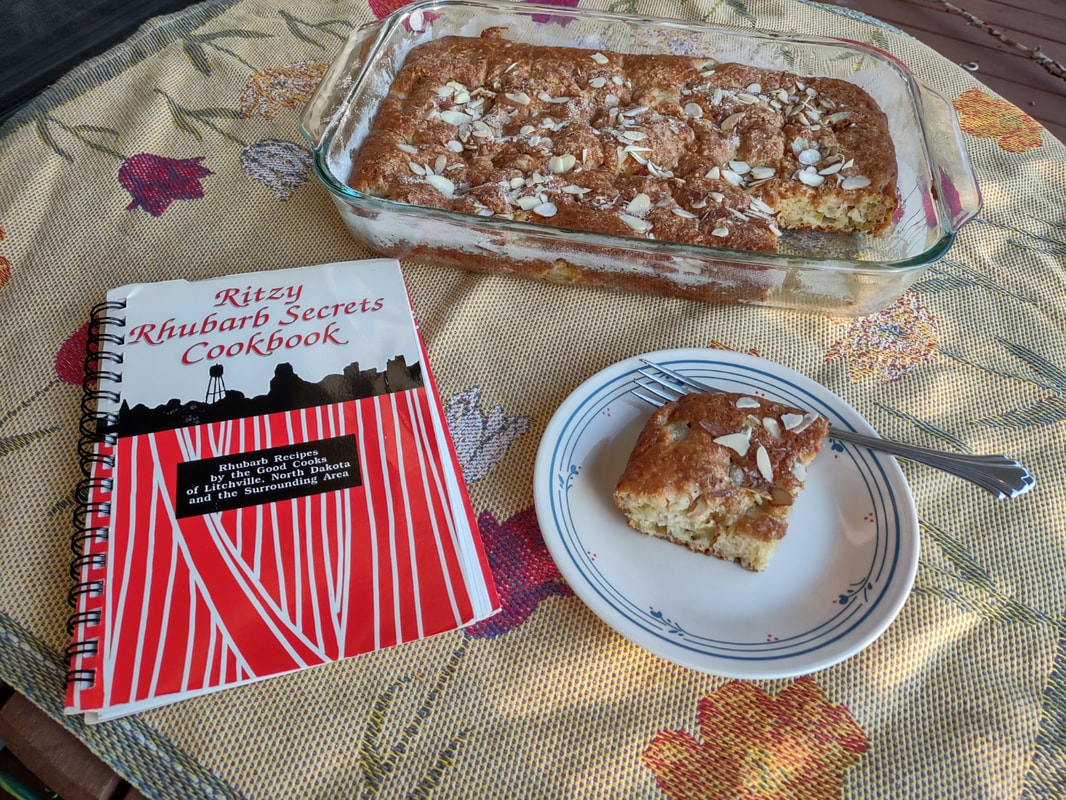 On the front porch with one of Mom's beautiful Scandinavian tablecloths and the "Ritzy Rhubarb Secrets Cookbook." This cake was so easy it is definitely going in regular rotation. It will probably be a little more tender and moist with real sour cream, or full-fat yogurt, than the nonfat kind, however. But I could see it easily adapting to each fruit harvest as it comes in - rhubarb, strawberries, sour cherries, raspberries, blueberries, peaches, plums, blackberries, etc. And of course, you can always slice and freeze raw rhubarb for wintertime baking. Litchville is a very small town in Barnes County in the Eastern half of the state, and clearly there are lots of rhubarb experts there! The cookbook has approximately 150 pages of recipes, everything from the more traditional like cakes, pies, and preserves, to beverages, breads, and salads. Rhubarb culture is strong in the Upper Midwest, especially North Dakota, because the cold climate makes it difficult to grow most fruits. Rhubarb thrives in cold and neglect. North Dakota's long, cold winters, and cool, wet springs are perfect for rhubarb, which needs a certain number of below-freezing days in the winter to produce. Certainly the rhubarb I planted in New York is doing much less well. According to Ritzy Rhubarb, "Rhubarb is an enigma. Botanically it is a vegetable, but legally it is a fruit. A court ruling in Buffalo, New York, on July 17, 1947, declared it a fruit because its use in the home is similar to that of other fruits." Rhubarb is related to buckwheat, and only the stalk is edible. The leaves contain a toxic amount of oxalic acid (what makes rhubarb sour) and should not be eaten. The stalks, which range in color from pale green to ruby red, are a sour treat after a long winter. Mom and others of her generation remember going out to the garden with a cup of sugar and a paring knife and dipping the raw rhubarb stalks in the sugar to eat. That's a little too sour for me, but a fun childhood memory. I like rhubarb in everything from pie, bars, cakes, breads and jams to more savory applications like mixing rhubarb sauce with garlic and eating it with chicken or pork. Yum. Do you have a favorite way to eat rhubarb? The Food Historian blog is supported by patrons on Patreon! Patrons help keep blog posts like this one free and available to the public. Join us for awesome members-only content like free digitized cookbooks from my personal collection, e-newsletter, and even snail mail from time to time! Don't like Patreon? Leave a tip!  A few weeks ago, COVID finally got me, and making myself a simple chicken noodle soup made me feel so nourished, even as I felt terrible. So when a friend told me she had also gotten COVID, feeling fatigued with a cough, I knew I had to make something and bring it over. But my friend is vegetarian, so chicken soup was out. What to make? Inspiration struck in the form of chickPEA noodle soup. I didn't have any intention of posting this recipe, but my friend thought it was so good she demanded I share, especially since vegetarian and vegan-friendly alternatives to chicken soup are often so few and far between. It is incredibly easy and quick to make, so even if you don't have anyone to cook for you, you can tackle this recipe. If you are feeling under the weather, this will perk you right up. To be honest, in many ways, I thought it was better than traditional chicken noodle soup, and it will probably go in regular rotation, especially when I'm not feeling well. Vegan Chickpea Noodle SoupThis soup relies heavily on the quality of your vegetable stock. I used Better Than Bouillon refrigerated organic vegetable bouillon doctored with some herbs and turmeric for color and flavor and it turned out lovely. It also scales up nicely and frankly, the bouillon is the most expensive ingredient! Everything else is eminently affordable. If you're feeding a crowd or want to double the recipe for a week of lunches or to freeze, you can. It's also extremely quick. The whole thing, including chopping vegetables, probably took about 30 minutes, start to finish. Which is nice when you're feeling under the weather or you need some comfort food in a hurry. 2 tablespoons fat (I used 1 each olive oil and salted butter) 1/2 cup sliced carrots 1/2 cup minced celery 1 small onion, minced (about 1/2 a cup) 1 clove garlic, finely minced 1 can chickpeas 4-5 cups water 4-5 teaspoons bouillon (less if you like a thinner, less salty broth, substitute 1 bouillon cube per teaspoon) a few generous shakes of ground turmeric a shake or two of dried thyme a pinch of dried marjoram a pinch of ground pepper 1 bay leaf a small handful (about the size of a nickel) of short spaghetti In a large stockpot over medium heat, sauté the carrots, celery, and onion in the fat until the onion is translucent. Add the garlic and stir well. Let it keep cooking while you drain, but do not rinse, a can of chickpeas. Add the chickpeas and water to the pot, then add the bouillon and herbs and spices. Bring to a boil, reduce heat to medium-high, and let cook until the vegetables and chickpeas are tender, 5-10 minutes. Then add the spaghetti and simmer/boil until the spaghetti is tender. Serve hot with plenty of fresh bread and butter, or biscuits (my friend felt well enough to make some garlic cheddar biscuits. I was jealous), or Saltines, or any other comforting carb you prefer. The vegetable bouillon I used does have tomato in it, so discerning palates will be able to detect a hint of tomato in the broth, but it's not particularly noticeable. If you are using boxed vegetable broth, add a tablespoon of soy sauce (an ingredient in the bouillon) or miso paste for some extra umami flavor and richness. The tender chickpeas really do mimic the flavor and texture of chicken, and the broth is almost identical. Don't skimp on the fat - you want some of that golden goodness floating on top. But my husband commented that it tasted less greasy than chicken noodle soup, and that he preferred this lighter version. From a distance, it even looks like chicken noodle soup. 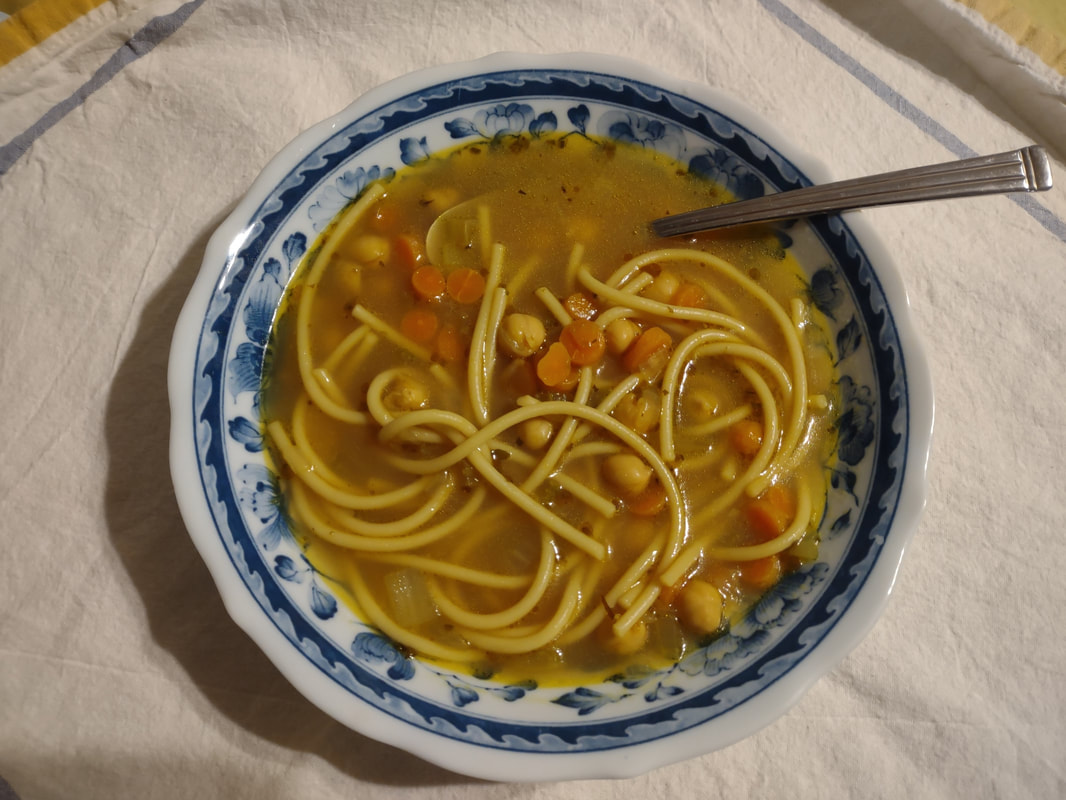 The beautifully golden chickpea noodle soup in a lovely new blue transferware bowl my grandma gave me. Keep this recipe in your back pocket when you are in need of some comforting. It's easy, inexpensive, and healthy. Just the ticket to get you feeling better. You could also easily riff this soup to substitute potatoes or rice for a gluten-free alternative to the pasta, add other vegetables like frozen peas and/or corn, and add cream or milk for a creamier broth. If you like your soup brothier, add more water and more bouillon. If you don't have chickpeas and want to substitute another type of legume like cannellini beans, I recommend adding them after the pasta is done cooking, otherwise you'll end up with beautiful, golden, bean mush. Chickpeas are a little sturdier and I find they often need extra cooking to soften them up a bit, but cannellini beans will start to disintegrate after a few minutes of boiling. I hope you haven't been sick recently, but this new extra-contagious variant is going around, and most of us have spent the last two years avoiding getting regular colds and the flu, so our immune systems aren't quite as up to the challenge as they might usually be. The season of spring also means pollen, leading to irritated throats and sinuses for some of you. This soup will make you feel better, whatever ails you. Stay healthy, dear reader. The Food Historian blog is supported by patrons on Patreon! Patrons help keep blog posts like this one free and available to the public. Join us for awesome members-only content like free digitized cookbooks from my personal collection, e-newsletter, and even snail mail from time to time! Don't like Patreon? Leave a tip! |

AuthorSarah Wassberg Johnson has an MA in Public History from the University at Albany and studies early 20th century food history. Archives
September 2023
Categories
All
|
 RSS Feed